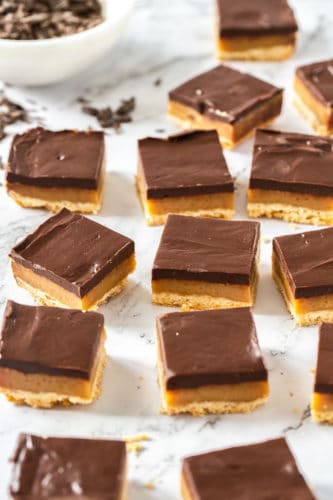
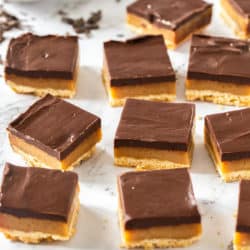
Three simple but indulgent layers make this Millionaire Shortbread recipe a winner every time. Just 8 every day ingredients magically turn into a crispy shortbread base, soft and chewy caramel centre and a rich and thick layer of chocolate ganache.
If you adore caramel like I do, you’ll love these bars but you’ll also love these Carmelitas, Salted Caramel Brownie Bites or Homemade Caramels too.

Millionaire Shortbread Recipe
You’ll love biting through the soft and chewy top layers of this slice, then into that crisp, buttery base. It’s rich and indulgent in all the best ways but takes relatively little effort to make. It’s easy too, there’s nothing too technical here.
Ingredients in Millionaire Shortbread
One of the great things about this dessert is the simplicity of the ingredients and how, when they’re combined, they create something that tastes like a million bucks.
- Flour: Just regular all purpose flour
- Sugar: two types in this one – white (I prefer superfine but granulated will work) in the shortbread base and brown in the caramel.
- Butter: Use unsalted so you have control over the amount of salt you’d like to add.
- Salt: I use regular table salt for this and just a ½ teaspoon to balance it but you can easily make this a salted caramel by adding another ½ teaspoon.
- Sweetened Condensed Milk: One tin is all you need and creates a gorgeous creamy flavour in the caramel filling.
- Chocolate: Use a semi-sweet or dark chocolate (50% cocao and above). Milk chocolate will definitely make these too sweet.
- Heavy cream: this is cream with a fat content of at least 35%. It goes with the chocolate to make a gorgeous, thick ganache on top.

How to Make Soft and Chewy Millionaire Shortbread
Here’s the easy steps to homemade millionaire shortbread!
The shortbread
- Mix it: Beat together the butter and sugar until lightened and creamy. Don’t skimp on this step. Then add the flour and mix just until it starts clumping and you can’t see flour anymore.
- Bake it: Press the dough into a lined 8 inch square tin very lightly then bake for 25 minutes or until the top is starting to turn golden.
The caramel
- Cook on the stove: Combine all the ingredients in a saucepan over low-medium heat and stir until everything melts together. Let it come to a light bubble then keep stirring for another 6-7 minutes until thickens and comes away from the side of the pan as you stir (it should also take a few seconds to settle back again).
- Bake: Pour the caramel over the baked shortbread base, smooth it out with a spatula, then bake again for a further 20 minutes until the top starts to turn golden in patches.
The chocolate ganache
- Heat the cream: (Once the caramel has cooled for at least an hour) heat the cream, then mix with the chocolate to a smooth ganache.
- Pour over the top: Pour it over the top of the caramel and place it back in the fridge to set.

Tips and Variations for The Best Millionaire Shortbread
- Shortbread dough: Only beat the dough until small clumps start forming. You don’t want a ball of dough but rather clumping dough that you can scatter over your tin. Also don’t press it down to firmly in your tin. This way it remains crisp rather than turning hard and doughy once baked.
- Baking the base: You want it to be starting to colour before taking it out of the oven. This also helps to keep it crisp as opposed to firm.
- Salt: Add an extra ½ teaspoon if you want a salted caramel middle.
- Caramel: The caramel will thicken after 6 or so minutes to a point where it will take a good few seconds to settle back again. At this point you add it to the shortbread.
- Chocolate: Make sure the chocolate is very finely chopped so it can easily melt into the cream and use a good eating chocolate (not a baking style chocolate). If it isn’t melting into the cream, zap it in the microwave for 20 seconds on half power, no more, then stir again.

How to Store Millionaire’s Shortbread Dessert
These bars keep well in the fridge for up to a week. Keep them stored in an airtight container, in one layer or with a sheet of baking paper between the layers.

More Amazing Caramel Recipes
- Caramel Chocolate Chip Cookie Bars
- Amazing Salted Caramel Popcorn
- Carmelitas (The Best Cookies Known to Man!)
- Homemade Twix Bars
- Cinnamon Caramel Crumble Bars
Millionaire Shortbread
Ingredients
THE SHORTBREAD
- ½ cup unsalted butter, softened (1 stick)
- ¼ cup superfine sugar (1.8oz)
- 1 cup all purpose flour (4.5oz)
THE CARAMEL FILLING
- 1 can sweetened condensed milk
- ½ cup, packed brown sugar
- 3 oz unsalted butter (¾ stick)
- ½ teaspoon salt
GANACHE TOPPING
- 1 and ½ cups finely chopped semi sweet chocolate (7oz)
- ⅓ cup heavy cream
Instructions
FOR THE SHORTBREAD
-
Preheat the oven to 350F. Line an 8 inch square baking tin with baking paper.
-
Beat together the butter and sugar until light and creamy, scraping down the sides of the bowl as necessary.
-
Add the flour, beating on low just until it starts forming small clumps
-
Scatter it into the prepared tin, then press it down lightly so there are no gaps.
-
Bake for 25 minutes.
FOR THE CARAMEL FILLING
-
Combine the condensed milk, sugar and butter in a saucepan over low-medium heat. Stir for around 6-7 minutes until the mixture is smooth and thickened slightly.
-
Stir in the salt, then pour the caramel over the shortbread base.
-
Bake for another 20 minutes. Let it cool for 30-40 minutes at room temperature before transferring to the fridge.
FOR THE CHOCOLATE GANACHE
-
Once the caramel is cool to the touch, place the chocolate in a medium heat proof bowl and set aside.
-
In a small saucepan, heat the cream over low heat, swirling every so often, just until it starts to bubble.
-
Pour the cream over the chocolate and give the bowl a gentle shake to settle the chocolate under the cream. Leave for 1 minute to soften, then stir to combine. If it's not all melting together, give it a zap in the microwave for 20 seconds on half power, no more.
-
Pour the chocolate over the caramel and level out, then chill for at least 1-2 hours or overnight before cutting into squares.
Notes
- Don't beat the dough to a ball of dough, you just want it to be starting to clump and so that you can't see streaks of flour anymore.
- Don't press the dough too firmly into the tin as this will make the cooked shortbread firm instead of crisp.
- Add an extra 1/2 teaspoon of salt to the caramel for a salted caramel flavour.
Nutrition
from The Recipe Critic https://ift.tt/2SYyV2i
https://ift.tt/2IoceCn