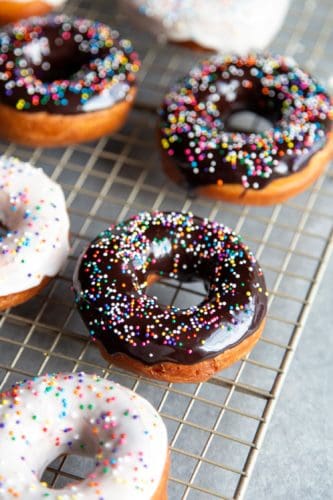
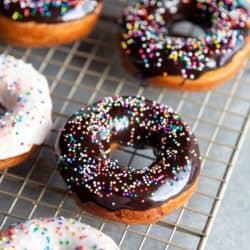
Homemade Donuts are easier to make than you might think! And yes, I’m talking about soft and fluffy fried yeasted donuts, dressed in your choice of vanilla or chocolate glaze.
Have a hankering for more comforting fried dough? Try this Easy Beignets Recipe, or these delicious and tender Apple Fritters. You can even skip the fair and make your very own homemade Funnel Cake!

Homemade Donuts Recipe
Do you prefer baked donuts or fried donuts? I do love both but I think I love fried yeasted donuts just a little bit more. If you’re a tiny bit afraid of frying like I used to be, my biggest tip is to invest in a thermometer! Knowing the oil temperature made a huge difference in my frying confidence.
Easy Homemade Donuts Ingredients
This homemade donut dough is exactly the same as my milk bread dough. The list of ingredients is very simple and can be halved or doubled easily to make less or more donuts in just a pinch.
- Heavy cream: Used for the added fat content for more tender bread dough.
- Whole milk: You can use 2% milk but remember more fat yields more tender bread. And we’re not adding eggs or butter in this recipe, so the fat comes directly from milk and heavy cream.
- Granulated sugar: For added sweetness in the dough. The majority of the sweetness will still come from the glaze.
- Active Dry yeast: to help the bread dough rise.
- Salt: For flavor.
- Flour: All purpose flour will do.
Note: The recipe calls for exactly half heavy cream and half milk so you can replace both the heavy cream and milk with half and half if you wish.
How to Make Homemade Donuts
- Heat up the cream, milk and sugar and allow it to cool down a bit before adding the yeast to activate it. Tip for working with yeast: make sure the liquid mixture is not too hot or you will kill the yeast.
- Once the yeast mixture is bubbly, mix it with the flour and salt to form a dough.
- Shape the dough into a ball and place it in an oiled bowl. Allow to rise until at least double in size.

Cutting Homemade Yeast Donuts
- Roll the dough out to about ½” thick and cut with a donut cutter if you have one. Don’t have a donut cutter? I used a 3” round cookie cutter for the outer ring and a 1 ½” round cookie cutter for the donut holes.
- Reroll the scraps and donut holes to cut out more donuts. Option: You can keep the donut holes for frying if you want, but you’ll end up making less donuts.
- Tip for rerolling: You will need to allow the dough to rest a bit when rerolling so the gluten has time to relax, otherwise when you cut the donuts, they will shrink.

Frying the Donuts
- Heat the oil in a thick bottom pot. I used a cast iron pan. Use a thermometer to keep the temperature between 350°F – 375°F. You will need to adjust the heat during the frying process.
- Fry 3 – 4 donuts at a time depending on the size of your pan until golden brown, flip the donuts halfway through frying. Don’t crowd your pan.

Homemade Glazed Donuts
I included 2 options for glaze in this recipe: a vanilla glaze and a chocolate glaze. Both are very easy sugar glaze made with powdered sugar and milk. But there are endless options of glaze you can try to pair with these donuts.
- Try a sweet maple glaze like in these baked apple donuts.
- Go fancy with a brown butter glaze like in these baked pumpkin donuts.
- Or embrace the holiday with an eggnog glaze like in this eggnog pound cake.
Storing Donuts
Fried homemade donuts are best the day they are made but they will stay soft up to 2 days, just keep them at room temperature in a lightly covered container.

More Sweet Breakfast Recipes
Homemade Donuts
Ingredients
Dough
- 1/2 cup heavy cream
- 1/2 cup whole milk
- ¼ cup granulated sugar
- 1 teaspoon active dry yeast
- ¾ tsp kosher salt
- 2 cup all-purpose flour
- Extra flour for rolling
- Oil for frying
Vanilla Glaze
- 1 cup + 6 tablespoon powdered sugar
- ½ teaspoon vanilla extract
- 2 tablespoon milk
- A tiny pinch of salt
Chocolate Glaze
- ½ cup powdered sugar
- ¼ cup dark cocoa powder dutch-processed
- A tiny pinch of salt
- ¼ teaspoon vanilla extract
- 7 teaspoon whole milk
Instructions
-
Add cream, milk and sugar to a small saucepan and bring the mixture to a simmer over medium heat stirring occasionally. Turn off the heat and let the mixture cool down to below 110°F.
-
Sprinkle active dry yeast over the liquid surface and let it bloom for 10 - 15 minutes, the mixture should puff up.
-
Add the flour and salt to a stand mixer bowl and stir to distribute. Add the yeast mixture to the flour mixture and knead with the dough hook on speed 2 for about 5 minutes.
-
Oil a glass bowl and your hands. Scrape the dough out of the mixing bowl and shape it into a ball in your hands and place it in the oiled bowl.
-
Cover, and let rise in a warm place for 1 - 2 hours until at least more than double in size.
-
Turn the dough out onto a lightly floured surface and roll out to about ½” thick. Use a 3” round cookie cutter to cut out the donuts and use a 1 ½” round cookie cutter to cut out the donut holes.
-
Reshape the dough including the donut holes into a ball and let it rest for about 10 - 15 minutes before you roll it back out and again and cut into more donuts. Continue to do this until you have cut out all of the donuts. Or leave the donut holes if you’d like.
-
Heat the oil in a heavy pot to 360°F, use a thermometer to monitor the temperature during frying as you may need to adjust the heat, try to keep the temperature between 350°F - 375°F.
-
Drop 3 - 4 donuts into the hot oil, depending on the size of your pan, and fry until golden brown, flipping the donuts halfway through cooking. Don’t crowd the pot.
-
Remove the donuts from the hot oil and rest them on a wire rack placed over a baking sheet to drain excess oil or simply place them on some paper towels to absorb the excess oil.
-
To make the vanilla glaze, whisk together powdered sugar, salt, vanilla extract and milk in a small mixing bowl until smooth.
-
To make the chocolate glaze, whisk together powdered sugar, cocoa powder, salt, vanilla extract and milk in a small mixing bowl until smooth.
-
Dip the donuts into the glaze of your choice and place them on a wire rack placed over a baking sheet to allow excess glaze to drip off.
Notes
When reshaping the dough to cut out more donut, you’ll need to allow the dough to rest to relax the gluten or it will shrink back on itself when cut.
Nutrition
from The Recipe Critic https://ift.tt/3omJ2w1
https://ift.tt/3oxYtBU