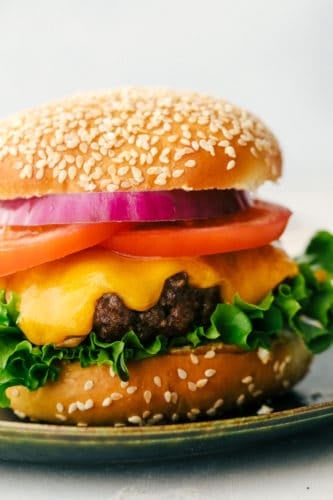
Juicy Air Fryer Hamburgers are the best burgers you will ever have, hands down! These are so succulent, they just might replace your grilled burgers forever!
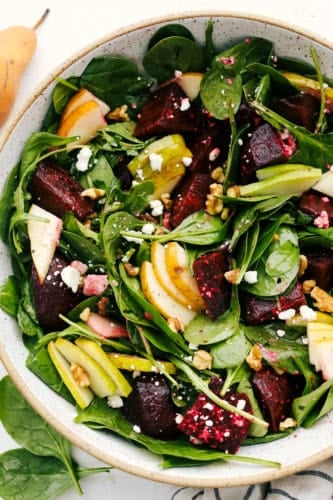
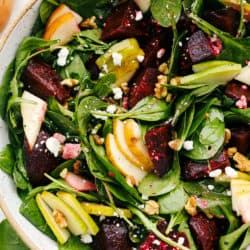
Hamburgers are meant to go with salads. Serve this up with some of my favorites like Strawberry Pretzel Salad, Incredible Bacon Ranch Pasta Salad, or Summer Corn Salad. They are all luscious!

The Best Air Fryer Burgers
I have never had a more juicy and tender burger in my life! What is it about the air fryer that just cooks everything so perfect? I don’t quite understand all the science behind air fryers but that doesn’t matter. I just know how well everything I have tried in the air fryer comes out! Perfect, every single time! I should tell you though, an air fryer isn’t actually a fryer. It uses forced air to circulate around the food to cook it, crisp it and make it magical. It’s almost more of a convection oven. If you haven’t tried an air fryer yet, it’s time!
These air fryer hamburgers couldn’t be any easier and they so mouth watering good! I love that I can have a juicy hamburger any time I want, even if isn’t grilling weather outside. Of course once you taste these, you may never use the grill again. And using the air fryer eliminates pan frying them where they simmer in their own fat. So yes it’s a bit healthier than pan frying but about the same healthiness as grilling, but the flavor and juiciness is unparalleled! You’ve got to try these ASAP!
Hamburger Ingredients
This recipe is my absolute favorite way to make burgers. If you have a favorite combination of seasonings, go ahead and use them. These are very customizable.
- Ground Beef: 80/20 beef is what I used with great success.
- Garlic: Minced or crushed garlic makes it easy to mix in.
- Salt and Pepper: Season to taste
- Worcheshire Sauce: Adds incredible flavor
- Buns: Pick your favorite kind! I prefer sesame seed bun but any will do!
- Optional Toppings: Think cheese, lettuce, tomatoes, pickles and red onions
How to Make Hamburgers in an Air Fryer
Super simple and easy you’re going to love this for the next time you get a craving for a great juicy hamburger!
- Mix: In a medium bowl combine the hamburger, garlic, salt and pepper and worcestershire sauce. Gently mix till combined
- Shape: Shape into 4 patties. They will shrink when cooking so keep that in mind.
- Cook: Place 2 patties in the fryer basket. Cook at 360 degrees for 5-8 minutes. Flip and cook for an additional 5 min or till internal temp registers 160 degrees.
- Cheese: If you are using cheese, add it to the top of the patty and cook for 1 more minute till it’s melted.
- Top: Place burgers on your buns and top as desired.
Can You Make Frozen Hamburgers in the Air Fryer?
Yes, air frying hamburgers works for both fresh and frozen! It just takes a little more time to cook is all. I did lower the temp by 10 degrees so that the outside doesn’t cook too fast before the inside gets done. So either way you make your burgers, they’ll be perfect every single time! YUMMY!
-
Place your frozen patties in the air fryer.
-
Cook at 350 degrees for a total of about 20 min.
-
After the first 10 minutes flip your burger and check for doneness. Adjust the cooking time accordingly.
-
During the last minute of cooking add your cheese to melt.
- There are many different sizes and types of patties, as well as many different air fryers. Check your air fryer manual and use this as a guide. Adjust the cooking time accordingly.

Tips for the Juiciest Hamburgers
Hamburgers have German origins, although the exact history of these tasty hamburgers is still up for debate. Where ever they came from hamburgers and especially cheeseburgers are definitely equated as an all American staple. Burgers are just so good I rarely think about where they came from, just when will I have them again!
- Shaping: Whether you’re a circle or square patty advocate, push your thumb into the center creating a divot in the patty. This will prevent it from shrinking too much and cooking it unevenly.
- Hamburger: I used 80/20 for this recipe. You want the fat to help create juiciness and flavor. You can go as lean as 85/15 but that’s about as lean as I would go before you start ending up with dry tasteless patties.
- Variations: Hamburgers are so versatile and customizable. Use different spices and sauces to diversify the flavors. BBQ sauce mixed inside, onion powder, chili powder, paprika, smoked paprika, seasoned salt, BBQ seasonings, all would be amazing. Let your taste buds get creative to what you’d like to try!
- Toppings: Anything goes here really. Again get creative. Make it Hawaiian with grilled pineapple and BBQ sauce. Sauté mushrooms and melt Swiss cheese. Use crispy bacon and avocado with Monterey Jack Cheese. Put pickled jalapeños and pepper jack cheese for a spicy twist. They will all be divine!
Is it Safe to Eat My Burger when It is Pink Inside?
Everyone likes their burgers done a little bit differently. For safety reasons health officials recommend that ground beef be cooked thoroughly. This is because the bacteria that is found on the outside of beef is mixed throughout the meat when it is ground. With meat such as steak, or roast the surface gets cooked killing any bacteria that might exist. This makes it ok for steak or roasts to be pink inside and eat it pink, even rare. This is because there isn’t bacteria found on the inside.
Unfortunately, undercooked ground beef is dangerous because the bacteria can get mixed up inside during the grinding process. If not properly heated through it won’t kill the bacteria. Be sure to cook your hamburger till the thickest part registers 160 degrees Fahrenheit for safety reasons. Your burgers still may be pink inside but as long as it registered 160 degrees you will be safe.
Don’t Forget the Fries!
Juicy hamburgers need fries to go with them. Make these Amazing Air Fryer French Fries before you make your hamburgers. Then make your hamburgers. While your topping your burgers place the fries back in the air fryer on 360 for 2-3 min to reheat and serve with this Famous Fry Sauce! The fry sauce is amazing on the burgers too!

More Air Fryer Recipes to Love
The air fryer is taking over the culinary world. It cooks in half the time, most of the time. It negates the need for extra added fats, and creates incredible dishes. What’s not to love?! Whether you are new to the air fryer community or a veteran give these winning recipes a try today.
- The Best Air Fryer Chicken Breast
- Perfect Air Fryer Steak with Garlic Herb Butter
- Brown Sugar Garlic Air Fryer Salmon
- The Best Air Fryer Crispy Chicken Tenders
- Air Fryer Crispy Parmesan Brussel Sprouts

Air Fryer Hamburgers
Ingredients
- 1 pound 80/20 ground beef
- 3 garlic cloves minced
- 1 Tablespoon worchestershire sauce
- salt and pepper
- 4 hamburger buns
Optional Toppings:
- Cheddar Cheese
- Tomato
- Red Onion
- Lettuce
Instructions
-
In a medium sized bowl combine the ground beef, garlic, Worcestershire sauce, and salt and pepper. Shape into four patties. I make my patties flat and round because they do shrink in the air fryer.
-
If using cheese, top with cheese and cook for an additional minute in the air fryer to melt. Place on hamburger bun with desired toppings.
Nutrition
from The Recipe Critic https://ift.tt/35iLk7u
https://ift.tt/396pOnK