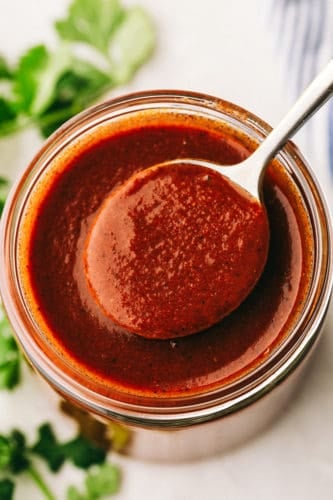
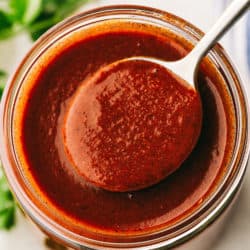
Quick and Easy Homemade Enchilada Sauce is a thousand times better than a can, and ready in no time! Perfectly spiced, thick and delicious, this will be your go to from now on.
I love making my own mixes and sauces from scratch. It’s always easier than you think and cheaper than you expect. Try some of these favorites like this Homemade Cheese Sauce, The Best Homemade Alfredo Sauce and Amazing Homemade Taco Seasoning to get you started.

Easy Homemade Enchilada Sauce
Do you want to know the secret to killer enchiladas? It’s homemade enchilada sauce of course! This divine sauce is going to rock your world. No more buying from a can, and no more tinny enchilada aftertaste. This is perfectly seasoned, rich and flavorful. Your family is going to thank you for making this enchilada sauce. And you are going sleep sounder knowing you are serving your family ingredients you can pronounce without the added sugars, MSG or other fillers you can’t say. And the best part is, it is amazing!
Homemade Enchilada Sauce is such a luscious sauce. And it has so many uses, not just in enchiladas. It is no wonder this homemade sauce has found its way into so many different Mexican recipes. Use the sauce to enhance tacos and chimichangas. Mix it with ranch dressing for a dynamite taco salad. I’ll get to more ways to use this sauce down below. But seriously, you need to try it. Homemade is always better! And this is definitely one of those. Wow your family and whip up this quick, easy homemade enchilada sauce tonight!
Ingredients for Authentic Enchilada Sauce
Made from pantry staples this sauce comes together quickly. You can add more or less spice as desired. If you want even more kick add a bit of cayenne.
- Olive Oil: To help roast the flour and chili powder.
- Flour: Adds flavor and thickens the sauce.
- Chili Powder: A MUST for spice and flavor.
- Tomato Sauce: Creates the color and flavor.
- Vegetable Stock: This has a more neutral flavor over beef, but you can use chicken.
- Garlic Powder and Onion Powder: Flavor enhancers
- Cumin: A spice found in most Mexican food.
- Salt and Pepper: Add to taste.
Making Your Own Enchilada Sauce from Scratch
This incredible sauce takes only a matter of minutes to make. And you won’t regret any of the time you spend. It’s so simple it’s almost maddening that I ever spent money on the canned stuff in the first place. The taste is just unparalleled in this enchilada sauce.
- Roux: In a medium sized skillet add the olive oil, flour and chili powder. Whisk until it starts to brown and is fragrant.
- Add: Slowly whisk in the tomato sauce, vegetable stock, garlic powder and cumin. Whisk until it starts to thicken.
- Remove: Remove from heat and salt and pepper to taste.

Tips for the Best Enchilada Sauce
Smooth and velvety is the way you want your Homemade Enchilada Sauce, and there are a few ways to master this.
- Roux: Make sure to cook the flour and chili powder a good full 2 minutes at least. Wait till it’s brown and fragrant before adding the broth. This will make sure the flour is good and toasted and you won’t have any raw flour taste. It also allows the chili powder to bloom enhancing its flavor.
- Slow: Be sure to add the chicken or vegetable broth slowly, whisking constantly. Add it before you add the tomato sauce too. If you need to stop pouring to give yourself more time to work out the lumps do it. It’ll be ten times easier to dissolve any lumps before you add the tomato sauce.
- Reduce Heat: Speaking of lumps, it is a lot easier to work them out when the temperature isn’t too hot. You may need to reduce the temperature while you add the chicken or vegetable broth. Once everything is fully incorporated turn the heat up to a good simmer.
- Spice: This recipe is easy to manage how much heat you want in your homemade enchilada sauce. Pay attention to what kind of chili powder you are using. There are hot, medium and mild chili powders. Choose the one that best suits you and your family. You can dial it back or dial it up depending on your tastes. If you love a good smokey flavor try using chipotle chili powder for a nice smokey spicy twist.
- Simmer: Simmer to your desired consistency. Some like it thinner and some like it thicker. The longer you leave it to simmer the thicker it will get. If it gets too thick thin it with some water or broth.

Serving Red Enchilada Sauce
There are so many ways to use homemade enchilada sauce, seriously endless possibilities. Use it on eggs, pastas, rice, soups and more. Here are a few of my favorite ways to use this incredible homemade sauce. Chicken Enchilada Pasta, Chicken Enchilada Stuffed Peppers, Slow Cooker Enchilada Soup, Skinny Chicken Enchiladas and Beefy Enchilada Dip.
Storing and Freezing Homemade Red Enchilada Sauce
You are going to love this homemade enchilada sauce so much! Not only is it super easy but it stores beautifully and you can use it for so many things! Make sure you double, triple or even quadruple the recipe and so you always have some on hand! Trust me! When you need a dinner in a pinch you’ll want this delectable sauce around.
- Store: Keep the sauce in tightly sealed container in your refrigerator for up to a week. It can thicken in the fridge, you can thin it with water or broth as needed.
- Freeze: The sauce can stain plastic so I recommend freezing it in glass jars or freezer safe bags. It will keep for up to 3 months. When ready to use let thaw in the fridge completely. Thin with water or broth as needed.

More Homemade Recipes to Love
Homemade is just better isn’t it? It’s comforting knowing exactly what you’re feeding your family and yourself. With simple ingredients and a little bit of time you can create a whole pantry full of homemade, better for you, great tasting products to use. Fill up your personal store with these favorites.
- Homemade Fajita Seasoning
- Easy Homemade BBQ Sauce
- Amazing Homemade Ranch Seasoning
- Homemade Cream of Chicken Soup
- Authentic Japanese YUM YUM Sauce
Homemade Enchilada Sauce
Ingredients
- 1/4 cup olive oil
- 2 Tablespoons Flour
- 3 Tablespoons Chili Powder
- 1 15 ounce can tomato sauce
- 1 1/2 cups vegetable stock
- 1/2 teaspoon garlic powder
- 1/2 teaspoon onion powder
- 1/4 teaspoon cumin
- salt and pepper
Instructions
Nutrition
from The Recipe Critic https://ift.tt/3q9BrRx
https://ift.tt/2MQfeK8