शुक्रवार, 22 जनवरी 2021

Best Ever Bran Muffins

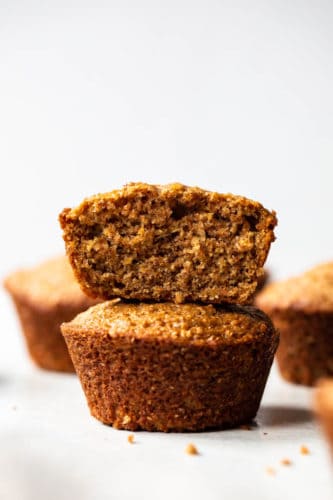
These bran muffins are incredibly tender and flavorful. Look no further for a tasty, and healthier start to your day! 

Are you looking to have a healthier start to your day? These bran muffins pair perfectly with a bright Smoothie, some Bacon or Eggs!  Bran muffins stacked on top of each other.

Homemade Bran Muffins

Muffins are a great option for breakfast. They can be made ahead of time, they are easy to grab and go, plus they are typically on the sweeter side. One of our favorite muffins to get from the bakery are Bran Muffins. They are lightly sweetened, ultra tender and moist, and definitely filling. 

These homemade bran muffins are just like the ones we always get from the bakery! They’re sweetened with a bit of light brown sugar, flavored with an extra boost of vanilla and a sprinkle of cinnamon. These muffins are the perfect way to start the day! 

Ingredients Needed for Wheat Bran Muffins

  • Wheat Bran: this is the hard exterior of the wheat that is separated during the milling process. It has a slight nutty flavoring.
  • Buttermilk: using buttermilk gives extra moisture to these muffins.
  • All Purpose Flour: the base flour used, could also use a white whole wheat, I don’t recommend wheat since it would dry out the muffin. 
  • Egg: one large egg 
  • Oil: vegetable oil is used for extra moisture. 
  • Light Brown Sugar: sweetens and gives a deeper flavoring than regular white sugar. 
  • Vanilla Extract: a healthy dose of vanilla is needed for flavor. 
  • Cinnamon: can be omitted, but the warm spice pairs wonderfully with the deep, nutty flavors of the muffin. 
  • Baking Powder: used as a leavening agent. 
  • Baking Soda: extra leavening that reacts with the buttermilk in the recipe. 
  • Salt: needed to get all the flavoring out of the muffin.

How to Make The Best Bran Muffins

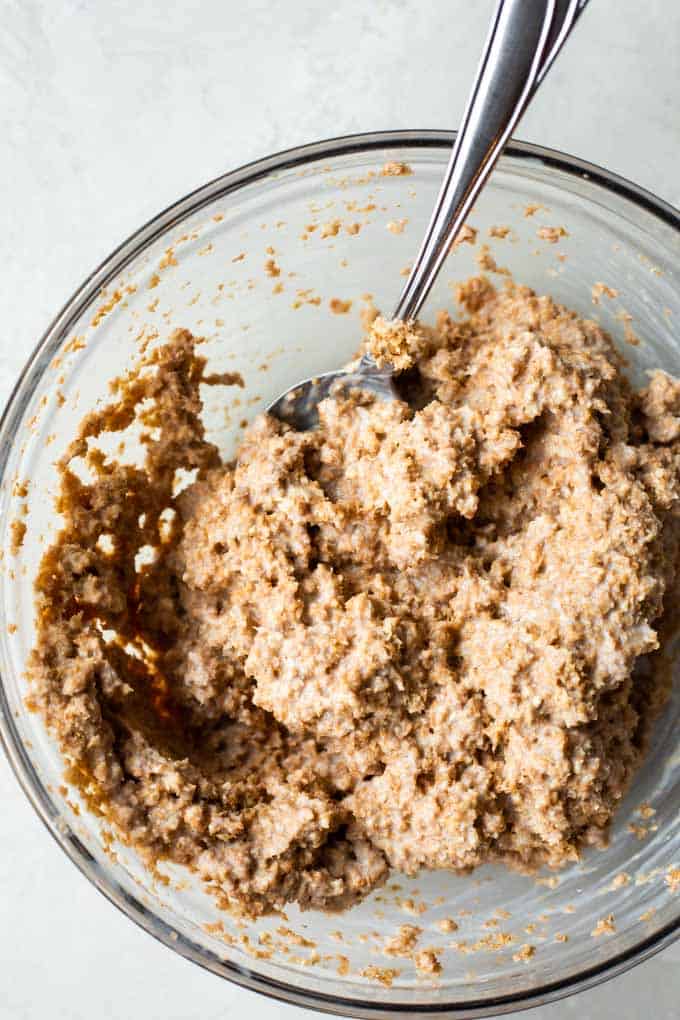
  1. Soak the Wheat Bran: pour the wheat bran into a small bowl and pour the buttermilk over the top. Stir together and let this mixture soak for at least 10 minutes. 
  2. Mix wet ingredients: in a medium size mixing bowl combine the oil, egg, vanilla and light brown sugar. Stir this together until combined. 
  3. Mix dry ingredients: in a small bowl combine the flour, baking powder, baking soda, salt and cinnamon. Stir with a fork until well mixed. 
  4. Add the Bran: Add the soaked wheat bran to the wet ingredients. 
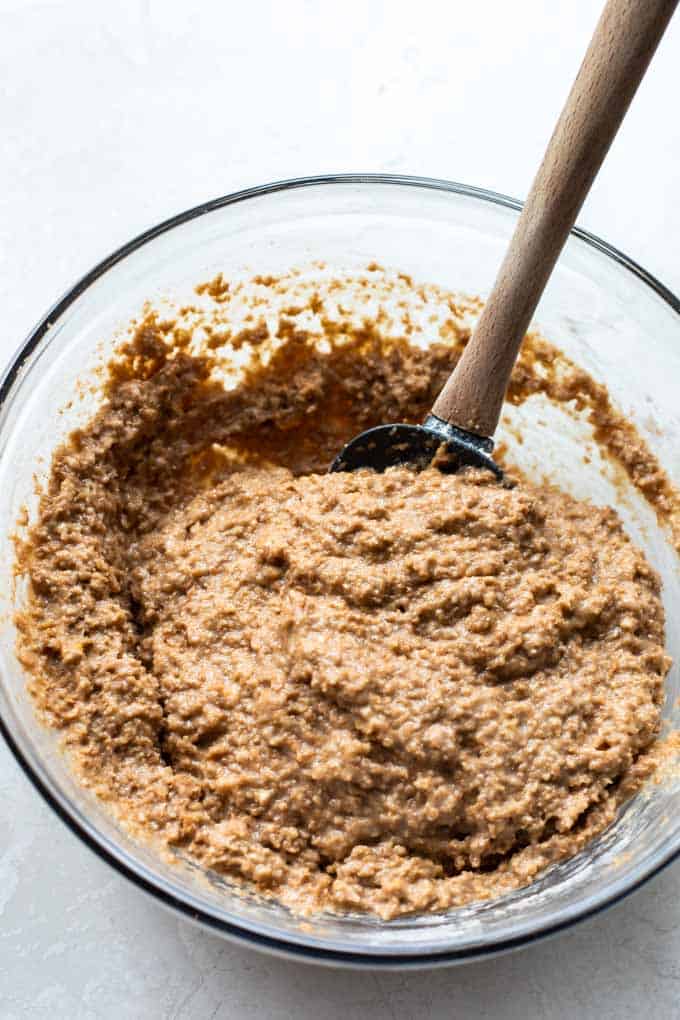
  5. Mix Together: Slowly add the dry ingredients to the wet ingredients while stirring. 
  6. Scoop into muffin tin. Spray the muffin tin with baking spray and fill to about 2/3 full, this recipe will make 12 muffins. 
  7. Bake for about 16-17 minutes, until a toothpick inserted in the middle comes out clean. 

Perfect Bran Muffin Substitutions

  • Wheat Bran: this is an ingredient that has been becoming more difficult to find in some markets, if you are unable to find plain Wheat Bran, you can use an All-Bran cereal instead. Treat it the same as the wheat bran and soak it in the buttermilk for the first step.
  • Buttermilk: use greek yogurt instead of buttermilk. Or make your own buttermilk by combining milk with vinegar or lemon juice.
  • Oil: swap the vegetable oil with coconut oil or apple sauce.
  • Egg: replace the egg with a mashed banana.

Bran in a cup measurement.  

Buttermilk Bran Muffin Add Ins 

  • Raisins: add some raisins to the muffin batter. 
  • Carrots: shredded carrots are another fun way to get more vitamins in your muffins. 
  • Nuts: add some chopped nuts to the muffin batter for more texture. 

Bran muffins on a wire rack.

More Muffin Recipes

Print

The Best Bran Muffins

Bran Muffins. These muffins are incredibly tender and flavorful. Look no further for a tasty, and healthier start to your day! 
Course Breakfast
Cuisine American
Keyword bran muffins
Prep Time 15 minutes
Cook Time 17 minutes
Total Time 32 minutes
Servings 12 Muffins
Calories 212kcal
Author Serene Herrera

Ingredients

  • cup wheat bran
  • 1 cup buttermilk
  • cup oil vegetable
  • 1 large egg
  • ½ cup light brown sugar
  • 1 tsp vanilla extract
  • 1 cup all purpose flour
  • 1 tsp ground cinnamon
  • 1 tsp baking powder
  • 1 tsp baking soda
  • ½ tsp salt

Instructions

  • Preheat oven to 375℉ and spray a muffin tin with baking spray. Set aside.
  • In a small bowl add the wheat bran and pour the buttermilk over, stir to combine, let this soak for 10 minutes.
  • In a large size bowl combine the oil, egg, brown sugar and vanilla. Stir to combine.
  • In a medium size bowl add the flour, cinnamon, baking soda, baking powder and salt. Stir with a fork or whisk.
  • Add the soaked wheat bran to the wet ingredients. Stir to combine.
  • Slowly add the dry ingredients to the wet and mix together.
  • Scoop the batter into the prepared muffin tin, fill to 2/3 full. This recipe makes 12 muffins.
  • Bake for 16-18 minutes until a toothpick inserted in the center comes out clean.

Nutrition

Serving: 1muffin | Calories: 212kcal | Carbohydrates: 37g | Protein: 7g | Fat: 9g | Saturated Fat: 1g | Trans Fat: 1g | Cholesterol: 18mg | Sodium: 219mg | Potassium: 441mg | Fiber: 13g | Sugar: 10g | Vitamin A: 59IU | Vitamin C: 1mg | Calcium: 72mg | Iron: 4mg


from The Recipe Critic https://ift.tt/3c2WAJq
https://ift.tt/2Ma6C0y

गुरुवार, 21 जनवरी 2021

Air Fryer Stuffed Peppers

A super easy and delicious dinner begins here with Air Fryer Stuffed Peppers. Filled with a savory mixture and cooked to tender perfection, it is going to be a family favorite!

These air fryer peppers are a complete meal in themselves, but you can serve them with sides as well. Serve these scrumptious stuffed peppers with this Salad, Garlic Bread, and Cookie Bars for dessert.

Air Fryer Stuffed peppers with cheesy rice filling.

Air Fryer Stuffed Peppers Recipe

Stuffed peppers are a comfort food that is actually pretty good for you. And cooking them in the air fryer makes them even better. The air fryer adds a little bit of crunch to the the peppers but keeps the inside juicy and delicious. The air fryer keeps the peppers from getting soggy bottoms. This is why I love cooking these stuffed peppers in the air fryer! And they cook in half the time. When I need to get dinner on the table quick, it is my new go to method of cooking.

Peppers have such a great crunchy taste and texture. And depending on the color, will depend on the flavor. Green bell peppers have a mildly bitter flavor that actually sweetens as it is cooking and combines well with flavorings. Yellow and orange peppers are sweeter and the red peppers being the sweetest of the pepper family. Whichever kind of pepper you pick, this air fryer recipe is a winner with all of them. You will forever cook stuffed peppers in the air fryer after you try this recipe.

Mexican Stuffed Pepper Ingredients

Simple wholesome ingredients go into these air fryer stuffed peppers. This is a great way to use up leftover rice. It is healthy, it is cheesy and it is filling!

  • Whole Peppers: Any variety will work, green, red, yellow or orange.
  • Olive Oil: For sauteing the onion and beef.
  • Onion: Small diced onion is all you need.
  • Lean Ground Beef: Can use ground chicken or turkey.
  • Can Diced Tomatoes: I like to use petite diced tomatoes.
  • Can Tomato Sauce: Low sodium works well.
  • Cooked Rice: You can use any variety of cooked rice.
  • Italian Seasoning: Incredible combination of flavors.
  • Garlic Powder: Adds great flavor.
  • Salt and Pepper: Add to taste.
  • Colby Jack Cheese: Shred your own so it’ll melt better. Pre shredded cheese has anti caking agents which can make it hard to melt.

How to Make Stuffed Peppers in the Air Fryer

Making these stuffed peppers is easy. Sauteing and cooking the beef will take a matter of minutes. Then the air fryer does all the work. Dinner in no time!

  1. Cut: To prepare the peppers, slice the tops off and remove any veins or seeds inside.
  2. Saute: In a medium sized saucepan over medium high heat add the olive oil and onion. Cook until almost tender.
  3. Add: Add in the ground beef and cook and crumble until no longer pink.
  4. Pour: Add in the diced tomatoes, tomato sauce, rice, Italian seasoning, garlic powder and salt and pepper.
  5. Fill: Stuff the peppers with the mixture and place in the basket of the air fryer.
  6. Air Fry: Cook the the peppers at 360 degrees until tender for 10 minutes. Top with cheese and then cook for an additional 2-3 minutes.

Making the filling and putting the filling in the peppers and air frying.

Tips for Easy Air Fryer Stuffed Peppers

Air Fryer stuffed peppers are so delicious, and super easy to make. To make sure your stuffed peppers come out the way you like here are some tips.

  • Peppers: When you are looking for peppers, look for ones that are roughly the same size and have good even bottom so they’ll stand up.
  • Wobbly Peppers: If your peppers can’t stand up on their own, you can trim the bottom so they sit flatter.
  • Lean on Each Other: Don’t be tempted to lean them against each other to keep them straight up. You want the air to circulate around them the best it can.
  • Slice The Peppers: If you have really uneven bottomed peppers you can cut the peppers in half and fill them.
  • Variety: Feel free to use a variety of peppers, green, red, yellow or orange will all be fantastic.
  • Crunchy Top:  You will want to top the filling with cheese to keep the rice from getting to crunchy in the air fryer.
  • Shred Your own Cheese:  Pre shredded cheese usually has anti-caking agents in it which can keep them from melting nicely.
  • Know Your Air Fryer:  I might sound like a broken record when you read my air fryer recipes but every air fryer is different. My temperature and timings are guidelines. Refer to your own manual for guidance and experience for what works best for your air fryer recipes.

Air fried stuffed peppers.

Variations for Air Fryer Peppers

There are so many tempting variations for air fryer stuffed peppers. Your only limited to your imagination and tastes.

  • Meat: Try using ground chicken, turkey or pork. Mild, spicy or Italian sausage are incredible. For a spicy hit try Chorizos. For italian flavoring add in pepperoni
  • Rice: Sub out the rice for brown rice, quinoa or for low carb use riced cauliflower.
  • Add ins: Add in black or kidney beans. Finely chop up zucchini, celery, mushrooms, or sweet potatoes to add to the filling. Top with chopped tomatoes and green onions.
  • Sauces:  You can use your own marinara sauce or pizza sauce to mix with the stuffed pepper filling. You could even use BBQ Saucefor a western flare.
  • Spices: Add different combinations of spices to create diverse flavors. Think Taco Seasoning, onion soup mix, ranch dressing mix or fajita flavorings.
  • Cheese: Cheddar, monterey jack, pepper jack, swiss or mozzarella are all good melty cheeses to try.

Storing and Freezing Stuffed Peppers

Air fryer stuffed peppers are actually ideal for freezing. They keep their shape and the filling stays flavorful when properly stored. Make extras and freeze them for another day.

  • Refrigerate: Store leftovers tightly sealed and covered in the fridge for up to 4 days. Reheat in the air fryer for 2-3 minutes.
  • Freeze:  Allow the air fryer stuffed peppers to cool completely. Individually wrap in plastic wrap and then aluminum foil to prevent freezer burn. Place in a freezer safe bag or container and keep for up to 6 months. Thaw the stuffed peppers in the fridge overnight and reheat in the air fryer for 3-5 minutes checking half way through to check for doneness. They can also be reheated straight from the freezer if needed. Just add a few minutes to your cooking time.

Scooping out the savory filling for stuffed peppers.

Air Fryer Recipes to Try Today

Healthy, fast and easy, that describes perfectly what cooking with an air fryer is like. It’s one of the best kitchen inventions yet. The food it produces is impeccable and it’s so versatile. From dinner, to sides to dessert, air fryers can do it all. Try these recipes with your air fryer.

Print

Air Fryer Stuffed Peppers

A super easy and delicious dinner begins here with Air Fryer Stuffed Peppers. Filled with a savory mixture and cooked to tender perfection, it is going to be a family favorite!
Course Dinner, Main Course
Cuisine American
Keyword air fryer stuffed peppers, stuffed peppers
Prep Time 15 minutes
Cook Time 15 minutes
Total Time 30 minutes
Servings 4 Stuffed Peppers
Calories 797kcal
Author Alyssa Rivers

Ingredients

  • 4 whole bell peppers
  • 1 tablespoon olive oil
  • 1 small onion diced
  • 1 pound lean ground beef
  • 1 15 ounce can of diced tomatoes
  • 1 8 ounce can of tomato sauce
  • 2 cups rice cooked
  • 1 Tablespoon Italian Seasoning
  • 1 teaspoon garlic powder
  • salt and pepper
  • 2 cups Colby Jack cheese shredded

Instructions

  • To prepare the peppers, slice the tops off and remove any veins or seeds inside. In a medium sized saucepan over medium high heat add the olive oil and onion. Cook until almost tender. Add in the ground beef and cook and crumble until no longer pink.
  • Add in the diced tomatoes, tomato sauce, rice, Italian seasoning, garlic powder, and salt and pepper.
  • Stuff the peppers with the mixture and place in the basket of the air fryer.
  • Cook the peppers at 360 degrees until tender for for 10 minutes. Top with cheese and then cook for an additional 2-3 minutes.

Nutrition

Calories: 797kcal | Carbohydrates: 79g | Protein: 47g | Fat: 31g | Saturated Fat: 17g | Cholesterol: 133mg | Sodium: 481mg | Potassium: 633mg | Fiber: 2g | Sugar: 1g | Vitamin A: 709IU | Vitamin C: 3mg | Calcium: 512mg | Iron: 4mg


from The Recipe Critic https://ift.tt/3iwhFNL
https://ift.tt/3o1RAal

बुधवार, 20 जनवरी 2021

Juicy Air Fryer Pork Chops

Air Fryer Pork Chops are the best pork chops ever! With a golden seasoned crust and fork tender juicy insides, it is makes these the perfect pork chops.

Pork Chops are simple to make like these Smothered Pork Chops, Easy Crockpot and Cast Iron Skillet pork chop recipes. Add them to these impeccable Air Fryer Pork Chops and you will always have pork chops that impress!

Juicy and flavorful Air Fryer Pork Chops.

Bone in Air Fryer Pork Chops

My whole family loved these air fryer pork chops! Cooking them in the air fryer saves time and creates a juicy pork chop that is irroestiable. You just can’t replicate the taste and texture in your oven that you can get with the air fryer. Perfectly seasoned golden crusted outside and tender, juicy, and full of flavor inside. These air fryer pork chops are perfect for an incredible weekend or weekday meal!

Pair these pork chops with Mashed Potatoes, Vegetables and Hand Pies for dessert! You will have a complete meal your family will love. The air fryer makes these pork chops so delicious, that even if you are new to cooking with an air fryer or with pork chops, they will be amazing!

Ingredients for Thick Cut Pork Chops

Look for fresh pork chops that are pink with a bit of marbling when purchasing. Fresh pork chops can be kept in the fridge for up to 3 days before cooking. Most of the dry ingredients may already be in your pantry!

  • Pork Chops: Thick cut and bone in pork chops.
  • Salt and Pepper: To taste
  • Brown Sugar: Adds a bit of sweet and balance
  • Chili Powder: A little bit of spice
  • Paprika: A subtle flavor and adds color.
  • Italian Seasoning: An incredible combination of flavors for seasoning
  • Garlic Powder: Everything is better with garlic!

How to Make Pork Chops in the Air Fryer

This is a quick, easy, hands off recipe for air fryer pork chops. It is so simple that the air fryer does all the work. The internal temperature for pork should reach 145 degrees Fahrenheit when done.

  1. Prepare: Salt and pepper the pork chops.
  2. Dry Rub: In a small bowl add the brown sugar, chili powder, paprika, Italian seasoning and garlic powder. Rub on the pork chops.
  3. Cook: In the basket of your air fryer add pork chops. Turn the air fryer to 400 degrees and cook for 10 minutes.  Then flip the pork chops and cook for an additional 5-7 or until no longer pink

Seasoning Pork Chops.

All About Pork Chops!

I think sometimes pork chops are the forgotten meat. So many recipes revolve around beef and chicken. I am talking strictly pork chops. They just don’t get as much attention as they deserve. Here’s why!

  • What is a pork chop? A pork chop, like other meat chops, is a loin cut taken perpendicular to the spine of the pig and is usually a rib or part of a vertebra. Pork chops are unprocessed and leaner than other cuts. Chops are commonly served as an individual portion. Pork is one of the most commonly consumed meats in the world.
  • Nutrition Facts: Pork is a rich source of certain vitamins and minerals your body needs to function, like iron and zinc. It is also an excellent source of high-quality protein.
  • What kind to Buy:  There are different kinds of “pork chops” at the grocery store, so it’s a good idea to know which ones to buy. For this recipe I prefer what is called rib pork chops. They are a cut from the rib area. They are the bone-in version of boneless pork chops. These are the prefered chops. You can also find loin chops that will have a bone in them as well. These are cut from the back and hip area and will contain lots of bone, fat and connective tissue.
  • Get them Thick!  Also look for pork chops that are good and thick. They’ll give you the best flavor and juiciest meat inside and give you a nice crust outside. Thinner chops will be done before the outside is good and charred.

Seasoned pork chops in the air fryer basket.

Tips for The Best Air Frying Pork Chops

To get the most from your air fryer pork chops, there are a few tips you can use. Your pork chops will be amazing every single time.

  • Leave the Layer of Fat:  There is a thin layer of fat around the outsides that you might be tempted to cut off, don’t. This fat adds instense flavor and moistness. Remove it after you cook it if you desire.
  • Season it well:  Pork on its own is a very mild flavored meat, so it does well with lots of seasoning. If you feel like you need more, don’t hesitate to add more and especially don’t forget to add some salt. Salt will help draw out the natural flavor of pork.
  • Don’t overlap:  You might have to cook your pork chops in batches, but whatever you do do not overlap them and if you can keep them from even touching. This allows the air to circulate around all the meat evenly and allows that incredible tasting crust to form on the outside.
  • Let it Rest:  Always allow your air fryer pork chops to rest before cutting into them. Give it at least 10 minutes before cutting into it. If you don’t let it rest when you cut into your pork chops all the flavorful juices will run out onto your plate or cutting board. Resting allows the meat fibers to relax, become tender, and soak in and redistribute all those succulent juicy flavors.
  • Take off the Chill: Like with all meat, you should take it out of the refrigerator at least 15-30 minutes before cooking. If your pork chops are too cold inside when added to the air fryer, the outside will get done before the inside has enough time to cook through. Resulting in underdone tough inside and burnt rubbery outside.

Juicy and tender air fryer Pork chops on a bed of mashed potatoes.

More Air Fryer Recipes

Air Fryers are one of the best kitchen inventions, as you must know by now. They make cooking easy, healthy and taste so amazing. Try some of these winning recipes in your air fryer tonight.

Print

Air Fryer Pork Chops

Air Fryer Pork Chops are the best pork chops ever! With a golden seasoned crust and fork tender juicy insides, it is makes these the perfect pork chops. 
Course Dinner, Main Course
Cuisine American
Keyword air fryer pork chops, pork chops
Prep Time 5 minutes
Cook Time 15 minutes
Total Time 20 minutes
Servings 2 Pork Chops
Calories 265kcal
Author Alyssa Rivers

Ingredients

  • 2 Bone Thick Cut Pork Chops
  • salt and pepper
  • 2 tablespoons brown sugar
  • 1 teaspoon chili powder
  • 1/2 teaspoon paprika
  • 1 teaspoon Italian seasoning
  • 1 teaspoon garlic powder

Instructions

  • Salt and pepper the pork chops. In a small bowl add the brown sugar, chili powder, paprika, Italian seasoning and garlic powder. Rub on the pork chops.
  • In the basket of your air fryer add pork chops. Turn the air fryer to 400 degrees and cook for 10 minutes. Then flip the pork chops and cook for an additional 5-7 or until no longer pink.

Nutrition

Calories: 265kcal | Carbohydrates: 14g | Protein: 29g | Fat: 10g | Saturated Fat: 3g | Cholesterol: 90mg | Sodium: 86mg | Potassium: 537mg | Fiber: 1g | Sugar: 12g | Vitamin A: 543IU | Calcium: 35mg | Iron: 1mg


from The Recipe Critic https://ift.tt/2KsSpv4
https://ift.tt/3p4Q60o

मंगलवार, 19 जनवरी 2021

Black Bean Soup

A pot of black bean soup with a wooden spoon.

Black bean soup is easy to make, delicious, and healthy. It’s made with kitchen-staples like cans of black beans, carrots, onions, and spices so you can make this recipe anytime you’re craving Tex-Mex flavors.

A side of Bread is perfect for dunking in this tasty soup. And if you love black beans, also check out this Black Bean and Corn Salad.

A pot of black bean soup with a wooden spoon.

Quick and Easy Black Bean Soup

We love this recipe as it’s flavorful and super easy to make. You and your family can be sitting down to a healthy dinner in just 25 minutes. It doesn’t get better than that!

Most black bean soup recipes call for vegetable stock. While you can definitely do that if you want a vegetarian soup, we love to use beef broth. The flavor works really well in this recipe and makes the soup richer tasting. And while we usually use canned black beans, you can also make Black Beans in the instant pot for an even more budget-friendly meal.

How to Make Black Bean Soup

Making black bean soup is so easy! Here’s how you’ll do it:

  1. Sauté the veggies: onion, garlic, carrot, celery, and bell pepper.
  2. Now add the spices and stock to the pot.
  3. After you drain and rinse the beans, add ¾ of them to the pot. The rest get blended with a little soup stock before getting added to the pot. The blended beans give the soup a wonderful texture.

A closeup of a pot of bean soup.

Easy Black Bean Soup Variations

  • Stock: Make this a vegetarian black bean soup by using vegetable stock.
  • Corn: Add some frozen corn at the end of cooking
  • Tomatoes: Use fire-roasted tomatoes.
  • Add Some Spice! Use a minced jalapeño to make it spicy.

Best Soup Toppings!

We love soup toppings! Some of our favorites that go well with this soup are:

  • Tortilla chips (pictured are RiceWorks Sweet Chili Chips)
  • A dollop of sour cream
  • Some grated cheddar cheese
  • A squeeze of lime juice (this really adds a nice flavor to the soup)
  • Minced cilantro
  • Sliced or diced avocado

Black bean soup in a white bowl with avocado on top.

Popular Soup Recipes

Black bean soup in a white bowl with avocado on top.
Print

Black Bean Soup

Black bean soup is easy to make, delicious, and healthy. It's made with kitchen-staples like cans of black beans, carrots, onions, and spices so you can make this recipe anytime you're craving Tex-Mex flavors.
Course Dinner, Main Course, Soup
Cuisine American, Tex Mex
Keyword black bean soup, black bean soup recipe
Prep Time 10 minutes
Cook Time 15 minutes
Total Time 25 minutes
Servings 8 servings
Calories 64kcal
Author Kristen Stevens

Ingredients

  • 2 tablespoons cooking oil
  • 1 medium onion, minced
  • 3 garlic cloves, minced
  • 3 carrots, diced
  • 2 celery stalks, diced
  • 1 red pepper, diced
  • 1 tablespoon cumin
  • 1 tablespoon chili powder
  • 1 teaspoon oregano
  • 1/2 teaspoon chili flakes (optional)
  • 6 cups beef stock
  • 4 15-ounce cans black beans, drained and rinsed

Optional toppings:

  • sour cream
  • cheddar cheese
  • cilantro
  • lime juice
  • tortilla chips
  • avocado

Instructions

  • Heat the oil in a large pot over medium-high heat. Add the onion and garlic and cook for 3 minutes, until the onion is transparent. Add the carrots, celery, and red pepper to the pot and cook for 5 minutes, until the vegetables begin to soften.
  • Add the cumin, chili powder, oregano, chili flakes (if using), and stock to the pot and bring it to a boil.
  • While the soup comes to a boil, drain and rinse the cans of beans. Add 3 cans (or ¾ of the beans if you rinsed them together) to the pot. Add the remaining beans to your blender. Add a couple of scoops of the soup to the blender and blend on high until the beans are smooth. Pour them back into the pot.
  • Season the soup to taste with salt and pepper then serve with any or all of the optional toppings.

Nutrition

Calories: 64kcal | Carbohydrates: 4g | Protein: 4g | Fat: 4g | Saturated Fat: 1g | Sodium: 384mg | Potassium: 396mg | Fiber: 1g | Sugar: 1g | Vitamin A: 388IU | Vitamin C: 1mg | Calcium: 35mg | Iron: 1mg


from The Recipe Critic https://ift.tt/2KrSTSc
https://ift.tt/3bZ7vnH