रविवार, 11 जुलाई 2021

Blackberry Lime Fruit Salad

Blackberry Lime Fruit Salad showcases tons of fresh, summer fruit and has a delicious easy dressing. Refreshing, light, and sweet, this fruit salad will be eaten in no time!

A good dressing can really work to enhance and bring together different flavors cohesively. My poppyseed, honey lime, and creamy grape are prime examples of how dressing can make a fruit salad pop!

Mixed summer fruits with poppyseed dressing in bowl.

Easy Blackberry Lime Fruit Salad Recipe

This blackberry lime fruit salad is chock-full of delicious fruits and has a sweet and tangy dressing drizzled on top. I absolutely love summer fruits, and this salad highlights each of them perfectly while adding a tart and nutty finish with the dressing! It is so simple to make and the combination is sweet, tangy and just right. This fruit salad is a the perfect combination!

Only requiring a few fresh ingredients and less than 10 minutes to throw together, this blackberry lime fruit salad recipe is as easy as they come! Perfect for a healthy, refreshing snack on a hot day, or to make in bulk for a potluck crowd-pleaser! This salad has my ultimate favorite line-up of fruits in a salad, but know that the fruit can be easily changed out and swapped for whatever you like best. As long as the quantities remain pretty consistent and you’ve got plenty of variation, this salad will be a hit!

Blackberry and Lime Fruit Salad Ingredients

All you need is fresh fruit and a couple of other simple ingredients to make Blackberry Lime Fruit Salad. Looking for individual measurements? They can all be found in the recipe card below.

  • Orange Juice: For dressing. You can use whatever kind of orange juice you like best!
  • Orange Zest: For adding citrus flavor.
  • Lemon Juice and Zest: From one lemon.
  • Lime Juice and Zest: From one large lime.
  • Honey: For sweetness and thickening the dressing. This gives it the perfect glaze finish.
  • Vanilla Extract: For taste. Pure vanilla extract works best to enhance all the flavors of the fruit.
  • Poppyseeds: For nuttiness and added texture.

How to Make The Best Fruit Salad

Only 5 simple instructions yield a perfectly fruity result that looks great and tastes great too! It is so simple to make and can be done within minutes.

  1. Mix Together Dressing: In a medium saucepan add the orange juice, zest, lemon juice and zest, lime juice and zest, and honey to a boil over medium high heat. Reduce the heat for about 5 minutes and let it thickem. Add in the vanilla and poppyseeds. Set aside to cool.
  2. Prepare Fruit: In a large bowl, add in the prepared mandarin oranges, sliced strawberries, sliced kiwis, grapes, blueberries, mangoes, blackberries, and raspberries.
  3. Add Dressing: Pour the dressing over the salad and lightly toss the ingredients together.
  4. Chill: Return to the fridge to allow to cool and let the flavors meld.
  5. Serve: Serve after the salad has been chilled, tossing once more.
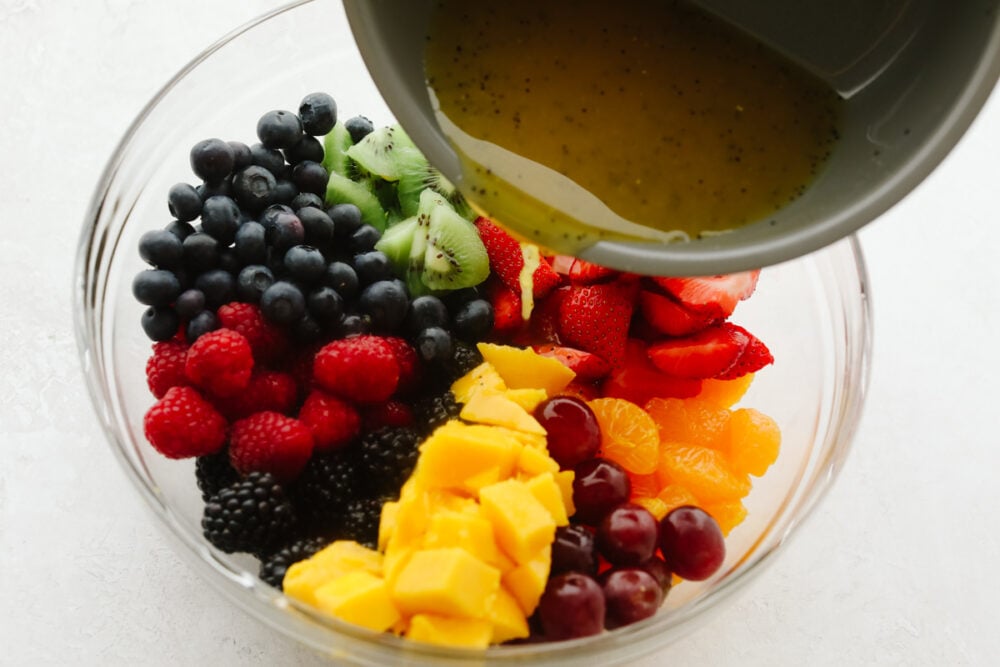
Pouring lime dressing over fruits.

Blackberry Lime Fruit Salad Quick Tips!

These tips can help you perfect your fruit salad and yield the most delicious, juicy result. Blackberry lime fruit salad will be the hit at your next get together!

  • Using the Freshest Fruits: Use fruits that are in season for the best result. In the summer, use fresh strawberries, blueberries, and blackberries, in the winter, add delicious pomegranate!
  • Adding Other Fruits: Tropical fruits like pineapple, mango, and papaya taste amazing in this salad. You can also add in things like bananas, figs, and dates. I usually avoid watermelon in fruit salads because of its high water content. It can make your fruit salads mushy.
  • Adding Herbs: I love to add fresh herbs to my fruit salads to give them an aromatic touch. Mint and basil taste amazing with this Blackberry Lime Fruit Salad!
  • Fruit Salad Presentation: If you want a fruit salad that really looks amazing, use lots of different colored fruit and make sure the pieces are cut into similar sizes.
  • Making Fruit Salad Before an Event: The longer a fruit salad sits, the juicier it becomes. If making your fruit salad a few days before serving, you can use a salad spinner or sieve to drain excess liquid and then add a drizzle of extra dressing for flavor.

Storing Leftover Fresh Fruit Salad

  • In the Refrigerator: Your fruit salad will last for 3-5 days when stored in an airtight container. Add a splash of lemon juice to your salad before storing it to keep your fruit from turning brown.
  • In the Freezer: Blackberry Lime Fruit Salad will keep in the freezer for up to a month in an airtight container. Thaw for a few hours in the fridge before serving.
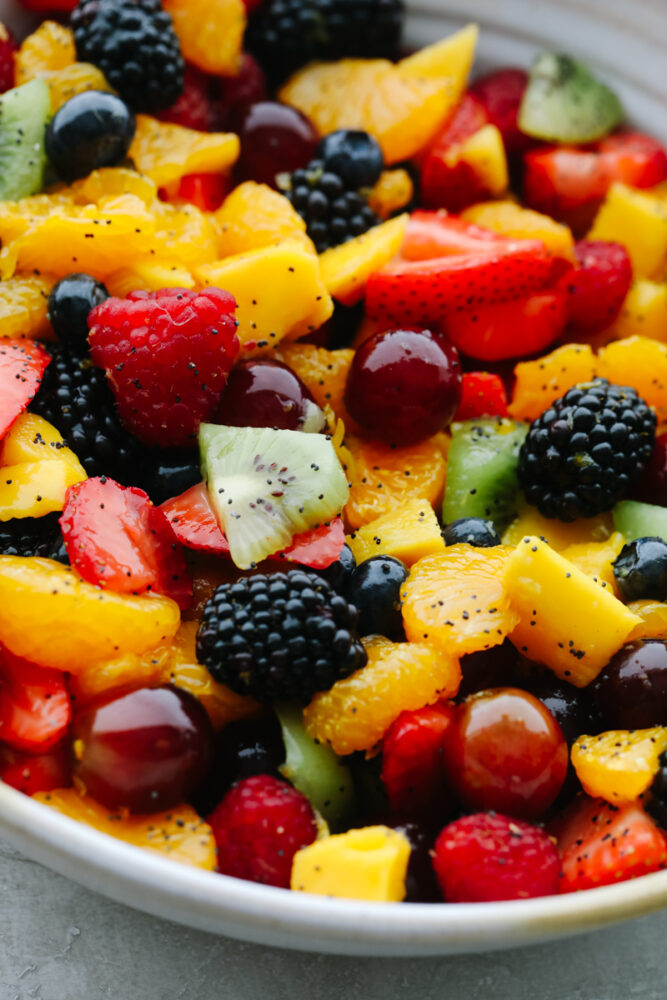
Blackberry Lime Fruit Salad with poppyseed dressing in bowl.
Print

Blackberry Lime Fruit Salad

Blackberry Lime Fruit Salad showcases tons of fresh, summer fruit and has a delicious easy dressing. Refreshing, light, and sweet, this fruit salad will be eaten in no time!
Course Salad, Side Dish
Cuisine American
Keyword blackberry lime fruit salad, fruit salad
Prep Time 15 minutes
Total Time 15 minutes
Servings 6 people
Calories 189kcal
Author Alyssa Rivers

Ingredients

!Dressing

  • 1/4 cup orange juice
  • 1 teaspoon orange zest
  • juice and zest from one lemon
  • juice and zest large lime
  • 1/4 cup honey
  • 1 teaspoon vanilla extract
  • 1 teaspoon poppyseeds

!Salad

  • 1 (15 ounces) can mandarin oranges, thoroughly drained
  • 2 cups fresh strawberries hulled and sliced
  • 3 medium kiwis peeled, halved, and sliced
  • 1 cup seedless grapes
  • 1 cups blueberries
  • 2 large mangoes peeled and diced
  • 1 cup blackberries
  • 1 cup raspberries

Instructions

  • In a medium saucepan add the orange juice, zest, lemon juice and zest, lime juice and zest, and honey to a boil over medium high heat. Reduce the heat for about 5 minutes and let it thickem. Add in the vanilla and poppyseeds. Set aside to cool.
  • In a large bowl, add in the prepared mandarin oranges, sliced strawberries, sliced kiwis, grapes, blueberries, mangoes, blackberries, and raspberries.
  • Pour the dressing over the salad and lightly toss the ingredients together.
  • Return to the fridge to allow to cool and let the flavors meld.
  • Serve after the salad has been chilled, tossing once more.

Notes

Updated on July 10, 2021
Originally Posted on May 26, 2017

Nutrition

Calories: 189kcal | Carbohydrates: 47g | Protein: 3g | Fat: 1g | Saturated Fat: 1g | Polyunsaturated Fat: 1g | Monounsaturated Fat: 1g | Sodium: 5mg | Potassium: 501mg | Fiber: 7g | Sugar: 37g | Vitamin A: 903IU | Vitamin C: 115mg | Calcium: 57mg | Iron: 1mg


from The Recipe Critic https://ift.tt/2UHy1Lm
https://ift.tt/3ARDHTW

शनिवार, 10 जुलाई 2021

French Baguette

This French Baguette is super easy and is going to change your life! It has a perfect crusty outside and tender soft inside, perfect for your bread cravings.

Bread makes every meal a little bit better and complete! Try these incredible bread recipes the next time you need some bread in your life, Rolls, Homemade Bread, and Garlic Bread.

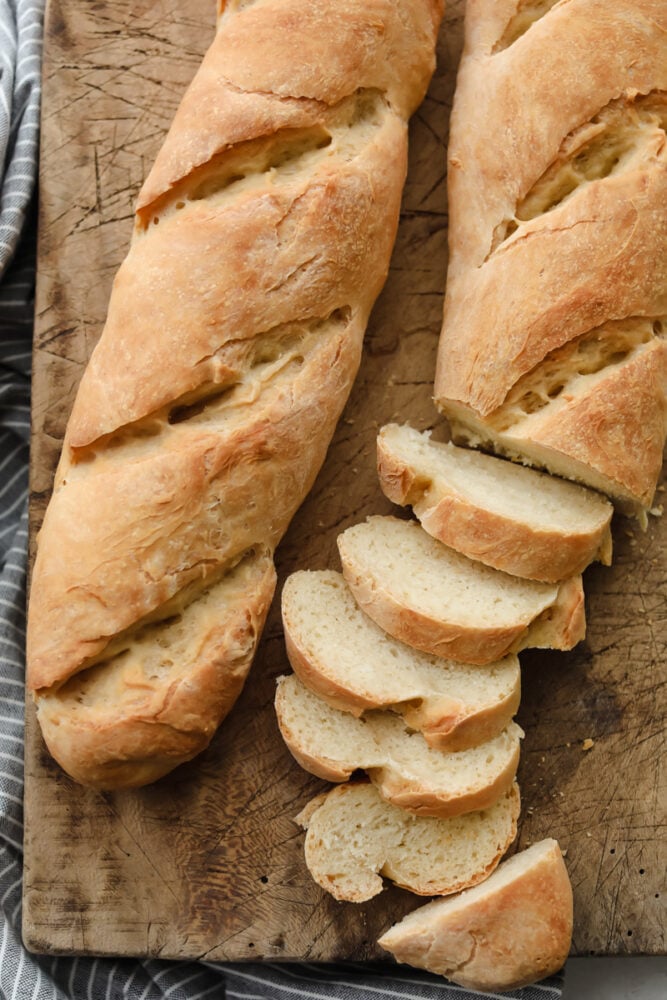
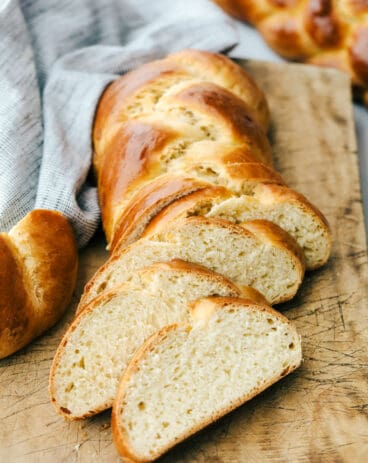
French Baguettes on a cutting board and one is sliced.

French Baguette Recipe

Nothing beats the smell of fresh-baked bread! And this French baguette recipe is so easy, all it takes is time and you can fresh bread at your fingertips. This loaf will have the signature crusty outside with the perfect soft chewy inside you would come to expect from french bread. Using a water pan in the oven will give it the perfect crust, and letting it prove overnight, or all day will allow the inside to be perfect. You may never grab a loaf from the store again! This French baguette will taste so much better!

One of the best things about a French baguette is that the structure is such that you can slice into it while it’s still warm. Let it cool for 5-10 minutes then slice into it and slather it with butter or your favorite toppings. Homemade Jam, Cinnamon Honey Butter, or toast it and turn it into some of the best Bruschetta ever! Dip this French baguette in some gourmet olive oil and cracked pepper or just eat it plain. You can’t go wrong, any way you eat it! This French Baguette is so luscious, your whole family is going to love this, you have to try it!

Ingredients for Homemade French Baguette

With just 5 ingredients this is one of the easiest bread recipes to make! These pantry staple ingredients are the perfect combination in this French baguette bread. Find the total amount of measurements in the recipe card below.

  • All purpose flour: This is a good sturdy flour, perfect for the french baguette.
  • Water:To mix with the flour to create the dough.
  • Salt:This will give it flavor so be sure to put it in, otherwise your dough will taste bland and not good.
  • Instant yeast:Give the bread it’s rise, using instant means you do not have to activate it first.
  • Honey:Honey not only gives the bread a touch of sweetness, it will feed the yeast and give it a nice rise.

How to Make an Authentic Baguette

The overnight proof lets the yeast really develop into a fabulous taste and texture. French baguette is a favorite recipe that goes well with so many family meals or eating it all on its own!

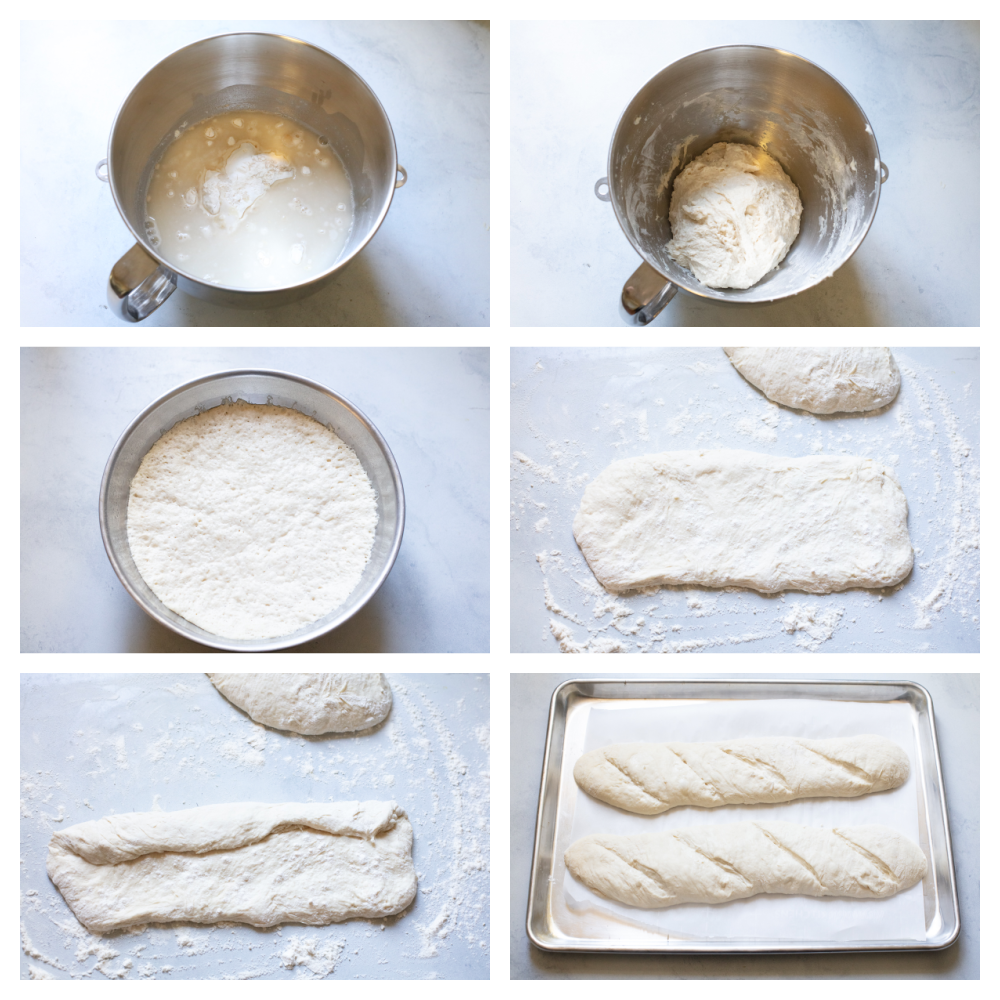
  1. Combine and Rise: Add all the ingredients in the bowl of a stand mixer and combine with a dough hook. Once combined, cover with plastic wrap and let it rest on the counter overnight, about 12 hours.
  2. Shape: In the morning the dough will be bubbly and wet and large. Flour your hands and counter and gently remove the dough to the floured surface. Cut into two pieces and gently stretch into 12-14 inch rectangle. Gently but snugly roll the rectangles inward to form logs and place on a parchment lined baking sheet.
  3. Rise and slice: Dust generously with flour and cover with a clean dish towel. Allow to rise for 1-2 hours. Once risen use a very sharp knife or a clean razor blade to cut about 4-5 long diagonal slits along the loaf, cutting in about ½ inch.
  4. Steam: In the oven, arrange the racks so there is one on the bottom rack and one in the middle. Place a cookie sheet full of hot water on the bottom rack. Preheat the oven to 475°.
  5. Bake: Be careful of the steam from the pan in the oven, add the loaves on the middle rack. Bake for 15 minutes.
  6. Rotate: Remove the water pan and turn the baguettes around. Lower the temperature to 450° and bake for 15 more minutes, until nice and golden brown.
  7. Cool and Enjoy: Allow the loave to cool for at least 5 minutes before cutting into them.
Making the french bread dough and shaping it for baking.

The Best French Baguette Tips

Fresh from the oven this french baguette not only smells amazing but tastes divine! These tips are the best to making the perfect bread every time!

  • Overnight Proving: Letting the dough ferment overnight will allow the bread to form a deep rich flavor that is typical of french bread. If you do not plan on making this in the morning, you can place the dough in the fridge to rise overnight till ready to use. Remove from the fridge 30 minutes before rolling out, allowing the bread to come to room temperature. You can also make this first thing in the morning and let it prove all day and then bake it so it’s nice and fresh for dinner.
  • Slashing: Use a really sharp knife to make the cuts in the dough before placin it in the oven. This will prevent the bread from bursting and ruining it’s shape. I have also used a sharp serrated knife with great success.
  • Steaming the Oven: This is a crucial step to getting that signature crusty texture of a french baguette, so do not skip it. Place the cookie sheet in the oven and then pour the water in cookie sheet. That way your chances of spilling the water are less. You can also use a skillet or pot in the oven as long as it has an oven safe handle. Do not use glass. If you pour cold water or even hot water into a glass pan that’s heated it can explode. If all you have is a glass 9×13 put it in the oven before turning it on, fill it with water and then turn on your oven. Make sure you put enough water in your pans that it doesn’t all evaporate while baking. You will burn your pan.
French baguettes on a wooden board.

Storing and Freezing French Bread

There is nothing better than slicing into fresh warm bread, and baguettes are best eaten the day they are made while still warm.

  • Storing: This french loaf is easy to store. Wrap it loosely and keep it at room temperature for 2 to 3 days. If the bread isn’t as crusty after a while you can place it in a warm oven (200 degrees) for 5 or 10 minutes, and it should come out good as new.
  • Freeze: Make a double batch and then freeze some loaves for a later date. Wrap the completely cooled loaves in plastic wrap and then in foil. Keep in the freezer for up to 3 months. Let it thaw at room temperature. To bring back it’s crustiness place in a warm oven for 5-10 minutes till you bring back that crusty goodness you love. You can also slice the bread before freeze and place in a freezer safe bag and then remove just what you need. Toast the bread in a toaster for ultimate crunch and flavor.
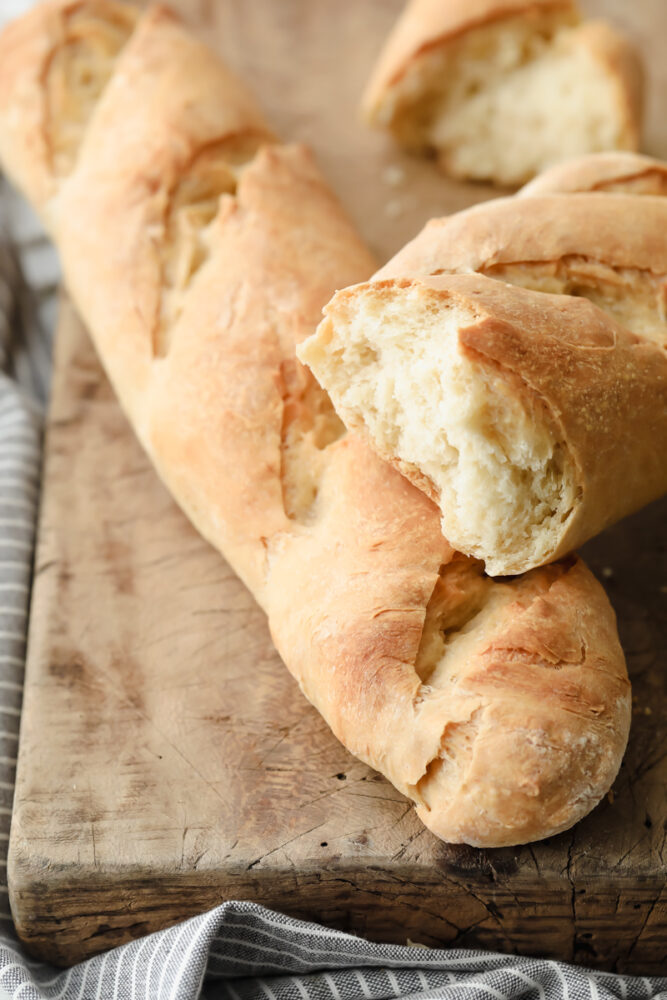
A torn loaf of french bread resting on another loaf.
Print

French Baguette

This French Baguette is super easy and is going to change your life. It has a perfect crusty outside and tender soft inside, perfect for your bread cravings.
Course Bread
Cuisine French
Keyword french baguette, french baguette recipe
Prep Time 30 minutes
Cook Time 40 minutes
Rise 13 hours
Total Time 14 hours 10 minutes
Servings 24 slices
Calories 85kcal
Author Alyssa Rivers

Ingredients

  • 4 cups all purpose flour
  • 1 ½ cups water plus 1 Tablespoon
  • 2 teaspoons salt
  • 2 ½ teaspoons Instant yeast
  • 2 Tablespoons Honey

Instructions

  • Add all the ingredients in the bowl of a stand mixer and combine with a dough hook. Once combined, cover with plastic wrap and let it rest on the counter overnight, about 12 hours.
  • In the morning the dough will be bubbly and wet and large. Flour your hands and counter and gently remove the dough to the floured surface. Cut into two pieces and gently stretch into 12-14 inch rectangle. Gently but snugly roll the rectangles inward to form logs and place on a parchment lined baking sheet.
  • Dust generously with flour and cover with a clean dish towel. Allow to rise for 1-2 hours. Once risen use a very sharp knife or a clean razor blade to cut about 4-5 long diagonal slits along the loaf, cutting in about ½ inch.
  • In the oven, arrange the racks so there is one on the bottom rack and one in the middle. Place a cookie sheet full of hot water on the bottom rack. Preheat the oven to 475°.
  • Be careful of the steam from the pan in the oven, add the loaves on the middle rack. Bake for 15 minutes.
  • Remove the water pan and turn the baguettes around. Lower the temperature to 450° and bake for 15 more minutes, until nice and golden brown.
  • Allow the loave to cool for at least 5 minutes before cutting into them.

Nutrition

Calories: 85kcal | Carbohydrates: 18g | Protein: 3g | Fat: 1g | Saturated Fat: 1g | Polyunsaturated Fat: 1g | Monounsaturated Fat: 1g | Sodium: 196mg | Potassium: 35mg | Fiber: 1g | Sugar: 1g | Vitamin C: 1mg | Calcium: 4mg | Iron: 1mg


from The Recipe Critic https://ift.tt/3hTZku0
https://ift.tt/3r0Gqpu

शुक्रवार, 9 जुलाई 2021

Lemon Icebox Cake

This lemon icebox cake is layers of buttery shortbread and lemon cream that come together in this scrumptious no-bake summer dessert! Not only is this recipe beyond easy, but has the perfect balance of tart and sweet flavors!

Lemon Ice Box Cake is so rich, zesty, and delicious! Looking for more lemon? Try my cupcakes, cookies, and brownies for more mouthwatering citrus flavor!

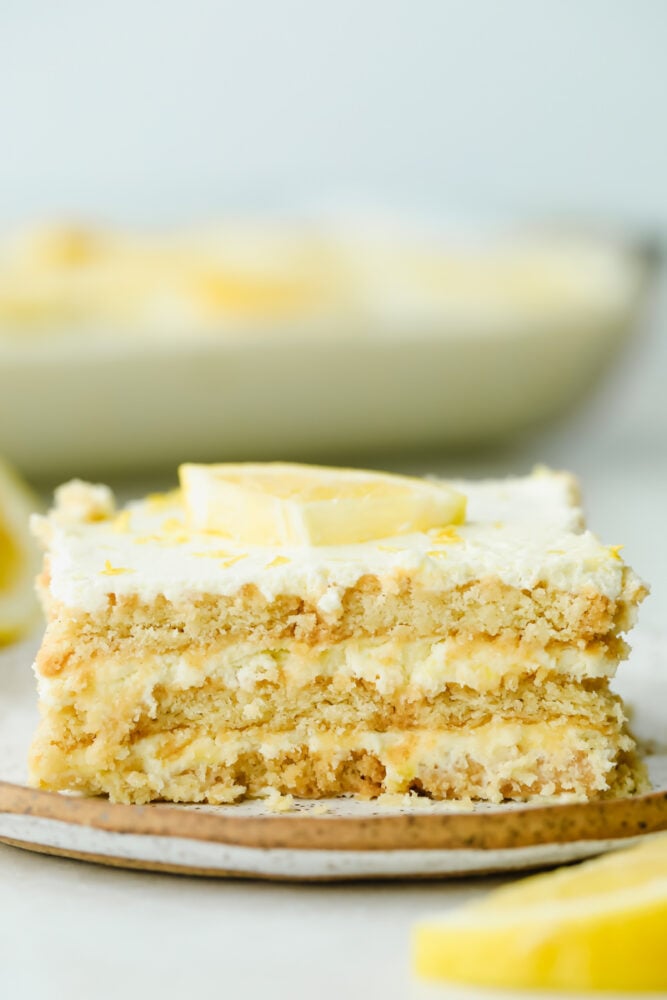
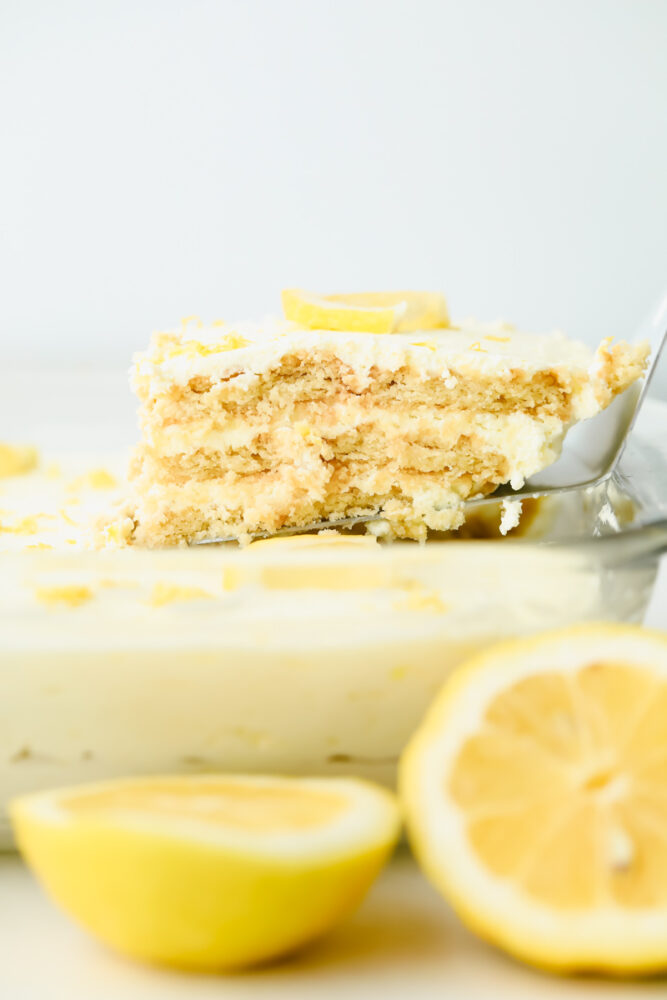
Slice of Lemon Ice Box Cake

Sweet Lemon Icebox Cake Recipe

I can never get enough of lemon desserts. They are so light, bright, refreshing and absolutely perfect for summer! I love the way the tartness of lemon fuses with sweet creams and buttery crusts. These flavors plus the ease of putting ice box cakes together is a winning combination. This lemon icebox cake comes together in a snap without even having to touch your oven.

This lemon icebox cake truly is a foolproof recipe. My kids make it with me all the time! With only a few easy ingredients and simple layering process, lemon icebox cake will be your new go-to dessert. It is so bright and delicious, it is hard to resist sneaking bites all throughout the day. You have to try this divine lemony goodness for yourself!

No Bake Lemon Icebox Cake Ingredients

Lemon icebox cake is a delicious and inexpensive dessert to whip up for all of your summer get-togethers! Follow the recipe card below for the printable recipe card with measurements.

  • Heavy Cream: To create lemon filling.
  • Powdered Sugar: For sweetness and smooth texture.
  • Instant Lemon Pudding Powder: For flavor and thickness.
  • Vanilla Extract: Adds flavor. I recommend using pure vanilla extract for best taste!
  • Lemon Juice: Fresh lemon juice works best. I have found that sometimes bottled lemon juice can be too bitter for desserts.
  • Lemon Zest: For zesty flavor.
  • Shortbread Cookies: I prefer to use Lorna Doone cookies, but you can use whatever shortbread cookie brand you like best! Nilla Wafers are also a delicious substitute.

How to Make The Best Lemon Icebox Cake

You don’t need to worry about messing up this lemon icebox cake. It is super simple and turns out delicious each and every time!

  1. Make Lemon Cream: Using a mixer with the whisk attachment, whip the heavy cream, powdered sugar, pudding powder vanilla extract, lemon juice and lemon zest together on high until you have stiff peaks.
  2. Layer Cream and Cookies: In the bottom of a 9×13 pan, spread a thin layer of whipped cream over the bottom. Add a layer of shortbread cookies topped with ⅓ of the remaining whipped cream.
  3. Repeat: Repeat the layers two more times until all the cookies and whipped cream have been used. Top with more lemon zest.
  4. Chill Overnight: Cover with plastic wrap and chill for 4 hours, or overnight. Serve cold.
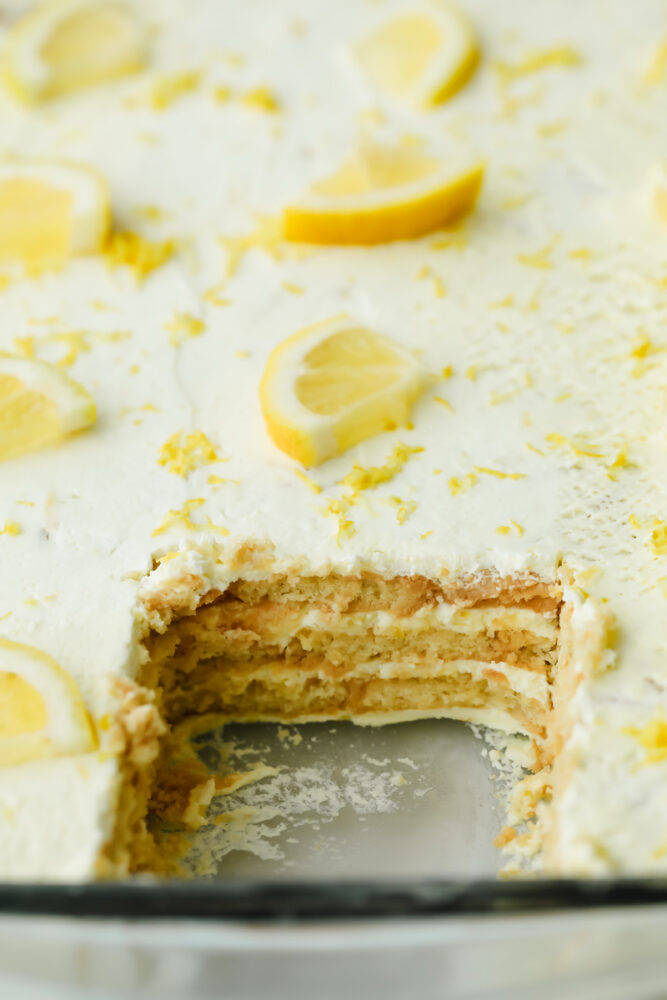
Piece taken out of Lemon Icebox Cake.

Lemon Icebox Cake Tips

Make the most of this easy, delicious cake recipe with these simple tips! The lemon icebox cake is perfect for all occasions!

  • Picking Lemons: For the best tasting lemon juice, I recommend picking lemons that are heavy, slightly soft when squeezed and completely yellow all around. Any hints of green indicate a lemon that is not yet ripe and your juice may be too bitter.
  • Keep Whipped Cream and Mixer Cold: Keeping your whipped cream and mixer attachments cold will help your lemon cream base thicken completely.
  • Toppings: I love to serve my Lemon Icebox Cake with fresh raspberries on top. You can also serve with blueberries or strawberries for extra juicy flavor. Top it with homemade caramel sauce for a boost of decadence.
  • Enhancing Lemon Flavor: For extra tangy flavor and creaminess, add my homemade lemon curd between layers.
  • Let Chill Before Serving: It is important to let your Icebox Cake chill before serving. This helps it solidify and allows the cookies to absorb moisture from the cream- giving you the best cake texture possible.
  • Cookies: Try substituting shortbread cookies with sugar or NIlla wafers to switch up your cake’s flavor and texture.
  • Garnish: For a dessert that is sure to impress, top your cake with candied lemons. This not only makes your cake look beautiful, but adds a pop of flavor and texture as well!

Storing Leftover Lemon Icebox Cake

The best part about lemon icebox cake is that it stores easily and can be eaten straight from the fridge!

  • In the Refrigerator: Wrap cake with plastic wrap and store in fridge for up to 4 days.
  • In the Freezer: Wrap cake completely with aluminum foil. Icebox Cake will keep in the freezer for up to a month. Simply thaw in the fridge overnight before serving.
Taking a piece of Lemon Icebox Cake.
Print

Lemon Icebox Cake

Course Cake, Dessert
Cuisine American
Keyword lemon icebox cake, lemon icebox cake recipe
Prep Time 20 minutes
Cook Time 4 hours
Total Time 4 hours 20 minutes
Servings 12 People
Calories 227kcal
Author Alyssa Rivers

Ingredients

  • 3 cups heavy cream
  • ½ cup powdered sugar
  • ¼ cup instant Lemon pudding powder
  • ¾ teaspoon vanilla extract
  • ¼ cup fresh lemon juice
  • 3 Tablespoon lemon zest
  • 2 ½ boxes Lorna Doone shortbread Cookies or other shortbread cookies

Instructions

  • Using a mixer with the whisk attachment, whip the heavy cream, powdered sugar, pudding powder vanilla extract, lemon juice and lemon zest together on high until you have stiff peaks.
  • In the bottom of a 9×13 pan, spread a thin layer of whipped cream over the bottom. Add a layer of shortbread cookies topped with ⅓ of the remaining whipped cream.
  • Repeat the layers two more times until all the cookies and whipped cream have been used. Top with more lemon zest.
  • Cover with plastic wrap and chill for 4 hours, or overnight. Serve cold.

Nutrition

Calories: 227kcal | Carbohydrates: 7g | Protein: 1g | Fat: 22g | Saturated Fat: 14g | Polyunsaturated Fat: 1g | Monounsaturated Fat: 6g | Cholesterol: 82mg | Sodium: 23mg | Potassium: 53mg | Fiber: 1g | Sugar: 5g | Vitamin A: 876IU | Vitamin C: 4mg | Calcium: 41mg | Iron: 1mg


from The Recipe Critic https://ift.tt/36mUJuT
https://ift.tt/3qXXGeY