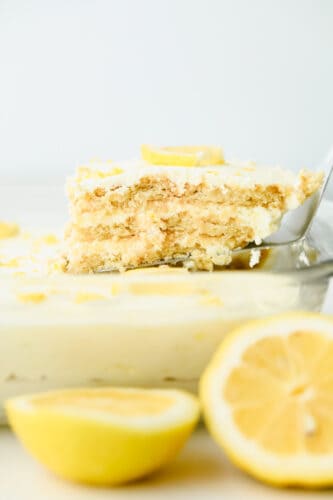
Alyssa Rivers July 09 लेबलों वाले संदेश दिखाए जा रहे हैं. सभी संदेश दिखाएं

शुक्रवार, 9 जुलाई 2021

Lemon Icebox Cake

This lemon icebox cake is layers of buttery shortbread and lemon cream that come together in this scrumptious no-bake summer dessert! Not only is this recipe beyond easy, but has the perfect balance of tart and sweet flavors!

Lemon Ice Box Cake is so rich, zesty, and delicious! Looking for more lemon? Try my cupcakes, cookies, and brownies for more mouthwatering citrus flavor!
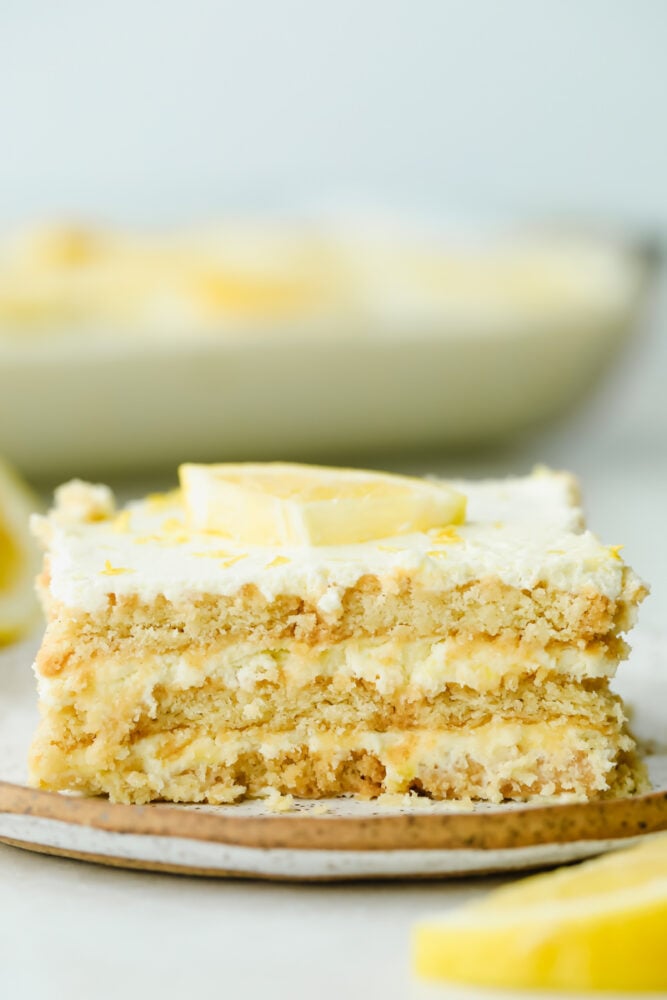
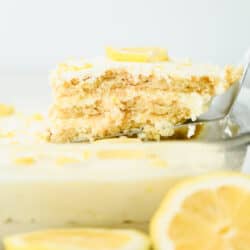
Slice of Lemon Ice Box Cake

Sweet Lemon Icebox Cake Recipe

I can never get enough of lemon desserts. They are so light, bright, refreshing and absolutely perfect for summer! I love the way the tartness of lemon fuses with sweet creams and buttery crusts. These flavors plus the ease of putting ice box cakes together is a winning combination. This lemon icebox cake comes together in a snap without even having to touch your oven.

This lemon icebox cake truly is a foolproof recipe. My kids make it with me all the time! With only a few easy ingredients and simple layering process, lemon icebox cake will be your new go-to dessert. It is so bright and delicious, it is hard to resist sneaking bites all throughout the day. You have to try this divine lemony goodness for yourself!

No Bake Lemon Icebox Cake Ingredients

Lemon icebox cake is a delicious and inexpensive dessert to whip up for all of your summer get-togethers! Follow the recipe card below for the printable recipe card with measurements.

  • Heavy Cream: To create lemon filling.
  • Powdered Sugar: For sweetness and smooth texture.
  • Instant Lemon Pudding Powder: For flavor and thickness.
  • Vanilla Extract: Adds flavor. I recommend using pure vanilla extract for best taste!
  • Lemon Juice: Fresh lemon juice works best. I have found that sometimes bottled lemon juice can be too bitter for desserts.
  • Lemon Zest: For zesty flavor.
  • Shortbread Cookies: I prefer to use Lorna Doone cookies, but you can use whatever shortbread cookie brand you like best! Nilla Wafers are also a delicious substitute.

How to Make The Best Lemon Icebox Cake

You don’t need to worry about messing up this lemon icebox cake. It is super simple and turns out delicious each and every time!

  1. Make Lemon Cream: Using a mixer with the whisk attachment, whip the heavy cream, powdered sugar, pudding powder vanilla extract, lemon juice and lemon zest together on high until you have stiff peaks.
  2. Layer Cream and Cookies: In the bottom of a 9×13 pan, spread a thin layer of whipped cream over the bottom. Add a layer of shortbread cookies topped with ⅓ of the remaining whipped cream.
  3. Repeat: Repeat the layers two more times until all the cookies and whipped cream have been used. Top with more lemon zest.
  4. Chill Overnight: Cover with plastic wrap and chill for 4 hours, or overnight. Serve cold.
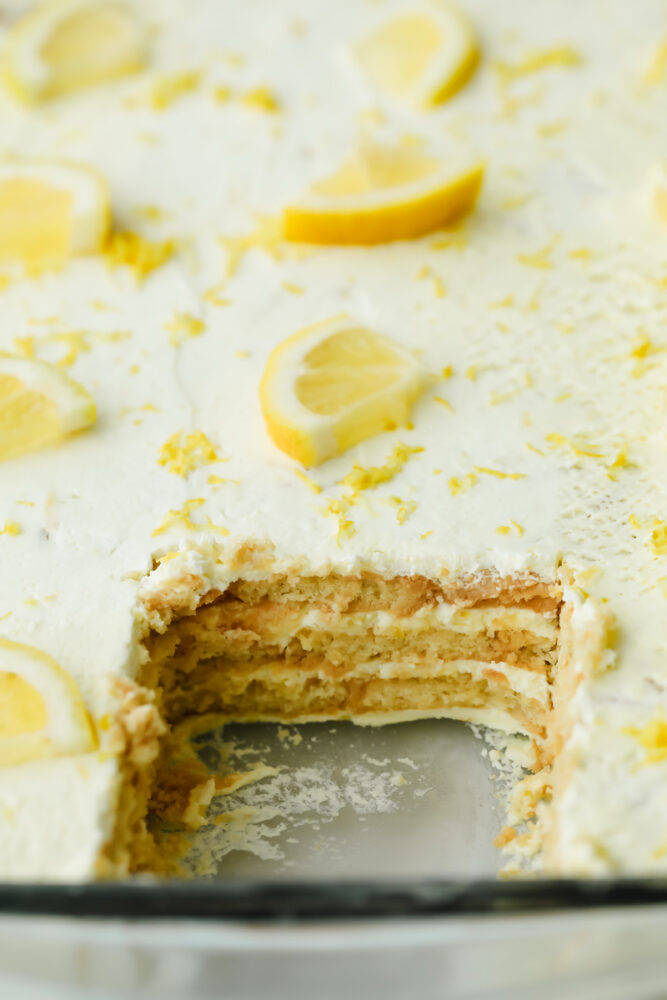
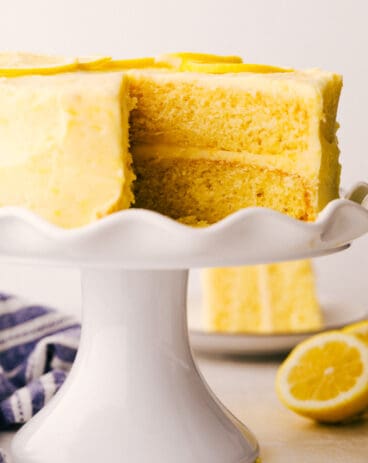
Piece taken out of Lemon Icebox Cake.

Lemon Icebox Cake Tips

Make the most of this easy, delicious cake recipe with these simple tips! The lemon icebox cake is perfect for all occasions!

  • Picking Lemons: For the best tasting lemon juice, I recommend picking lemons that are heavy, slightly soft when squeezed and completely yellow all around. Any hints of green indicate a lemon that is not yet ripe and your juice may be too bitter.
  • Keep Whipped Cream and Mixer Cold: Keeping your whipped cream and mixer attachments cold will help your lemon cream base thicken completely.
  • Toppings: I love to serve my Lemon Icebox Cake with fresh raspberries on top. You can also serve with blueberries or strawberries for extra juicy flavor. Top it with homemade caramel sauce for a boost of decadence.
  • Enhancing Lemon Flavor: For extra tangy flavor and creaminess, add my homemade lemon curd between layers.
  • Let Chill Before Serving: It is important to let your Icebox Cake chill before serving. This helps it solidify and allows the cookies to absorb moisture from the cream- giving you the best cake texture possible.
  • Cookies: Try substituting shortbread cookies with sugar or NIlla wafers to switch up your cake’s flavor and texture.
  • Garnish: For a dessert that is sure to impress, top your cake with candied lemons. This not only makes your cake look beautiful, but adds a pop of flavor and texture as well!

Storing Leftover Lemon Icebox Cake

The best part about lemon icebox cake is that it stores easily and can be eaten straight from the fridge!

  • In the Refrigerator: Wrap cake with plastic wrap and store in fridge for up to 4 days.
  • In the Freezer: Wrap cake completely with aluminum foil. Icebox Cake will keep in the freezer for up to a month. Simply thaw in the fridge overnight before serving.
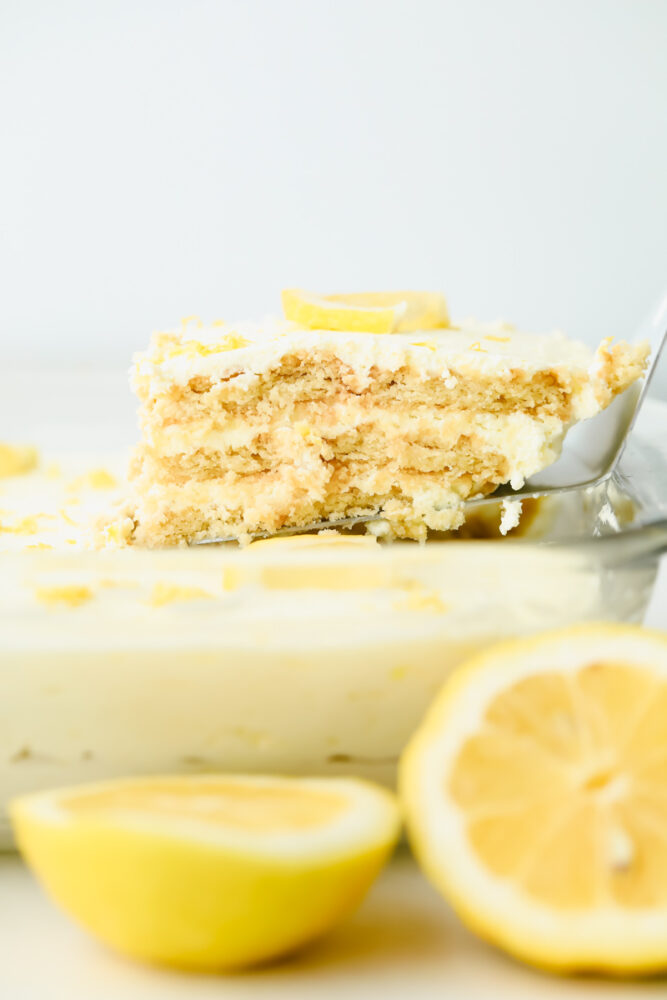
Taking a piece of Lemon Icebox Cake.
Print

Lemon Icebox Cake

Course Cake, Dessert
Cuisine American
Keyword lemon icebox cake, lemon icebox cake recipe
Prep Time 20 minutes
Cook Time 4 hours
Total Time 4 hours 20 minutes
Servings 12 People
Calories 227kcal
Author Alyssa Rivers

Ingredients

  • 3 cups heavy cream
  • ½ cup powdered sugar
  • ¼ cup instant Lemon pudding powder
  • ¾ teaspoon vanilla extract
  • ¼ cup fresh lemon juice
  • 3 Tablespoon lemon zest
  • 2 ½ boxes Lorna Doone shortbread Cookies or other shortbread cookies

Instructions

  • Using a mixer with the whisk attachment, whip the heavy cream, powdered sugar, pudding powder vanilla extract, lemon juice and lemon zest together on high until you have stiff peaks.
  • In the bottom of a 9×13 pan, spread a thin layer of whipped cream over the bottom. Add a layer of shortbread cookies topped with ⅓ of the remaining whipped cream.
  • Repeat the layers two more times until all the cookies and whipped cream have been used. Top with more lemon zest.
  • Cover with plastic wrap and chill for 4 hours, or overnight. Serve cold.

Nutrition

Calories: 227kcal | Carbohydrates: 7g | Protein: 1g | Fat: 22g | Saturated Fat: 14g | Polyunsaturated Fat: 1g | Monounsaturated Fat: 6g | Cholesterol: 82mg | Sodium: 23mg | Potassium: 53mg | Fiber: 1g | Sugar: 5g | Vitamin A: 876IU | Vitamin C: 4mg | Calcium: 41mg | Iron: 1mg


from The Recipe Critic https://ift.tt/36mUJuT
https://ift.tt/3qXXGeY
गुरुवार, 9 जुलाई 2020

Crispy Onion Rings (Baked or Fried!)

Crispy Onion Rings, whether baked or fried, will be a huge hit appetizer that you will want to make again and again.  The sweet onion wrapped in a crunch of perfectly crispy panko breading is just as delicious as any restaurant version, and surprisingly easy to make at home!

For more delicious appetizers that are warm and crispy try Baked Buffalo Cauliflower, Crispy Parmesan Fried Zucchini, or Mozzarella Sticks.  They will start any meal off right with vibrant flavors your family and friends will rave about!

Finished onion rings on a plate with dipping sauce.

Crispy Onion Rings (Baked or Fried!)

Crispy onion rings that you crave from your favorite restaurant or fast food chain can be made easily at home!  They are great as a side dish with hamburgers and hot dogs on the grill, or served as a crowd-pleasing appetizer.  Everyone will be so impressed at the crispy breading you are able to make from scratch at home.  You will never have to go out to enjoy these delicious onion rings again!

These homemade onion rings are can be fried or baked in the oven and either way you will end up with the best onion ring you have ever had.  It so crispy on the outside and tender on the inside.  Each bite gives the perfect crunch.  The sweet onion flavor is perfectly balanced by the warm paprika and garlic spices and the nutty parmesan cheese.  Pair these onion rings with a favorite dipping sauce and you will be amazed how quickly they are eaten and enjoyed!

What is Onion Ring Batter Made of?

These onions are so irresistible at any restaurant, and now they can be made from scratch in your kitchen using just a few common ingredients.  Most of these are staples in any pantry and are very easy to work with.  You will be shocked how fast these come together and how delicious they are!

  • Oil for frying: Canola, peanut, or vegetable oil are best for deep frying.
  • Onions: White or yellow onions work well. In the summer months Walla Walla or Vidalia are in season and are a great option for a sweeter onion.
  • Flour: Holds the crispy coating on to the onion.  Shake off any excess before dipping in the egg.
  • Baking powder: Adds a little more crispiness to the batter and helps hold the batter to the onion.
  • Eggs: Whisk eggs lightly before dredging onion rings through them.
  • Panko: Extra crispy Japanese breadcrumb that is light and airy.
  • Grated parmesan cheese: Adds a great nutty flavor to the batter.
  • Paprika: Adds great color and a very mild spice.
  • Garlic powder: Garlic flavor makes everything better and these onion rings are no exception!

How do You Make Onion Rings From Scratch?

Whether you are frying or baking your onion rings, this recipe is an easy way to create a delicious and crispy appetizer.  Simply follow the directions through step 4, then depending on your preferred cooking method you will complete step 5 accordingly.  Your family will go crazy over these delicious onion rings no matter which way you choose!

  1. Heat oil: In a medium sized skillet add oil 1/2 inch up the pan and preheat to medium high or 375 degrees.
  2. Slice onions: The onions should be about 1/4 inch thick.
  3. Prepare batter: In a small bowl add the flour and baking powder. In another bowl add the eggs and whisk. And in the last shallow dish add Panko, parmesan cheese, paprika and garlic powder.
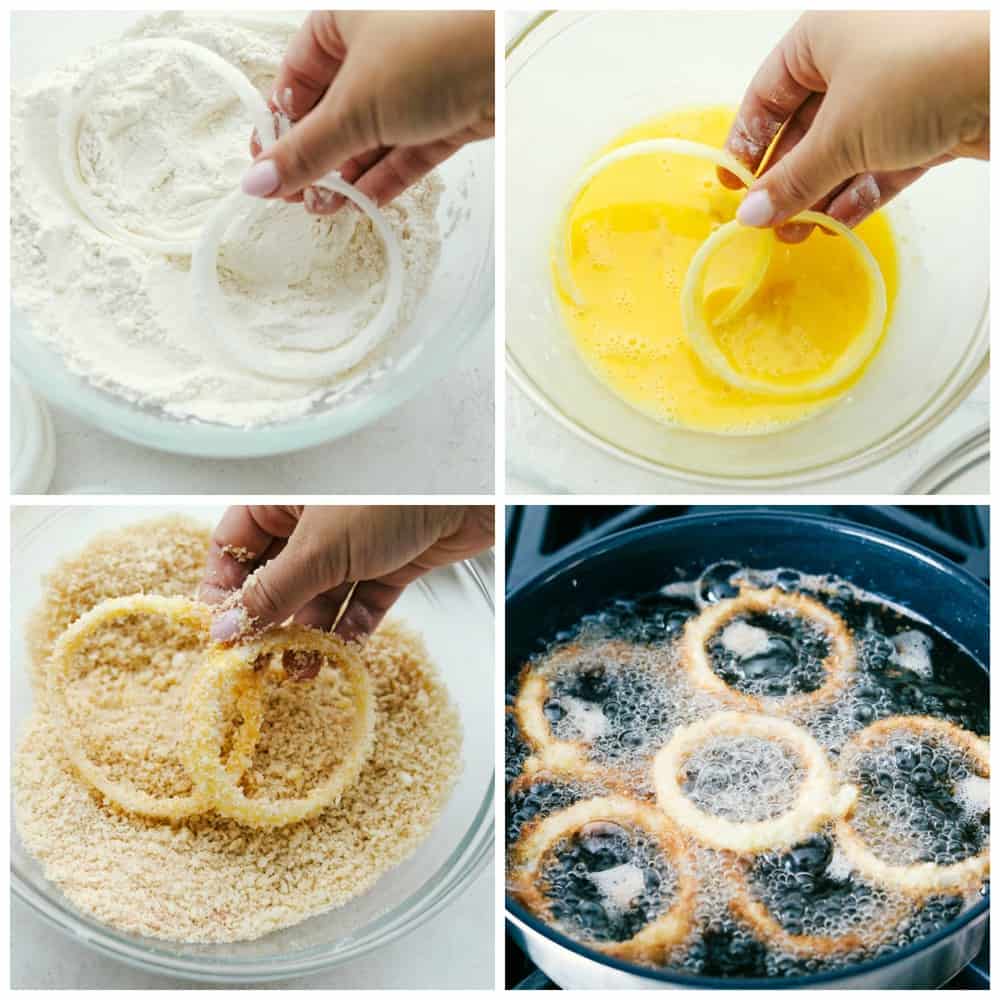
  4. Dip: First dip onion slice in the flour, then the egg, and lastly in the Panko mixture. Repeat with all of the onion rings.
  5. To Fry: Add the onion rings to the oil and fry until they are golden brown. To Bake: Preheat oven to 450 degrees. After coating the onion rings line a baking sheet with parchment paper. Bake for 10-15 minutes or until crispy and golden brown.
  6. Serve: Plate these up with your favorite dipping sauce.

Steps to make onion rings.

Tips for Crispy Onion Rings:

When it comes to making the perfect batter for a fried (or baked) onion ring, there may be a few questions that come to mind.  Here is my advice on making the BEST onion rings you have ever had.  Follow these tips to master the art of a crispy onion ring your family will go crazy over!

  • How to get the best onion flavor: When biting into an onion ring, you want to get a sweet and bright onion flavor.  To achieve this unique flavor, you will need to start by soaking the onion slices in cold water.  Allow them to chill in the water for at least 10 minutes.  Dry them off completely before beginning to batter them.
  • How to keep batter from falling off onion rings: In order to keep that tasty and crispy breading on your onion you will want to use cold batter and hot oil.  Also, make sure you shake off any excess flour before dipping the onion in the egg mixture.  You need thin layers as you go.
  • How to cut the onion: Cut the stem end off and remove the peel. Then trim off the root end. Now cut a thin slice off the end of the onion to keep the onion from rolling while you slice it.  Finally, place the onion flat side down and cut cross wise into thick slices for the perfect onion rings.
  • How to get extra crispy onion rings: For an extra crispy coating, double dip the onion rings in the egg and panko mixture. Also, when cooling the onion rings, place them on a wire cooling rack with paper towels below it so that the crispy rings are not laying directly on the oil soaked paper towel as they cool.

Can I Freeze Battered Onion Rings?

Yes!  Place your onion rings in an airtight container and store in the refrigerator for up to 5 days or in the freezer for up to a year.  To reheat, place in a 375 degree oven until heated through.

Dipping onion rings in sauce.

More Crispy Appetizer Recipes:

Print

Crispy Onion Rings

Crispy Onion Rings, whether baked or fried, will be a huge hit appetizer that you will want to make again and again.  The sweet onion wrapped in a crunch of perfectly crispy panko breading is just as delicious as any restaurant version, and surprisingly easy to make at home!
Course Appetizer, Side Dish, Snack
Cuisine American
Keyword crispy onion rings, fried onion rings, onion rings
Prep Time 15 minutes
Cook Time 15 minutes
Total Time 30 minutes
Servings 6 People
Calories 264kcal
Author Alyssa Rivers

Ingredients

  • oil for frying
  • 2 large onions
  • 1 1/4 cup flour
  • 1 teaspoon baking powder
  • 3 eggs
  • 2 cups panko
  • 1/2 cup grated parmesan cheese
  • 1 teaspoon paprika
  • 1/2 teaspoon garlic powder

Instructions

  • In a medium sized skillet add oil 1/2 inch up the pan and preheat to medium high or 375 degrees. Slice the onions 1/4 inch thickness into rings.
  • In a small bowl add the flour and baking powder. In another bowl add the eggs and whisk. And in the last shallow dish add Panko, parmesan cheese, paprika and garlic powder.
  • Dip one onion ring in the flour, then the egg, and lastly in the Panko mixture. Repeat with all of the onion rings.
  • Add the onion rings to the oil and fry until they are golden brown. Serve with favorite dipping sauce.

To Bake:

  • Preheat oven to 450 degrees. After coating the onion rings line a baking sheet with parchment paper. Bake for 10-15 minutes or until crispy and golden brown.

Nutrition

Calories: 264kcal | Carbohydrates: 40g | Protein: 12g | Fat: 6g | Saturated Fat: 2g | Cholesterol: 89mg | Sodium: 309mg | Potassium: 256mg | Fiber: 3g | Sugar: 4g | Vitamin A: 355IU | Vitamin C: 4mg | Calcium: 186mg | Iron: 3mg


from The Recipe Critic https://ift.tt/31ZALFz
https://ift.tt/3iVgXtg

2 Ingredient Cheesecake Dip

2 Ingredient Cheesecake Dip is a super easy to make, sweet and tangy dip.  It is so creamy and perfect for dipping fruit as a cool summer snack or dessert!

Also try Fluffy Marshmallow Cream Cheese Dip or Strawberry Cream Cheese Fruit Dip.  They are quick and easy to whip up, but taste like they took all day!

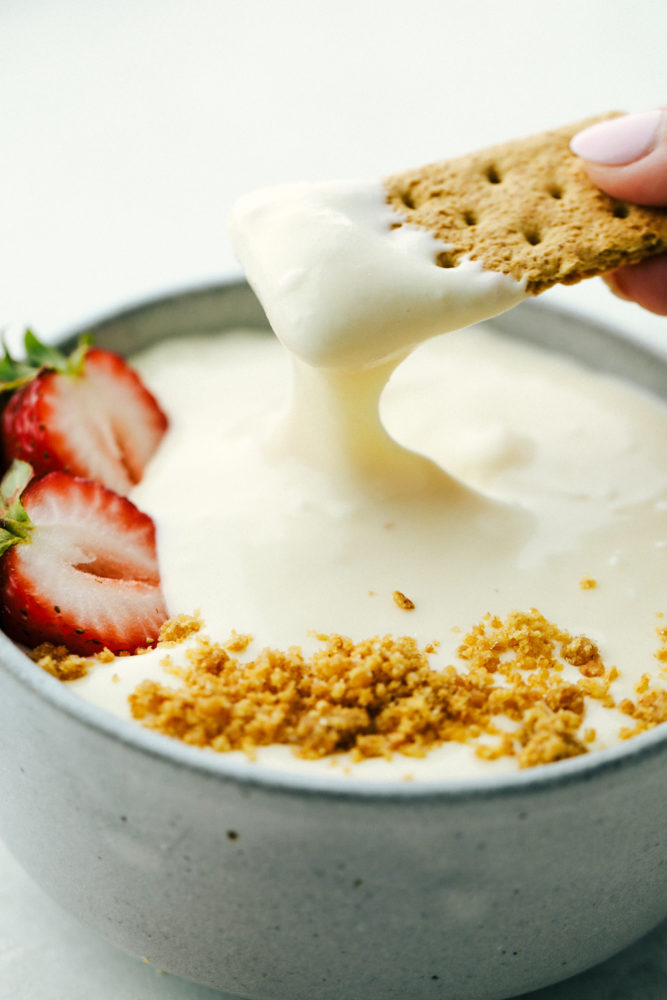
Dipping a graham cracker into cheesecake dip.

2 Ingredient Cheesecake Dip

This light and tasty cheesecake dip is the perfect way to liven up any of your favorite fruit.  With its refreshing tangy sweetness, this dip will become an instant favorite! The combination of the cream cheese with the sticky sweet condensed milk, create the most balanced flavor and the creamy but fluffy texture is unbelievably delicious!

Cheesecake dip is a great choice for any time of day because it is sweet and satisfying. The simple and well-balanced flavors keep you coming back for one more dip. Drench a graham cracker in it for a bite that is inspired by a vanilla cheesecake with a buttery crust. Or use it as a fruit dip for a family barbecue. However you decide to serve it, you will see it is a huge hit with anyone who tries it! Stop now and add this recipe to your list of must try summer recipes!

What is Cheesecake Dip Made of?

This is one of the best versions of cheesecake dip and it’s amazing that the delicious cheesecake flavor is made of just 2 ingredients!  Not only is this a super short ingredients list, but you may find you already have both on hand!  With these 2 simple and delicious ingredients, how could you do wrong?

  • Cream Cheese: Softened cream cheese will add a mild sweet and tangy flavor.
  • Sweetened condensed milk: Adds sweetness and creamy texture.

It’s Easy to Make Cheesecake Dip!

Making the most perfect cheesecake dip is simple and no-fuss.  Just beat the cream cheese until it is nice and smooth then add in the condensed milk until you get your desired thick and fluffy consistency.  It doesn’t get any easier than that! Just remember it will also disappear just as quickly as it is made!

  1. Beat cream cheese: In a stand mixer or using a handheld mixer beat the cream cheese until smooth.
  2. Add in condensed milk: Add in the sweetened condensed milk and continue to beat until smooth or creamy.
  3. Serve: This dip is delicious when served with fruit, graham crackers, or whatever you would like.

Tips for the Most Amazing Dip:

This 2 ingredient dip is seriously the best and easiest dip ever!  If you are looking to modify this recipe at all here are some tips to keep in mind.

  • Healthy version: To make this cheesecake dip a little healthier you can use low-fat cream cheese and instead of sweetened condensed milk use yogurt.
  • Flavors: To quickly add a little extra flavor add a tiny bit of vanilla extract or the zest of citrus fruits like orange, lemon, or lime.
  • Tip: Make sure the cream cheese is soft, not melted.  Cut the cream cheese into pieces, then microwave it for 15-20 seconds.
  • Skewers: Smaller fruit may be difficult to dip into this heavenly cheesecake dip.  So serve them on toothpicks or make fruit skewers to add to the fun of this treat.

What to Serve with Cheesecake Dip:

Its amazing how addicting 2 ingredients can be!  The list of things to serve with this cheesecake dip is so long, because it is truly amazing with anything!  Here are some family favorites to consider.

  • Crackers/Cookies: Graham Crackers, Chocolate Graham Crackers, Cinnamon Graham Crackers, Nilla Wafers, Chessman cookies, Oreo’s, Vanilla Oreo’s
  • Fruit: Strawberries, grapes, and raspberries tend to be the most popular, but any fruit will taste amazing in this dip!

Can I Make Fruit Dip in Advance?

This cheesecake dip is such a huge hit you will not have to worry with leftovers.  However, you may want to prepare this ahead of time for a quick afternoon snack or after dinner treat.  To make it ahead of time, place in an sealed container and store it in the refrigerator up to 4 days.  Freezing is not recommended.

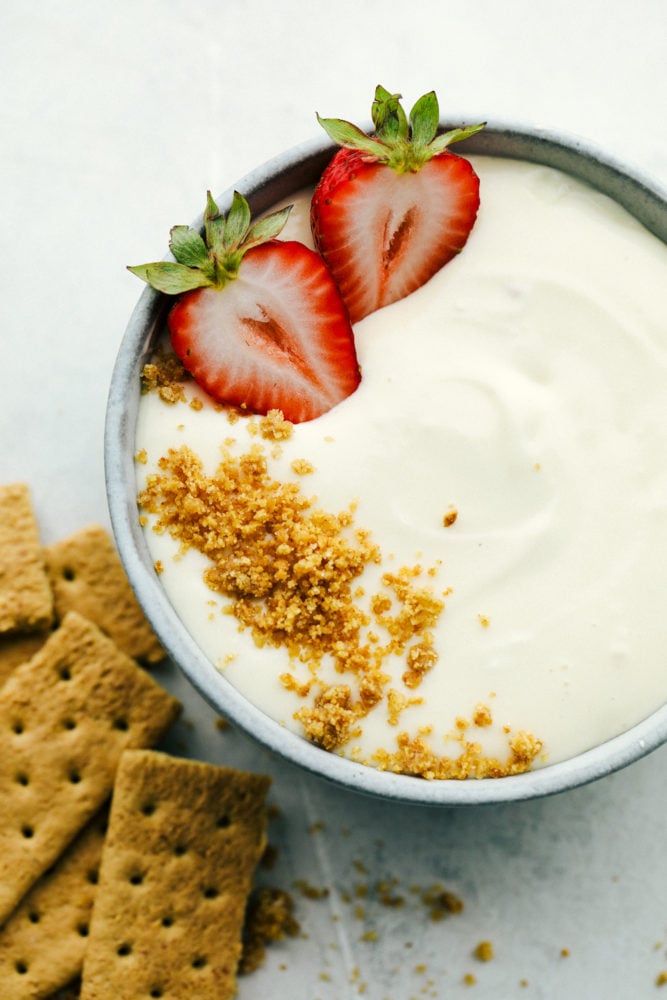
Graham cracker crumbles and strawberries garnishing cheesecake dip.

More Cheesecake Inspired Recipes:

Print

2 Ingredient Cheesecake Dip

2 Ingredient Cheesecake Dip is a super easy to make, sweet and tangy dip.  It is so creamy and perfect for dipping fruit as a cool summer snack or dessert!
Course Appetizer, Dessert, Side Dish, Snack
Cuisine American
Keyword 2 ingredient cheesecake dip, cheesecake dip
Prep Time 10 minutes
Total Time 10 minutes
Servings 8 People
Calories 22kcal
Author Alyssa Rivers

Ingredients

  • 2 8 ounce Cream Cheese, softened
  • 1 14 ounce Sweetened condensed milk

Instructions

  • In a stand mixer or using a handheld mixer beat the cream cheese until smooth.
  • Add in the sweetened condensed milk and continue to beat until smooth or creamy.
  • Serve with fruit, graham crackers, or whatever you would like.

Nutrition

Calories: 22kcal | Carbohydrates: 1g | Protein: 1g | Fat: 1g | Saturated Fat: 1g | Cholesterol: 1mg | Sodium: 1mg | Sugar: 1g


from The Recipe Critic https://ift.tt/3eiJgOQ
https://ift.tt/2ObgjJG