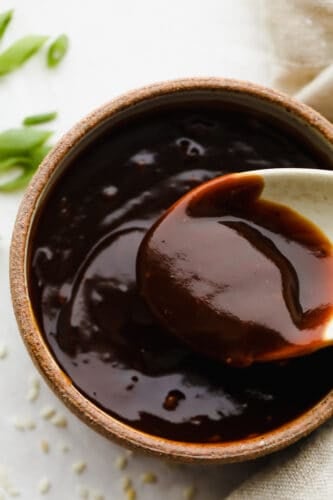
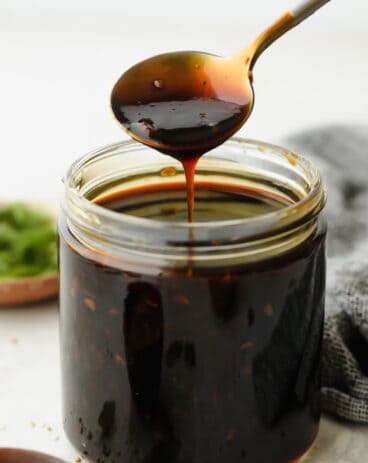
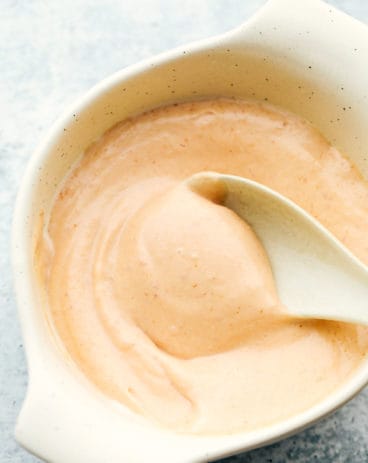
Rich, sweet, and salty, hoisin sauce is the perfect foundation for all of your Asian-inspired dishes. This homemade variation packs so much delicious flavor, you won’t want store-bought again!
Hoisin sauce is the mouthwatering secret ingredient for an array of Asian dishes. My glazed salmon, General Tso’s chicken, and seared ahi tuna are just a few that utilize this super flavorful ingredient!

Easy Homemade Hoisin Sauce Recipe
Everyone knows and loves soy sauce, but today I’m here to tell you about its awesome cousin- hoisin sauce. Both soy and hoisin sauces are made with a soybean base, but I’m going to give you the lowdown on why you need to incorporate this underrated sauce into your cooking. Hoisin sauce is packed with all the flavors you love- garlic, pepper, and sriracha. However, it has a few other ingredients that give it its distinct flavor and texture. Peanut butter, sesame oil, and rice vinegar to name a few! These flavors are all amazing on their own. But combine them all together, and you have a delicious and complex result! It hits every taste- sweet, tangy, salty, and umami.
The best thing about hoisin sauce is that a little goes a long way. This is a super-concentrated sauce and will last you a long time; considering that most recipes only require a few tablespoons for a tasty flavor boost! The sauce, thick and dark, can be used as a glaze, for stir-fry, and even a dipping sauce! Additionally, it adds the most delicious-looking, caramel color to rice and noodles. Hoisin sauce also works as a great marinade! It infuses meat and seafood with a perfectly fragrant, mouthwatering flavor while also keeping it super tender! Sticky Asian glazed chicken and hoisin shrimp are star examples of this delicious process. It’s time to mix up a few simple ingredients to have this versatile sauce on hand! I know hoisin sauce will become one of your new favorites.
Ingredients Needed for Hoisin Sauce
My favorite part of this recipe is that all of these ingredients were just sitting in my cupboard! They came together to create the most flavorful end result. You’ll love it in your cooking!
- Soy Sauce: Soy sauce will give your hoisin a boost of salty goodness. I like to use Kikkoman soy sauce in my cooking! If you want to watch your sodium, you can use light soy sauce here.
- Molasses: This will thicken up your hoisin sauce. We want that perfect glaze-like texture here.
- Sesame Oil: Sesame oil adds a distinct nutty flavor to your hoisin sauce. It is one of the key ingredients for getting a complex, rich flavor. Ottogi is my favorite brand!
- Rice Vinegar: This is where the tang comes in. Rice vinegar adds the perfect hint of sweetness and tanginess. I use Marukan brand rice vinegar in this recipe.
- Peanut Butter: Who knew peanut butter was such a versatile ingredient? This gives your hoisin sauce its amazing thick texture and umami flavor.
- Garlic: I use finely minced garlic in this recipe for a strong, savory flavor.
- Sriracha Sauce: Sriracha adds the perfect hint of spiciness. You can adjust to taste if you want a sauce with more heat!
- Ground Pepper: Add for flavorful, earthy goodness.
- Water: Add water as needed to reach your desired consistency.
- Cornstarch: This will help your sauce thicken up nicely.

Making Homemade Hoisin Sauce
This is the perfect quick and easy hoisin sauce recipe. Really, all you have to do is mix all of your ingredients together! You can easily keep it on hand for all of your cooking needs.
- Whisk Ingredients Together: First, in a small saucepan over medium high heat whisk together the soy sauce, molasses, sesame oil rice vinegar, peanut butter, garlic, sriracha, and pepper.
- Add Cornstarch: Next, in a small bowl combine water and cornstarch. Whisk it into the sauce.
- Simmer: Continue to simmer until it starts to thicken. Remove from heat and allow to cool.

Hoisin Sauce Tips and Tricks
Here are a handful of easy tips to help you perfect this tasty sauce! You are going to love how these Cantonese flavors upgrade your dishes.
- Adjusting Consistency: If your sauce is too watery, you can add a bit of cornstarch as needed to thicken it up. Vice versa, a tablespoon of water at a time can help to thin out sauce that has become too thick. Keep in mind that traditionally this sauce is served on the thicker side.
- Using Soybean Paste: Traditionally, soybean paste is used in place of peanut butter. Using this will give your sauce more of a savory, miso-like flavor. It can be found at your local Asian supermarket!
- Sauté Garlic: For a pop of savory, smoky flavor, you can brown your garlic in a skillet before adding it to your mixture.
- Adding More Spice: If you like your sauces hot, you can add an extra dash of sriracha or chili powder until you have reached your desired flavor!

What to Use Hoisin Sauce For
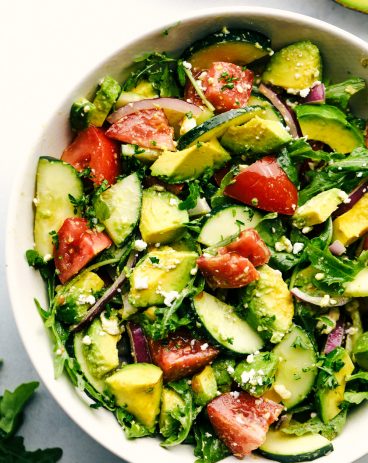
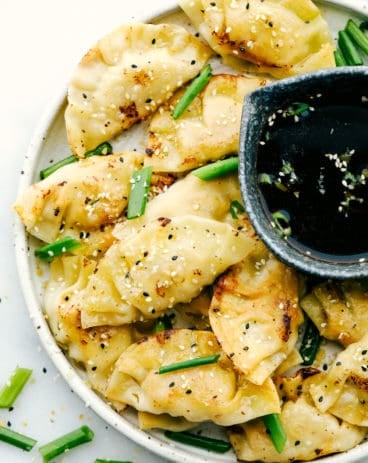
From stir fries to noodle bowls, hoisin sauce will work in nearly every kind of dish for a pop of Cantonese flavor! We have been loving this as a dipping sauce in my house. I love to serve hoisin sauce up with appetizers like wontons, dumplings and spring rolls. It enhances foods that you wouldn’t think were able to taste any better!

Dinner
Mongolian Chicken Noodles

Dinner
Crispy Air Fryer Egg Rolls
Appetizers
Amazing Chicken Potstickers
Dinner
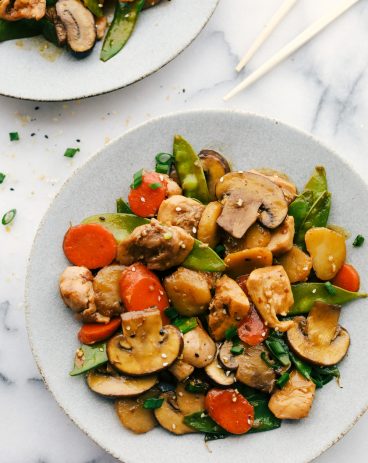
Easy Moo Goo Gai Pan Recipe
Storing Leftover Hoisin Sauce
Hoisin sauce can easily be made and stored for a pop of delicious Asian flavor, whenever! If you are anything like me, you are going to want to put this on everything!
- In the Refrigerator: Hoisin sauce will keep for up to 2 weeks in the fridge. I like to keep mine in an airtight glass jar.
- In the Freezer: Store your hoisin sauce in an airtight container or jar. It will keep for up to 3 months! A little separation may occur once its thaw, so give it a good mix before serving!

More Delicious Homemade Sauces
Dressings, Sauces, and Dips
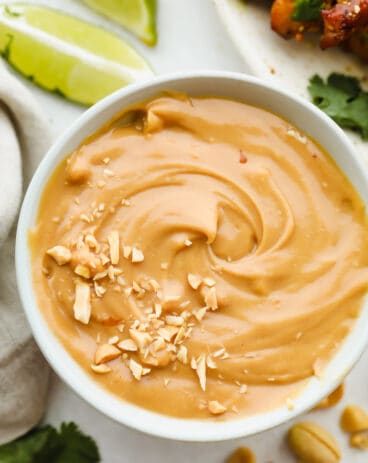
Peanut Sauce
Dressings, Sauces, and Dips
Homemade Teriyaki Sauce
Dressings, Sauces, and Dips
Yum Yum Sauce
Dressings, Sauces, and Dips
Homemade Buffalo Sauce
Hoisin Sauce
Ingredients
- 1/4 cup soy sauce
- 3 Tablespoons molasses
- 2 teaspoons sesame oil
- 1 tablespoon rice vinegar
- 2 Tablespoons peanut butter
- 2 garlic cloves finely minced
- 2 teaspoons sriracha sauce
- 1/4 teaspoon ground pepper
- 1 Tablespoon water
- 1 teaspoon cornstarch
Instructions
-
In a small saucepan over medium high heat whisk together the soy sauce, molasses, sesame oil rice vinegar, peanut butter, garlic, sriracha, and pepper.
-
In a small bowl combine water and cornstarch. Whisk it into the sauce. Continue to simmer until it starts to thicken. Remove from heat and allow to cool.
Nutrition
from The Recipe Critic https://ift.tt/3B6TIEJ
https://ift.tt/3mqgH9A