सोमवार, 13 सितंबर 2021

Honey Mustard Salmon

Honey mustard salmon is the perfect blend of tangy and delicious. It’s tender and flaky and it completely falls apart on your fork! This tried and true recipe is one that your family will go crazy for!

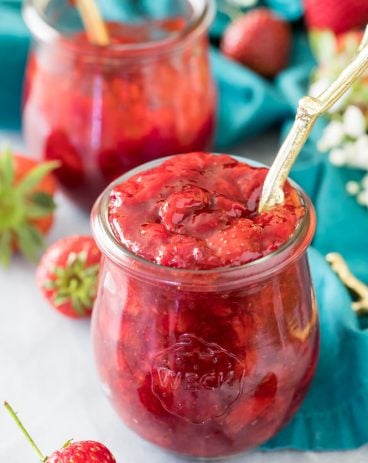
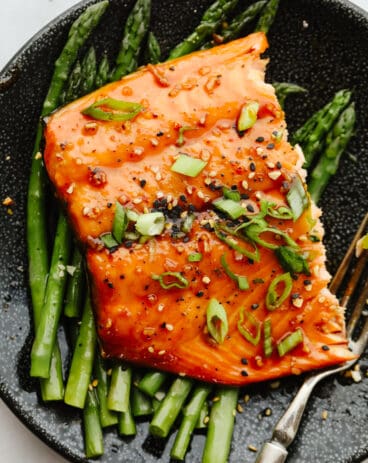
Salmon is an amazing entree for any occasion. The honey mustard dressing really just takes it to the next level! It is quick and easy and leaves you time to make sides for the meal like this delicious Creamy Strawberry Broccoli Salad, amazing Hawaiian Sweet Rolls, and some delicious Grilled Asparagus.

Baked salmon in a casserole dish.

Honey Mustard Salmon

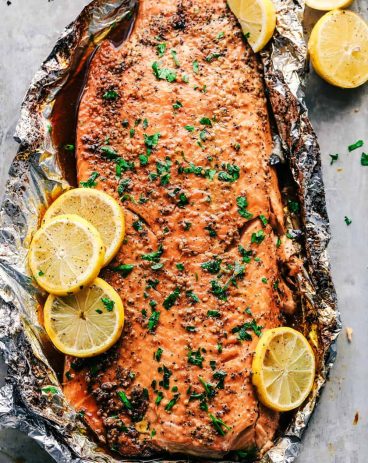
If you are looking for a meal that will impress all of your friends and family, look no more! This honey mustard salmon is a recipe for the books! It takes about 5 minutes to make…I mean, it doesn’t get much better than that! And not only does it taste restaurant-worthy, but it also looks absolutely incredible. With that golden, pink color topped with some fresh herbs, it will look as if it were made by a professional chef.

I used to think that salmon was only for fancy meals and it intimidated me! It seemed like a recipe that should be saved for special occasions because I thought that it was complicated to make! But I was wrong and I’m so glad that I was! This honey mustard salmon only used FOUR ingredients and it will blow your socks off! The texture is perfect and the taste is tangy but has a little bit of sweet honey to balance it out. It’s a MUST try for your family! They will go crazy over it!

Ingredients Used in This Salmon

Like I said before, only 4 ingredients are needed to make this must-have honey mustard salmon! It’s so simple that I’m sure it will end up on your regular dinner rotation! See the recipe card below for a list of exact ingredient measurements!

  • Salmon filets: Don’t go for the cheapest ones at the market. Get a good quality filet!
  • Salt and pepper: To use for added seasoning.
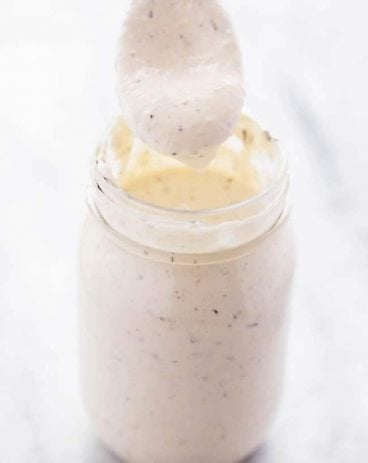
  • Homemade Honey Mustard: This recipe is amazing and takes 5 minutes to make. It’s so delicious that you will never buy it at the store again!
  • Dill: Use some chopped dill oto garnish and add some tangy flavor.
Salmon filets being basted before being cooked.

How to Make Honey Mustard Salmon

If you can set aside 25 minutes, that’s all you will need before you are eating this amazing salmon! It takes only a few minutes of prep work and then the rest of the time, you are just waiting for it to bake!

  1. Prep and bake: Preheat oven to 375 degrees. Lay the salmon skin side down and top with salt and pepper.
  2. Add the glaze: Brush the glaze on the salmon and bake for 17-20 minutes until salmon is cooked through.
  3. Serve: Brush more honey mustard on the salmon 5 minutes before it’s done baking. Let sit for 5 minutes and serve warm.

Tips for Baking Salmon

There are a few things that you want to watch for as you cook up your salmon. If you do these things and follow these tips, your salmon will turn out JUST right!

  • Pick out the right salmon: If you don’t get this step right, there isn’t much hope for it turning out well! Make sure that when you are picking out your salmon that you don’t go for the cheapest one. You want a good quality filet. The best way to tell if its good salmon is to smell it! If it smells fishy (or anything NOT good) then don’t buy it or take it back! Fresh salmon won’t have a strong smell to it.
  • Don’t overcook: Salmon finishes cooking AFTER you take it out of the oven. So if you let it cook to long in the oven, it will continue to cook and be overdone after you take it out! You want to take it out of the oven before it flakes apart and is still a bit raw in the middle. Then, as it continues cooking while you wait to eat it, it will fall apart just perfectly on your fork!
  • Dressing: This homemade honey mustard dressing is a MUST when baking this salmon. It brings a delicious flavor and adds to the amazing taste! Don’t skip this step!
Close up of baked honey mustard salmon.

How to Store Leftovers

This salmon is so delicious that I’m not sure if you will have anything leftover to store! But if you do, here is how you can safely do it to enjoy this later.

  • Refrigerate: Once it has cooled, place your salmon in an airtight container. It will last in your fridge for 3-4 days!
  • Reheat: You want to reheat salmon slowly so that it doesn’t dry out! Place your honey mustard salmon on a baking sheet. Put it in the oven at 275 degrees for about 15 minutes or until heated through. The internal temperature should be 130 degrees.
A fork digging in to baked honey mustard salmon
Print

Honey Mustard Salmon

Honey mustard salmon is the perfect blend of tangy and delicious. It's tender and flaky and it completely falls apart on your fork! This tried and true recipe is one that your family will go crazy for!
Course Dinner, Main Course
Cuisine American
Keyword honey mustard salmon
Prep Time 5 minutes
Cook Time 20 minutes
Total Time 25 minutes
Servings 4 salmon filets
Calories 223kcal
Author Alyssa Rivers

Ingredients

Instructions

  • Preheat oven to 375 degrees. Lay the salmon skin-side down and top with salt and pepper.
  • Brush the glaze on the salmon and bake in a pan for 17-20 minutes until salmon is cooked through.
  • Brush more honey mustard on the salmon 5 minutes before it's done baking. Let sit for 5 minutes and serve warm.

Nutrition

Calories: 223kcal | Carbohydrates: 12g | Protein: 23g | Fat: 7g | Saturated Fat: 1g | Polyunsaturated Fat: 3g | Monounsaturated Fat: 2g | Cholesterol: 62mg | Sodium: 206mg | Potassium: 556mg | Fiber: 1g | Sugar: 6g | Vitamin A: 53IU | Vitamin C: 1mg | Calcium: 14mg | Iron: 1mg


from The Recipe Critic https://ift.tt/3k6bpP5
https://ift.tt/3E6W6Od

Chocolate Cream Cheese Frosting

This chocolate cream cheese frosting is rich, smooth, and ready to enhance all of your desserts! It only takes 15 minutes of prep and a few super simple ingredients to create chocolatey perfection.

Honestly, this frosting is a chocoholic’s dream. It is smooth and creamy and tastes absolutely incredible when layered on other desserts like chocolate cupcakes, chocolate cake, and brownies! It’s the cherry on top to any dessert.

Mixing frosting with an icing spatula.

The Ultimate Chocolate Cream Cheese Frosting Recipe

Chocolate lovers, prepare to meet your new best friend. This super easy chocolate cream cheese frosting has been one of my latest obsessions. It is so quick and easy! All you need is cream cheese, cocoa powder, and a couple of other basic ingredients to create this smooth and creamy treat! The end result is honestly so amazing, it tastes as if it came straight from a bakery. Find chocolate buttercream a bit too sweet? This is the frosting for you! The addition of cream cheese gives this frosting the slightest bit of tang. It balances the sweetness perfectly. Both buttercreams and cream cheese-based frostings are delicious depending on what kind of dessert you are wanting to create! You will love them all!

This frosting is melt-in-your-mouth smooth! It is also sturdy enough for piping and works especially well for cupcakes! If double chocolate isn’t your thing, the flavor of this frosting pairs really well with vanilla and cappuccino cupcakes. The result is absolutely divine! This frosting always gets compliments wherever it goes. When asked for the recipe, I love telling friends and family about how easy it is to make! It’s a staple recipe that I know you will be going back to time and time again. With chocolate frosting this good, it is too hard to resist! Go ahead and eat it straight from the bowl. I won’t tell anyone!

Ingredients for Chocolate Cream Cheese Frosting

What I love most about this recipe is that it doesn’t require any fancy ingredients to put together! Sometimes simple is best! You can find measurements for each ingredient below.

  • Cream Cheese: This is the MVP in this recipe. It is responsible for the ultra smooth consistency and irresistible tangy flavor in the frosting! You can use your favorite brand here, but I always opt for Philadelphia. I like to make sure my cream cheese is softened. This way, everything mixes together smoothly.
  • Butter: I use unsalted, softened butter. This helps add to the tasty richness of the frosting.
  • Vanilla Extract: Vanilla helps to deepen the overall flavor of the frosting. Opt for pure vanilla extract over imitation if possible! It will give your frosting a better flavor.
  • Salt: Added to enhance flavor.
  • Powdered Sugar: Powdered sugar will give your chocolate cream cheese frosting its amazing sweetness. Once mixed, it adds a smooth texture, too!
  • Unsweetened Cocoa Powder: Some people swear by Dutch cocoa for its smooth flavor. I have used both Hershey’s and Ghiradelli cocoa powder and loved it just as much! No matter what cocoa you decide to use, make sure it is unsweetened since we will be adding powdered sugar to the mix.

How to Make Your Frosting

Since all you have to do here is mix everything together, you can’t go wrong! This frosting is as delicious as it is easy. Optional step: taste test once… twice… or maybe a dozen times. Let’s make some frosting!

  1. Beat Butter and Cream Cheese: To begin, in the bowl of a mixer, use the paddle attachment to beat the cream cheese and unsalted butter together until smooth. Scrape down the bowl and beat again for about 10 seconds to make sure everything is completely incorporated.
  2. Mix in Dry Ingredients: To follow, add the vanilla, salt, and powdered sugar. Mix on low until the powdered sugar is moistened enough for you to increase the speed to medium high without making a mess. Beat until incorporated.
  3. Add in Cocoa Powder: Scrape down the bowl again and add the cocoa powder. Mix on low until mostly combined and then increase the speed to medium high and beat for 1-2 minutes until the color lightens and the frosting is nice and fluffy.
  4. Frost: And, you are done! Frost completely cooled cupcakes or cake and enjoy!
Process shots of mixing cocoa powder together with cream cheese.

The Best Chocolate Cream Cheese Frosting Tips

Take the deliciousness of traditional cream cheese frosting one step further with the addition of chocolate! This combination is the best. It pairs well with so many desserts. Here are a few helpful tips for making this frosting perfectly every time!

  • Room Temperature Ingredients: Make sure you start with cream cheese and butter that is room temperature. This will help the two combine. The result? A smooth, creamy frosting without any clumps.
  • Use Full-Fat Cream Cheese: It may not be the healthiest, but full-fat cream cheese is super important when making frosting. The higher the fat content, the more smooth and creamy your frosting will be! Try to avoid low-fat cream cheese in recipes like this one.
  • Mix Slowly: When adding the powdered sugar, make sure you start slowly! Go slow until it’s moistened. Then, you can begin to increase the speed. This way, you don’t end up with a cloud of powdered sugar in the air covering everything in your kitchen!
  • Thicker Frosting: If you decide that you want the frosting to be a little thicker, add 2 tablespoons of powdered sugar at a time until you reach your desired consistency.
  • Sift Powdered Sugar: Notice clumps of sugar in your frosting? Sift your powdered sugar before mixing it into your cream cheese. This is especially important if you are piping your frosting. Clumps can get stuck in your piping tips and cause a whole lot of mess!

Storing Your Chocolate Cream Cheese Frosting

Unfortunately, chocolate cream cheese frosting is prone to heat and melting. Because of this, it needs to be kept in the fridge until it is ready to be used. Whatever you have frosted will also need to be stored in the fridge!

  • In the Refrigerator: Store in an airtight container for up to 7 days. Bring to room temperature before use.
  • In the Freezer: You can freeze chocolate cream cheese frosting for up to 3 months in an airtight container. Allow to thaw in the fridge before bringing it to room temperature on the counter. If it is a little too soft, mix more powdered sugar into it until it is as stiff as you would like!
A white bowl filled with chocolate cream cheese frosting.
Print

Chocolate Cream Cheese Frosting

This chocolate cream cheese frosting is rich, smooth, and ready to enhance all of your desserts! It only takes 15 minutes of prep and a few super simple ingredients to create chocolatey perfection.
Course Dessert
Cuisine American
Keyword chocolate cream cheese frosting
Prep Time 15 minutes
Total Time 15 minutes
Servings 20 Ounces
Calories 178kcal
Author Alyssa Rivers

Ingredients

  • 8 Ounces Cream Cheese softened
  • ½ Cup unsalted Butter softened
  • 1/2 teaspoon vanilla extract
  • ½ Teaspoon Salt
  • 4 Cups powdered sugar
  • ½ Cup Unsweetened Cocoa Powder

Instructions

  • In the bowl of a mixer use the paddle attachment to beat the cream cheese and unsalted butter together until smooth. Scrape down the bowl and beat again for about 10 seconds to make sure everything is completely incorporated.
  • Add the vanilla, salt, and powdered sugar. Mix on low until the powdered sugar is moistened enough for you to increase the speed to medium high without making a mess. Beat until incorporated.
  • Scrape down the bowl again and add the cocoa powder. Mix on low until mostly combined and then increase the speed to medium high and beat for 1-2 minutes until the color lightens and the frosting is nice and fluffy.
  • Frost completely cooled cupcakes or cake.

Nutrition

Calories: 178kcal | Carbohydrates: 26g | Protein: 1g | Fat: 9g | Saturated Fat: 5g | Polyunsaturated Fat: 1g | Monounsaturated Fat: 2g | Trans Fat: 1g | Cholesterol: 25mg | Sodium: 96mg | Potassium: 50mg | Fiber: 1g | Sugar: 24g | Vitamin A: 294IU | Calcium: 16mg | Iron: 1mg


from The Recipe Critic https://ift.tt/3k4LJ5v
https://ift.tt/3tD4jVf

रविवार, 12 सितंबर 2021

Homemade 5 Minute Honey Mustard

Homemade honey mustard sauce is SOO good! It’s easy, sweet, and creamy and you will be able to use it on just about everything! 

Quick and simple, this recipe will take you only a few minutes from start to finish! You will go crazy over the delicious taste! In fact, try it with these tried and true recipes like this Chicken Salad, this delicious Pretzel Chicken, or some amazing Air Fryer Brats.

Honey Mustard Dressing

Once you’ve tried this Homemade honey mustard, you will never go back to buying it at the store! It’s such a classic taste that can be used with salads, meat, and veggies! The best part about this recipe is that you can make it ahead of time! In fact, go ahead and double the recipe because you’ll love it so much! It will last in your fridge for a week and you will be trying to find every excuse that you can to eat this with something!

I think honey mustard is such an underrated sauce… I feel like the only time that I used to think about using it is when I was at a restaurant. And once I had it, the flavor was always so good! Which made me always wonder. WHY don’t I have some of this at home all the time?! So this recipe came about and I have been happier ever since! It’s so versatile and absolutely delicious to the taste, you will go crazy over it! 

Ingredients in Honey Mustard Recipe

I know that I said that the best part about this is being able to make it ahead of time but… I think the best part about this is that you probably already have all of these ingredients in your house to make this! No having to go to the store to pick out obscure ingredients! So, no excuses, get out your bowl and whisk and make it right now! See the recipe card below for exact measurements.

  • Dijon mustard: You can use regular mustard but I believe that the dijon makes this taste SO much better. It gves it a restaurant worthy flavor!
  • Honey: This will balance out the tanginess with some sweet!
  • Mayonaise: It’s a great base and makes this so creamy!
  • Lemon juice: The juice keeps the recipe tasting fresh.
  • Paprika: A delicious spice without the heat!

How to Make Homemade Honey Mustard

As if having all of the ingredients already at home doesn’t make this easy enough…This only takes one step and then you are finished! Quick and simple, you will have this ready to eat in less than 5 minutes! Whisk: Add dijon, honey, mayonnaise, lemon juice, and paprika. Whisk until smooth. Serve as desired.

2 pictures showing ingredients being whisked in a bowl.

Quick Tips for the Best Honey Mustard

Once you’ve made this amazing honey mustard sauce, here are a few tips on how to keep it fresh and delicious and use it all the time! It doesn’t last too long at our house because there are just SO many things to dip it in. Luckily it’s easy enough to make it over and over again!

  • Stir it up: Once you’ve made this and it’s been in your fridge for a day or two, you will want to make sure that you stir it up well. Sometimes the ingredients can separate so whisk it up quickly and you’ll be ready to eat it in no time!
  • Storing: Place this sauce in an airtight container in your fridge. It will last up to 6 days! If you don’t eat it before then…
  • Dipping: This is one of my favrite sauces not only to use in recipes but to dip ALLLLL the things in! Try dipping some fresh vegetables, french fries or classic chicken nuggets.
Print

Homemade 5 Minute Honey Mustard

Homemade honey mustard sauce is SOO good! It’s easy, sweet, and creamy and you will be able to use it on just about everything! 
Course Sauce, Side Dish
Cuisine American
Keyword homemade honey mustard, honey mustard, honey mustard recipe
Prep Time 5 minutes
Total Time 5 minutes
Servings 12 Tablespoons
Calories 42kcal
Author Alyssa Rivers

Ingredients

  • 1/3 cup dijon mustard
  • 1/4 cup honey
  • 2 Tablespoons mayonaise
  • 1 teaspoon lemon juice
  • 1/4 teaspoon paprika

Instructions

  • Add dijon, honey, mayonnaise, lemon juice, and paprika. Whisk until smooth. Serve as desired.

Nutrition

Calories: 42kcal | Carbohydrates: 6g | Protein: 1g | Fat: 2g | Saturated Fat: 1g | Polyunsaturated Fat: 1g | Monounsaturated Fat: 1g | Trans Fat: 1g | Cholesterol: 1mg | Sodium: 94mg | Potassium: 15mg | Fiber: 1g | Sugar: 6g | Vitamin A: 27IU | Vitamin C: 1mg | Calcium: 5mg | Iron: 1mg


from The Recipe Critic https://ift.tt/3C7rjib
https://ift.tt/3A9fLL4

शनिवार, 11 सितंबर 2021

Pizza Sliders

These pizza sliders are about to become your new favorite appetizer. Brushed with a buttery Italian seasoning glaze and filled with all of your favorite pizza toppings, each bite is truly irresistible!

Sliders are the best way to enjoy all of your favorite foods in a bite-sized portion. Cheeseburger, buffalo chicken, and ham and cheddar sliders are more of my absolute favorites! They get devoured at every event I bring them to.

Closeup of pulling a pizza slider out of the pan.

Quick and Easy Pizza Slider Recipe

These pizza sliders are by far one of the easiest appetizers to put together. They are perfect for bringing to parties! They are so amazingly cheesy and ooey-gooey, they are bound to be a hit no matter who they’re feeding. This is a favorite at our house and my kids are always coming back for seconds and thirds. You would be surprised at how quickly 12 sliders are eaten up! But it makes sense. I mean, how can you resist melty cheese and pepperoni on a Hawaiian roll?! This is the ultimate combination of all of my favorite comfort foods. I think I may love them more than my kids do, which is hard to beat!

The best part about these sliders is that they can be customized to your favorite pizza flavor! Classic pepperoni is always a favorite at my house. I like to upgrade my sliders by smothering them in homemade pizza sauce. I feel like this gives it an extra touch of fresh flavor. Honestly, no matter what sauce and toppings you choose, these bad boys are going to blow your mind with how easy and delicious they are! Be prepared to have them as regulars in your weekly dinner lineup! You won’t be able to get enough of their cheesy, golden goodness.

Everything You Need for Homemade Pizza Sliders

You will love how simple the ingredients for pizza sliders are. It is such an inexpensive treat but packs incredible flavor in each bite! It is the perfect thing to throw together right before a party. And with how tasty these are, no one will suspect that it only took a few pantry staples to whip up! You can find measurements for each ingredient in the recipe card at the end of the post.

  • Hawaiian Roll Sliders: This is one of my favorite parts of the recipe. With Hawaiian rolls, you get that perfectly soft and sweet layer to each slider. It compliments the Italian seasoning glaze that we brush on top perfectly! If you’re feeling up to it, trying making homemade Hawaiian rolls for optimal flavor! It is a lot easier than you would think, and they taste incredible fresh out of the oven.
  • Pizza Sauce: You can use your favorite brand, here. I, personally, like to use homemade pizza sauce for the freshest flavor possible!
  • Mozzarella Cheese: Not only does mozzarella taste amazing, but it becomes so perfectly stretchy and melty once baked. Cheddar and provolone are also great substitutes!
  • Butter: For this recipe, I use melted, unsalted butter. This is for brushing on top of your sliders for that bakery-worthy shine!
  • Parmesan Cheese: I like to add parmesan to the sliders’ glaze for a pop of cheesy flavor. It also bakes down and creates a delicious crispy texture.
  • Garlic Powder: Garlic powder is a necessity for adding the perfect savory flavor to your pizza sliders!
  • Italian Seasoning: A blend of basil, oregano, rosemary, marjoram, and thyme is the key to achieving the best pizza flavor. I like to make my Italian seasoning at home so I can customize the spices to my liking!

How to Make Your Pizza Sliders in the Oven

This is a completely foolproof recipe, you can’t go wrong! Pizza sliders are so easy but so delicious! My kids always love to help spread the sauce and add toppings. It makes it a fun activity for all of us, and allows everyone to customize their own sliders to their liking!

  1. Preheat Oven and Prep Buns: Let’s start! To begin, preheat your oven to 375 degrees Fahrenheit. Cut the slider buns in half and lay in a 9×13 inch pan.
  2. Add Sauce and Cheese: Evenly spread the pizza sauce on top. Sprinkle the shredded cheese on top.
  3. Add Desired Toppings: Next, add the pepperoni and put the top of the slider rolls.
  4. Mix Up Buttery Glaze: Then, in a small bowl, add the melted butter, parmesan cheese, garlic powder and Italian seasoning. Brush on top of the rolls.
  5. Bake: Bake for 12-15 minutes or until the cheese is melted and golden brown. Serve immediately.
Process shots of preparing sliders and adding toppings.

The Best Pizza Sliders Tips and Tricks

Here are some easy ways to customize and perfect your pizza sliders! Your family is going to go crazy over how supremely cheesy and mouthwatering these are.

  • Sauce and Toppings: Like traditional pizza, you can switch up your sliders with a variety of different sauces and toppings! Chicken alfredo, buffalo, and BBQ pizza sliders are all super fun and delicious flavors to try! Sausage and bacon crumbles are tasty toppings as well, perfect for the mini size of these sliders. Get creative!
  • Bun Choices: I like to use Hawaiian rolls because they stay soft during baking and add a hint of sweetness, but you can use plain dinner rolls as well! Brioche or potato buns are also super delicious substitutes.
  • Serve With: These pizza sliders make a delicious appetizer or meal on their own, but can be complimented with some fresh breadsticks. An Italian side salad would be delicious as well and add a little nutritional value!
  • Make Ahead: You can prepare your sliders in advance and refrigerate for up to 24 hours before baking! This way, you have sliders on hand, ready to go, but your guests also have the delight of tasting them fresh out of the oven!

How to Store Pizza Sliders

Although they are best served fresh, you can store your pizza sliders for a few days after baking. The only problem is, the longer the pizza sauce sits on your buns, the higher your risk of having soggy sliders is.

  • In the Refrigerator: Wrap your pizza sliders tightly or store them in an airtight container. They will stay good for up to 3 days.
  • Reheating: You can cook your sliders in the microwave for 10-15 second intervals until warmed through for a quick, delicious snack! To keep your bread from becoming soggy, (even though it is a little more time consuming) my favorite way to reheat pizza sliders is by popping them in the oven at 350 degrees Fahrenheit for 10-15 minutes. This keeps the bread slightly crispy.
A top-down view of 8 pizza sliders.
Print

Pizza Sliders

These pizza sliders are about to become your new favorite appetizer. Brushed with a buttery Italian seasoning glaze and filled with all of your favorite pizza toppings, each bite is truly irresistible!
Course Appetizer, Dinner, Main Course
Cuisine American
Keyword pizza sliders, pizza sliders recipe
Prep Time 10 minutes
Cook Time 15 minutes
Total Time 25 minutes
Servings 12 sliders
Calories 186kcal
Author Alyssa Rivers

Ingredients

  • 12 Hawaiian Roll Sliders
  • 1/2 cup pizza sauce
  • 2 cups mozzarella cheese shredded
  • 1/4 cup butter melted
  • 2 Tablespoons grated parmesan cheese
  • 1/2 teaspoon garlic powder
  • 1 teaspoon Italian seasoning

Instructions

  • Preheat oven to 375 degrees. Cut the slider buns in half and lay in a 9×13 inch pan.
  • Evenly spread the pizza sauce on top. Sprinkle the shredded cheese on top.
  • Add the pepperoni and put the top of the slider rolls.
  • In a small bowl add the melted butter, parmesan cheese, garlic powder, and Italian seasoning. Brush on top of the rolls.
  • Bake for 12-15 minutes or until the cheese is melted and golden brown. Serve immediately.

Nutrition

Calories: 186kcal | Carbohydrates: 16g | Protein: 8g | Fat: 10g | Saturated Fat: 6g | Polyunsaturated Fat: 1g | Monounsaturated Fat: 2g | Trans Fat: 1g | Cholesterol: 35mg | Sodium: 301mg | Potassium: 54mg | Fiber: 1g | Sugar: 5g | Vitamin A: 299IU | Vitamin C: 1mg | Calcium: 109mg | Iron: 1mg


from The Recipe Critic https://ift.tt/3nByc7N
https://ift.tt/3hj21G0