मंगलवार, 21 सितंबर 2021

Easy Spaghetti Pie

This tasty baked dish is super easy, cheesy, and flavorful! For adding a little Italian goodness to busy weeknights, spaghetti pie is the answer!

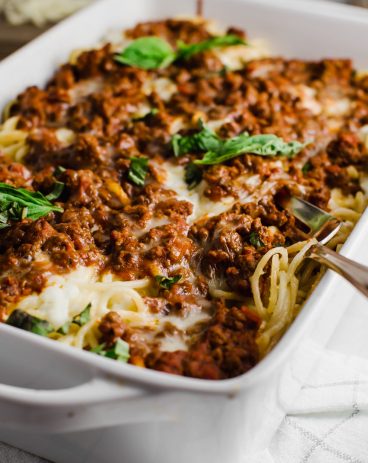
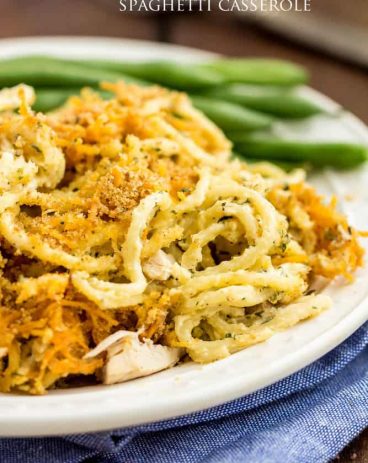
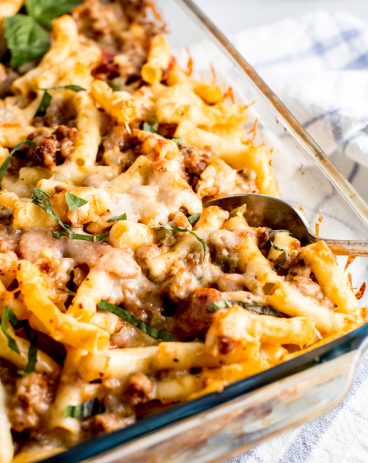
Deep-dish pasta dishes are some of my absolute favorites. You have got to try my baked manicotti, chicken spaghetti, and chicken parmesan casserole! They have the BEST texture and so much ooey-gooey cheese!
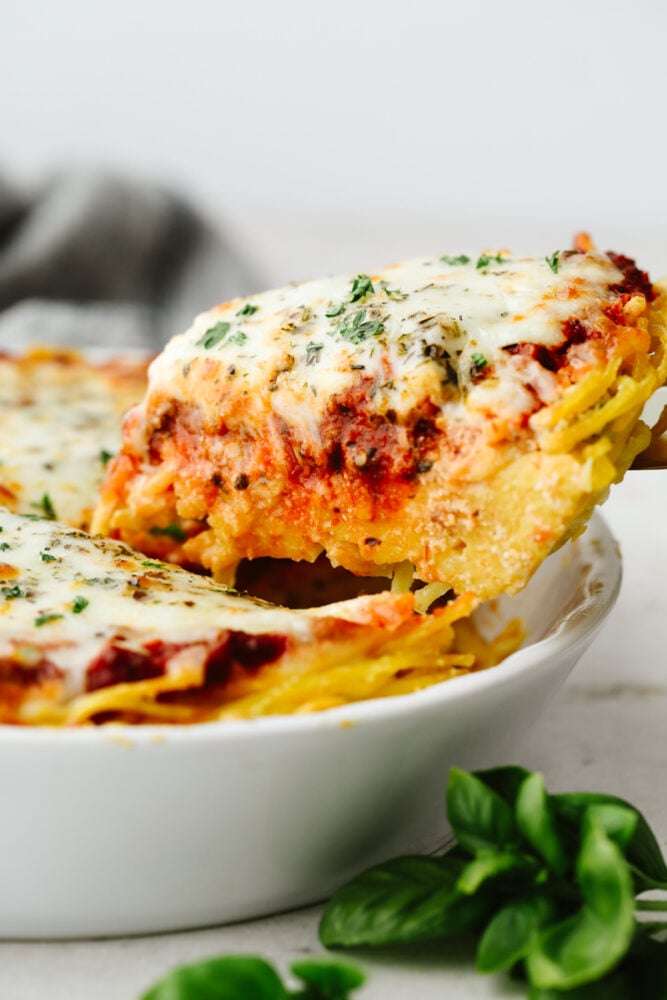
Taking a slice of spaghetti pie.

Cheesy Baked Spaghetti Pie Recipe

If you are anything like me, when you make spaghetti, you make enough to feed an army. No matter how I measure out my spaghetti, this always seems to be the case! So, when I’m left with tons of leftover noodles, I’m always on the hunt for ways to utilize them! Here’s the solution. Spaghetti pie! This incredible recipe has all of the things you love about traditional spaghetti; the sauce, the meat, the cheese, and of course, noodles! It’s just in casserole form. This particular recipe uses a pie dish for baking, hence the name spaghetti pie. It makes it easy to cut into pieces once it’s done! It’s the perfect way to use up leftover pasta and create a dinner your family will obsess over.

Even though making spaghetti pie is super simple, the flavor is anything but! The “crust” is spaghetti noodles mixed with butter, eggs, and parmesan. When baked, it creates the most AMAZING texture and buttery flavor! Then, we add layers of meat, homemade marinara, fresh herbs, and all the cheese on top. I love watching this bad boy cook. The cheese gets so bubbly and turns to an amazing golden brown. It honestly looks as good as it tastes. My family goes crazy whenever I tell them that I’m making spaghetti pie for dinner! I pair it with some Olive Garden copycat breadsticks and everything gets devoured at the speed of light. I mean, what’s better than a cheesy pasta bake in one convenient pie-shaped slice?

Ingredients Needed for Spaghetti Pie

I love that this recipe utilizes so many leftover and pantry-staple ingredients. It makes it even easier to throw together! For a full list of ingredients and measurements, check out the recipe card at the end of the post!

Crust

  • Spaghetti Noodles: You can either make your spaghetti fresh or use leftovers! Also, feel free to experiment with other noodles like angel hair and bucatini.
  • Butter: I use salted butter here. It’s going to help enhance the flavor of the “crust” and add richness!
  • Egg: The egg is super important. It’s what will bind all the crust ingredients together and help it hold its shape.
  • Parmesan Cheese: Grated parmesan adds an amazing flavor and texture to the spaghetti pie crust. You can’t go wrong with cheese!

Cheese Layer

  • Ricotta Cheese: Creamy and sweet, ricotta is perfect for balancing savory flavors in this dish.
  • Italian Seasoning: This seasoning is the secret weapon for all things Italian. It’s super easy to make at home! And, you can customize your own blend to your liking!

Meat Layer

  • Lean Ground Beef: Beef crumbles make this recipe deliciously hearty. This is another great place to use leftovers!
  • Marinara Sauce: You can use your favorite brand here, but I always like to make marinara sauce at home because the flavor is much more fresh.

Topping

  • Mozzarella Cheese: Shredded mozzarella is the perfect topping for that cheesy effect. It gets so stretchy and melty when baked and is absolutely scrumptious!
  • Basil: Topping your bake with fresh basil will give you the best, aromatic flavor.
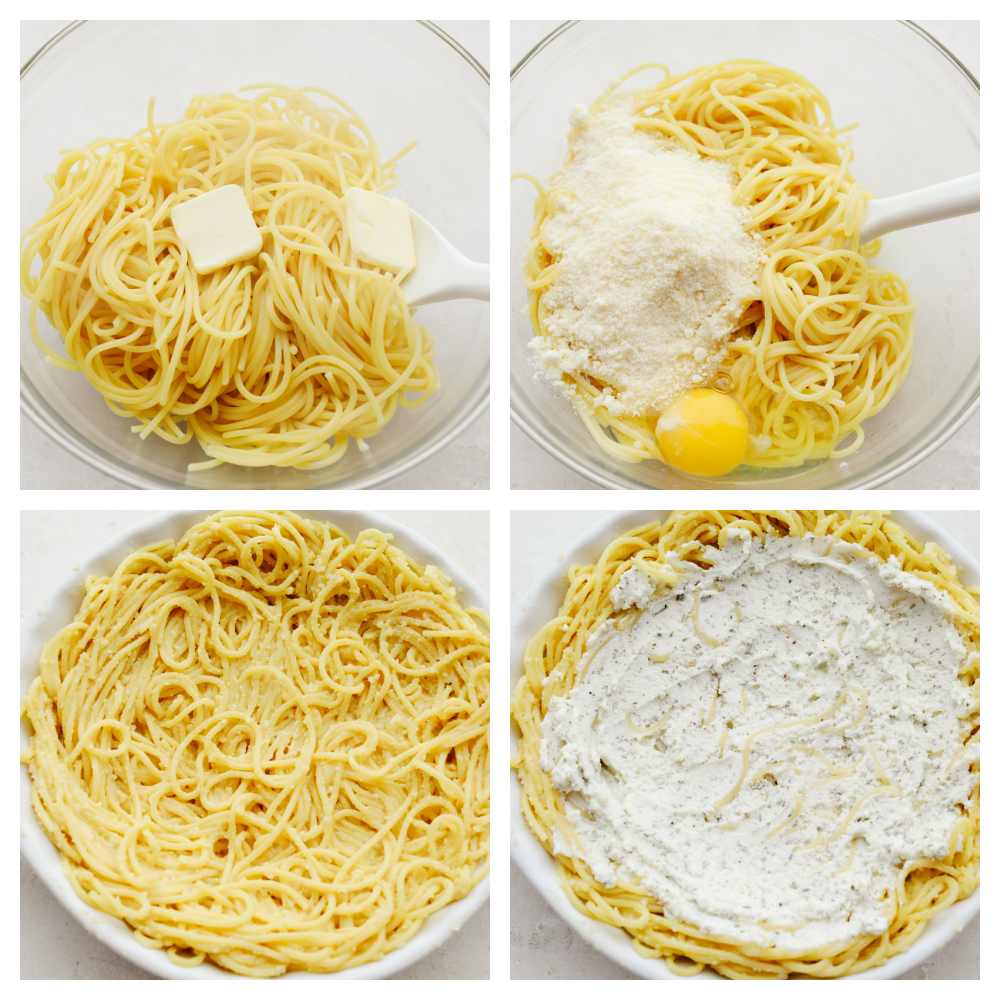
Process shots of preparing crust.

How to Make Spaghetti Pie

Spaghetti pie is perfect for all of you busy moms out there. Not only does it use a lot of leftovers, but it’s quick to make, too! Only a few minutes of prep, and then it’s hands-off for 20 minutes in the oven! You can use that time to whip up some easy bread twists or even a side salad!

For the Crust

  1. Preheat Oven and Prep Dish: First, preheat oven to 350 degrees Fahrenheit. Spray a 9 inch pie dish with cooking spray and set aside.
  2. Cook Pasta: Next, cook the pasta according to package directions and drain.
  3. Toss with Butter, Egg, and Cheese: Toss with the butter until melted. Add in the egg and parmesan cheese and stir until combined.
  4. Press Into Dish: Finally, press into the bottom and sides of your pie dish. It’s ready for the next layer!

To Make the Cheese Layer

  1. Mix Cheese and Seasoning Together: Combine the ricotta cheese and the italian seasoning. Then, spread on top of the pasta.

For the Meat Layer

  1. Prepare Meat, Add Sauce: In a medium sized skillet over medium-high heat, add the ground beef and cook until no longer pink. Add in the marinara sauce. Spread on top of the cheese layer.
  2. Bake and Serve: Top with shredded cheese and bake for 20-25 minutes or until golden and bubbly. Serve with chopped basil if desired.
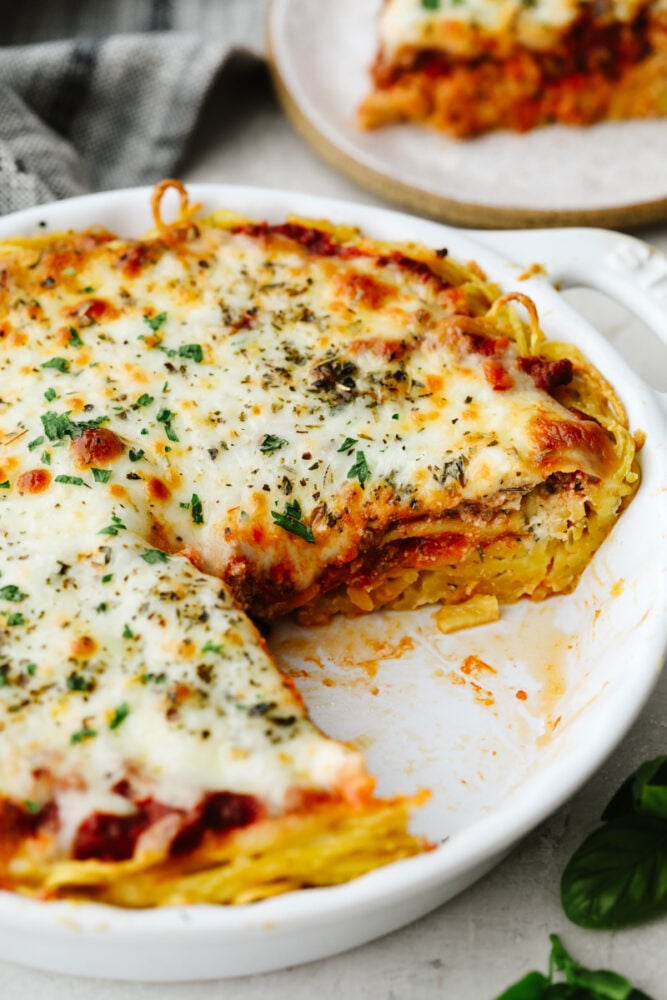
A spaghetti pie with a slice taken out of it.

The Best Spaghetti Pie Tips and Tricks

This dinner is as easy as it gets. It is full of meat, cheese, and tasty baked noodles! The end result is going to be one you won’t forget! To make sure your spaghetti pie reaches peak deliciousness, use these simple tips and tricks!

  • Don’t Skip the Egg: Using an egg in your crust is super important. Without it, your “pie” won’t hold its shape and it will be a mess when you try to dish up.
  • Meat Alternatives: Feel free to swap out your ground beef with turkey or chicken for a lighter version of this dish.
  • Additional Fillings: You can add other vegetables and flavors to your spaghetti pie to your liking! Chopped onions, garlic, and peppers are just a few tasty suggestions.
  • Serve With: I like serving my spaghetti pie up with breadsticks, bread twists, or garlic knots as a classic side. For a complete Italian-inspired meal, you can also serve it with some chicken gnocchi soup and a green salad with homemade dressing! You and your family will love it!

Storing Leftover Baked Spaghetti Pie

Spaghetti pie makes a great leftover meal and tastes as good as when it was made fresh!

  • In the Refrigerator: Wrap your spaghetti pie with plastic wrap before storing. It will keep for 2-3 days.
  • In the Freezer: Prepared spaghetti pie can be stored in the freezer for up to 3 months wrapped in either tin foil or plastic wrap. Let thaw in the fridge overnight before reheating.
  • To Reheat: Pop your spaghetti pie in the oven at 350 degrees Fahrenheit. Cook for 15-20 minutes or until warmed through.
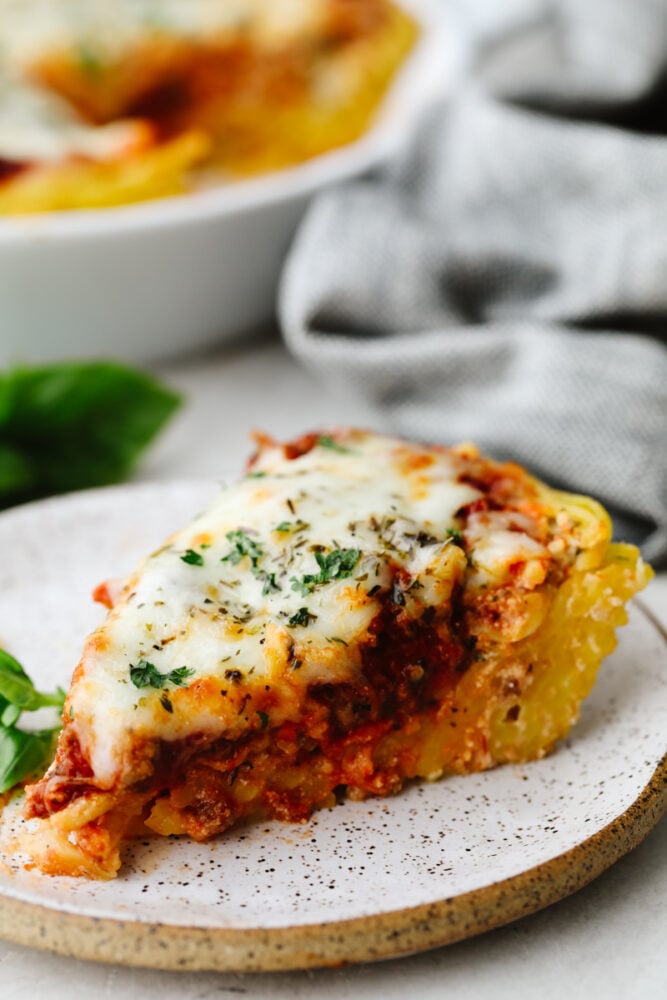
A slice of spaghetti pie on a stoneware dish.
Print

Spaghetti Pie

This tasty baked dish is super easy, cheesy, and flavorful! For adding a little Italian goodness to busy weeknights, spaghetti pie is the answer!
Course Dinner, Main Course
Cuisine American, Italian American
Keyword spaghetti pie
Prep Time 15 minutes
Cook Time 25 minutes
Total Time 40 minutes
Servings 8 slices
Calories 307kcal
Author Alyssa Rivers

Ingredients

Crust:

  • 6 ounce spaghetti noodles
  • 2 tablespoons butter
  • 1 large egg
  • 1/4 cup grated parmesan cheese

Cheese Layer:

Meat Layer:

Topping:

  • 2 cups shredded mozzarella cheese
  • fresh chopped basil

Instructions

To make the crust:

  • Preheat oven to 350 degrees. Spray a 9-inch pie dish with cooking spray and set aside. Cook the pasta according to package directions and drain. Toss with the butter until melted. Add in the egg and parmesan cheese and stir until combined. Press into the bottom and sides of your pie dish.

To make the cheese layer:

  • Combine the ricotta cheese and the Italian seasoning. Spread on top of the pasta.

To make the meat layer:

  • In a medium-sized skillet over medium-high heat add the ground beef and cook and crumble until no longer pink. Add in the marinara sauce. Spread on top of the cheese layer.
  • Top with shredded cheese and bake for 20-25 minutes or until golden and bubbly. Serve with chopped basil if desired.

Nutrition

Calories: 307kcal | Carbohydrates: 22g | Protein: 21g | Fat: 15g | Saturated Fat: 9g | Polyunsaturated Fat: 1g | Monounsaturated Fat: 5g | Trans Fat: 1g | Cholesterol: 84mg | Sodium: 741mg | Potassium: 487mg | Fiber: 2g | Sugar: 5g | Vitamin A: 805IU | Vitamin C: 6mg | Calcium: 246mg | Iron: 2mg


from The Recipe Critic https://ift.tt/3zsB09p
https://ift.tt/3AvEnxt
Delicious Coconut Banana Bread

Coconut banana bread is sweet and insanely delicious! The moist texture combined with its amazing taste will make it hard to stop after just one slice!

This bread is such a yummy snack that you can eat for breakfast, brunch, or a mid-afternoon snack! This coconut banana bread delivers an amazing taste! In fact, bake it up with this Casserole, Monkey Bread, and this delicious Peach Smoothie and you will have an early morning feast to remember!

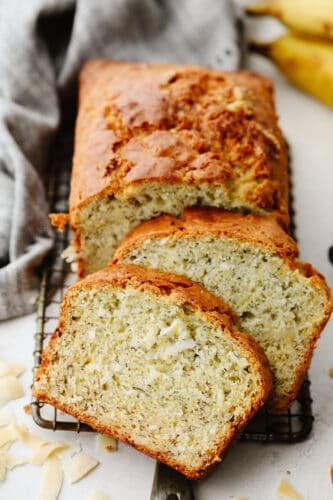
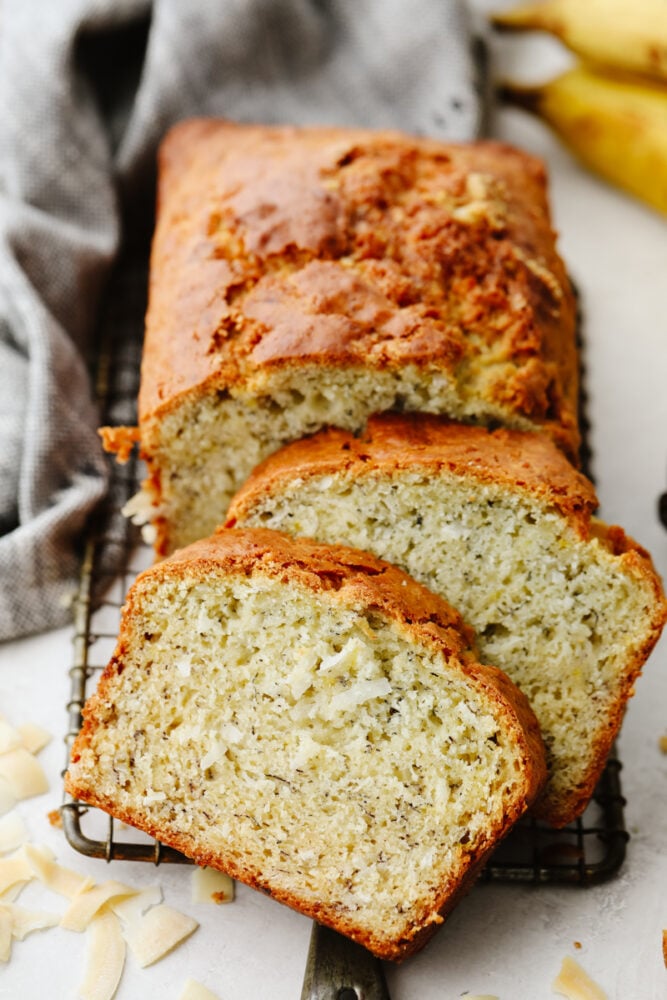
Sliced coconut banana bread on a cooling rack.

Coconut Banana Bread

Banana bread is a classic recipe. But add in some coconut flavor and well… You have just taken it to the next (very delicious!) level! Don’t get me wrong, regular banana bread is SO good. But I feel like I can’t make it too often or we will get sick of it! So, this recipe changes it up just enough that we can make it a little different each time! It is so sweet and moist and it makes the perfect bread recipe. I love bringing some to share with my neighbors and friends. They are always pleasantly surprised at the taste when they eat a slice! It’s unexpected in all the best ways!

This recipe is so easy to make and it fills my house with the most delicious smell! It’s a win-win! I always try and double or triple the recipe because we eat it up SO fast. Plus, I have included below how you can freeze this and save it for later! This is a total home run recipe and one that you will want to keep on hand. If you want to use up all of those ripe bananas, you can bake up some Easy Banana Muffins and Best Banana Pancakes as well! You might as well make the most of them!

Ingredients in Coconut Banana Bread

If you have some ripe bananas and some shredded coconut, this recipe will be a cinch! Using ingredients that are probably already in your pantry, this coconut banana bread comes together in just a few minutes! See the recipe card below for exact ingredient measurements.

  • Canola oil: I used canola oil but you could substitute it for vegetable oil!
  • Sugar: This is used to make this a sweet bread.
  • Eggs: Use eggs that are at room temperature and beaten well!
  • Vanilla and almond extract: This adds a delicious flavoring to the sweetness.
  • Flour: I used all purpose flour.
  • Baking powder and baking soda: These will help the bread to rise and be soft and moist.
  • Salt: Salt enhances the flavor of the other ingredients.
  • Bananas: Make sure that your bananas are very ripe (meaning that they are yellow and brown). They are sweeter when they are like this!
  • Coconut milk: Using coconut milk brings out that coconut flavor!
  • Coconut: Shredded coconut brings the perfect texture to this bread!

Let’s Bake Some Bread!

Once you have gathered all of the ingredients you need, you just mix it up and pop it in the oven! It is super simple and easy and you will be smelling and tasting this amazing coconut banana bread before you know it!

  1. Prep: Preheat oven to 350F. Grease a 9 x 5-inch loaf pan.
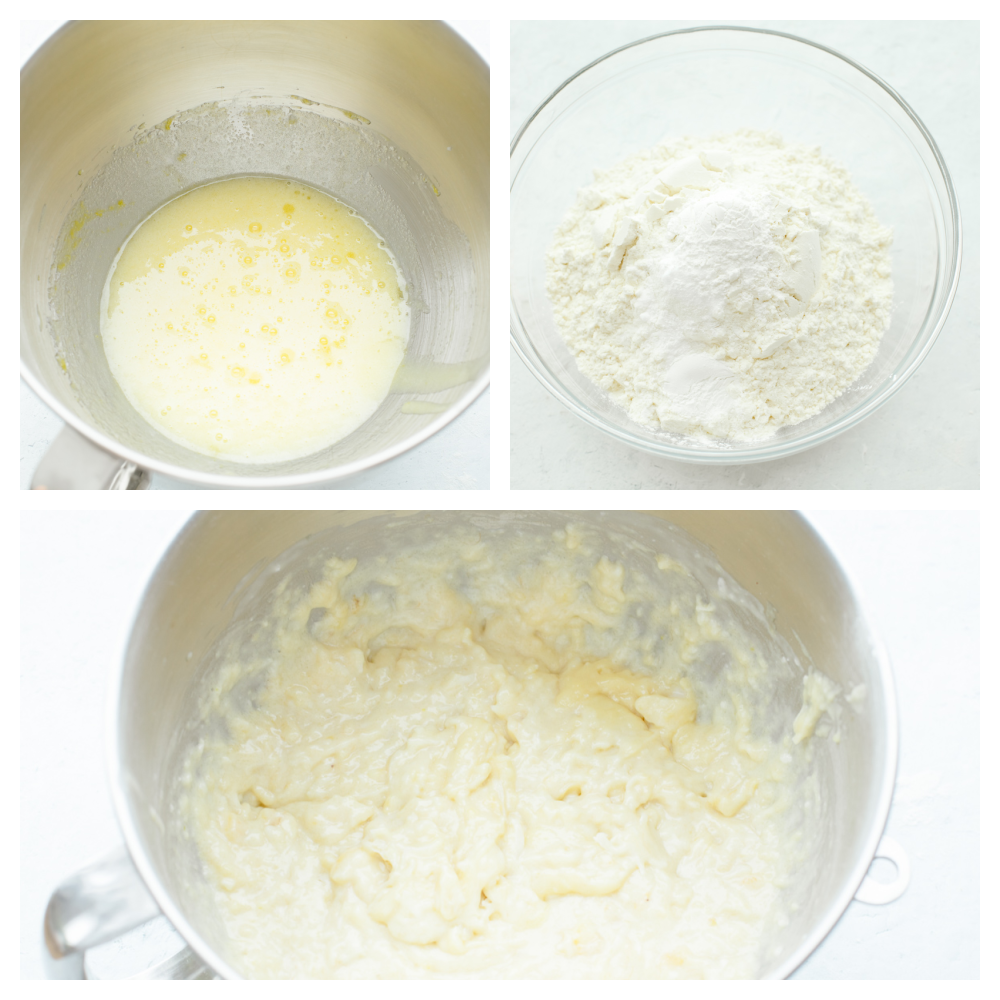
  2. Beat and mix: With an electric mixer, beat together the oil and sugar in a large mixing bowl. Add the eggs mixing well after each addition until mixture is smooth and fluffy. Stir in the vanilla and almond extracts. Set aside.
  3. Stir and mash: In a separate bowl, stir together flour, baking powder, soda, and salt. In a third mixing bowl, mash the bananas with a fork or pastry cutter. Stir in the coconut milk and shredded coconut.
  4. Dry ingredients: Alternate between adding the dry ingredients and banana mixture to the egg mixture. Begin and end with the dry ingredients.
  5. Pour, bake and cool: Pour the mixture into the prepared loaf pan and bake for 1 hour 15 minutes or until a toothpick inserted in the middle of the loaf comes out clean. Remove from oven and allow to cool for about 10-15 minutes. Transfer to a wire rack to cool completely before slicing and serving.
3 pictures showing how to mix up coconut banana bread batter.

Baking Tips

To make this coconut banana bread turn out perfectly, here are a few tips and tricks! In fact, if you follow these, you can’t go wrong! This recipe will turn out just perfectly!

  • Ripe bananas: In order to get that sweet taste out of a banana, you need to make sure that it is ripe. It needs to be yellow with brown spots on it to be perfect for coconut banana bread!
  • Don’t underbake: To check if it’s done, insert a toothpick into the middle of your bread. If it comes out clean, your bread is done! If there is still some batter on the toothpick, put the bread back into the oven and continue baking it. The bread should be lightly browned on the outside when it’s done.
  • Mashed bananas: To mash up the bananas, I like to peel them and mash them up with a fork. That way, I can make sure that I get all of the lumps out before mixing the bananas in with the batter!
  • Let it cool: To make sure that the bread slices up nicely, let it cool completely before you slice it! Otherwise, it will crumble.
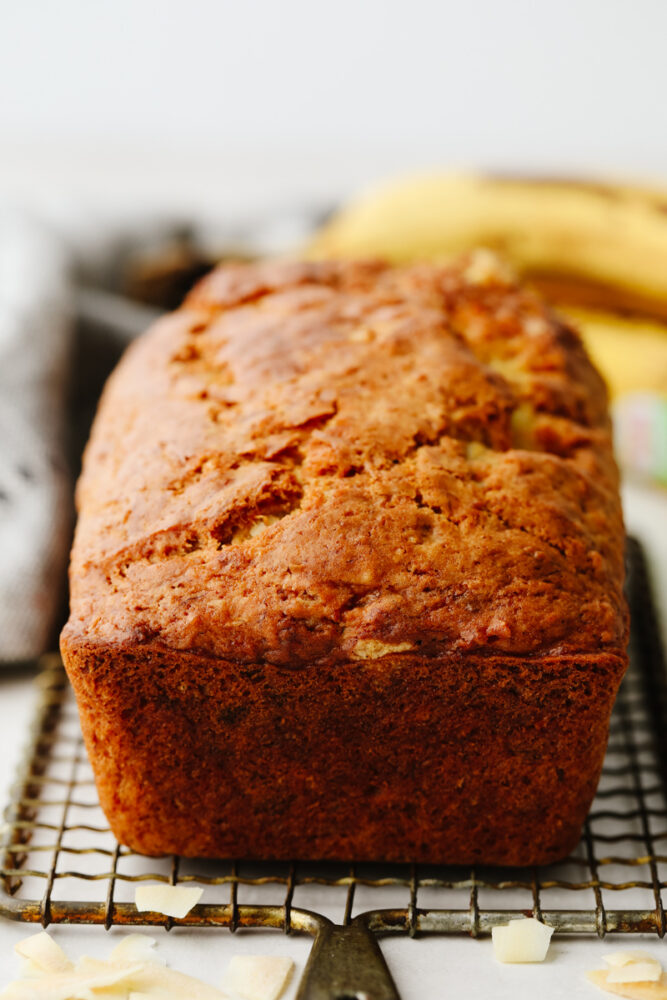
A loaf of bread on a cooling rack.

How to Store Coconut Banana Bread

Once you have baked this delicious coconut banana bread, you will want to know how to store it correctly! Here’s how you can do that to make it last a few days!

  • At room temperature: Once your banana bread has cooled, wrap it in plastic wrap or store it in an airtight container. You can store it on your counter for up to 3 days!
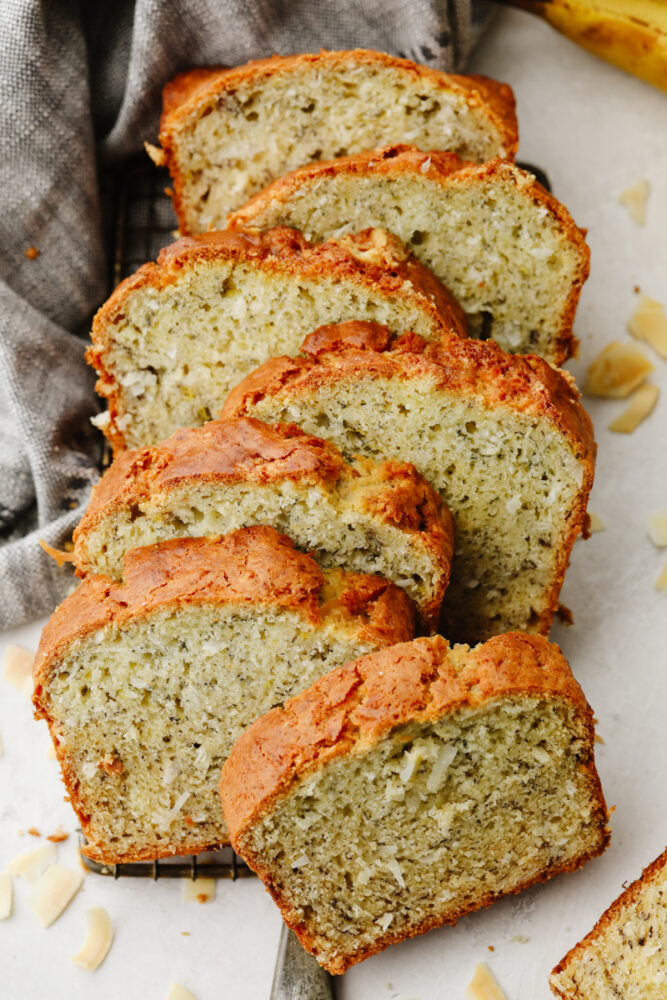
Sliced coconut banana bread.

How to Bake Ahead and Freeze

This bread freezes so well! You can make a few extra loaves and store them in your freezer for a later time! Once your coconut banana bread has cooled, wrap each loaf in some plastic wrap and place it in a ziplock freezer bag. Label the bag with the date and place it in your freezer. It can last for up to 2 months frozen! When you are ready to eat, just defrost it. Then, you can slice it and serve it up! It will be just as delicious as the day that you baked it!

Print

Coconut Banana Bread

Coconut banana bread is sweet and insanely delicious! The moist texture combined with its amazing taste will make it hard to stop after just one slice!
Course Bread
Cuisine American
Keyword banana bread recipe, coconut Banana bread
Prep Time 15 minutes
Cook Time 1 hour 15 minutes
Total Time 1 hour 30 minutes
Servings 12 Servings
Calories 327kcal
Author Alyssa Rivers

Ingredients

  • 1/2 cup canola oil
  • 1 cup granulated sugar
  • 2 large eggs beaten
  • 1 teaspoon vanilla extract
  • 1 teaspoon almond extract
  • 2 1/2 cups all-purpose flour
  • 2 teaspoons baking powder
  • 1/2 teaspoon baking soda
  • 1 teaspoon salt
  • 1 cup bananas mashed
  • 1 cup coconut milk
  • 1 cup coconut shredded

Instructions

  • Preheat oven to 350F. Grease a 9 x 5-inch loaf pan.
  • With an electric mixer, beat together the oil and sugar in a large mixing bowl. Add the eggs mixing well after each addition until the mixture is smooth and fluffy. Stir in the vanilla and almond extracts. Set aside.
  • In a separate bowl, stir together flour, baking powder, soda, and salt. In a third mixing bowl, mash the bananas with a fork or pastry cutter. Stir in the coconut milk and shredded coconut.
  • Alternate adding the dry ingredients and banana mixture to the egg mixture. Begin and end with the dry ingredients.
  • Pour the mixture into the prepared loaf pan and bake for 1 hour 15 minutes or until a toothpick inserted in the middle of the loaf comes out clean. Remove from oven and allow to cool for about 10-15 minutes. Transfer to a wire rack to cool completely before slicing and serving.

Notes

Updated on September 20, 2021
Originally Posted on March 22, 2013

Nutrition

Calories: 327kcal | Carbohydrates: 41g | Protein: 4g | Fat: 17g | Saturated Fat: 7g | Cholesterol: 27mg | Sodium: 255mg | Potassium: 215mg | Fiber: 2g | Sugar: 19g | Vitamin A: 48IU | Vitamin C: 1mg | Calcium: 41mg | Iron: 2mg


from The Recipe Critic https://ift.tt/3zmlJXL
https://ift.tt/3CvmxeF

सोमवार, 20 सितंबर 2021

Apple Streusel Muffins

These crumbly apple streusel muffins are sure to become your new favorite treat. They are perfectly spiced with cinnamon and nutmeg, and bursting with fall flavor in each bite!

Apples are a must when making any fall dessert. They are so soft and juicy when baked, and their tart flavor pairs perfectly with warm spices! Apple galette, tart, and cobbler are more rustic desserts to try out this fall!

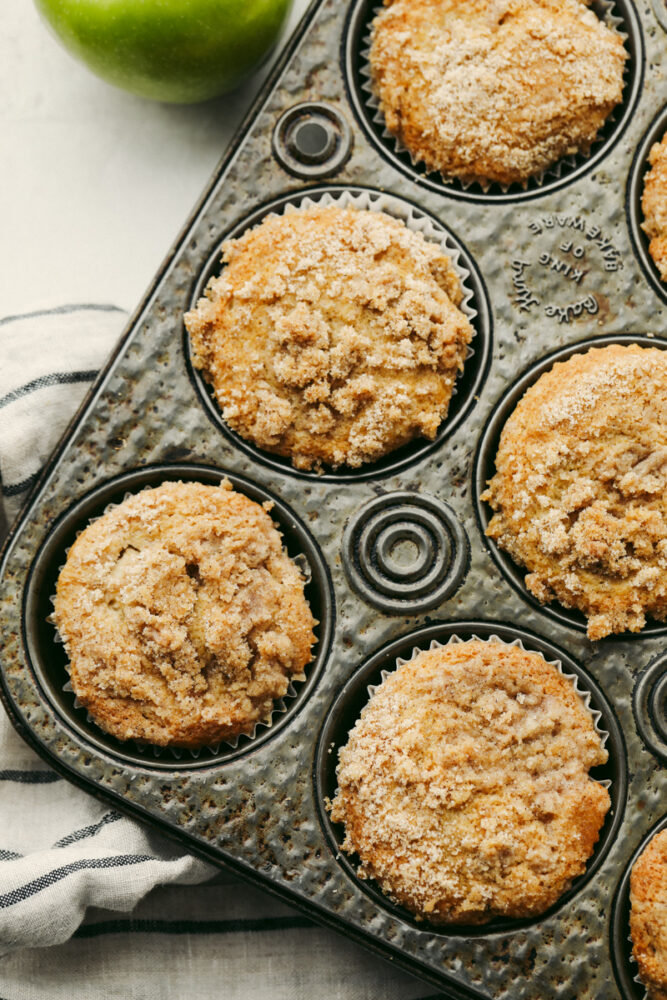
Apple streusel muffins in a muffin tin.

Cinnamon Apple Streusel Muffin Recipe

As much as I love some pumpkin, I think apple recipes are highly underrated for fall. Apple is king in my book. The way the tart, sweet flavor of apple blends with cinnamon and nutmeg is so delicious. It’s a classic pairing! Then, put it in muffin form and you have a seriously tasty treat on your hands. My caramel apple cupcakes have been a favorite at our house recently, but I think these apple streusel muffins are just as good, if not better! Topping the muffins with streusel makes them taste like little pastries. It’s all the buttery goodness that you need in your life right now. They are absolute perfection!

Take them to a potluck. Serve them at a birthday party. Have them with coffee. These tasty muffins will shine no matter the occasion! When I pull these out of my oven, 1- the smell is to die for, and 2- it is beyond difficult not to gobble one up in all of its steamy, warm goodness. Whether you choose to eat them as-is or with a little cinnamon honey butter inside, you’re going to love how perfectly sweet and moist these are. They’re the perfect dessert or breakfast, honestly, and I haven’t been able to get enough! These apple streusel muffins are soft, sweet, and ready to please. Just the kind of thing your family will go crazy over!

Ingredients for Apple Streusel Muffins

Don’t let the hefty ingredient list fool you, these are all things you have in your pantry right now! The key here is just to use the freshest apples possible. Looking for measurements? You can find them in the recipe card below!

Muffin Base

  • Eggs: Eggs are used as a binding agent and to add moisture.
  • Sour Cream: This is the secret ingredient for getting your muffins as moist as possible! It bumps up the fat content in your batter. It also adds a hint of a tangy flavor which I find to be delicious!
  • Butter: I use unsalted, melted butter in this recipe. Because of the added fat content, it helps to keep your muffins moist. It also adds a tasty rich flavor!
  • Granulated Sugar: This is what’s going to make your muffins perfectly sweet. It melts down to create the perfect texture during the baking process!
  • All-Purpose Flour: Not only is it what I typically have on hand, but all-purpose flour also makes your muffins light and airy! This is because it doesn’t have a high protein content.
  • Baking Powder and Baking Soda: Using both baking powder and baking soda is a must! They keep your muffins from becoming dense.
  • Salt: Add salt to enhance flavor!
  • Cinnamon: This is what’s going to give your muffins their perfect fall flavor! It’s the perfect addition of warm spice.
  • Nutmeg: Also a necessity! Nutmeg is warm, sweet, and woody.
  • Apples: You can use just about any apple variety here. I like using Granny Smith for their tart flavor! No matter the apple you choose, just make sure they are fresh, peeled and diced! See more tips on choosing apples below.

Streusel Topping

  • All-Purpose Flour: For the best light and crumbly structure!
  • Granulated Sugar: This will add the perfect sweetness to your streusel.
  • Brown Sugar: For a little extra depth and rich sweetness!
  • Cinnamon: You can never have enough cinnamon in fall desserts! Pop some into your streusel for added tastiness.
  • Cold Butter: Using diced cold butter is super important here! The low temperatures will make your topping nice and crumbly.

How to Make Apple Cinnamon Streusel Muffins

Making homemade muffins is much easier than you’d think! They come together in just a few simple steps. In no time, your kitchen will be filled with the amazing smells of apple and autumn spice!

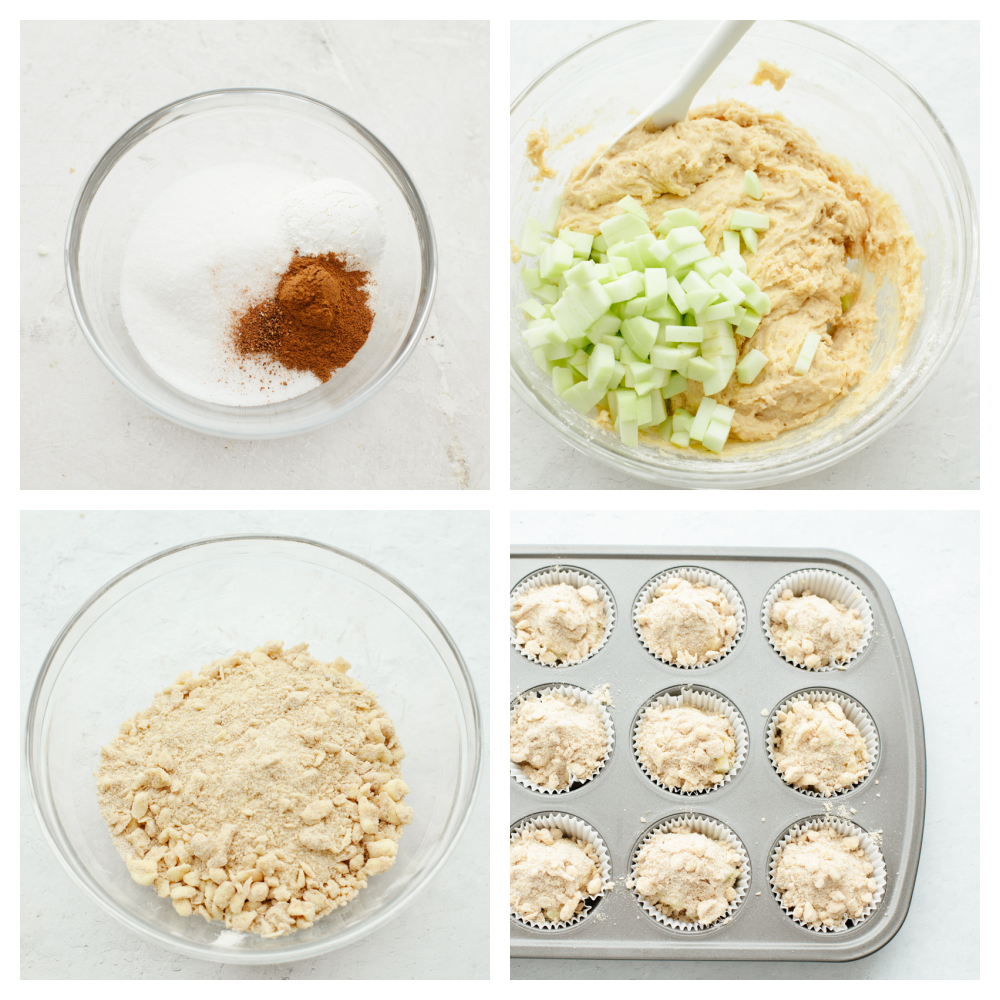
  1. Preheat Oven and Prep Pan: Let’s make some muffins! To begin, preheat your oven to 350° Fahrenheit. Line a baking pan with cupcake liners. Set aside.
  2. Prepare Streusel: Now on to the streusel. Start by mixing the flour, sugar, brown sugar, and cinnamon together. Then, cut in the butter using a pastry cutter or a fork until you have pea sized clumps remaining
  3. Mix Wet Ingredients and Sugar: In a large bowl, whisk together the eggs, sour cream, melted butter and sugar.
  4. Mix Dry Ingredients: In another bowl, whisk together the flour, baking powder, baking soda, salt, cinnamon and nutmeg.
  5. Combine Wet and Dry Ingredients: Next, add the dry ingredients to the wet ingredients and mix until just combined. Stir in the apples.
  6. Fill Liners and Top With Streusel: Use a large cookie scoop to fill the baking cups 2/3 of the way full. Sprinkle the streusel over the tops of the muffins.
  7. Bake and Serve: Bake for 20-25 minutes, until they turn golden brown and set in the center. Allow the muffins to cool before serving.
Process shots of preparing muffin batter.

Tips for Making the Best Streusel Muffins

Hardly anything says fall quite like spiced apples. These muffins are perfect for a cool crisp fall morning or for serving as a dessert. Here are a few tips to help you make the best apple streusel muffins! They’ll be a hit.

  • Vegetable Oil: Using vegetable oil instead of butter in this recipe will give your muffins a more tender crumb. It also adds moisture. If you’d like to substitute the oil for butter, you may, but know that the crumb will change the texture.
  • Diced Apples: You can dice your apples large or small for this recipe, but I like a smaller dice so the apple gets more evenly distributed throughout the batter.
  • Apple Varieties: There are several different types of apples that hold up well to baking. Granny Smith apples are nice and tart and hold their shape, while Honeycrisp are sweeter, larger and hold their shape just as well. Braeburn or Pink Lady apples are bursting with flavor and a popular choice!
  • Don’t Overfill: Only fill your muffin tin 2/3 of the way full. If you overfill them, they may spill over the sides and stick to the pan.
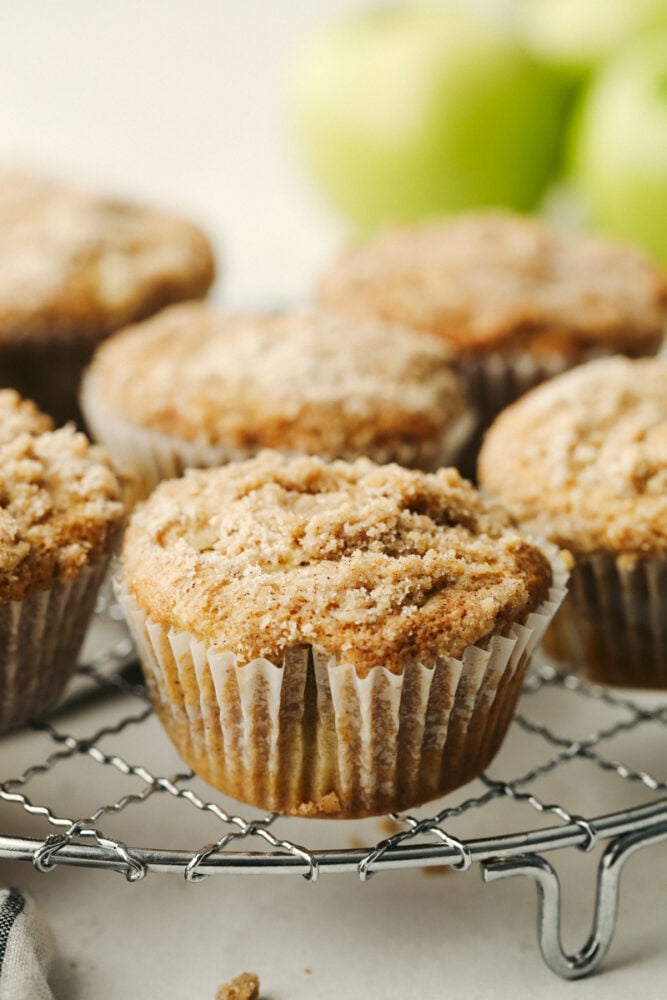
Apple streusel muffins on a wire rack.

Storing Apple Muffins

These muffins do very well at room temperature and can be stored for up to 5 days. I would avoid storing them in the fridge as that can make the streusel topping become wet and sticky.

  • In the Refrigerator: Store in an airtight container in the refrigerator for up to 5 days. Let come to room temperature before serving.
  • In the Freezer: You can store your muffins in freezer bags for up to 3 months. Let them thaw overnight in the fridge before eating.
  • Reheating: To reheat, wrap your muffin in a paper towel and pop it in the microwave for 10-15 second intervals. Serve when warmed through.
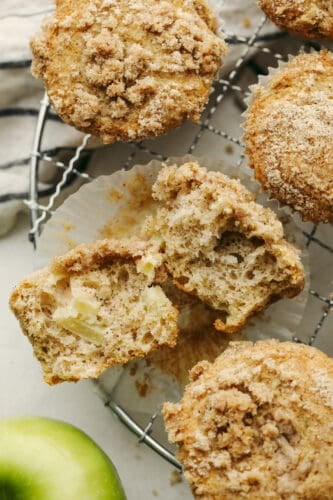
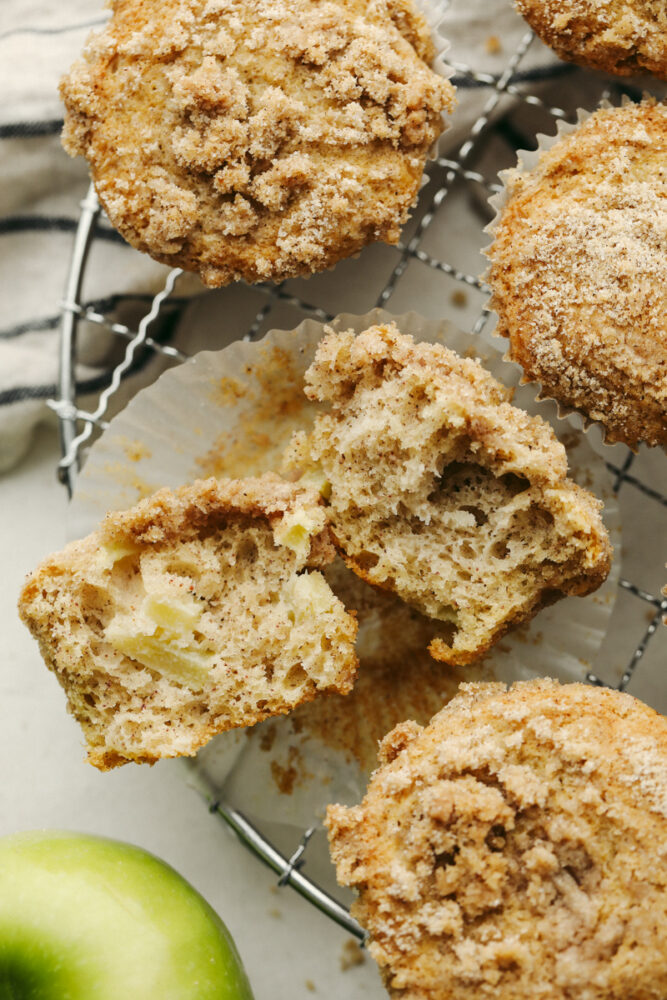
A muffin torn into 2 pieces on a wire rack.
Print

Apple Streusel Muffins

These crumbly apple streusel muffins are sure to become your new favorite treat. They are perfectly spiced with cinnamon and nutmeg, and bursting with fall flavor in each bite!
Course Breakfast
Cuisine American
Keyword apple streusel muffins
Prep Time 15 minutes
Cook Time 25 minutes
Total Time 40 minutes
Servings 18 Muffins
Calories 246kcal
Author Alyssa Rivers

Ingredients

  • 2 large Eggs
  • 1 Cup Sour Cream
  • ½ Cup Unsalted butter melted
  • 1 Cup Granulated Sugar
  • 2 Cups All Purpose Flour
  • 1 Teaspoon Baking Powder
  • ½ Teaspoon Baking Soda
  • ½ Teaspoon Salt
  • 1 Teaspoon Cinnamon
  • ¼ Teaspoon Nutmeg
  • 1 ½ Cup Apples Peeled and Diced

Streusel

  • ½ Cup All Purpose Flour
  • ¼ Cup Granulated Sugar
  • ¼ Cup Brown Sugar
  • 1 Teaspoon Cinnamon
  • 6 Tablespoons Cold Butter diced

Instructions

  • Preheat the oven to 350° and line a baking pan with cupcake liners. Set aside.
  • Prepare the streusel by mixing the flour, sugar, brown sugar, and cinnamon together. Cut in the butter using a pastry cutter or a fork until you have pea-sized lumps remaining
  • In a large bowl whisk together the eggs, sour cream, melted butter, and sugar.
  • In another bowl whisk together the flour, baking powder, baking soda, salt, cinnamon, and nutmeg.
  • Add the dry ingredients to the wet ingredients and mix until just combined. Stir in the apples. Use a large cookie scoop to fill the baking cups 2/3 of the way full. Sprinkle the streusel over the tops of the muffins.
  • Bake for 20-25 minutes, until starting to turn golden brown and set in the center. Allow the muffins to cool before serving.

Nutrition

Calories: 246kcal | Carbohydrates: 32g | Protein: 3g | Fat: 12g | Saturated Fat: 7g | Polyunsaturated Fat: 1g | Monounsaturated Fat: 3g | Trans Fat: 1g | Cholesterol: 51mg | Sodium: 149mg | Potassium: 86mg | Fiber: 1g | Sugar: 18g | Vitamin A: 390IU | Vitamin C: 1mg | Calcium: 38mg | Iron: 1mg


from The Recipe Critic https://ift.tt/3nKcDSq
https://ift.tt/3tUpCSw