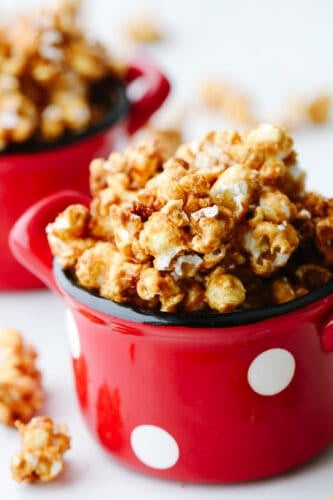
Crunchy caramel corn is absolutely divine! This classic crunchy snack delivers on that deep, rich caramel flavor that we all know and love! Eat it at home or on the go…Either way, you’re going to be hooked!
The rich, sweet taste of caramel gets me every time! I am loving caramel these days and if you’re like me, will want to try all of the recipes! This Apple Pie, these Brownie Bites, and these amazing Cinnamon Rolls are the absolute best!

Caramel Popcorn
Ok, can we talk about caramel corn for a minute? There are SO many options out there that I never know which one will be good or not. And let’s be honest, more often than not, they aren’t the best! Until I made this one!! It is SOO GOOD and is the perfect amount of crunch. It doesn’t feel like it’s going to break your teeth but it’s not ooey-gooey and messy. The caramel flavor is not overly sweet which means I can eat a LOT of this before getting sick of it!
I love snacks that I can bring with me on the go and this one is exactly that. Once you make this and let it cool, I like to put it in some snack bags and bring it for my family! We’ve brought it to movies, sporting events (take me out to the ballgame!), and on family walks. You can also bring this as a quick and easy dessert to a party. Try it out and I bet that it will become your go-to snack that your whole family loves! In fact, bake up some turtle rice Krispie treats and some classic muddy buddies and you will have the whole neighborhood asking when your next party will be!
What You Need to Make Homemade Caramel Corn
If you are looking for an easy snack to make, this crunchy caramel corn is it. There are only 6 ingredients that you will need and then you’ll be well on your way to munching and crunching! See the recipe card below for exact measurements.
- Popcorn kernels: I like to double check and make sure my kernals are fresh! Old popcorn kernals don’t fully pop and definitely don’t taste as fresh!
- Brown sugar: Brown sugar brings in that deep, rich flavor of caramel.
- Butter: I like to use unsalted butter so that I am not adding in too much salt to the flavor.
- Karo syrup: Karo syrup is mixed in to bind all of the ingredients together!
- Sweetened condensed milk: If I could pick one of my favorite sweet ingredients of all time, this would be it! This is what will make this caramel stand out!
- Baking soda: When you use baking soda it will react with the brown sugar and corn syrup! It helps the caramel get that soft texture.

Let’s Pop Some Popcorn!
This crunchy caramel corn is not only delicious but is simple to make! I always like to make a little extra because it gets eaten up so fast at our house!
- Pop the popcorn: Pop your popcorn kernels in an air popper machine and pop into a large bowl. Set aside.
- Mix, boil, add the sweetened condensed milk: On medium high heat in a medium saucepan, cook the brown sugar, butter, and karo syrup. Allow it to come to a boil and then add sweetened condensed milk.
- Boil: Allow to softly boil for about 3-4 minutes until it gets to the softball stage. Be careful to not cook to long and allow it to burn.
- Add baking soda: Remove from heat and then carefully stir in baking soda.
- Pour and mix: Pour the caramel over the popped popcorn then mix with a wooden spoon to make sure that it can all be coated evenly.
- Bake and stir: Preheat your oven to 250 degrees and then pread the popcorn evenly on a parchment lined baking sheet. Bake for 45 minutes stirring every 15 minutes. (It’s ok if there are clumps.)
- Cool and break up clumps: Remove from the oven and then let it cool. Go ahead and break up any clumps and enjoy!

Tips and Tricks
Crunchy caramel corn is the best and everyone loves it! Here are a few of my tips and tricks that will make eating this snack that much better!
- Put it in the bag: I like to make individual servings of this popcorn! You can put it into cute, themed cellophane bags for a party favor or regular ziplocks for individual treats to bring on the go!
- Get rid of unpopped kernals: There isn’t anything worse than biting into caramel corn and a surprise unpopped kernal almost breaks your tooth! To make sure that this doesn’t happen then you should try this trick! Once you are done popping your popcorn then grab a cooling rack and place it on top of a baking sheet. Pour all of your popped popcorn onto it. Your popcorn will stay on top while all of the unpopped kernals fall through the rack! Then, take those kernals and thrown them away. Put your popcorn back in the bowl and you don’t have to worry about those surprise kernals again!
- Add toppings: If you want to jazz this up with some toppings then try adding some sprinkles, some extra salt (for salted caramel corn) or even some m&m’s to your popcorn. Add any toppings on just before you place this in the oven to bake!

How to Store Leftovers
My favorite part about crunchy caramel corn is that it keeps so well! You can have this treat for a few days….If you can make it last that long!
At room temperature: Once the caramel corn has cooled, then store it in a sealed airtight container. It can last on your counter like this for up to a week! Enjoy!

More Popcorn Recipes to Try
Desserts
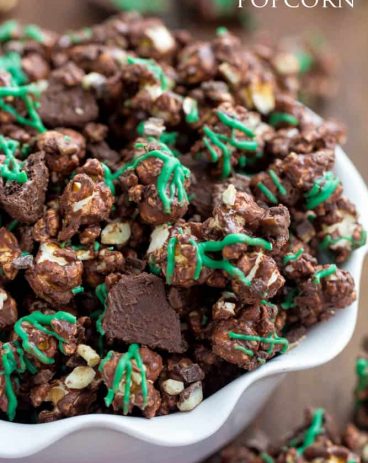
Grasshopper Popcorn

Desserts
Funfetti Popcorn (Bunny Bait)
Desserts
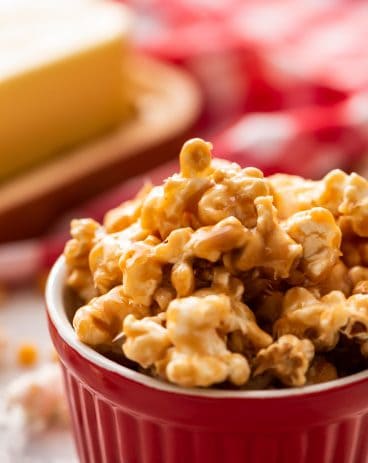
Amazing Salted Caramel Popcorn

The Perfect Crunchy Caramel Corn
Ingredients
- 1/2 cup uncooked popcorn kernels (it makes about 13 cups popped)
- 1 cup brown sugar
- 1/4 cup butter
- 1/2 cup light karo syrup
- 1/2 cup sweetened condensed milk
- 1/2 teaspoon baking soda
Instructions
-
Pop your popcorn kernels in an air popper machine and pop into a large bowl. Set aside.
-
On medium-high heat in a medium saucepan, cook the brown sugar, butter, and Karo syrup. Allow coming to a boil. Add sweetened condensed milk.
-
Allow to softly boil for about 3-4 minutes until it gets to the softball stage. Be careful to not cook too long and allow it to burn.
-
Remove from heat and carefully stir in baking soda.
-
Pour the caramel over the popped popcorn. Mix with a wooden spoon to make sure that it can all be coated evenly.
-
Preheat your oven to 250 degrees. Spread the popcorn evenly on a parchment-lined baking sheet. Bake for 45 minutes stirring every 15 minutes. It is ok if there are clumps.
-
Remove from the oven and let cool. Break up any clumps and enjoy!
Nutrition
from The Recipe Critic https://ift.tt/3EQk5Bv
https://ift.tt/3EU1N27