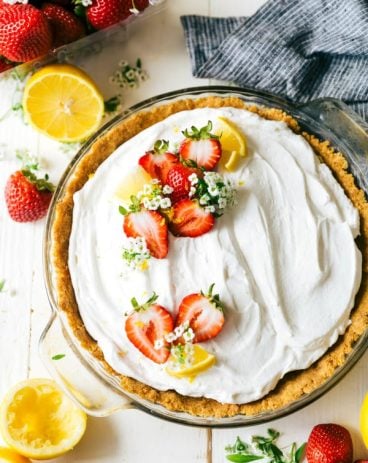
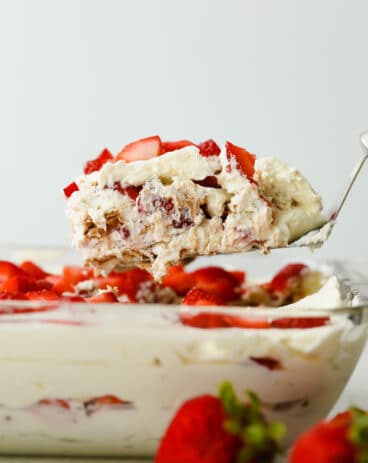
शनिवार, 23 अक्तूबर 2021

Amazingly Delicious Cauliflower Tots

Cauliflower tots are healthy and delicious! Baked to absolute perfection, these tots are crispy on the outside and soft on the inside. Everyone will love them so much that they will fly off the table!

These can be dipped in so many different things! In fact, try them out in this Famous Fry Sauce, this delicious Yum Yum Sauce, or this amazing Copycat Chick fil A Sauce. You can’t go wrong with dipping these in any of them!
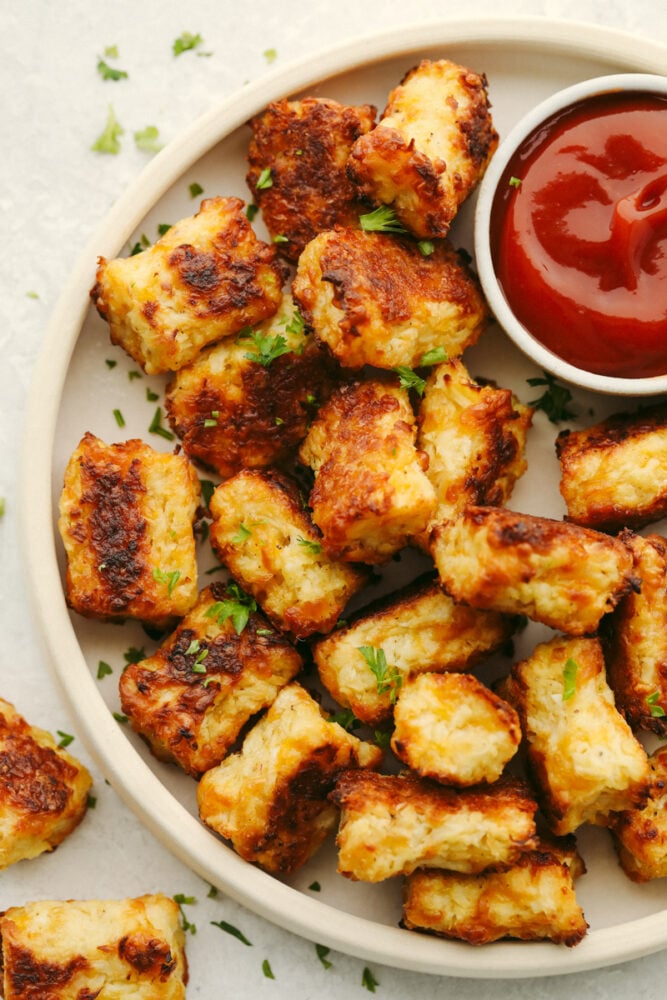
A platter of cauliflower tots with some ketchup.

Cauliflower Tots

I LOVE tater tots. They are the perfect size and taste but they aren’t exactly the healthiest. These cauliflower tots not only give them a run for their money but they are made from a vegetable and they are BAKED instead of fried! They are already winning! Cauliflower tots have the same texture and consistency as a tater tot. They are crispy on the outside and soft on the inside. But what sets these apart is the flavor!!

Using different cheeses, onions, garlic, and some salt and pepper, these cauliflower tots have the most incredible taste!! The flavor is fantastic and it makes it so that you can easily dip them in just about anything. These make a fantastic side dish to any burgers or chicken! Or, you could use them as an appetizer at a party! Whip them up and make a few extra for yourself to snack on. You’ll be so glad that you did!

Ingredients You Need to Make Cauliflower Tots

As long as you have some cauliflower, you’ll probably already have most of these ingredients in your kitchen! They are simple yet insanely delicious! See the recipe card below for a list of exact ingredient measurements.

  • Riced cauliflower: If you are using regular cauliflower instead, follow the instructions on the recipe card on how to prepare it!
  • Egg: This will bind all of your ingredients together so that you can form it into a tater tot shape!
  • Cheddar cheese: You can shred it from a block or use pre-shredded cheese!
  • Parmesan Cheese: This adds in a depth of flavor when it’s mixed with the cheddar cheese.
  • Flour: I used all purpose flour in this recipe.
  • Onion: Grate the onion up so that the pieces are nice and thin.
  • Garlic clove: If you don’t have any fresh cloves on hand, you can use minced garlic from your fridge instead! ½ tsp equals one clove of garlic.
  • Salt and pepper: These seasonings will enhance the flavors of the other ingredients.

Let’s Get Baking!

These cauliflower tots take just over an hour including baking time! Double up the recipe and freeze some for later! You can see my leftover tips below on how to do this!

  1. Preheat and spray: Preheat the oven to 400° and spray a baking sheet well with pan spray.`
  2. Prepare cauliflower: If using frozen riced cauliflower, prepare it according to the package and let cool until it is cool enough to handle. If using fresh cauliflower, prepare a pot of boiling water. Cut the cauliflower into florets and place in a steamer basket over the boiling water. Cover and steam for 5 minutes until the florets are fork tender. Once cooked, place the steamed florets in a food processor and pulse for 10-15 seconds until you get a nice riced consistency.
  3. Mix the ingredients: Transfer the riced cauliflower to cheesecloth or paper towels and squeeze to remove as much liquid as possible. Measure out 4 cups of cauliflower and add to a large bowl. Add the egg, both cheeses, flour, onion, garlic, salt and pepper. Mix together and set aside to rest for 5 minutes or so.
  4. Form the tots and bake: Using your hands, form the tots (about 40) that are about 1.5x.5 inches and line them up on the baking sheet leaving space between them. Bake for about 20 minutes before removing from the oven, flip them over and then bake for another
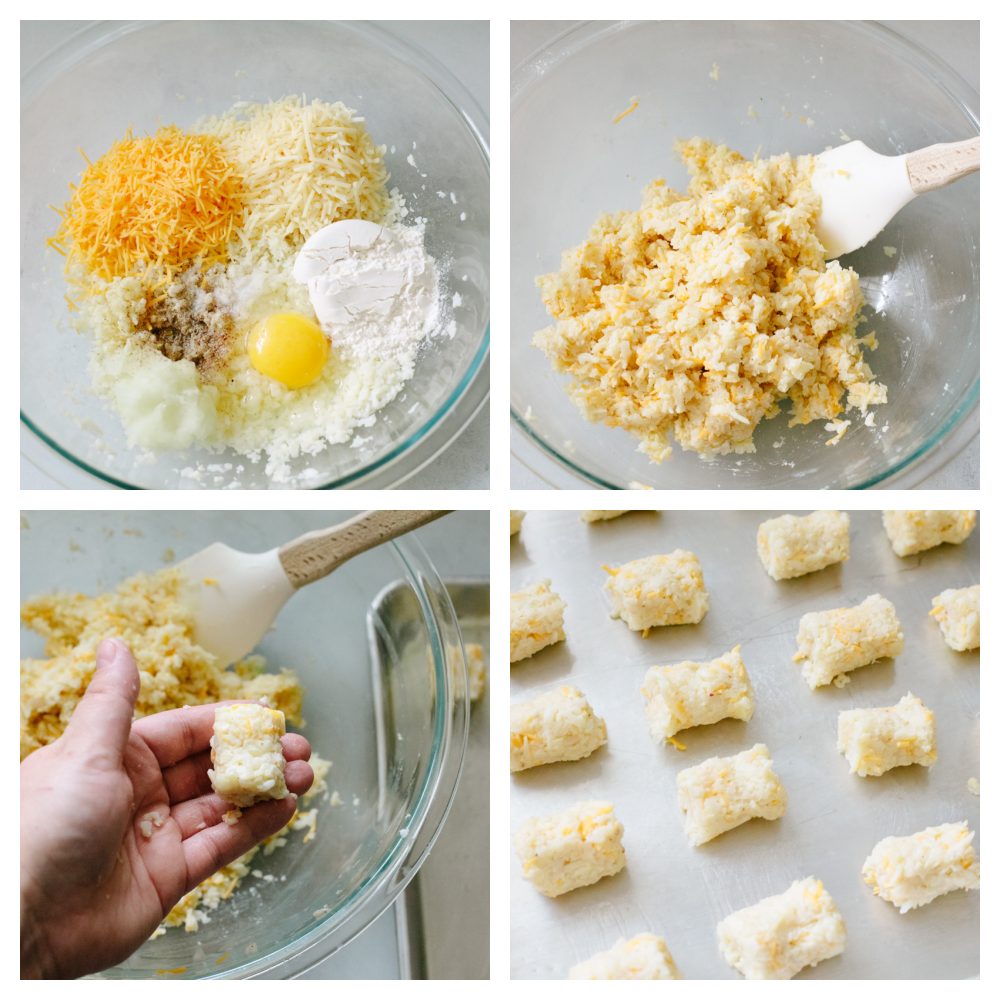
4 step by step pictures showing how to mix and form cauliflower tots.

Quick Tips!

Cauliflower tots are so delicious and a healthy alternative to your traditional tater tots! Here are a few tips for making this delicious recipe!

  • Frozen or fresh: It doesn’t really matter whether you are starting with a frozen bag of riced cauliflower or fresh cauliflower! The end result will taste the same. You will be able to make this recipe either way. Just make sure that you account for the extra time that it will take to cook up, process and puree fresh cauliflower!
  • Don’t forget to flip: An important part to remember when baking these tots is to flip them halfway! This will help get that crispy outside. It will also make them cook more evenly!
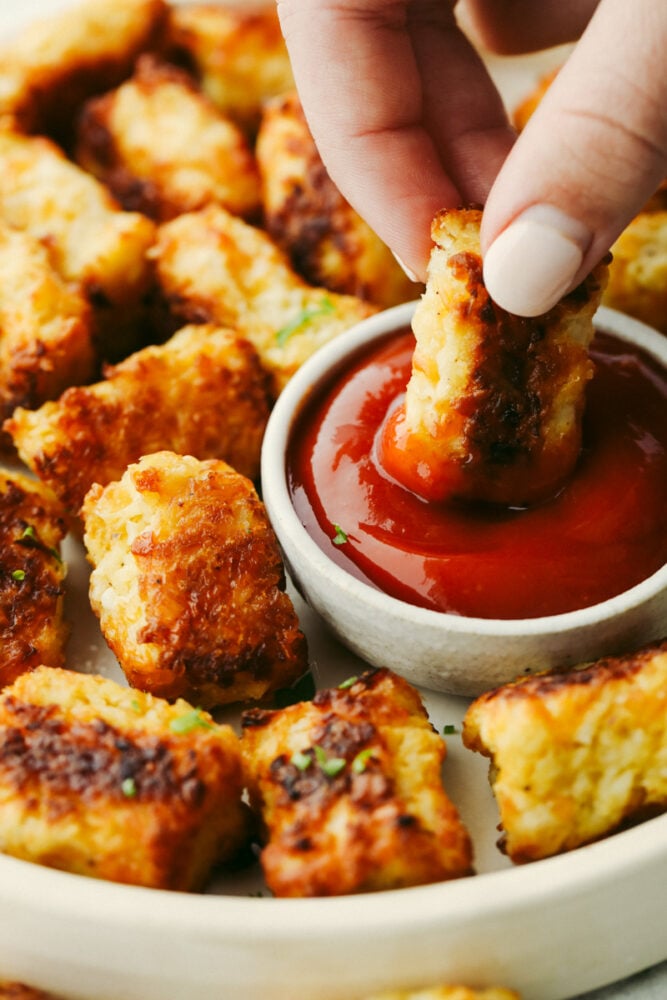
A cauliflower tot being dipped into ketchup.

How to Store Leftovers

Extra cauliflower tots can be stored for later! They make delicious leftovers! in fact, go ahead and double your recipe and freeze some. Then, you will always have some on hand!

  • Refrigerator: Once the tots have cooled then store them in an airtight container. Put them in your fridge and they will last up to 5 days!
  • Freezer: You can bake these up and store them for later! Place them in and airtight container in your freezer and label it with the date. They will last for up to 3 months!
  • Reheat: The best way to reheat your tots will be in an air fryer or an oven. This will make them taste crispy and fresh again! Preheat your air fryer or oven to 400 degrees and cook them for 3-5 minutes or until heated through. Frozen ones will take a couple minutes longer.
Print

Amazingly Delicious Cauliflower Tots

Cauliflower tots are healthy and delicious! Baked to absolute perfection, these tots are crispy on the outside and soft on the inside. Everyone will love them so much that they will fly off the table! 
Course Side Dish
Cuisine American
Keyword cauliflower tots
Prep Time 40 minutes
Cook Time 40 minutes
Total Time 1 hour 20 minutes
Servings 40 Cauliflower Tots
Calories 19kcal
Author Alyssa Rivers

Ingredients

  • 4 Cups riced cauliflower
  • 1 large Egg
  • ½ Cup Shredded Cheddar Cheese
  • ½ Cup Shredded Parmesan Cheese
  • ¼ Cup All Purpose Flour
  • ½ Grated Onion
  • 1 Clove Garlic minced
  • ½ Teaspoon Salt
  • ¼ Teaspoon Ground Pepper

Instructions

  • Preheat the oven to 400° and spray a baking sheet well with pan spray.`
  • If using frozen riced cauliflower, prepare it according to the package and let it cool until it is cool enough to handle. If using fresh cauliflower, prepare a pot of boiling water. Cut the cauliflower into florets and place it in a steamer basket over the boiling water. Cover and steam for 5 minutes until the florets are fork-tender. Once cooked, place the steamed florets in a food processor and pulse for 10-15 seconds until you get a nice riced consistency.
  • Transfer the riced cauliflower to cheesecloth or paper towels and squeeze to remove as much liquid as possible. Measure out 4 cups of cauliflower and add to a large bowl. Add the egg, both kinds of cheeses, flour, onion, garlic, salt, and pepper. Mix together and set aside to rest for 5 minutes or so.
  • Using your hands, form the tots (about 40) that are about 1.5x.5 inches and line them up on the baking sheet leaving space between them. Bake for about 20 minutes before removing them from the oven, flip them over and then bake for another

Nutrition

Calories: 19kcal | Carbohydrates: 1g | Protein: 1g | Fat: 1g | Saturated Fat: 1g | Polyunsaturated Fat: 1g | Monounsaturated Fat: 1g | Trans Fat: 1g | Cholesterol: 7mg | Sodium: 64mg | Potassium: 53mg | Fiber: 1g | Sugar: 1g | Vitamin A: 31IU | Vitamin C: 8mg | Calcium: 30mg | Iron: 1mg


from The Recipe Critic https://ift.tt/3prstlB
https://ift.tt/3m60qpX
शुक्रवार, 22 अक्तूबर 2021

Pumpkin Pecan Pie Bars

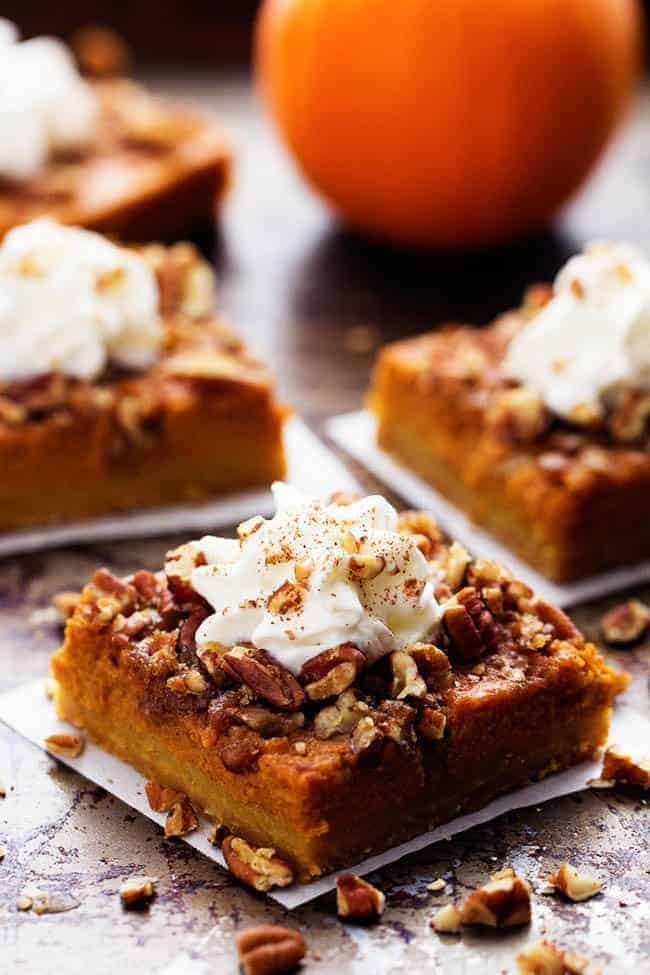
All of the goodness of fall treats combine in these delicious pumpkin pecan pie bars. Layers of buttery shortbread, sweet pecan, and spiced pumpkin will have you hooked!

Is it just me, or do the best treats come out in the fall? I almost drool thinking about pumpkin snickerdoodles, pumpkin cream cheese truffles, and pumpkin pie caramel blondies. These are a few more tasty treats enhanced with a little fall flair!

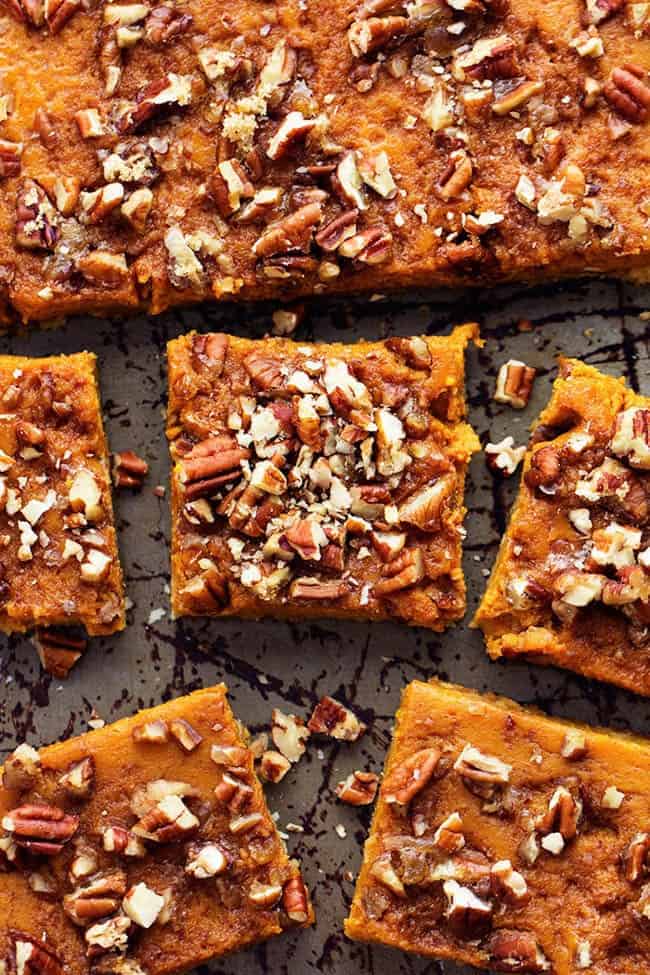
Pumpkin pecan pie bars sliced into 2" x 2" pieces on parchment paper.

Insanely Good Pumpkin Pecan Pie Bars Recipe

Fall is my favorite time of the year. I love the crisp fall air and the beautiful big trees in our park that have colorful fall leaves. My other favorite part of fall is the treats! Pumpkin pie is a must. Pecan Pie is a must. So it came to me… I need to combine both! All of the goodness of pumpkin and pecan pie get fused together in this delicious dessert. It starts with a buttery shortbread crust. Then, it is followed by a pumpkin pie layer and topped with a brown sugar pecan topping. The brown sugar adds a caramel flavor as the bars cook. The result? Pure fall perfection.

First, I love these bars because they are perfect for cutting up and feeding a crowd. Second, they are a lot easier than you think! It only takes 10 minutes of prep and then they are hands-off once they go in the oven. The hardest part is waiting for them to finish. The smell that fills my kitchen makes me want to gobble up the whole pan immediately. They are so soft, sweet, buttery, with the best hint of fall spice! You are going to love everything about these delicious bars. If you love pumpkin pie and pecan pie, get ready to go crazy for these!

Ingredients for Pumpkin Pecan Pie Bars

I love that this delicious recipe utilizes a lot of ingredients I have at home. It makes for a simple and inexpensive dessert! The end result will amaze you with its rich, sweet, perfectly spiced flavors. You can find measurements for each ingredient in the recipe card below!

Shortbread Layer

  • Flour: Flour is used to give your crust structure. I like to use all-purpose flour because it keeps your crust light and crumbly.
  • Oats: You can use old-fashioned or instant here. Oats will give your crust a tasty texture!
  • Brown Sugar: This is used to add a sweet, rich flavor to the crust.
  • Butter: I use salted butter here for enhanced flavor. You can also use margarine! No matter what you choose, make sure it is softened before adding it to your mixture.

Pumpkin Layer

  • Granulated Sugar: For a smooth texture and sweetness!
  • Pumpkin: You can use canned pumpkin or homemade pumpkin puree!
  • Evaporated Milk: The perfect ingredient for adding delicious creaminess!
  • Eggs: Eggs work as a binding agent to solidify your pumpkin layer once baked.
  • Pumpkin pie spice: A necessary ingredient to get those amazing fall flavors! In fact, try making this pumpkin pie spice from scratch! It’s super easy!

Pecan Layer

  • Pecans: I like to chop mine up into small pieces so they incorporate thoroughly.
  • Brown Sugar: For the perfect rich sweetness of a pecan pie!
  • Whipped Cream: This is used on top. You can whip your own using heavy cream, but canned whipped cream tastes amazing, too!

How to Make Pumpkin Pecan Pie Bars

Making this incredible crowd-pleaser isn’t difficult at all! All you have to do is layer and throw it in the oven. This is a recipe that both beginner and seasoned bakers can thoroughly enjoy! Warning: May cause an irresistible fall scent in your kitchen.

  1. Prepare Crust: First, preheat your oven to 350° Line a 9×13 inch pan with foil and lightly spray with cooking spray. In a mixing bowl, combine flour, oats, brown sugar and butter and then beat at low speed until mixture is combined and crumbly. Next, press into the bottom of your 9×13 inch pan and bake for 15 minutes. Remove from the oven.
  2. Pumpkin Layer: To begin, in a medium-sized bowl combine sugar, pumpkin, evaporated milk, eggs, and pumpkin pie spice. Beat for about 1-2 minutes. Next, pour over crust. Bake for 20 minutes and then remove it from the oven.
  3. Pecan Layer: Combine brown sugar and pecans. Sprinkle over the filling and then continue to bake for 15 -20 minutes or until knife inserted in center comes out clean. Let it cool completely. Lastly, top with whipped cream and serve!
Pumpkin pecan pie bars cut into pieces.

Tips and Tricks

Here are some easy things to keep in mind as you make these tasty pumpkin pie pecan bars! The end result will be so delicious that your friends and family will surely be asking for more!

  • Using a food processor: If you are having trouble getting your crust to press down into the pan then your mixture may be too thick. You can blend your dry ingredients in a food processor beforehand for a more finely-milled crust mixture!
  • Pumpkin pie spice: If you don’t have this on hand, you can make it at home with a simple blend of cinnamon, nutmeg, and ginger! You can use this recipe as a guide on ratios, but it can easily be customized to fit your individual tastes!
  • Let bars cool completely: This is easily the hardest tip to follow, but well worth it! If you try to cut into bars too prematurely then they won’t hold their shape. Pumpkin, specifically, needs time to set in place. In fact, you can stick your bars in the fridge to help this process along. Either way, it will typically take a few hours before they are completely ready.
  • Serve with ice cream: I use whipped cream in my recipe, but these bars transform into a decadent dessert when served à la mode! A scoop of homemade ice cream or even frozen yogurt can really take this dessert up a notch.
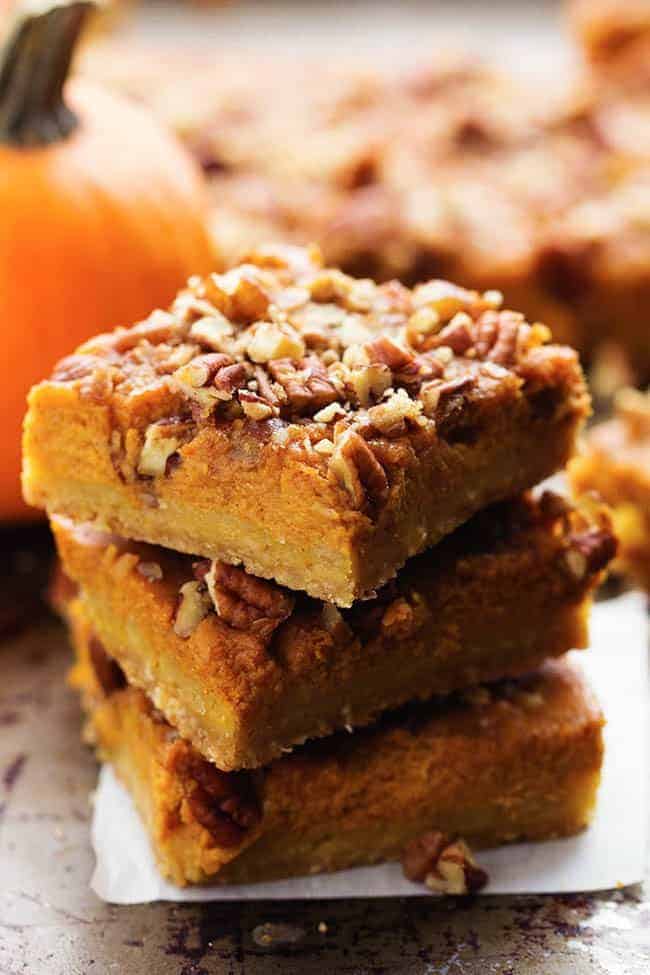
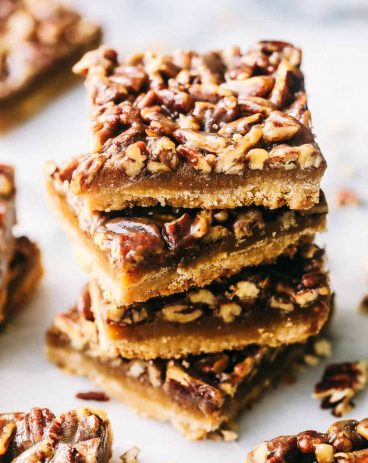
Three pumpkin pecan pie bars stacked on top of each other.

How to Store Leftovers

These pumpkin pie bars taste fantastic the next day! Here is how you can store them and enjoy them later!

  • Refrigerator: If you store your bars in an airtight container, they will keep for 5-6 days.
  • Freezer: In an airtight container, your pumpkin pecan pie bars will stay good in the freezer for up to 2 months. Let them thaw in the fridge for 1 whole day before consuming.

A Reader’s Review

I have been making these for years. This recipe is tried and true. Easy to make… Perfect dessert for a nice meal!
-Marlena
Print

Pumpkin Pecan Pie Bars

All of the goodness of pumpkin and pecan pie combine in these delicious dessert bars. They are baked on top of a buttery shortbread crust and make one fantastic dessert!
Course Dessert
Cuisine American
Keyword pecan pie bars, pumpkin pecan pie bars, pumpkin pie bars
Prep Time 10 minutes
Cook Time 1 hour
Total Time 1 hour 10 minutes
Servings 12 slices
Calories 128kcal
Author Alyssa Rivers

Ingredients

Shortbread Layer:

  • 1 cup all-purpose flour
  • 1/2 cup old-fashioned or instant oats
  • 1/2 cup packed brown sugar
  • 1/2 cup butter or margarine softened

Pumpkin Layer:

Pecan Layer:

  • 1/2 cup pecans chopped
  • 1/4 cup packed brown sugar
  • Whipped cream

Instructions

  • To make the crust: Preheat the oven to 350° Line a 9×13 inch pan with foil and lightly spray with cooking spray. Combine flour, oats, brown sugar, and butter in a small mixer bowl. Beat at low speed until mixture is combined and crumbly. Press into the bottom of your 9×13 inch pan and bake for 15 minutes. Remove from the oven.

To make the pumpkin layer:

  • In a medium-sized bowl combine sugar, pumpkin, evaporated milk, eggs, and pumpkin pie spice. Beat for about 1-2 minutes. Pour over crust. Bake for 20 minutes. Remove from oven.

To make the pecan layer:

  • Combine brown sugar and pecans. Sprinkle over the filling. Continue to bake for 15 -20 minutes or until the knife inserted in the center comes out clean. Cool completely and top with whipped cream.

Notes

Updated on October 22, 2021
Originally Posted on November 2, 2018

Nutrition

Calories: 128kcal | Carbohydrates: 21g | Protein: 2g | Fat: 4g | Saturated Fat: 1g | Cholesterol: 27mg | Sodium: 11mg | Potassium: 38mg | Fiber: 1g | Sugar: 13g | Vitamin A: 40IU | Vitamin C: 0.1mg | Calcium: 11mg | Iron: 0.8mg


from The Recipe Critic https://ift.tt/2qnvLXr
https://ift.tt/2RwG4Uv

Cannolis

Crispy and creamy, this ricotta-filled dessert is as decadent as it gets! Cannolis are the traditional Italian treats you’ll want to make again and again.

There’s a reason cannolis have been loved for hundreds of years! You’ll have to try these other classic recipes. Baklava, crème brulée, and apple galette are more old-world desserts that will wow with their sweet, delicious flavor!

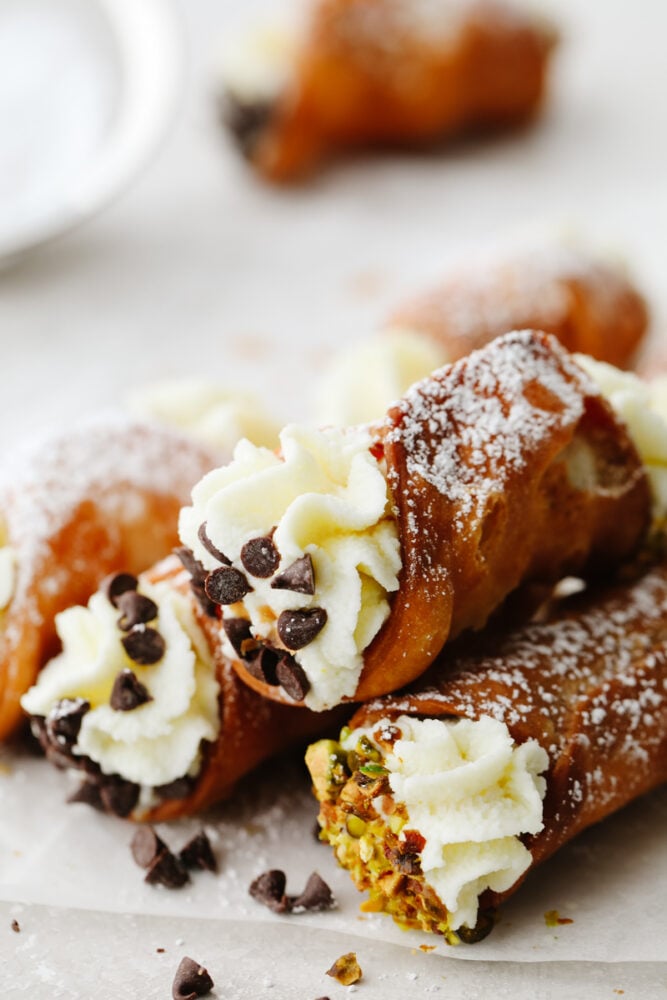
Closeup of 3 cannolis.

Flaky and Delicious Cannoli Recipe

Cannolis are one of those things where if I see them behind the glass of a bakery, I just can’t resist getting one. That first bite through layers of a golden, flaky shell and sweetened ricotta cream is pure heaven. The textures of cannoli are, honestly, out of this world! These tasty desserts have Sicilian roots and some even date them back to 827 AD! You know it’s got to be good if it was passed down for a thousand years.

Sometimes you’ll find them dipped in nuts or filled with chocolate chips which really enhances their flavor. (I’ve got both varieties in this recipe!) To be honest, it’s no surprise that cannolis are found in ice creams and sweet spreads. You can even use empty shells as “chips” to go with it! The creaminess of the ricotta and the buttery shell is an amazing flavor combination you won’t want to miss.

Ingredients for Cannoli

Cannolis use a lot of standard baking ingredients. So as long as you’ve got some ricotta and a little red wine, you can whip up these incredible desserts! As always, measurements for each ingredient is located in the recipe card at the end of the post.

Shells

  • All-Purpose Flour: Gives your cannolis a light, flaky structure.
  • Granulated Sugar: This is what’s going to give your shells their amazing sweetness! When you fry them, the sugar melts down to give the cannolis their gorgeous golden brown color.
  • Salt: Added to enhance flavors.
  • Unsalted Butter: Since we add salt separately, I like using unsalted butter in this recipe. Butter is going to give your cannoli shells a tasty, rich flavor!
  • Marsala or Red Wine: If you’re wanting to make the most traditional version of this recipe, use marsala wine! It’s also Sicilian and is what has been used in cannolis, historically. This can be substituted for both red wine and grape juice, but will slightly alter the overall flavor.
  • Egg: Used as a binding agent and to provide structure.
  • Egg white: An egg white is needed for an egg wash.
  • Vegetable Oil: This is what I use for frying! Canola oil will work, too.

Filling

  • Whole Milk Ricotta: This is the base of your filling. With a little powdered sugar, it becomes a sweet, creamy delight! Make sure you strain your ricotta. This way, your filling won’t be runny.
  • Powdered Sugar: Added for sweetness! Because of its texture, it helps make your filling smooth, too.
  • Mini Chocolate Chips and Chopped Pistachios: These are optional. For extra flavor, add some in!

How to Make Cannolis

If you want to make cannolis, you’re going to need a little patience. This recipe has a longer prep time than most desserts, but it is well worth it! Honestly, I think the whole process is fun. You can even get the kids involved to help shape and fill the cannolis!

For Shells

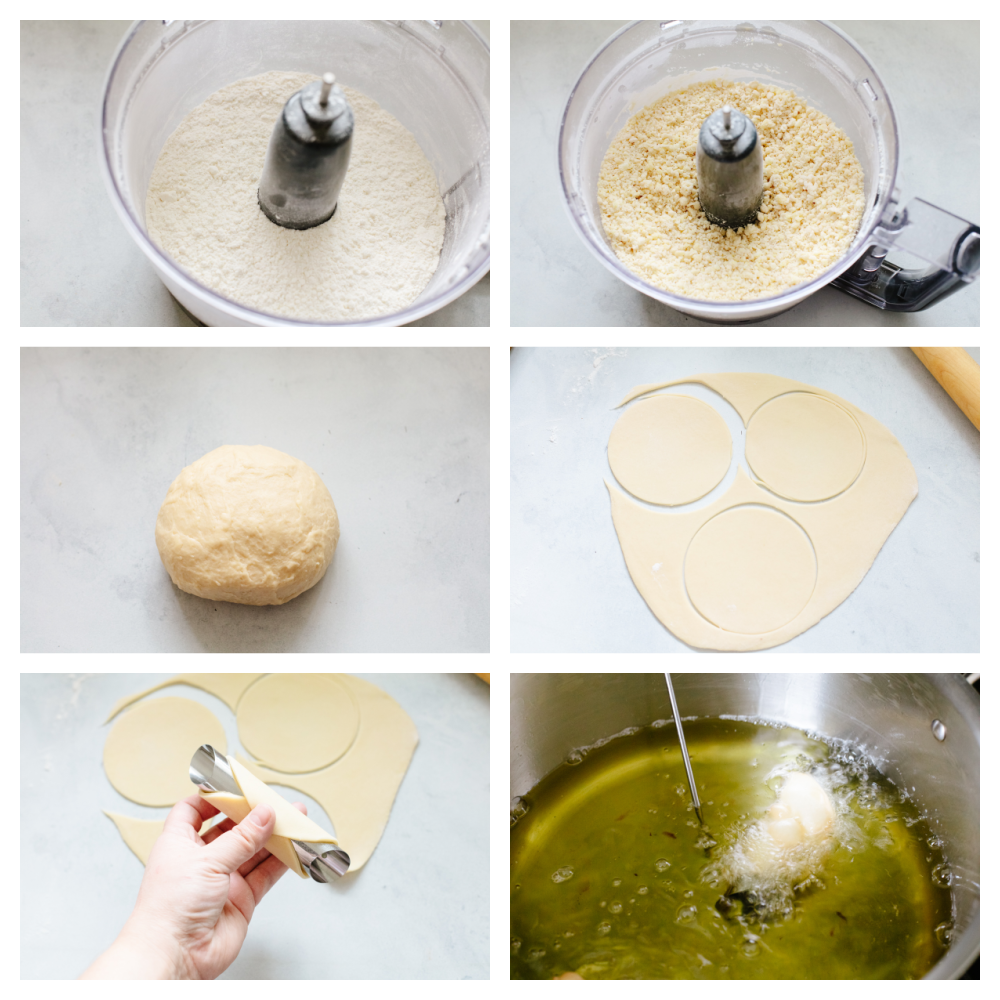
  1. Use Food Processor for Dough: To begin, add the flour, sugar and salt to a food processor and pulse for about 10-15 seconds until thoroughly combined. Add in the butter and combine until you have a fine, crumbly dough.
  2. Mix in Egg and Wine: Add in the wine and egg and pulse until the dough comes together. Turn out onto a clean surface and knead together until smooth, about 5-6 minutes, although it could be a little longer. Wrap the dough tightly in plastic wrap and rest in the fridge for at least an hour.
  3. Heat Oil: When the hour is just about up, get a large heavy bottomed pot and add the oil. Heat the oil over medium heat until it reaches 360°.
  4. Roll Out Dough: Cut the dough ball into 4 pieces and roll out one at a time, leaving the remaining pieces covered in the fridge until ready to roll out. Roll the dough on a well-floured surface as thin as you can. ¼ inch is going to be too thick, so try rolling it even thinner. The thinner the dough, the better it will crisp up when you fry it. Cut into 4 inch circles using a cookie cutter.
  5. Shape Cannolis: Lightly spray the cannoli forms with cooking oil, or brush them with vegetable oil. Wrap the dough circles around the cannoli forms and brush the edge with the egg wash and press the opposite side of the dough to it. Take the time to really press the edge together to make sure they come together as one. If you don’t seal it well enough it could come apart in the oil.

Frying

  1. Immerse Shells: Use tongs or a spider to immerse shells in the hot oil (about 3-4 at a time, depending on the size of your pot. Don’t overcrowd them!) and fry until golden brown all around, about 1-2 minutes. Turn the shells as needed and try to keep the oil temp between 360° and 380° while frying.
  2. Dry: Carefully remove the shells from the oil using tongs and transfer to a plate lined with paper towels to drain. Let cool slightly before using the tongs to pull the form free from the shell. Let cool completely.
  3. Repeat: Repeat with remaining dough until all the dough has been used. When using scrap dough, press together and let rest for at least 10 minutes before rolling it out again.

For Ricotta Filling

  1. Strain Ricotta: Be sure to strain the liquid from the ricotta using cheesecloth otherwise the dip can be runny. Place several layers of cheesecloth in a strainer and add the ricotta. Let drain for at least 20 minutes before squeezing by hand to remove the excess liquid. This can take a bit of time, but it’s worth it to get a better consistency!
  2. Mix Sugar and Ricotta: Add the strained ricotta and powdered sugar to a mixing bowl. Beat with a paddle until just combined.
  3. Pipe Cannoli Shells, Add Toppings: Pipe filling into fully cooled cannoli shells and dip the ends in mini chocolate chips or chopped pistachio seeds, if desired. Dust with powdered sugar and serve immediately.
Process shots of mixing and frying dough.

Tips For Successful Cannolis

Homemade cannolis aren’t the easiest dessert out there, but they certainly hit the spot! A light, creamy, not too sweet filling surrounded by a delightfully crisp shell…it’s hard to beat a cannoli! They can be a little testy, so here are some tips that will help you make great cannolis!

  • Rest Your Dough: Letting the dough rest between rolling it out will give the gluten in the dough time to relax so your cannoli shells aren’t tough.
  • Roll Dough Thin: The thinner the better for cannoli shells! If you don’t roll the dough thin enough, you run the risk of having the shells not fully cook through.
  • Cannoli Shells Coming Apart: If the shells are not staying around the form while in the oil, make sure your dough is A) rolled very thin, B) sealed with the egg white egg wash right on the edge, and C) The edges are pressed together very, very well!
  • Straining Ricotta: Don’t skip this step! Ricotta cheese has a high water content and that can result in a very runny filling. It takes a bit more time to make sure the cheese has the excess liquid removed, but it’s very worth it to make sure it’s done and gain a thicker, smoother consistency for your cannoli filling.
  • Fill Before Serving: The filling in cannolis can make the shell soft if you fill it too early. It is best to fill the cannolis just before serving them.

Storing Cannolis

Cannolis don’t keep very well once they’ve been filled, but the filling and shells can be prepared separately before being ready to serve! Fill one hour before serving for best results.

  • At Room Temperature: Store cannoli shells at room temperature in an airtight conainer. They will stay fresh for up to one week.
  • In the Refrigerator: Since the filling is cheese based, it needs to stay in the fridge until the cannolis are ready to be eaten. Store your filling in an airtight container- it will keep for 5 days.
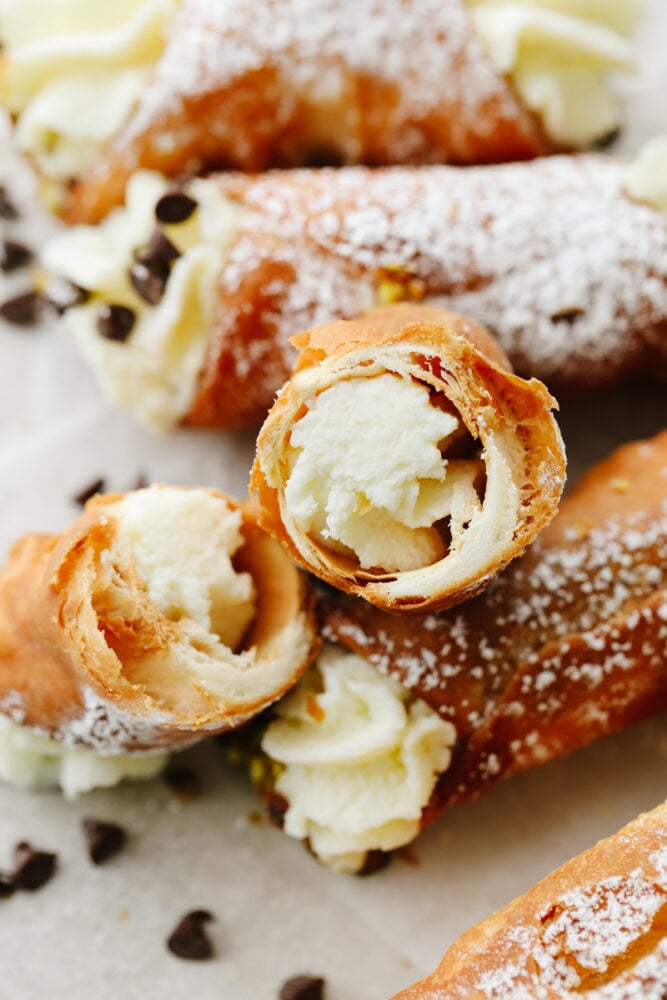
Closeup of a cannoli broken in half.
Print

Cannolis

Crispy and creamy, this ricotta-filled dessert is as decadent as it gets! Cannolis are the traditional Italian treats you’ll want to make again and again.
Course Dessert
Cuisine Italian American
Keyword cannoli, cannolis
Prep Time 1 hour
Cook Time 15 minutes
Chilling Time 1 hour
Total Time 2 hours 15 minutes
Servings 18 Cannolis
Calories 103kcal
Author Alyssa Rivers

Ingredients

Shells

  • 2 Cups All Purpose Flour
  • 2 Tablespoons Granulated Sugar
  • ¼ Teaspoon Salt
  • 3 Tablespoons Unsalted Butter
  • 1/3 Cup Marsala or Red Wine
  • 1 large Egg
  • 1 Egg white for egg wash
  • 2 Quarts Vegetable Oil for frying

Filling

  • 32 Oz Whole Milk Ricotta Strained
  • 1 Cup Powdered Sugar
  • Mini Chocolate Chips optional
  • Chopped Pistachios Optional

Instructions

Shells

  • Add the flour, sugar, and salt to a food processor and pulse for about 10-15 seconds until thoroughly combined. Add in the butter and pulse again until you have a finely crumbly dough.
  • Add in the wine and egg and pulse until the dough comes together. Turn out onto a clean surface and knead together until smooth, about 5-6 minutes, although it could be a little longer. Wrap the dough tightly in plastic wrap and rest in the fridge for at least an hour.
  • When the hour is just about up, get a large heavy-bottomed pot and add the oil. Heat the oil over medium heat until it reaches 360°.
  • Cut the dough ball into 4 pieces and roll out one at a time, leaving the remaining pieces covered in the fridge until ready to roll out. Roll the dough on a well-floured surface as thin as you can. ¼ inch is going to be too thick, so try rolling it even thinner. The thinner the dough, the better it will crisp up when you fry it. Cut into 4-inch circles using a cookie cutter.
  • Lightly spray the cannoli forms with cooking oil, or brush them with vegetable oil. Wrap the dough circles around the cannoli forms and brush the edge with the egg wash and press the opposite side of the dough to it. Take the time to really press the edge together to make sure they come together as one. If you don't seal it well enough it could come apart in the oil.
  • Use tongs or a spider to immerse shells in the hot oil (about 3-4 at a time, depending on the size of your pot. Don’t overcrowd them!) and fry until golden brown all around, about 1-2 minutes. Turn the shells as needed and try to keep the oil temp between 360° and 380° while frying.
  • Carefully remove the shells from the oil using tongs and transfer them to a plate lined with paper towels to drain. Let cool slightly before using the tongs to pull the form free from the shell. Let cool completely.
  • Repeat with remaining dough until all the dough has been used. When using scrap dough, press together and let rest for at least 10 minutes before rolling it out again.

Filling

  • Be sure to strain the liquid from the ricotta using cheesecloth otherwise, the dip can be runny. Place several layers of cheesecloth in a strainer and add the ricotta. Let drain for at least 20 minutes before squeezing by hand to remove the excess liquid. This can take a bit of time, but it's worth it to get a better consistency!
  • Add the strained ricotta and powdered sugar to a mixing bowl. Beat with a paddle until just combined.
  • Pipe filling into fully cooled cannoli shells and dip the ends in mini chocolate chips or chopped pistachios if desired. Dust with powdered sugar and serve immediately.

Nutrition

Calories: 103kcal | Carbohydrates: 19g | Protein: 2g | Fat: 2g | Saturated Fat: 1g | Polyunsaturated Fat: 1g | Monounsaturated Fat: 1g | Trans Fat: 1g | Cholesterol: 15mg | Sodium: 40mg | Potassium: 22mg | Fiber: 1g | Sugar: 8g | Vitamin A: 73IU | Calcium: 4mg | Iron: 1mg


from The Recipe Critic https://ift.tt/3G8QALY
https://ift.tt/3aWKVdD