रविवार, 14 नवंबर 2021

How to Cook Steamed Mussels

These steamed mussels are easy, elegant, and delicious! They are perfect for any dinner party and you won’t be able to stop after just one!

I love a recipe that I can surprise my guests with! These mussels do exactly that. If you are wondering what other sides to serve with this then try this Garlic Bread, these Potato Wedges or a toasted French Baguette!
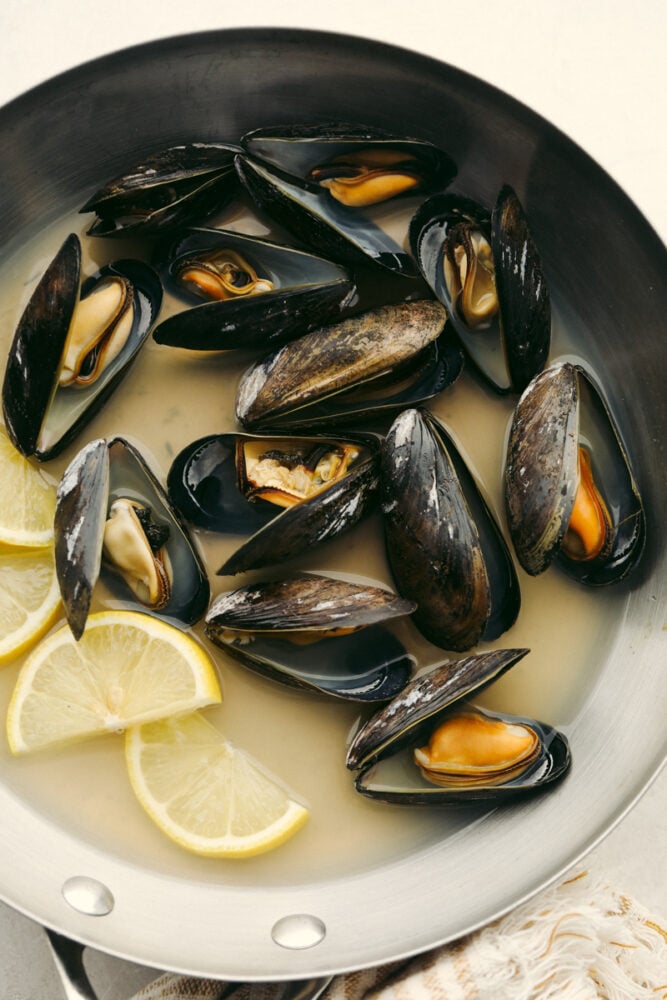
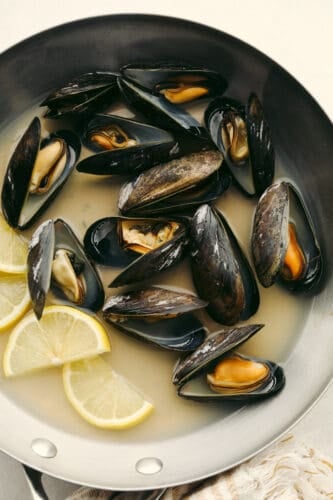
Mussels in a pot that are cooked and ready to eat.

Steamed Mussels

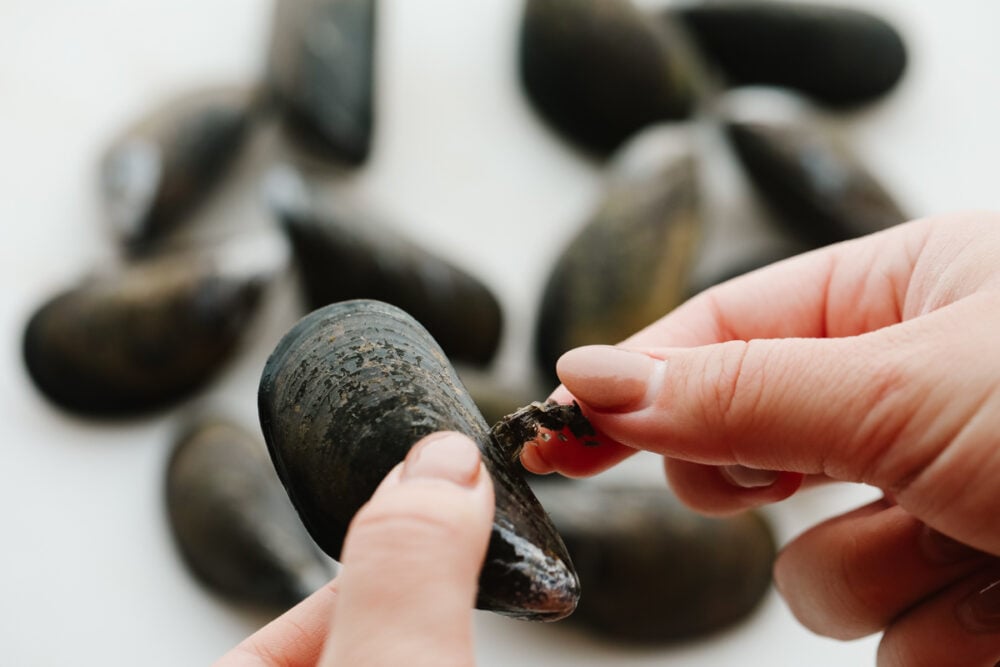
If you are wondering what mussels are and what they taste like then I am here to tell you! Mussels are similar to clams and oysters in texture and taste. They look fancy but they are actually one of the easiest seafood to prepare! The outside is typically a dark black or blue color and the inside is cream or pink. They have something called a “beard” on the outside that is a stringy tag that you need to pull of before cooking!

Now that you know what a mussel is, the fun part is finding out what it tastes like! They have a texture that is sort of like a mushroom. It’s firm but soft at the same time. It doesn’t taste fishy at all, it just has a hint of a salty taste. The texture should never be rubbery… This means that they have been overcooked! Because the flavor of a mussel by itself is light, then they take on the taste of whatever flavor you are cooking them in! These mussels are SOO GOOD. You really just need to try them and find out! Pair them with a Crostini, Grilled Asparagus, and some Pesto Pasta and you have yourself a delicious meal!

What You Need to Make Mussels

You only need a couple of ingredients to make these steamed mussels! See the recipe card below for a list of exact ingredient measurements.

  • Mussels: The key to this recipe! I have posted some tips below on how to pick them out at the store.
  • Chicken broth: I used chicken broth instead of water so that these took on more of a flavor when steaming!
  • White wine: The alcohol will cook out but this adds a delicious flavor to the recipe!
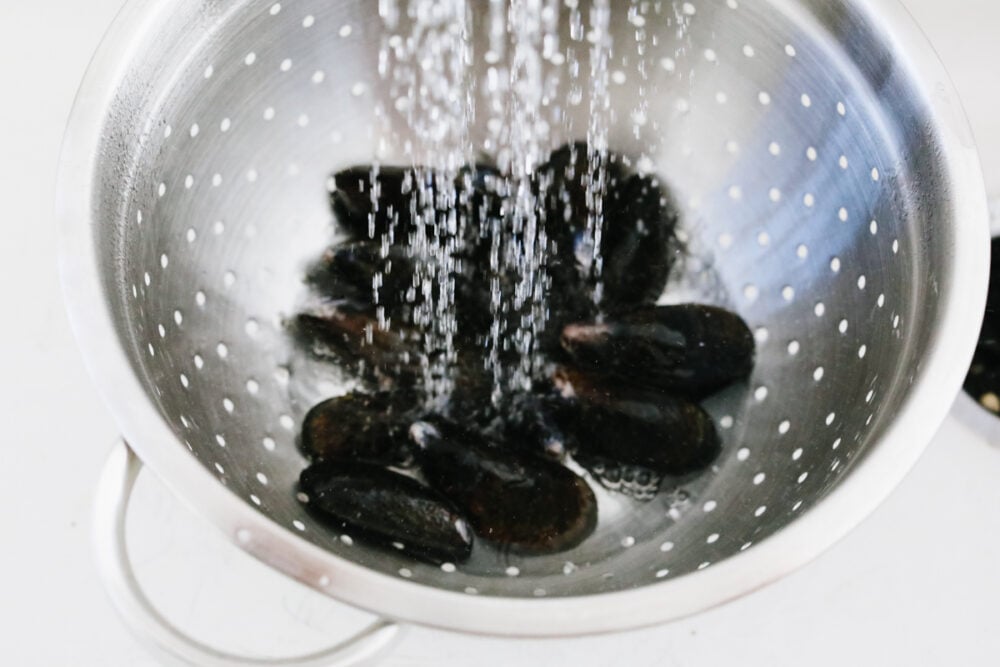
Mussels being rinsed with water.

Let’s Steam Those Mussels!

Now that you know all about mussels, it’s time to make them! These will only take you about 20 minutes and then you will know why these are so hard to resist!

Prepare the Mussels

  1. Clean and debeard: Right before you cook them then rinse them in cold water. If the shell is open, tap on the shell to close before steaming. Check to see if they need to be debeard. This looks like a little tag on the side of the shell. Firmly tug the beard out.

Add the broth and wine to a saucepan:

  1. Cook: Cook in a medium sized sauce pan and then add the chicken broth and white wine. Bring to a simmer and let the alcohol cook out.

Add the Mussels

  1. Add mussels: Add them to the boiling water and cover to let steam. Cook for 5 minutes and then remove the lid and check to see if they have opened. If they have not yet opened add the lid back and cook for another minute. Discard the mussels with the shells that have not opened by now.
  2. Serve: Serve them as desired.
A picture showing someone pulling the beard off of the shell.

How to Pick Mussels

It’s important to know what to look for when buying mussels. This will make or break your recipe. Here are some tips to make this part of the process easier!

  • Where do I find mussels? You should be able to find them at the seafood counter of your local grocery store!
  • How many should I get? This depends on if you are serving this as a main course, side dish or an appetizer. For a main dish, the suggested amount is 1 pound per person!
  • How to pick which ones to buy? You should look for farm-raised mussels. These kind are always a good choice because the quality is better.
  • Buy extra: When you are buying mussels, there will always be some that are cracked or dead. So buy a few extra so that you don’t have to worry!
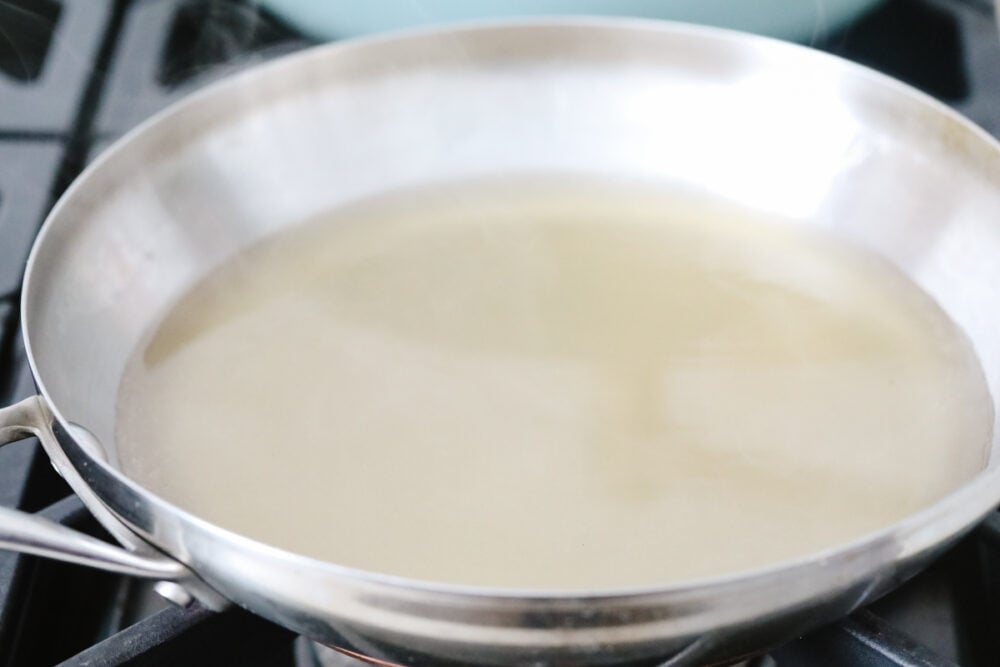
A pan filled with white wine and chicken broth.

How to Store Mussels Until You Cook Them

Did you know that mussels are alive when you buy them? This means that you need to have a plan on what to do with them between then and when you plan on cooking them! Dead mussels will make you sick so follow these tips… They are important!

  • In the fridge: Your mussels will come in a netted bag. Keep them in this until you plan on cooking them.
  • Keep them cold and wet: You can wrap a wet paper towel around the bag to keep them wet while in your fridge. This is key!
  • DON’T store them in water or a sealed bag: Because they are alive, they need to breathe!
  • How long can I store them for? You can store your mussels this way for 24 hours or less. The more fresh they are, the better when it comes to eating them!
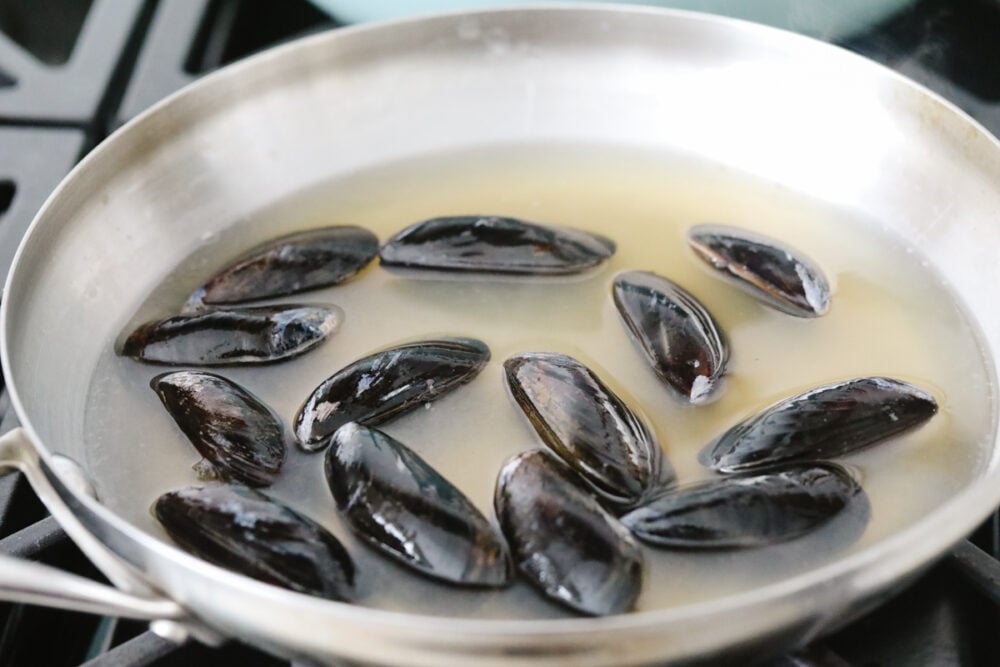
Uncooked mussels in a pan with white wine and chicken broth.

How to Clean Them

Anytime that you are working with seafood, it’s important to know how to safely clean it! Here are some tips on how to clean your mussels.

  • Don’t soak them: You just want to give them a nice rinse with cold water. No soaking necessary.
  • Scrub: If your mussel has dirt on it, scrub the shells with a brush or use your fingernails to remove any dirt.
  • Debeard: If your mussels have stringy tags attached to the outside of the shell, pull that off before you cook them. To remove it, pull it towards the hinge of the shell. ONLY DEBEARD WHEN YOU ARE READY TO COOK. Removing the beard will cause the mussel to only have a few minutes left to live. Only do this when you are ready to cook them immedietely!
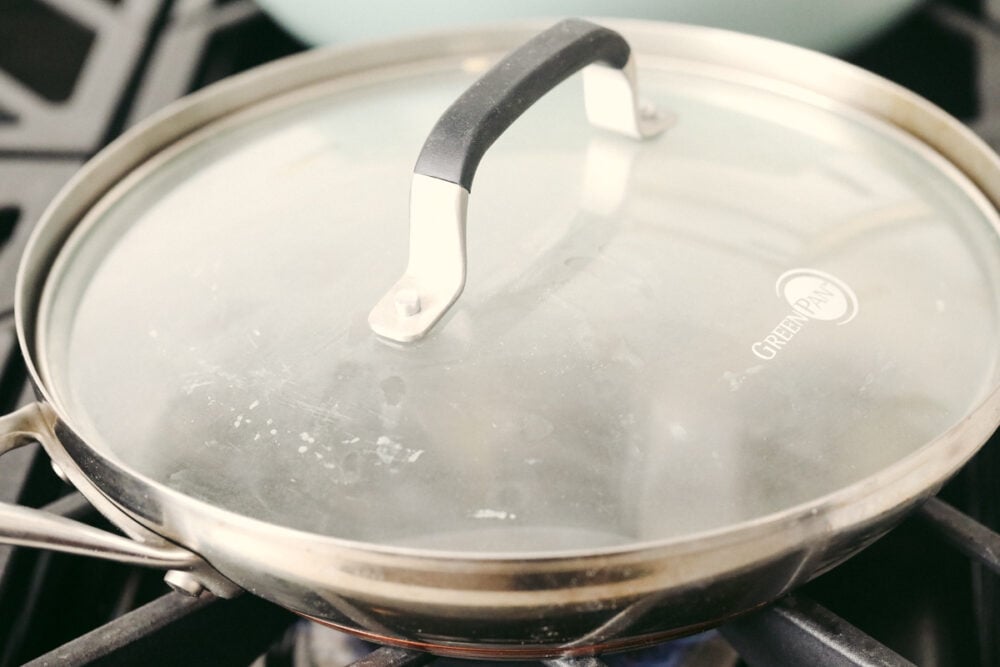
A pan on the stove with a lid that's full of steam.

How to Store Leftovers

The steamed mussels taste delicious for leftovers. Here is how you can safely store them to eat later!

  • Refrigerator: Once they have cooled, place the mussels in an airtight container in the fridge. They will last for 3-4 days!
  • Freezer: If you want to freeze your steamed mussels, you need to wait for them to cool. Then, put them in an airtight container or freezer bag. (Make sure to label it with the date!) They will last for 2-3 months in your freezer.
  • Reheating: If they are frozen, thaw them in the fridge overnight. Once thawed, place your mussels in the microwave and cover them. Cook for about 30 seconds or until heated through. Enjoy!
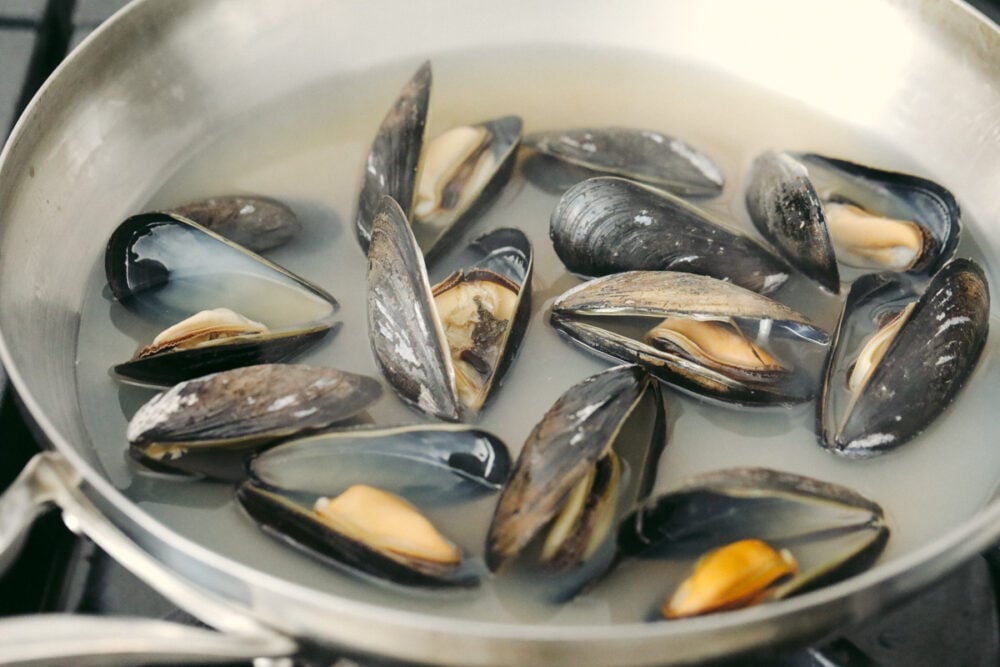
Mussels that are fully cooked and open in a pan.
Print

How to Cook Steamed Mussels

These steamed mussels are easy, elegant, and delicious! They are perfect for any dinner party and you won't be able to stop after just one! 
Course Appetizer, Dinner, Main Course
Cuisine American
Keyword how to cook mussels, mussels
Prep Time 5 minutes
Cook Time 15 minutes
Total Time 20 minutes
Servings 4 people
Calories 167kcal
Author Alyssa Rivers

Ingredients

  • 3-4 pounds mussels or desired amount
  • 2 cups chicken broth
  • 1/4 cup white wine

Instructions

Prepare the Mussels:

  • Right before you cook the mussels. Rinse them in cold water. If the shell is open, tap on the shell to close before steaming. Check to see if the mussels need to be debeard. This looks like a little tag on the side of the shell. Firmly tug the beard out.

Add the broth and wine to a saucepan:

  • In a medium-sized saucepan add the chicken broth and white wine. Bring to a simmer and let the alcohol cook out.

Add the mussels:

  • Add the mussels to the boiling water and cover to let steam. Cook for 5 minutes. Remove the lid and check to see if the mussels have opened. If they have not yet opened add the lid back and cook for another minute. Discard the mussels with the shells that have not opened by now.
  • Serve the mussels as desired.

Nutrition

Calories: 167kcal | Carbohydrates: 7g | Protein: 21g | Fat: 4g | Saturated Fat: 1g | Polyunsaturated Fat: 1g | Monounsaturated Fat: 1g | Cholesterol: 49mg | Sodium: 927mg | Potassium: 660mg | Sugar: 1g | Vitamin A: 280IU | Vitamin C: 22mg | Calcium: 54mg | Iron: 7mg


from The Recipe Critic https://ift.tt/3wH4fpf
https://ift.tt/3DgPtb4

शनिवार, 13 नवंबर 2021

Classic Honey Glazed Ham

This honey-glazed ham is coated with a delicious brown sugar and sweet honey glaze! It is tender and juicy and goes with everything which makes it ideal for your holiday meal!

The holidays at our house always have meat that’s the star of the show! Try this Juicy Butter Herb Turkey RecipeGarlic Butter Herb Prime Rib Recipe, or Best Ever Beef Wellington Recipe for more delicious recipes to enjoy for your holiday dinner.

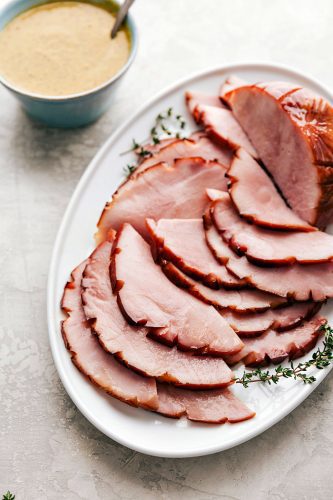
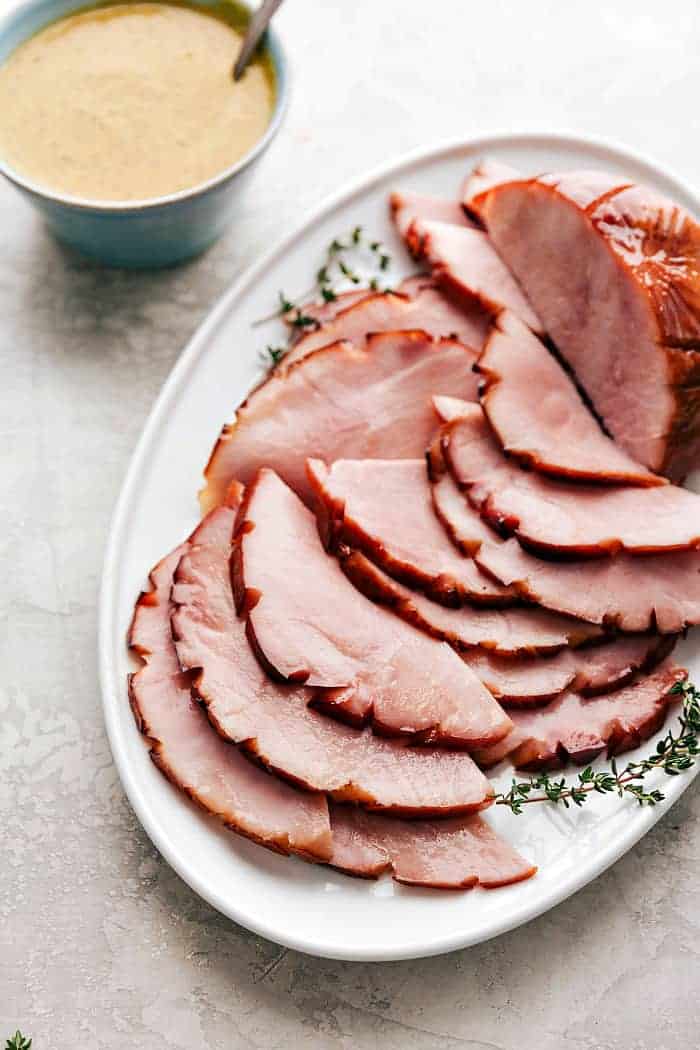
Ham sliced on a plate

Honey Baked Glazed Ham

Ham is one of my favorite ways to bring a delicious meal to a holiday meal. This honey-glazed ham is one of the most tender and juicy hams you will ever have. Sweet, and savory honey ham will be your show-stopping meal on Christmas Day. I also love how ham can go with every single side that I make to go with it! Oh, and did I mention that the leftovers of this are so good?! Use them for Ham and Cheddar Sliders, Ham and Cheese Quiche or even Southwest Baked Ham and Eggs Potato Hash!

A lot of people ask me questions on how to bake the perfect ham. It is pretty simple but there are a few tricks to get your ham to taste fantastic. My favorite glaze to use is a simple honey glaze and it gives the ham a perfectly sweet flavor. Once you have made it once then you will realize how simple and easy it is to make an impressive meal! It will be a staple for your holidays just like it is for mine!

Ingredients You Need for Honey Baked Glazed Ham

I love the smell of ham baking in the oven, it gets me so excited for the holidays! See the recipe card below for a list of exact ingredient measurements.

  • Ham: You want to get a ham that is about 5 pounds and precooked.
  • Honey: I use honey for the glaze because the sticky texture is perfect and sweet!
  • Butter: This helps to combine all of the ingredients.
  • Dark corn syrup: This is a great thickener and adds to that deliciously sweet taste.
  • Brown sugar: The brown sugar turns into a caramel taste when melted with butter.
  • Whole cloves: This is a strong and sweet with a little bitterness to it.

How to Cook a Precooked Ham

You can get a precooked ham at your local grocery store! If you choose a larger ham simply double the glaze mixture to have enough to cover over your ham. 

  1. Let your ham rest: Take the ham out of the refrigerator and allow it to rest 30 minutes before cooking. Preheat the oven to 325 degrees.
  2. Cook glaze mixture: Prepare the glaze by heating honey, butter, dark corn syrup, and brown sugar in a medium saucepan on medium low heat.
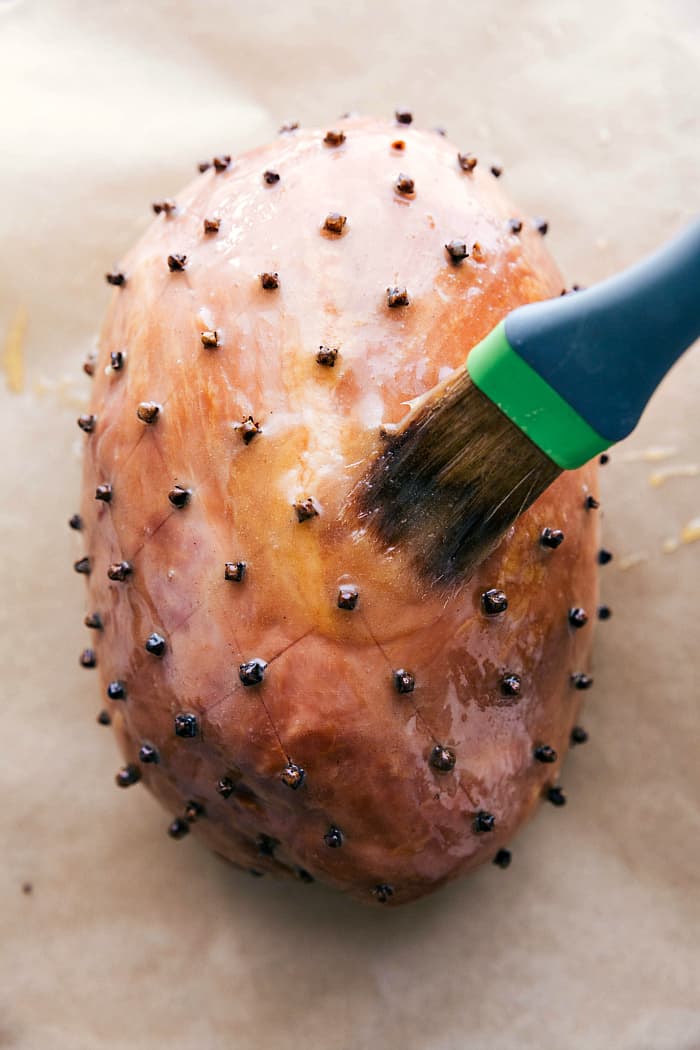
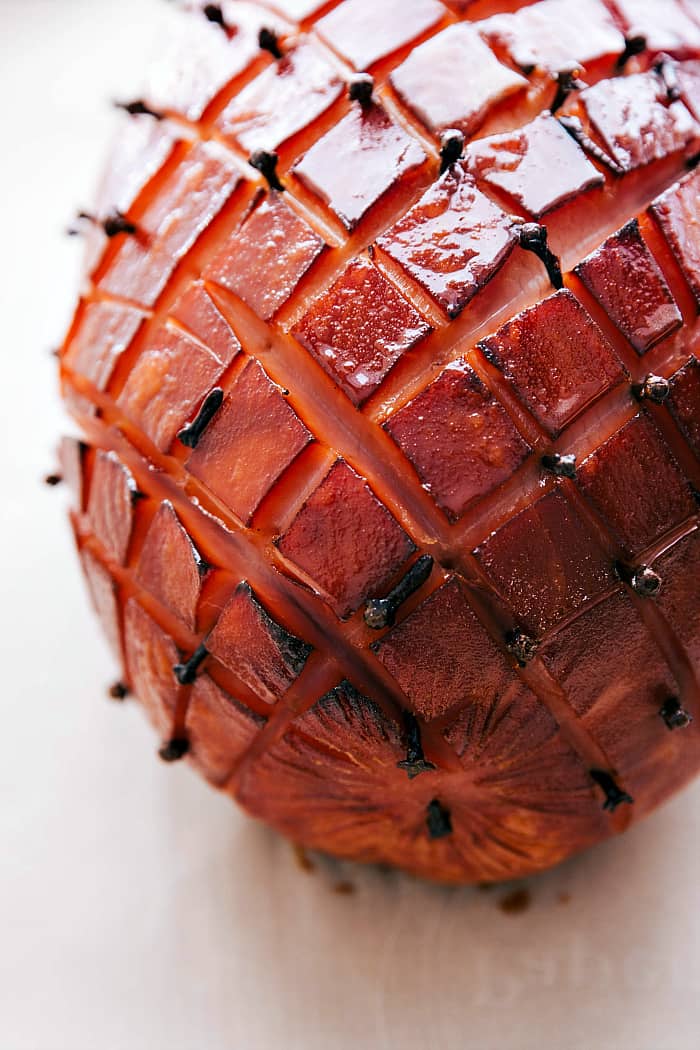
  3. Prepare the ham: Line a 9×13 inch pan with aluminum foil. If scoring the ham, lightly score the top into diamond shapes and place the ham in the pan. If using whole cloves, put them in between the lines you scored, but remove before cutting and eating.
  4. Brush the glaze on and bake the ham: Brush the glaze on top and create a foil tent over the ham. Bake the ham according to how many pounds you have. Usually 15 minutes per pound. Brush the glaze over the ham every 15 minutes.
  5. Broil: Remove the foil tent once your ham is all cooked! Caramelize the top by turning the oven to broil and letting the ham get dark for about 3-5 minutes. Then, remove the ham from the oven and pour remaining glaze over the top.
Ham that is scored and being brushed with a sweet glaze mixture

How Do you Know When your Ham is Cooked?

Most hams are already precooked. Essentially you are warming up your ham in the oven. The thickest part of the ham needs to be cooked to at least 145 degrees Fahrenheit according to the proper food safety temperature.

Honey glazed ham scored, baked and broiled.

Tips for Making the Best Honey Glazed Ham

Classic honey glazed ham is simple and easy to make with just a few ingredients. This sweet glaze is so good and tenderizes the ham while baking. These tips will help you make your holiday dinner what everyone is raving about!

  • Picking your ham: Pre-cooked and bone in is one type of ham. Or, there is precooked without the bone. Either one will work for this recipe! With these choices the ham is already juicy and great for left overs.
  • Scoring your ham: Before I cook my ham, I score the top in diamond shapes. This not only adds a beautiful presentation, but allows the glaze to seep into the ham. You can also put whole cloves into the cracks, but remove them before carving and eating.
  • Cutting the Ham:  Once your ham is fully cooked, it can be served at warm or cool temperatures but never straight out of the oven. Let the ham rest for about 10 minutes before cutting. And ham can be stored in the refrigerator for up to a week.’
  • Baking the ham: Place your ham cut-side-down into your baking pan. This will help the meat stay juicy with the tinfoil over top.
  • Use aluminum foil: Make sure to use aluminum foil or a cover over your honey glazed ham so it does not dry out.
  • Condiments: Serve with yellow mustard or spicy brown mustard at the table. You can also add a tablespoon of spicy mustard or honey mustard to the glaze for a hint of sweet and spicy flavor.
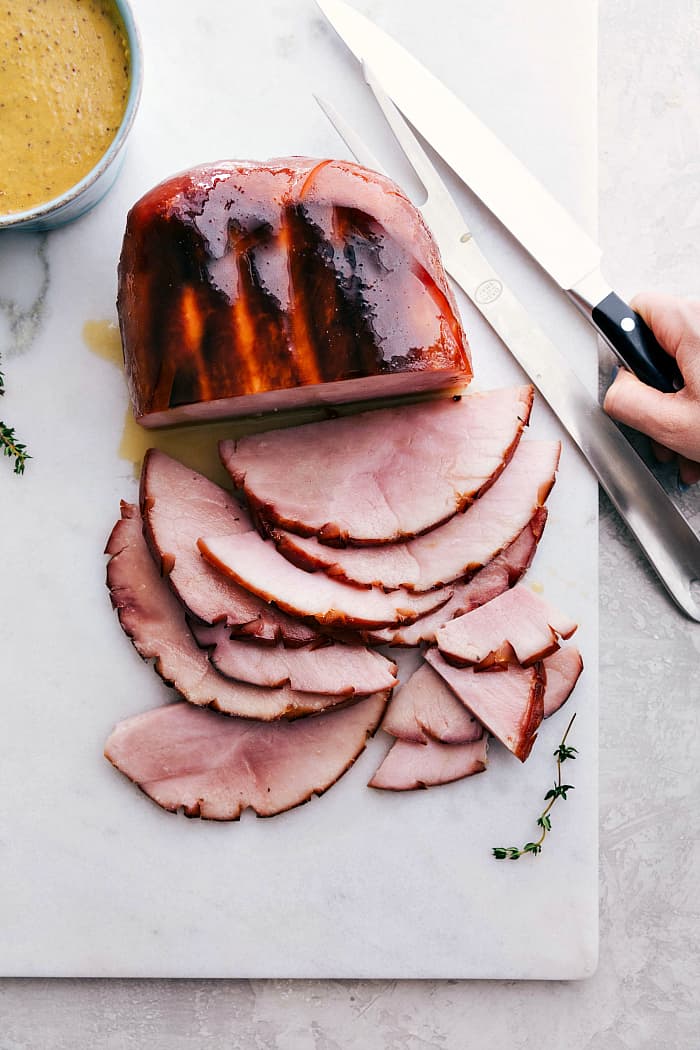
Ham sliced on a cutting board

Frequently Asked Questions

There are a few questions that always come up when cooking a ham. So, I thought I would put them all together so then you could have them answered all in one place!

  • How much ham per person? Usually it is about ½ pound of ham per person. If you are wanting left overs at the end estimate 1 pound per person when buying your ham.
  • How big of a ham should I buy? This is a great question for baking the ham. You may have several people coming but the important part is how big your pan is that will be baking it in. A 6 to 8 quart pot or 12 x 16 pan fits about a 6 to 7 pound ham.
  • Will a ham cook overnight? Yes! This is a great idea when needing more time for other things during the day. Simply preheat the oven to a 275 degrees. Follow the instructions for preparing and baking the honey glazed ham. Bake uncovered for 6 to 7 hours. While baking continue to spread the glaze over the ham.
  • Do you cover your ham? Yes, this is a great way to avoid your ham from over baking and becoming dry. At the end of baking the ham remove the aluminum foil and broil it for a crisp outer layer.
  • Should I glaze the ham before cooking? Yes! Brush the glaze mixture over top and into the ham as much and best that you can. Continue to glaze the ham throughout the baking process every 15 to 20 minutes for best results. When the ham is finished cooking brush the remainder of the glaze mixture and broil the top and outside layer of the ham. This will leave a caramelized look and texture on your ham.
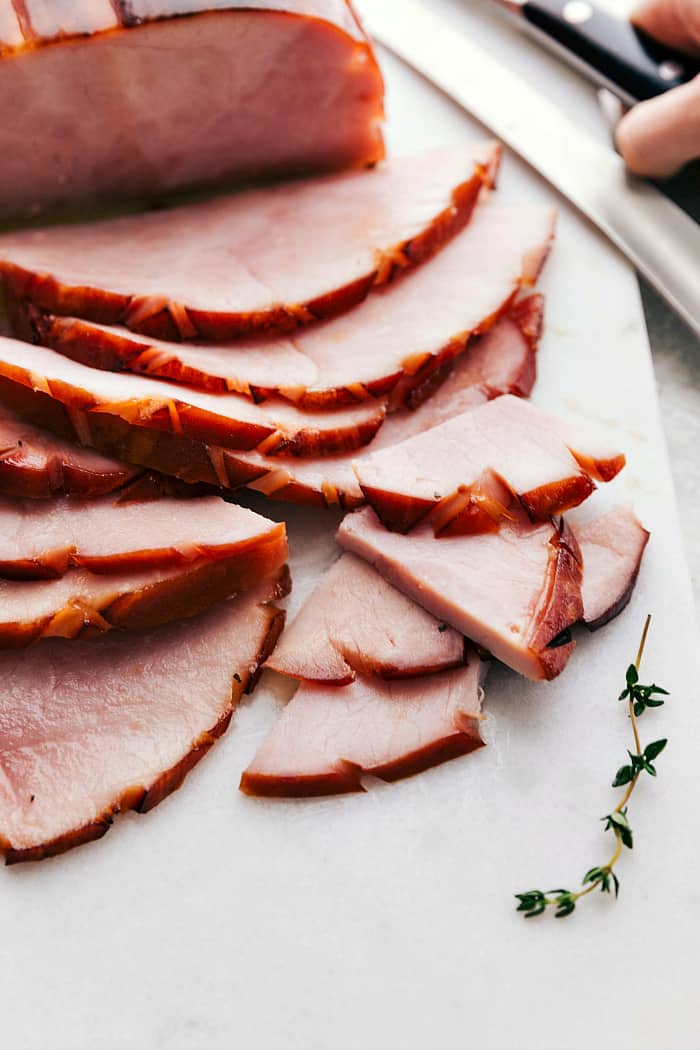
Honey glazed ham sliced on a cutting board.

Variations for Honey Glazed Ham

This is a tried and true honey-glazed ham favorite that we make year after year in our family. This Spiced Rub Brown Sugar Pineapple Glazed Ham or this Slow Cooker Honey Garlic Mustard Glazed Ham are other great ways to enjoy a classic ham recipe this holiday season. I love the traditional honey glazed ham recipe but there are some variations that can be made.

  • Sweetener: instead of honey try using maple syrup or add a little extra brown sugar. 
  • Syrup: if you do not have dark corn syrup on hand, molasses works great in replace of it.
  • Spices: you can omit garlic clove if you would like. This is an optional ingredient and try cinnamon or nutmeg in replace of it.
  • Extra flavoring: add pineapple juice or apple cider over top. Even orange juice or cranberry juice for a fruitier flavor.
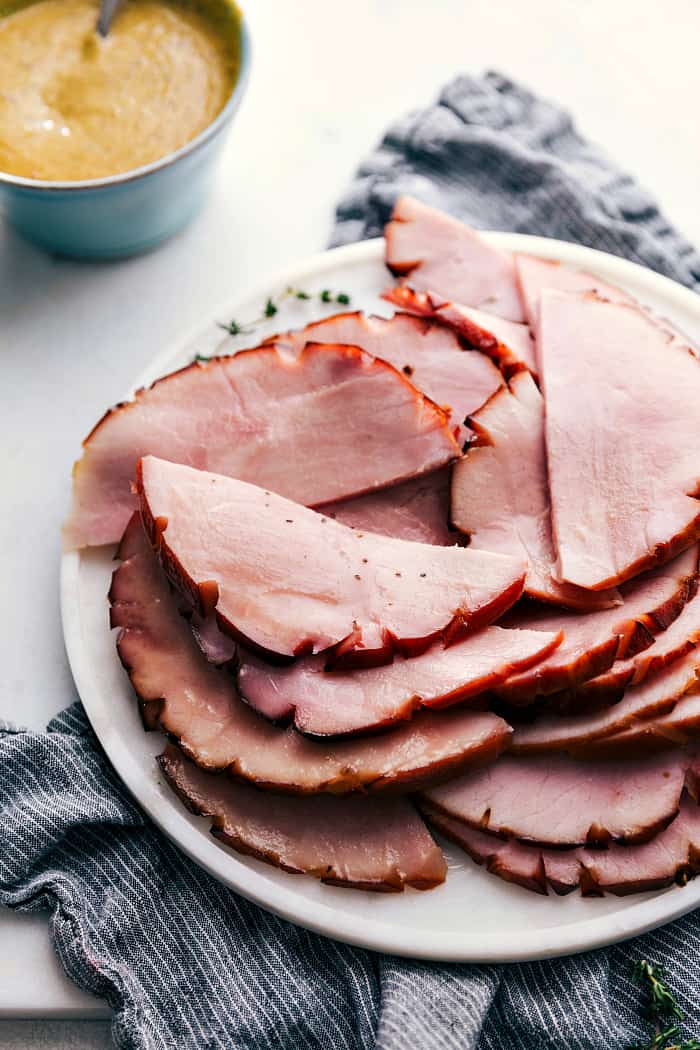
Honey glazed ham sliced on a plate.

How to Store Leftover Honey Glazed Ham

This honey-glazed ham is perfect for making ahead, storing for leftovers, and even freezing! Here are the best ways to store your honey glazed ham this holiday season:

  • Making honey glazed ham ahead of time: Place in the oven over night and cook at a low temperature warming it up slowly.
  • Refrigerate: Simply follow the instructions and bake your ham. Once it is cooled and rested, place in a ziplock bag or airtight container and store up to 1 week in the refrigerator.
  • Can you freeze honey glazed ham? Yes! This is a great meal to freeze for later. After your ham is cooked then place your ham (either sliced or not sliced) in a ziplock bag and lay flat for up to 1 month.
  • Warming up honey glazed ham: When you are ready to eat it then place your ham in the refrigerator and let it thaw. Reheat it in the microwave or oven until warmed through.
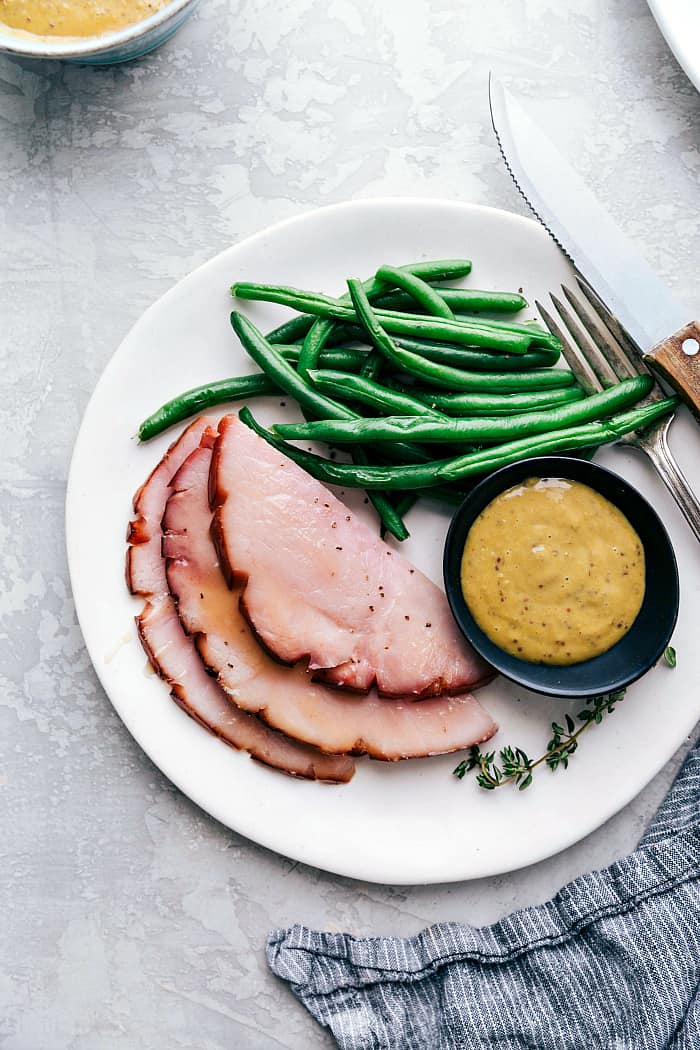
Ham sliced on a plate with green beans and honey mustard sauce.

A Reader’s Review

“I made this ham last night and it was a huge hit! The ham is so juicy and flavorful! Thanks for sharing!
-Cynthia
Print

Classic Honey Glazed Ham

This honey-glazed ham is coated with a delicious brown sugar and sweet honey glaze! It is tender and juicy and goes with everything which makes it ideal for your holiday meal!
Course Dinner, Main Course
Cuisine American
Keyword ham, honey glazed ham
Prep Time 20 minutes
Cook Time 1 hour
Total Time 1 hour 20 minutes
Servings 12 people
Calories 287kcal
Author Alyssa Rivers

Ingredients

  • 1 (5 pound) ham
  • 2 cup honey
  • 2/3 cup butter
  • 1/4 cup dark corn syrup
  • 1 Tablespoon brown sugar
  • whole cloves optional about ¼ cup

Instructions

  • Take ham out of the refrigerator and allow to rest at least 30 minutes before cooking. Preheat oven to 325.
  • Prepare the glaze by heating honey, butter, dark corn syrup, and brown sugar in a medium saucepan on medium-low heat.
  • Line a 9×13 in pan with aluminum foil. If scoring the ham, lightly score the top into diamond shapes and place the ham in the pan. If using whole cloves, put them in between the lines you scored, but remove them before cutting and eating. Brush the glaze on top and create a foil tent over the ham. Bake the ham according to how many pounds you have. Usually 15 minutes per pound. Brush the glaze over the ham every 15 minutes.
  • Once the ham is cooked, remove the foil tent and caramelize the top by turning the oven to broil and letting the ham get dark for about 3-5 minutes.
  • Remove the ham from the oven and pour the remaining glaze over the top. Cut into thin slices and enjoy!

Video

Notes

Updated on November 13, 2021
Original Post on December 16, 2018

Nutrition

Calories: 287kcal | Carbohydrates: 53g | Protein: 1g | Fat: 10g | Saturated Fat: 6g | Cholesterol: 27mg | Sodium: 105mg | Potassium: 36mg | Fiber: 1g | Sugar: 53g | Vitamin A: 315IU | Vitamin C: 1mg | Calcium: 8mg | Iron: 1mg


from The Recipe Critic https://ift.tt/2Br729V
https://ift.tt/2ClfUiO

Madeleines

Madeleines are the perfect mix between a cookie and a cake! Their gorgeous shell-like shape topped with some chocolate and powdered sugar makes this a treat fit for a king!

This cookie is perfect for the Holidays! For more treats to impress your guest with them try out these Soft and Delicious Alfajores Cookies, these Homemade Butter Cookies, and these perfectly Italian Cookies.

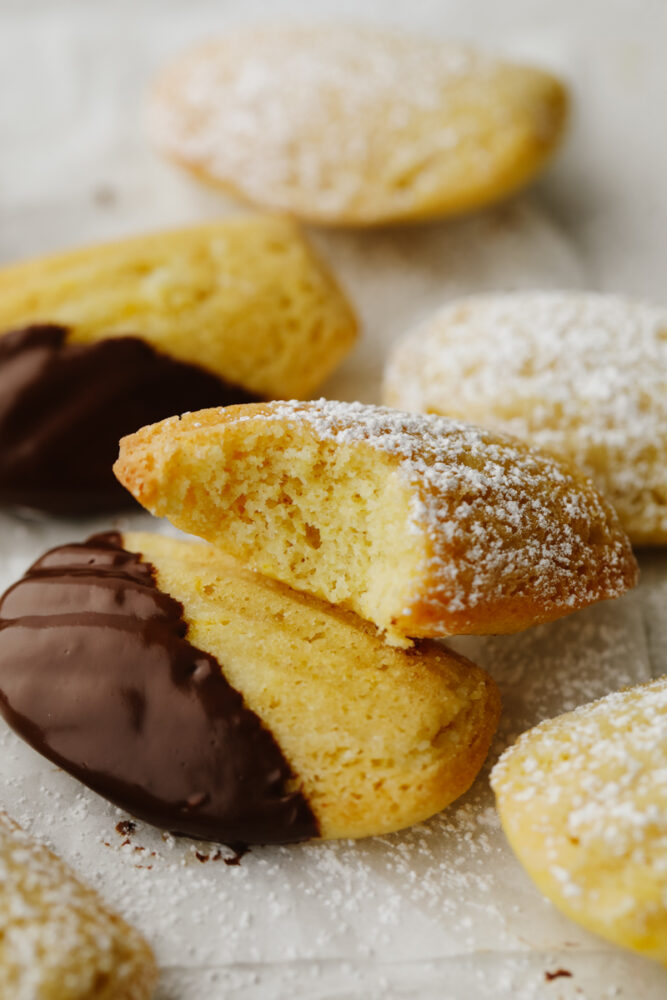
Powdered sugar and chocolate dipped madeleines.

What ARE Madeleines?

These amazingly delicious Madeleine cookies are from France! Even if you have never been to France, I am sure that you know that they are known for all of their delicious treats! These madeleines are a delicious cookie that has a sponge-like texture. So basically, they are like tiny little cakes that people call cookies. They are nice and airy and even though they look fancy, they are simple to make! That’s the beauty of so many French desserts… They can all be made in the comfort of your own home!

I love that this recipe uses a few simple ingredients but it somehow mixes up into a dessert that is SOO GOOD. I can’t stop at just one! Or two… The one thing that makes a madeleine a madeleine is its shape. It’s classically made into a mold that is shaped like a shell. It’s called a madeleine well. While this isn’t necessary to make the cookie taste fantastic, it will make everyone recognize exactly what they are! Go ahead and give these a try. Your guests will be so impressed!

Ingredients You Need to Make Madeleines

The ingredients for these cookies are simple and you probably already have everything in your kitchen! See the recipe card below for a list of exact ingredient measurements.

  • Butter: I used unsalted butter for this recipe! You are going to melt it and bowrn it so make sure that you pa close attention to that part!
  • Flour: You can use all purpose flour for this recipe!
  • Baking Powder: The baking powder helps these rise and give that sponge-like texture!
  • Salt: The salt will enhance the flavors of all of the ingredients.
  • Eggs: Plan ahead and set your eggs out before hand. room temperature ingredients mix better and help the dough have a better texture!  
  • Granulated Sugar: This will make these madeleines taste sweet!
  • Lemon Zest: This secret ingredient gives these madeleines a hint of lemon and fresh taste without overpowering the other ingredients.
  • Vanilla Extract: This adds a bit of flavor to the sweet sugar.
  • Butter: You will need some more unsalted butter for brushing in the pan
  • Powdered Sugar: This will be used to dust the tops of your madeleines and make them look fancy!

Let’s Bake Some Cookies!

These instructions are very detailed but it’s important to follow them closely when it comes to Madeleines! Don’t let the steps fool you into thinking this must be hard. It’s super easy, you can totally do it!

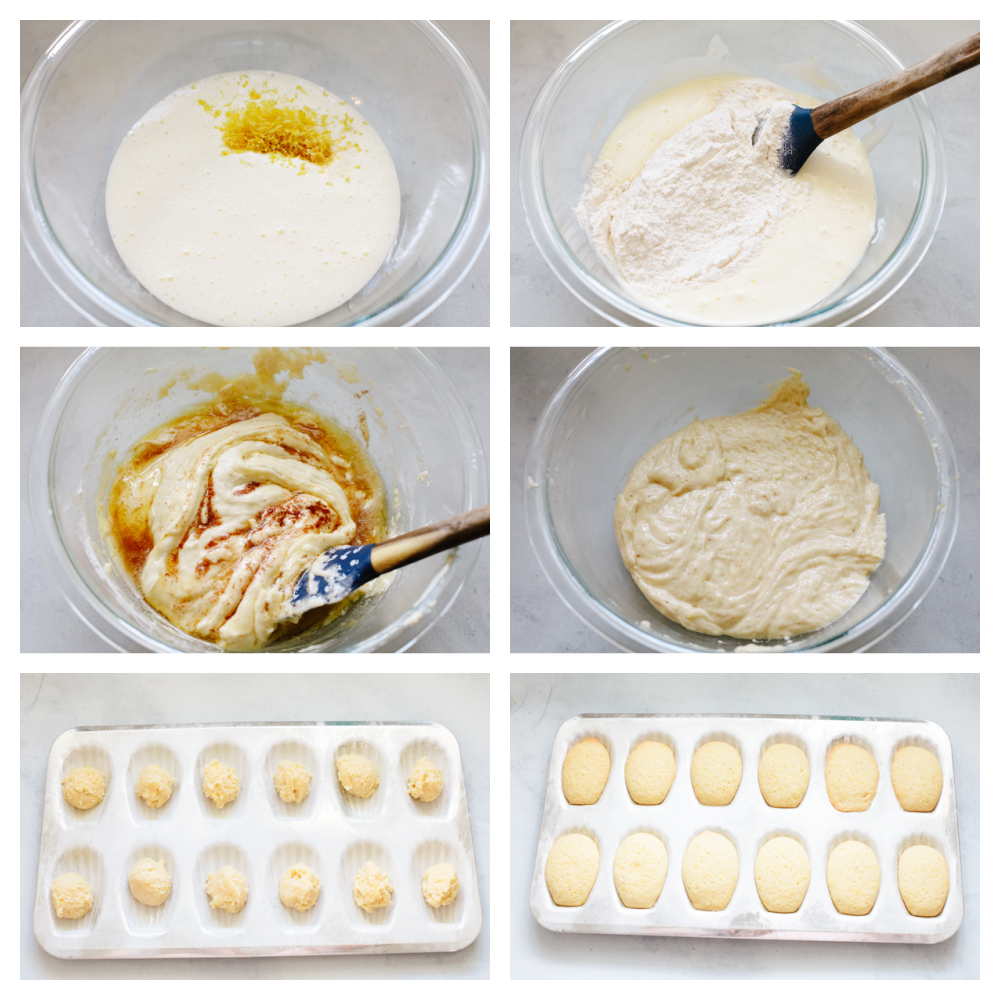
  1. Melt and brown the butter: Melt the butter in a heavy bottomed sauce pan and cook over low heat for about 10 minutes until browned. Then, pour into a small bowl and allow to cool while you prepare the rest of the batter.
  2. Whisk: In a medium bowl whisk together the flour, baking powder, and salt. Set aside.
  3. Beat eggs and mix in sugar, vanilla and lemon zest: In a large bowl add the eggs and sugar. Using either a stand mixer or hand mixer, use the whisk attachment to beat the eggs and sugar on medium-high speed until very thick and pale, about 5-6 minutes. Add the vanilla and lemon zest and fold in using a spatula.
  4. Fold and combine: Fold in the dry ingredients, mixing until just combined. Fold in the butter.
  5. Chill OVERNIGHT: Cover the bowl with plastic wrap, (make sure that it does not touch the batter). Then, put it in your fridge and refrigerate overnight.
  6. Preheat and prep: bout 20 minutes before you’re ready to bake, preheat the oven to 375°. Prep your madeleine pan by brushing the pan with melted butter and lightly dust it with flour.
  7. Scoop into well: Scoop a generous tablespoon in the center of each madeleine well. If the batter is still quite thick, gently press it a little flatter into the well. 
  8. Bake: Bake for 9-10 minutes or so, until the bellies have risen and are turning golden brown. The edges should just be starting to brown.
  9. Cool: Let the madeleines cool in the pan for a few minutes before gently loosening them from the pan. Let them finish cooling on a cooling rack.
  10. Topping: Dust with powdered sugar (or dip into chocolate) just before serving!
6 pictures showing the steps for how to make madeleine dough.

Toppings

I absolutely LOVE these tried and true madeleines! They are so delicious and have such an amazing texture! And another thing that is so great about them is how you can top them with different things to make them look and taste a bit different!

  • Chocolate: Try dipping these in some melted chocolate or white chocolate. Just dip one half so that they look extra fancy!
  • Change the color: You can try different colors of chocolate so that you can make these for certain occasions! I especially love doing that to make them festive for the holiday season!
  • Add sprinkles: Once you have dipped them in chocolate on one end, top that with some sprinkles. You can make them extra fancy by using gold sprinkles. Or, tie them into whatever occasion it is! Red and green for Christmas, pink for Valentine’s Day or red, white and blue for the 4th of July! This is such a cute way to make them mfit just what you need!
A madeleine with a bite taken out of it.

How to Store Leftovers

These madeleines are SOO GOOD that you will be lucky if you have any leftovers! Here’s how you can store them and eat them later!

  • On the Counter: Go ahead and place them in an airtight container and store them on your counter for 3-4 days.
  • Freezer: If you decide to make them ahead and freeze your madeleines, you totall can! Just make sure to only freeze the ones that are plain (without chocolate or powdered sugar.) Wrap the madeleines in a double layer of plastic wrap. Then, place them a in a ziplock bag (labeled with the date) in the freezer. They can last in the freezer for up to 3 months. Take them out to thaw and dust them with powdered sugar right before serving!
Print

Madeleines

Madeleines are the perfect mix between a cookie and a cake! Their gorgeous shell-like shape topped with some chocolate and powdered sugar makes this a treat fit for a king!
Course Dessert
Prep Time 25 minutes
Cook Time 10 minutes
Chill 8 hours
Total Time 8 hours 35 minutes
Servings 18 Madeleines
Author Alyssa Rivers

Ingredients

  • ½ Cup Unsalted Butter melted and browned
  • 1 Cup All-purpose Flour
  • 1 Teaspoon Baking Powder
  • ¼ Teaspoon Salt
  • 2 large Eggs Room Temperature
  • ½ Cup Granulated Sugar
  • 2 Teaspoons Lemon Zest
  • 1 ½ Teaspoons Vanilla Extract
  • Butter for brushing in the pan
  • Powdered Sugar For Dusting

Instructions

  • Melt the butter in a heavy-bottomed saucepan and cook over low heat for about 10 minutes until browned. Pour into a small bowl and allow to cool while you prepare the rest of the batter.
  • In a medium bowl whisk together the flour, baking powder, and salt. Set aside.
  • In a large bowl add the eggs and sugar. Using either a stand mixer or hand mixer, use the whisk attachment to beat the eggs and sugar on medium-high speed until very thick and pale, about 5-6 minutes. Add the vanilla and lemon zest and fold in using a spatula.
  • Fold in the dry ingredients, mixing until just combined. Fold in the butter.
  • Cover the bowl with plastic wrap, ensuring it does not touch the batter, and refrigerate overnight.
  • About 20 minutes before you’re ready to bake, preheat the oven to 375°. Prep your madeleine pan by brushing the pan with melted butter and lightly dusting it with flour.
  • Scoop a generous tablespoon in the center of each madeleine well. If the batter is still quite thick, gently press it a little flatter into the well.
  • Bake for 9-10 minutes or so, until the bellies have risen and are turning golden brown. The edges should just be starting to brown.
  • Let the madeleines cool in the pan for a few minutes before gently loosening them from the pan. Let them finish cooling on a cooling rack.
  • Dust with powdered sugar just before serving!


from The Recipe Critic https://ift.tt/3nbQcVv
https://ift.tt/3n8ubqE