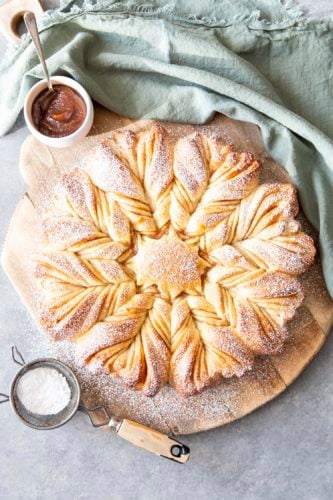
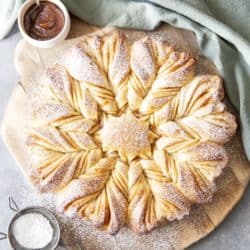
Star Bread is a visually stunning, decadent tasting sweet bread, that will be the talk of the table. Whether it’s for the holidays or a special occasion this eye-pleasing, mouth-watering bread is the way to go.
Bread is the ultimate comfort food for me, it’s so luscious and satisfying, especially when it’s homemade with love. Whether it’s this recipe or Grandma’s Perfect Homemade Bread Recipe, Easy Homemade Naan Bread, or Easy Cheesy Garlic Bread, they will all hit the spot!

Christmas Star Bread
I’m not entirely sure why this is called Star Bread, but I’m guessing it has to do with not only the shape but the fact that it will quite literally be the star of the meal. This isn’t just bread, it’s art. And it’s art you can eat! Everyone will not only rave about how beautiful and intricate your star bread looks but the fact that it is simply delicious. Make it for breakfast or brunch. In fact, make it an entire meal with this Homemade Breakfast Sausage, this Eggs Benedict with Hollandaise Sauce or these amazing Orange Cranberry Muffins!
Now before you say to yourself, that looks too hard. Let me tell you it’s super easy. Truly! Anyone who can use a pizza cutter or even a knife can make this bread. If you are worried about your cutting skills you can even use a template, or a big bowl turned upside down to cut around to get it perfect. The mesmerizing swirls and beautiful shape of this star bread all add to its elegance. The sweet filling isn’t just for show, it is just as rich and tasty as it is beautiful.
Ingredients You Need to Make Star Bread
This is your basic enriched dough with milk and butter added for increased structure and flavor. Most of these ingredients you might already have on hand. See the recipe card below for all of the ingredient measurements.
- Milk: Use whole or 2% milk if you can, it helps the dough become extra soft when baked.
- Butter: This adds incredible flavor.
- Instant Yeast: This can be made with active yeast too.
- Sugar: The sugar is what feeds the yeast.
- Salt: This actually retards the yeast from getting too active and adds important flavor to the bread.
- Flour: I used all purpose flour. Unbleached flour also works!
Apple Filling
- Apple butter: Make your own for incredible flavor, or you can purchase at your store.
- Egg wash: Helps create that deep golden color and stick it all together.
- Egg: I like to use large eggs at room temperature.
- Milk: This helps to mix everything all together!
- Powdered sugar: This is optional and used to dust the top if the baked bread. It looks stunning!
Creating This Amazing Pull Apart Bread
Because of the extra richness, the star bread will rise slightly slower than usual. So don’t worry if it isn’t rising as fast as you think it should. Follow these step-by-step instructions and then you will see just how simple this is!
- Scald: In a small saucepan add the milk and over medium heat bring to a simmer, stirring occasionally. Turn the heat off and add the cubed unsalted butter. Stir until the butter melts completely. Pour the hot milk mixture into a stand mixer bowl and set aside to cool to below 110 degrees F.
- Bloom: When the milk the mixture is cool enough then add the yeast and stir. Let it sit for 5 min to bloom.
- Mix: In a medium bowl, add the flour, sugar, salt and mix to blend. Then, transfer the flour mixture to the stand mixer bowl with the warm yeast and mix gently.
- Knead: Using a dough hook on speed 2 knead for about 7-10 min. The dough should start pulling away from the side of the bowl.
- Rise: Oil a glass bowl and your hands. Scrape the dough out of the mixing bowl and then shape it into a ball in your hands and place it in the oiled bowl. Over, and let rise in a warm place for 1-2 hours until at least doubled in size
Forming the Star
- Cut: Turn the dough out onto a lightly floured surface and cut into 4 equal portions. Shape into balls.
- Roll: Roll on dough ball out into a circle about 9″-10″ in diameter. Place it on a piece of parchment paper and spread 2 tablespoons of apple butter over it.
- Layer: Roll another dough ball out to the same size as the first one and place it on top, spread another 2 Tablespoons of apple butter over the top. Repeat for the 3rd and 4th dough ball. You should end up with 4 layers of dough and 3 layers of apple butter.
- Mark: With the back of a round cookie cutter or a cup, mark a 3″ circle in the middle. Cut the dough into 16 sections leaving the 3″ circle in the middle untouched.
- Twist: Take two sections away from each other and press the end together to form the star point. You should end up with 8 star points. Then, cover it and let rise for 20 minutes.
- Bake: Beat the egg with a tablespoon of milk and brush it lightly over the star bread. Bake for 30 min until golden brown. Dust with powdered sugar before serving.

Tips and Info for the Best Star Bread Ever
Working with yeasted bread can be intimidating but don’t stress! It’s really simple. If you feel like you need to practice try these favorites, Copycat Texas Roadhouse Rolls, Quick 45 Minute Cinnamon Rolls and Homemade Parker House Rolls. You’ll be an expert in no time, and adding star bread to your rotations will be excellent. It’s such gorgeous bread!
- Yeast: For this recipe I used instant yeast, which means you don’t have to mix it with the warm milk first if you don’t want to. Active yeast means you need to activate it. Which means you will definitely want to mix it with the warm milk first to feed it and to get it going.
- Warm Milk: Make sure your milk is below 110 degrees F before you add the yeast or you’ll kill it. But also make sure it’s above 80 degrees F or it won’t activate it, it will be too cool. If you have a thermometer then use that for best results.
- Shortcut: If you don’t trust your bread making skills you can use frozen bread dough. Use two loaves of frozen bread dough. Once it’s thawed then cut each loaf in half to create your 4 circles.
- Don’t sweat it: Even if your circles aren’t perfect, most of the time mine are not, don’t worry about it. It always seems to come out just as beautiful and tastes just as amazing.
- Twist: I found that you only need to twist the sections twice.

Christmas Bread Variations
There are multiple ways to fill this bread. The apple butter is one of my favorites though. Its silky smooth sweetness is the perfect balance of tart, sweet, and spice. The variations for this are endless.
- Cinnamon and Sugar
- Your favorite Jam (raspberry, strawberry, apricot…)
- Nutella
- Orange using butter, orange juice, orange zest and sugar
- Cinnamon, nuts and raisins
- Make a glaze with powdered sugar, milk and vanilla to drizzle over the top instead of the powdered sugar.
- Make it savory with pesto, tomato sauce, herbs, pepperoni, sausage, or cheese , etc.

Storing Baked Star Bread
This bread is so delicious, especially as leftovers! Here is how you can store it for later!
- Room temperature: Once your bread has cooled then go ahead an place it in an airtight container. Keep at room temperature for up to 4 days. Freeze for up to 3 months.
- Freeze: If you want to freeze this bread then you totally can! Once it’s cooled then wrape it in plastic wrap and then tinoil. Then, label it with the date. It can stay in your freezer for up to 3 months! Once you are ready to eat, let it come to room temperature and then enjoy!
More Delicious Breakfast Recipes to Try
Breakfast
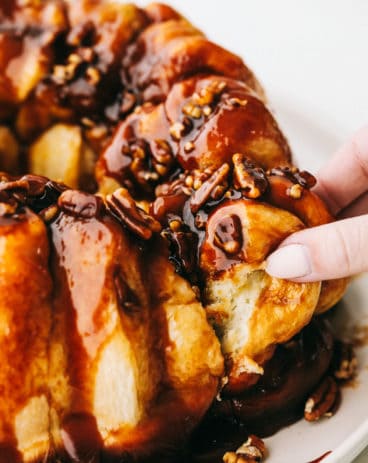
Sticky Buns- A Family Favorite Recipe!

Breakfast
The Best Breakfast Casserole
Breakfast
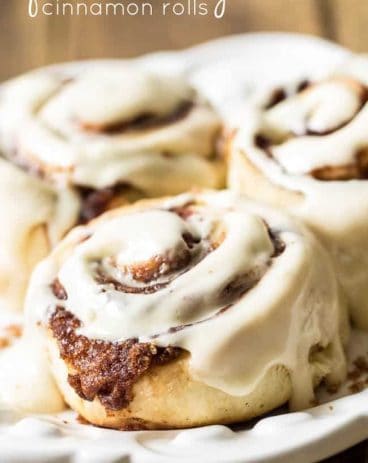
Quick and Easy Cinnamon Rolls

Star Bread
Ingredients
Dough
- 1 cup whole milk
- 2 ounces unsalted butter
- 2 teaspoon instant yeast
- ¼ cup granulated sugar
- 1 teaspoon kosher salt
- 2 ½ cups all-purpose flour
- Extra flour for rolling
Filling
- 6 tablespoon of apple butter
- Egg wash
- 1 large egg
- 1 tablespoon milk
- Powdered sugar for dusting
Instructions
-
Add milk to a small saucepan and bring to a simmer over medium heat stirring occasionally. Turn off the heat and add cubed unsalted butter to the hot milk, stirring until the butter melts completely. Pour the hot milk mixture into a stand mixer bowl and set it aside to cool to below 110°F.
-
When the milk mixture is cool enough, stir in the instant yeast and let it sit for 5 minutes to rehydrate.
-
In a medium mixing bowl, add flour, sugar, and salt, stir to distribute evenly. Transfer the flour mixture to the stand mixer bowl with the warm liquid mixture, and knead with the dough hook on speed 2 for about 7 – 10 minutes. The dough should start pulling away from the side of the bowl.
-
Oil a glass bowl and your hands. Scrape the dough out of the mixing bowl and shape it into a ball in your hands and place it in the oiled bowl. Cover, and let rise in a warm place for 1 – 2 hours until at least double in size.
-
Turn the dough out onto a lightly floured surface and cut into 4 equal portions. Shape into balls.
-
Roll one dough ball out into a circle about 9”-10” in diameter. Place it on a piece of parchment paper and spread 2 tablespoons of apple butter over it. Roll another dough ball out to the same size as the first one and place it on top, spread another 2 tablespoons of apple butter over it. Repeat for the 3rd and 4th dough ball. You should end up with 4 layers of dough and 3 layers of apple butter.
-
Mark a 3” circle in the middle with the back of a round cookie cutter or a cup. Cut the dough into 16 sections leaving the 3” circle in the middle untouched.
-
Twist two sections away from each other and press the end together to form the star point. You should end up with 8-star points. Cover and let rise for about 20 minutes.
-
Preheat the oven to 350°F.
-
Beat 1 large egg with a tablespoon of milk to make the egg wash. Lightly brush egg wash over the top of the bread and bake for 30 minutes until golden brown.
-
Remove the bread from the oven and let cool on a wire rack.
-
Dust with powdered sugar before serving.
Notes
Nutrition
from The Recipe Critic https://ift.tt/3gMELij
https://ift.tt/2K9JTkq