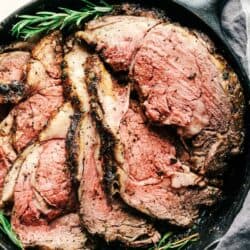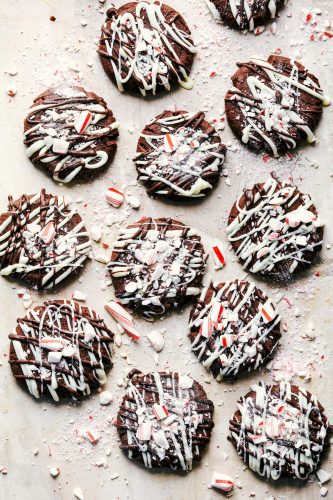
शुक्रवार, 3 दिसंबर 2021

Triple Chocolate Peppermint Cookies

Triple chocolate peppermint cookies are soft and chewy cookies that get drizzled with white and dark chocolate. They are topped with crushed candy canes and are the perfect treat for the holidays!

I love a good cookie and holiday ones are the BEST! Try out these Grinch Cookies, these Italian Christmas Cookies, or these delicious Christmas Gooey Butter Cookies!
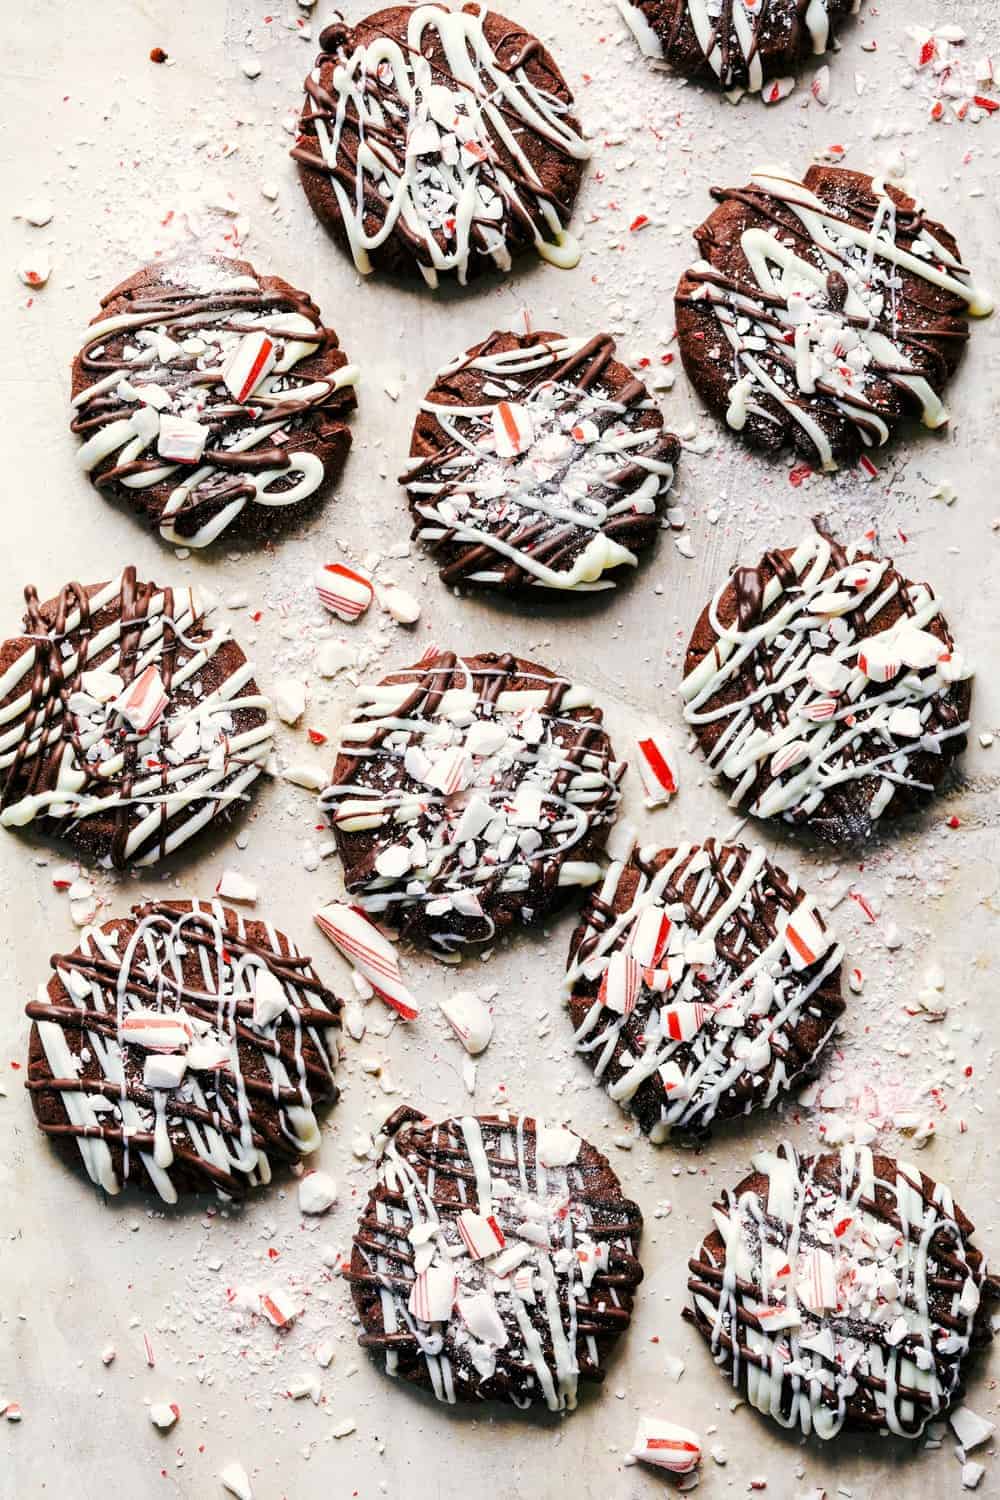
Triple Chocolate Peppermint Cookies in rows.

Triple Chocolate Peppermint Cookies

Does anyone else feel like the holidays can’t begin until you’ve baked a batch of Christmas cookies? Maybe it’s just me but I LOVE Christmas cookies! I especially love the peppermint flavor that’s a huge part of the holidays. So between chocolate, cookies, and peppermint, these are just about perfect. I mean it doesn’t get much better than a soft chocolate cookie with a hint of peppermint! Plus, they look so pretty drizzled with chocolate and topped with crushed candy canes.

These chocolate peppermint cookies are a tried and true favorite at our house and Christmas just wouldn’t be the same without them! Share these with your neighbors and show them what Christmas in a cookie tastes like! In fact, Christmas treats make the perfect neighbor gift. Bake up some of these along with some Red Velvet White Chocolate Chip Cookies, Madeleines, and some Homemade Toffee. Your neighbors will love you forever!

Ingredients for Triple Chocolate Peppermint Cookies

These cookies are simple and easy to make! In fact, make them with your kids. My daughter LOVES helping me with them! Her favorite part is crushing up all of the candy canes! See the recipe card below for a list of exact measurements.

  • Butter: If you can set this out so that it gets to room temperature before you bake it then that will work the best!  softened
  • Sugar: This is used to sweeten up the cookies!
  • Egg: I used a large egg that was at room temperature for this recipe.
  • Peppermint extract: This is the perfect way to flavor these cookies and make them taste just like Christmas!
  • Flour: I use all purpose flour in this recipe and it works great!
  • Baking cocoa: This is used to get that delicious, chocolatey flavor!
  • Baking soda: When you use baking soda in a recipe it helps so that your cookies are soft and not chewy.
  • Salt: This will enhance all of the other flavors in these yummy cookies!
  • Baking chocolate: Use white and semisweet baking chocolate to drizzle on top!
  • Candy canes: Crushing these is my kids favorite part! Sprinkle them on top and then you have yourself a Christmas cookie!  

Let’s Bake Some Cookies!

These triple chocolate peppermint cookies just might end up being your favorite of the season! They are a MUST TRY for everyone during the holidays!

  1. Preheat oven and mix butter, sugar and eggs: Preheat the oven to 350 degrees. In a medium-sized mixing bowl cream the butter and sugar until light and fluffy. Add the egg and peppermint extract and mix until incorporated.
  2. Whisk dry ingredients, then combine: In another mixing bowl whisk the flour, cocoa, baking soda and salt. Slowly add to the creamed mixture.
  3. Shape dough, bake and cool: Shape dough into 1 inch balls and place 2 in. apart on ungreased baking sheets. Flatten to 2 in. rounds with the bottom of a glass. Bake 6-8 minutes or until set (do not overbake). Let cool completely on pans and transfer to a wire rack.
  4. Melt chocolates, drizzle and add crushed candy canes: In the microwave in a microwave-safe bowl, add the white chocolate and cook for 30 seconds at a time stirring until melted. Drizzle over the cookies. Repeat for the semisweet chocolate and drizzle. Top with crushed candy canes and let set.
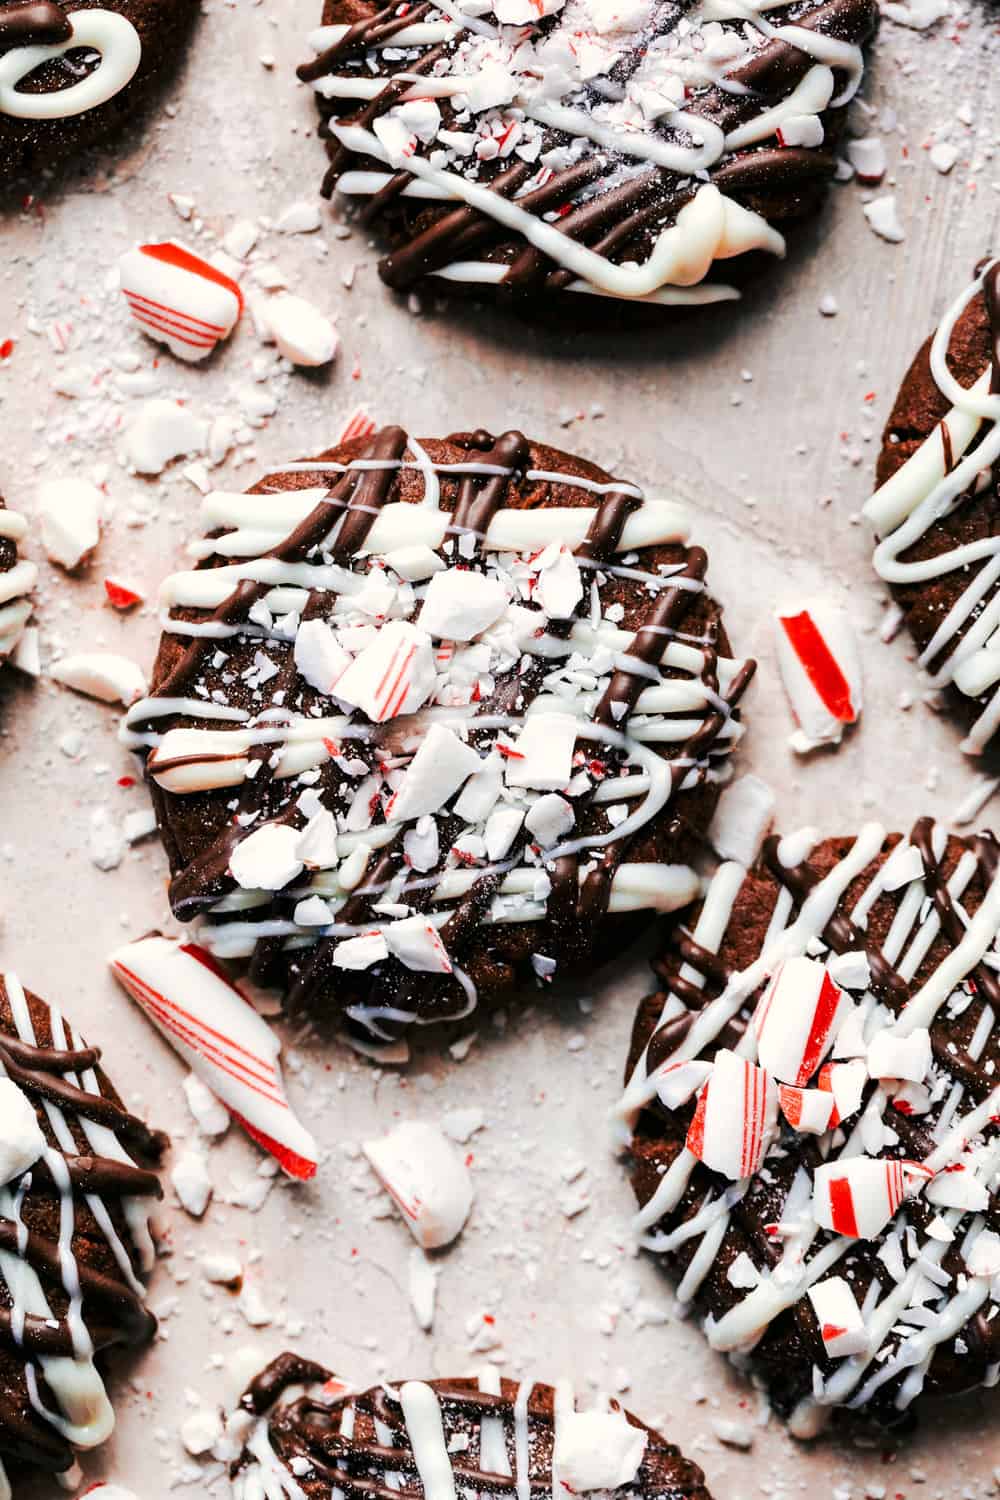
Triple Chocolate Peppermint Cookies close up.

Baking Tips

There are a few extra things to pay attention to when baking cookies! Here are a few tips that will make these triple chocolate peppermint cookies turn out just right!

  • Room temperature ingredients: I know that this can take a bit of thought beforehand but it really helps! Make sure to take all of your refrigerated ingredients out and put them on the counter a few hours before you plan on baking. Bringing your ingredients to room temperature really helps them mix nicely together and makes the dough really smooth! 
  • Don’t open the oven door: I know that it’s tempting to open the oven door while you are baking your cookies. After all, you just want to see how they are doing! But when you open the door while you are baking, you let a lot of the heat out. This makes it so that your cookies will bake unevenly.
  • Underbake: Remove the cookies from the oven while they still look gooey in the center. They will continue to bake on the hot tray after they have been removed from the oven!
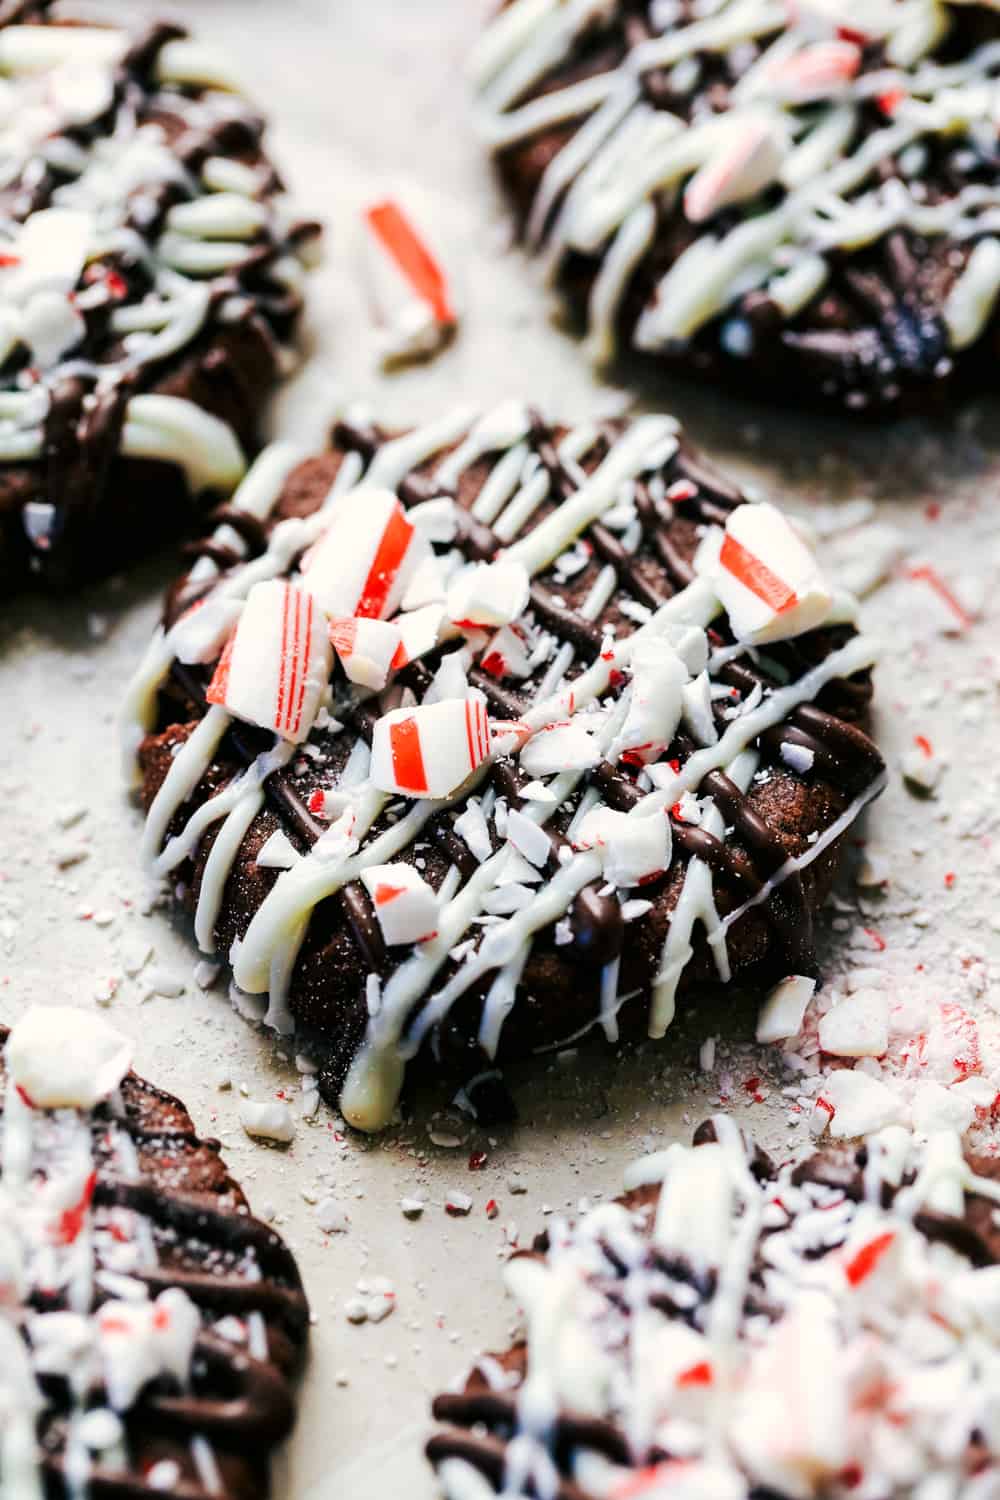
Triple chocolate peppermint cookies close up.

How to Store (and Freeze!) Leftovers

Whether you have extra or you baked these ahead of time, storing them is easy! Here is how you should store these chocolate peppermint cookies to make them last the longest!

  • On the counter: Once your cookies have cooled then you should place them in an airtight container. Put it in the counter and they can last up to 3 days!
  • In the freezer: If you want to freeze these cookies then you totally can! After your cookies cool (and before you put on the chocolate and the crushed candy canes) then place them on a baking sheet that is lined with parchment paper and put it in your freezer. Once the cookies are fully frozen then transfer them to a ziplock bag (labeled with the date) and they will last 8-12 months in your freezer! When you are ready to eat them then just set them out on the counter to thaw. Once they are at room temperature then drizzle on the chocolate and candy canes and they will taste as good as fresh!
Print

Triple Chocolate Peppermint Cookies

Triple chocolate peppermint cookies are soft and chewy cookies that get drizzled with white and dark chocolate. They are topped with crushed candy canes and are the perfect treat for the holidays!
Course Dessert, Snack
Cuisine American
Keyword peppermint cookies
Prep Time 10 minutes
Cook Time 8 minutes
Total Time 18 minutes
Servings 36 cookies
Calories 137kcal
Author Alyssa Rivers

Ingredients

  • 3/4 cup butter softened
  • 1 cup sugar
  • 1 large egg
  • 1/4 teaspoon peppermint extract
  • 1 3/4 cups flour
  • 1/2 cup baking cocoa
  • 1/4 teaspoon baking soda
  • 1/4 teaspoon salt
  • 1 cup white baking chocolate
  • 1 cup semisweet baking chocolate
  • 1/4 cup candy canes crushed

Instructions

  • Preheat the oven to 350 degrees. In a medium-sized mixing bowl cream the butter and sugar until light and fluffy. Add the egg and peppermint extract and mix until incorporated.
  • In another mixing bowl whisk the flour, cocoa, baking soda, and salt. Slowly add to the creamed mixture.
  • Shape dough into 1 inch balls and place 2 in. apart on ungreased baking sheets. Flatten to 2 in. rounds with the bottom of a glass. Bake 6-8 minutes or until set (do not overbake). Let cool completely on pans and transfer to a wire rack.
  • In the microwave in a microwave-safe bowl, add the white chocolate and cook for 30 seconds at a time stirring until melted. Drizzle over the cookies. Repeat for the semisweet chocolate and drizzle. Top with crushed candy canes and let set.

Notes

Updated on December 3, 2021
Originally Posted on December 7, 2017

Nutrition

Calories: 137kcal | Carbohydrates: 17g | Protein: 2g | Fat: 7g | Saturated Fat: 4g | Cholesterol: 16mg | Sodium: 63mg | Potassium: 66mg | Fiber: 1g | Sugar: 11g | Vitamin A: 127IU | Calcium: 15mg | Iron: 1mg


from The Recipe Critic https://ift.tt/3ddpmGR
https://ift.tt/3xQT1iu
Christmas Tree Sugar Cookies

If you’re wanting a dessert that is both festive and delicious, look no further! These Christmas tree sugar cookies will shine at any holiday party!

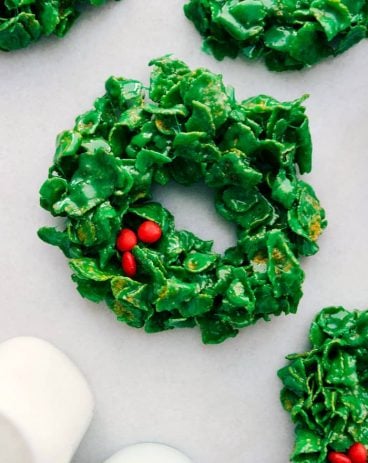
For more tasty themed treats, you’ll have to try my Grinch cookies, Italian Christmas cookies, and cornflake wreaths! They’re as cute as they are yummy!

A variety of Christmas tree cookies.

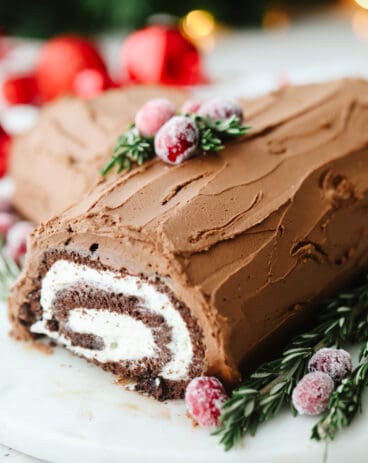
I’m so ready for the holidays! The Christmas cheer has been hitting me a little early this year… so that means more themed treats coming your way! First the cinnamon roll wreath, then the eggnog pancakes, the chocolatey yule log, and now the cutest little Christmas tree sugar cookies! These buttery sugar cookies are beyond easy to make but so incredibly delicious! In this recipe, I use a little sour cream in my cookie dough which makes them so soft and moist! They’re the perfect buttery treat. You need a batch of these bad boys right now!

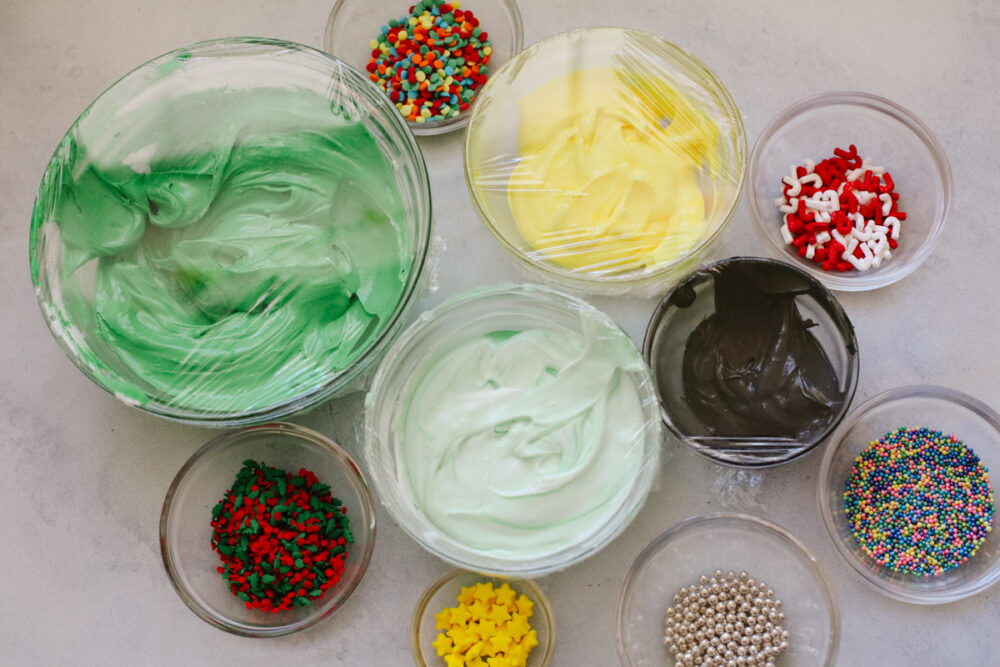
I’ve also included 3 super simple frosting ideas to get you started! My kids love helping with this part. I love watching each of them make their own little tree! I used my go-to cream cheese frosting for these cookies. That bit of tang is my favorite! You can also use buttercream or royal icing. No matter the frosting you choose, your Christmas tree sugar cookies are going to be sooo good! Cute, too! This is one recipe I’m surely going to be coming back to again and again this holiday season.

Ingredients for Christmas Tree Sugar Cookies

This sugar cookie recipe is a winner! These cookies are made of pantry staples (to make your life a little easier) but turn out absolutely delicious every time! Of all the sugar cookies I’ve made in the past, I think this recipe is the best! You can find all measurements in the recipe card below.

  • All-Purpose Flour: Used to give your Christmas tree sugar cookies a light structure!
  • Salt: You need to add salt to your cookies to enhance their flavor. Without it, they’ll be bland!
  • Baking Powder: For light and fluffy cookies!
  • Unsalted Butter: I use softened, unsalted butter for a rich flavor and to help the dough mix together smoothly.
  • Granulated Sugar: White sugar added for that perfect sweetness!
  • Egg Yolks: Egg yolks have a high fat content which will make your cookies soft and tender.
  • Sour Cream: Adds extra fat content (soft cookies!) and gives the cookies the slightest bit of tang.
  • Vanilla Extract: Vanilla helps to deepen the cookies’ flavor! Use pure vanilla extract if possible!
  • Lemon Extract: (Optional) I like to add a bit of lemon extract for a zesty finish.

Let’s Make Some Trees!

This recipe is perfect for all of your cookie-making needs this season. It’s so easy and you can switch up your cookie cutters to make all kinds of shapes! As cute as they may be, don’t expect them to last long! Each cookie is soft, buttery perfection.

  1. Preheat Oven, Line Cookie Sheets: Let’s start! To begin, preheat the oven to 350° Fahrenheit and line 2-3 cookie sheets with parchment paper.
  2. Whisk Dry Ingredients: In a medium bowl whisk together the flour, salt and baking powder. Set aside.
  3. Mix Butter and Sugar: In another medium bowl, beat together the butter and sugar for 2-3 minutes until light and fluffy.
    Add Remaining Ingredients: Next, add the egg yolks, sour cream and extracts and mix until just combined.
  4. Mix Wet and Dry Ingredients: Add the dry ingredients to the wet and mix until just barely full combined.
  5. Roll and Cut: This recipe does not require any chilling time, so you’re ready to roll out your cookies! Split the dough into 2-3 pieces and roll them one at a time on a lightly floured surface until they are ¼ inch thick. Use your favorite Christmas tree cookie cutters (or alternative shapes!) to cut out your cookies. Press the scraps together and set aside to rest for about 5 minutes. Reroll the scraps and cut more cookies until all the dough has been used.
  6. Bake: Place the cookies on the parchment lined cookie sheets leaving 1 ½ inches between them. Bake for 7-8 minutes, rotating the pan at 4 minutes. I find this gives the cookies a nice, even bake. The edges will be just set and the cookies will be very light in color and should have very minimal coloring underneath them.
  7. Cool and Frost: Let the cookies cool on the pan for 2 minutes for the shape to set before transferring to a cooling rack. Frost once they are cooled or store in an airtight container until you are ready to frost them.
Various frosting colors and sprinkles.

Sugar Cookie Tips and Tricks

Here are a few of my favorite tips for making your Christmas tree sugar cookies taste as good as they look! You’ll want to make them year-round!

  • Use Room Temperature Ingredients: The key to a smooth cookie dough is to use room temp wet ingredients! Let your butter, eggs, and sour cream sit out on the counter for 30 minutes before adding to dough mixture.
  • Don’t Overmix: The best part about sugar cookies is that they are light and fluffy! If you overmix your dough, your cookies will become hard and dense. Only mix until all of the ingredients are combined.
  • Frosting: Since sugar cookies have a neutral flavor, you can use any kind of frosting that you want! You’ll have to try them with cream cheese, chocolate buttercream, and chocolate cream cheese frostings!
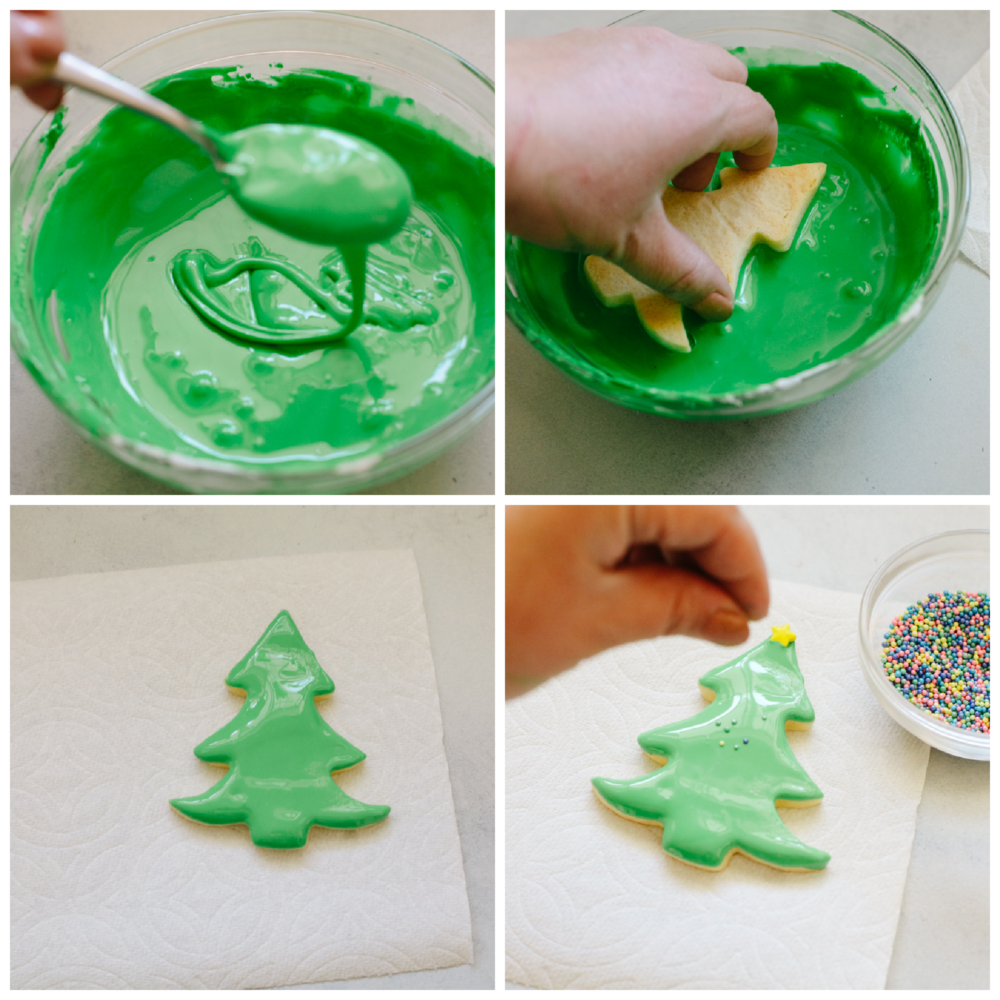
Process shots of dipping cookie into frosting and adding sprinkles.

Simple Christmas Tree Design

For our first design, we’re going to start with the most simple! This one is great if you’re making large batches of Christmas tree sugar cookies. Just dunk, sprinkle, and go!

  1. Warm Frosting: Dye a small bowl of frosting a bright green color. You can pop your frosting in the microwave for a few seconds for a smoother texture!
  2. Dip: Place your cookie flat into the melted frosting until it is fully coated.
  3. Sprinkle: Finish up with a candy star and add sprinkles as ornaments!
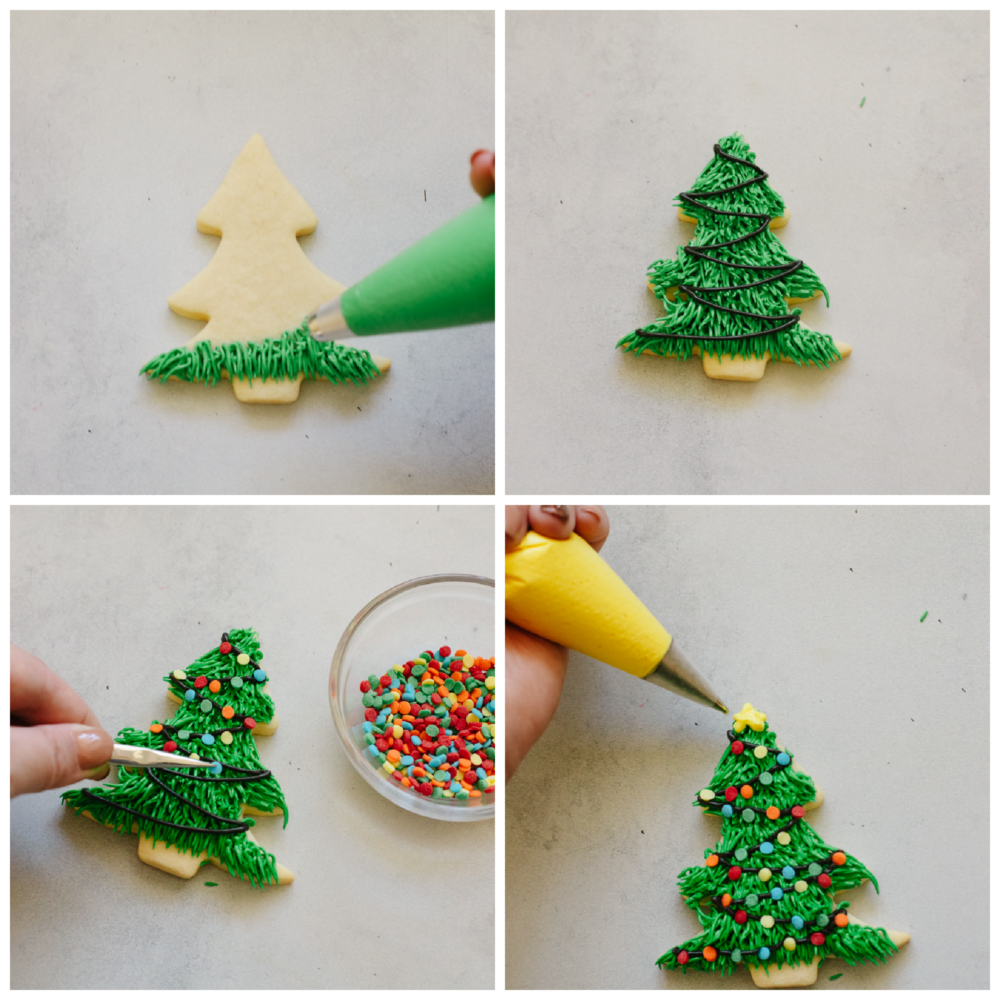
Frosting cookie with Christmas lights design.

Christmas Light Tree Design

This traditional Christmas tree design is one of my favorites. It’s so cute!

  1. Frost Branches and Needles: Using a fine piping tip and green frosting, create needles sloping downward until entire cookie is covered.
  2. Add Lights: Using black gel frosting, pipe a zig zag motion downwards to create the string of Christmas lights. Add multicolored candies on top as bulbs.
Closeup of a Christmas tree sugar cookie with Christmas light detailing.

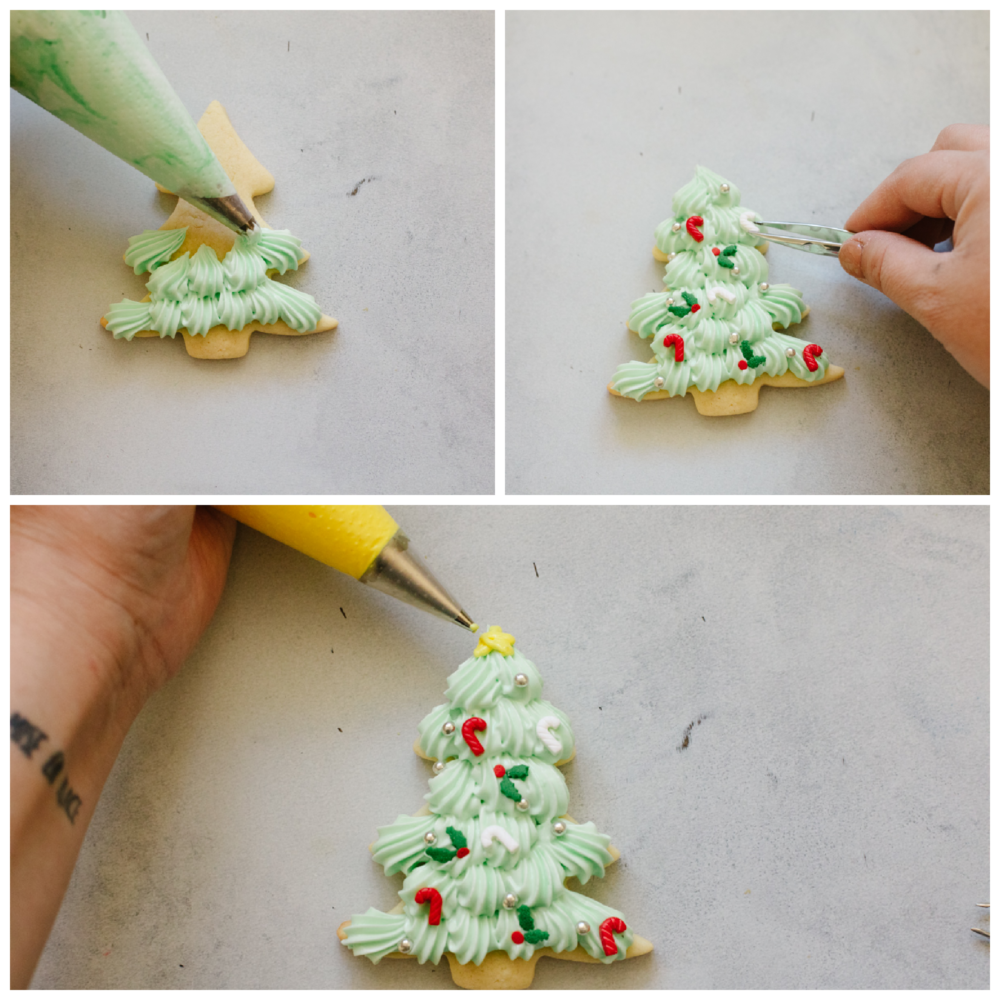
Fluffy Christmas Tree Design

This fluffy tree design is the perfect addition to your sugar cookie lineup! The light green color makes it look frosted with snow!

  1. Mix Light Green Frosting: First, add a bit of white frosting to your green bowl to make a pastel variation.
  2. Frost Needles: Using your pastel green frosting and an extra large star-shaped piping tip, layer dollops to make the tree look fluffy. Cover entire cookie.
  3. Add Details: Using a very fine piping tip or gel liners, add mistletoe and candy cane detailing. You can also add sprinkles for ornaments in between!
Frosting a Christmas tree cookie and adding candy cane detailing.

Storing Leftover Christmas Tree Cookies

If you have leftover Christmas tree sugar cookies, (which I highly doubt you will) here’s how to store them! I assure you, you’ll love having them around to munch on! There’s so insanely good, even days after you’ve made them!

  • At Room Temperature: If you have frosted your cookies with royal icing, they can be stored at room temperature in an airtight container for up to 1 week.
  • In the Refrigerator: If you used buttercream or cream cheese frosting on your cookies, they need to be stored in the fridge. They will last for 2-3 days.
Closeup of a Christmas tree cookie with mistletoe and candy cane detailing.
Print

Christmas Tree Sugar Cookies

If you're wanting a dessert that is both festive and delicious, look no further! These Christmas tree sugar cookies will shine at any holiday party!
Course Dessert
Cuisine American
Keyword christmas tree cookies, christmas tree sugar cookies
Prep Time 25 minutes
Cook Time 8 minutes
Total Time 33 minutes
Servings 18 Cookies
Calories 137kcal
Author Alyssa Rivers

Ingredients

  • 2 Cups All Purpose Flour
  • ½ Teaspoon Salt
  • ½ Teaspoon Baking Powder
  • ½ Cup Unsalted Butter Softened
  • 2/3 Cup Granulated Sugar
  • 2 Egg Yolks
  • 2 Tablespoons Sour Cream
  • 1 ½ Tablespoon Vanilla Extract
  • 1 Teaspoon Lemon Extract optional

Instructions

  • Preheat the oven to 350° and line 2-3 cookie sheets with parchment paper.
  • In a medium bowl whisk together the flour, salt, and baking powder. Set aside.
  • In another medium bowl beat together the butter and sugar for 2-3 minutes until light and fluffy. Add the egg yolks, sour cream, and extracts and mix until just combined.
  • Add the dry ingredients to the wet and mix until just barely full combined.
  • This recipe does not require any chilling time, so you’re ready to roll out your cookies! Split the dough into 2-3 pieces and roll them one at a time on a lightly floured surface until they are ¼ inch thick. Use your favorite Christmas tree cookie cutters (or alternative shapes!) to cut out your cookies. Press the scraps together and set them aside to rest for about 5 minutes. Reroll the scraps and cut more cookies until all the dough has been used.
  • Place the cookies on the parchment-lined cookie sheets leaving 1 ½ inches between them. Bake for 7-8 minutes, rotating the pan at 4 minutes. I find this gives the cookies a nice, even bake. The edges will be just set and the cookies will be very light in color and should have very minimal coloring underneath them.
  • Let the cookies cool on the pan for 2 minutes for the shape to set before transferring to a cooling rack. Frost, once they are cooled or stored in an airtight container until you are ready to frost them.

Nutrition

Calories: 137kcal | Carbohydrates: 18g | Protein: 2g | Fat: 6g | Saturated Fat: 4g | Polyunsaturated Fat: 1g | Monounsaturated Fat: 2g | Trans Fat: 1g | Cholesterol: 36mg | Sodium: 68mg | Potassium: 33mg | Fiber: 1g | Sugar: 8g | Vitamin A: 195IU | Vitamin C: 1mg | Calcium: 13mg | Iron: 1mg


from The Recipe Critic https://ift.tt/3EjdjU8
https://ift.tt/3ohX44b

गुरुवार, 2 दिसंबर 2021

Garlic Butter Herb Prime Rib

Garlic butter herb prime rib is melt in your mouth tender, cooked to medium-rare perfection, and marbled with fat. The seared garlic butter herb crust is incredible!

Impress your family with this beautiful cut of meat! When making this prime rib add Green Beans, Mashed Potatoes, and Rolls for a complete meal.

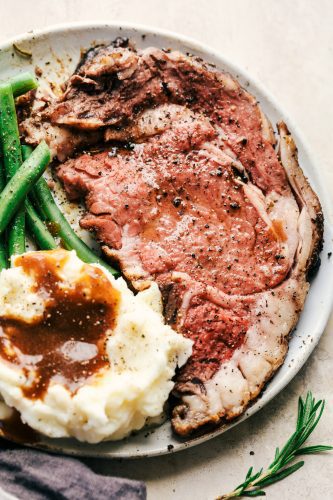
Prime rib with beans and potatoes on a plate.

The Best Prime Rib

The holidays wouldn’t be complete without a prime rib roast. Well, I am here to bring you the best prime rib recipe with a few tips and tricks for cooking the perfect tender and juicy meat every single time. You are going to bring your A-game to Christmas dinner with a flavorful and bold beef rib roast that is actually really simple to make! Cook up some grilled asparagus or some Brussel sprouts. They will go so well with this!

With these easy-to-follow steps, you will have a perfect Christmas dinner that will be loved by all. Prime rib is top-of-the-line meat that tastes just as AMAZING as it looks. The marbled cut and beautiful bone structure are just what you need to have this slice of heaven on your plate. Cooking this beef does not have to take long. It is best to have a crispy outside and a tender, juicy inside. With this garlic butter herb prime rib recipe you will have the PERFECT decadent dinner this holiday season!

Herb Garlic Butter Prime Rib Ingredients

I always buy my roast with the bone. The butcher at our local grocery store cuts the bone but leaves it partially attached and ties it onto the roast. This makes it easier to carve the meat and the bone creates a rack for the meat to cook on. See the recipe card at the bottom of the post for exact measurements.

  • Prime rib: I like to get a cut that is bone in and tied.
  • Butter: Make sure that the butter is softened so that it will blend well with the herbs and seasonings.
  • Garlic cloves: If you don’t have any fresh garlic cloves on hand then you can use minced garlic! ½ tsp equals about 1 clove.
  • Thyme, Oregano and Rosemary: I like to use freshly chopped herbs to make the flavor taste top notch!
  • Salt and pepper: Use these to taste!

How to Cook Prime Rib

Preparing your meat is a great way to ensure your cooking time is perfected by having an evenly cooked prime rib. Taking out your roast before cooking will help with this process! Enjoy this decadent recipe this holiday season with friends and family!

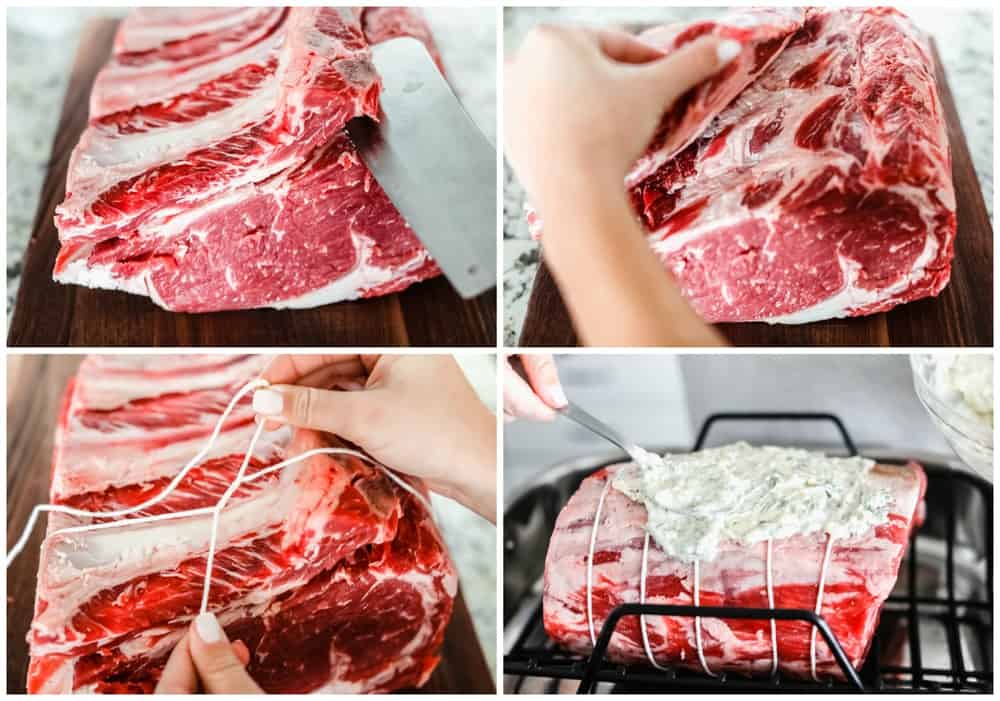
  1. Prepare your meat: Remove the prime rib from the refrigerator at least 30 minutes before to bring it to room temperature. Preheat the oven to 450 degrees.
  2. Mix together garlic butter herb sauce : In a small bowl mix butter, garlic, thyme, oregano, rosemary, salt and pepper. Then, rub all of the butter on the outside of your prime rib and plave in a roasting pan or large skillet with the fat side up.
  3. Cook prime rib: Cook for 15 minutes and reduce the temperature to 325 degrees. It is about 15 minutes per pound of meat. Bake until it reaches an internal temperature of 110 degrees.
  4. Let your meat rest: Remove from oven and let it rest with foil for at least 20 minutes. The temperature will rise to 130 degrees for a medium rare prime rib.
4 pictures showing how to prepare raw meat.

What Cut Of Meat Is Best?

A prime rib roast (or a standing roast) is cut from the back of the upper rib section of the steer. It usually is a total of 7 ribs. To make this slow-roasted prime rib then you will need a 3 bone rib roast. This is cut from either the chuck or the loin end of the rib sections. Here are some tips on how to choose the best meat!

  • Bone IN: You will want a bone in prime rib. On average a 2 to 6 pound prime rib has 2 to 3 bones.
  • Tied: When ordering from a butcher, ask to keep the strings on it if possible. This will ensure cooking it evenly and keeps its form while cooking.
  • Deckle: If possible, ask to have the largest deckle. The deckle is tender and the most flavorful piece of meat.
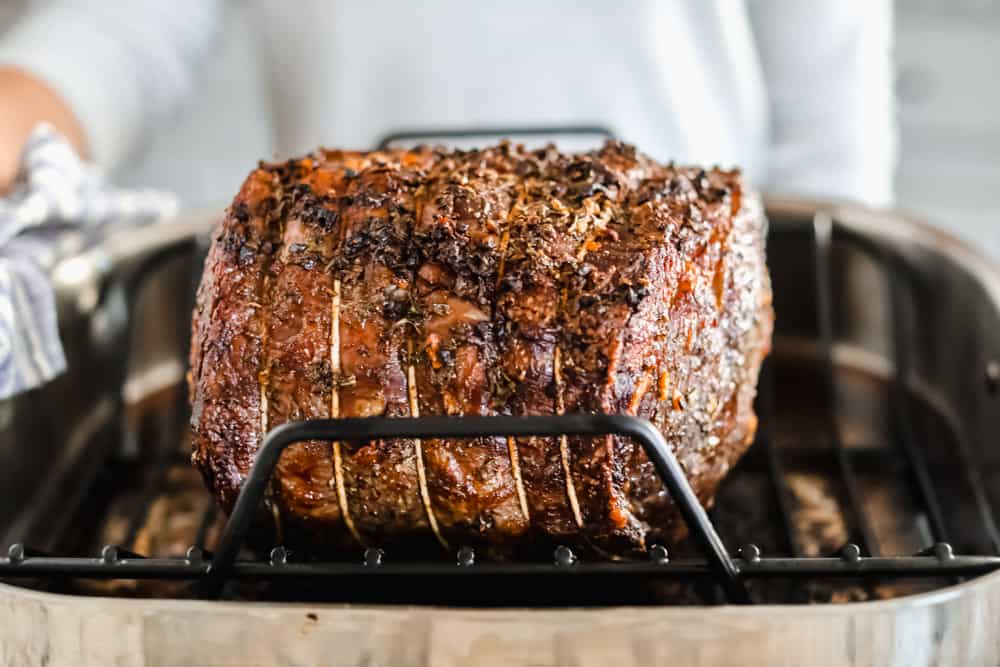
Prime rib on a rack, cooked.

Cooking Information Per Pound

The bones create a natural roasting rack for the meat. Cook the prime rib at a higher temperature of 450 degrees for 15 minutes. Then reduce the temperature to 325 degrees and continue to cook until the thermometer reads 110 degrees. About 15 minutes of cooking time per pound.

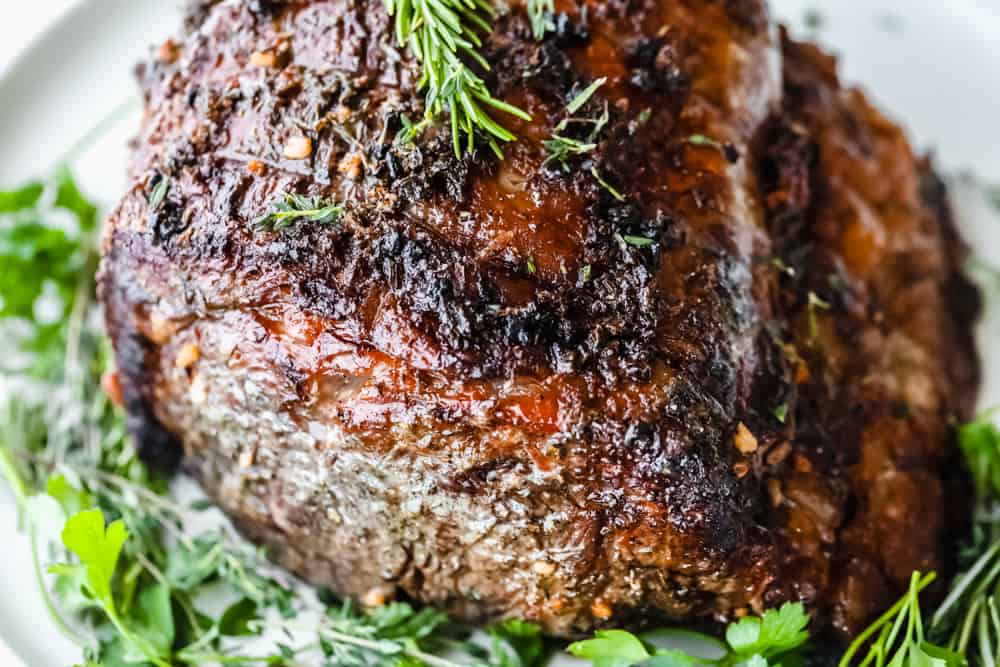
A prime rib garnished and ready to eat.

Cooking Tips

Melt in your mouth prime rib is just what you need to celebrate the holidays this year! These quick and simple tips will help cook it to perfection!

  • Use a thermometer: Using a meat thermometer is the best way to ensure a perfect prime rib every time.
  • Take it out of the fridge: Take your prime rib out of the refrigerator for about 30 minutes to let it rest before cooking. This will ensure an even cook time.
  • Keep the bone in: You can remove the bones before cooking but it is not necessary. The bone in adds to the flavor and helps keep the prime rib tender and juicy.
  • Let it rest! Remove your prime rib out of the oven when it is about 5 degrees lower than your temperature you are wanting. Cover your meat and let it rest. It will slowly cook as it is resting.
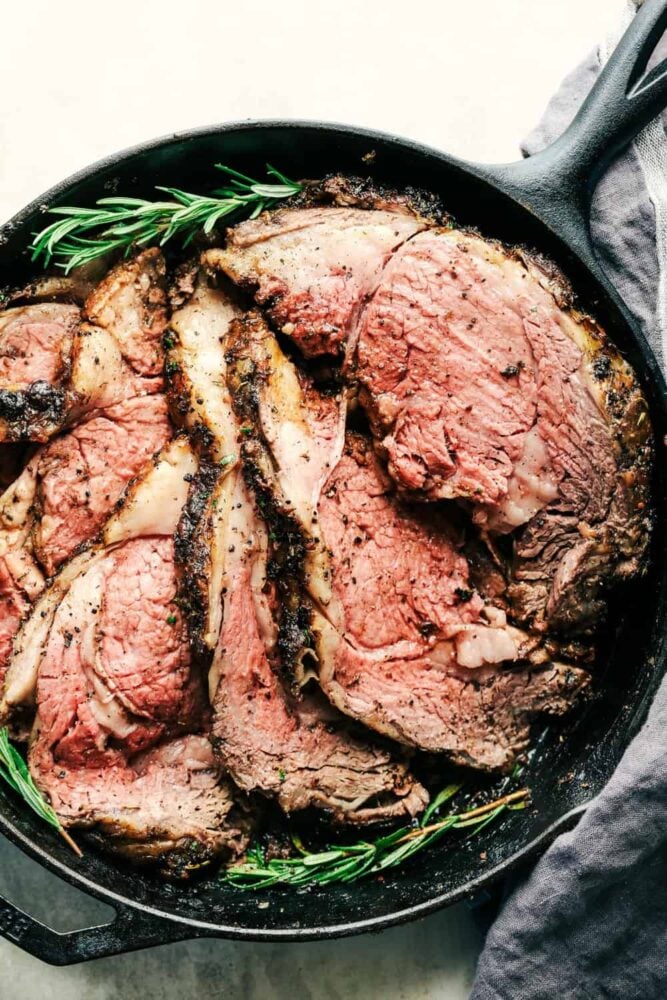
Prime rib that is in a pan, sliced and ready to serve.

Cooking Temperatures

Prime rib can be a little intimidating to make because you are trying to achieve the perfect medium-rare temperature The closed oven method is where you roast the meat at 500 degrees for 5 minutes per pound. Then, you leave the oven closed for 2 hours and it slowly cooks. If using this method then I highly recommend putting a thermometer inside of the meat so that you can check on it without opening the oven while it cooks.

  • Rare: 120 to130 degrees Fahrenheit
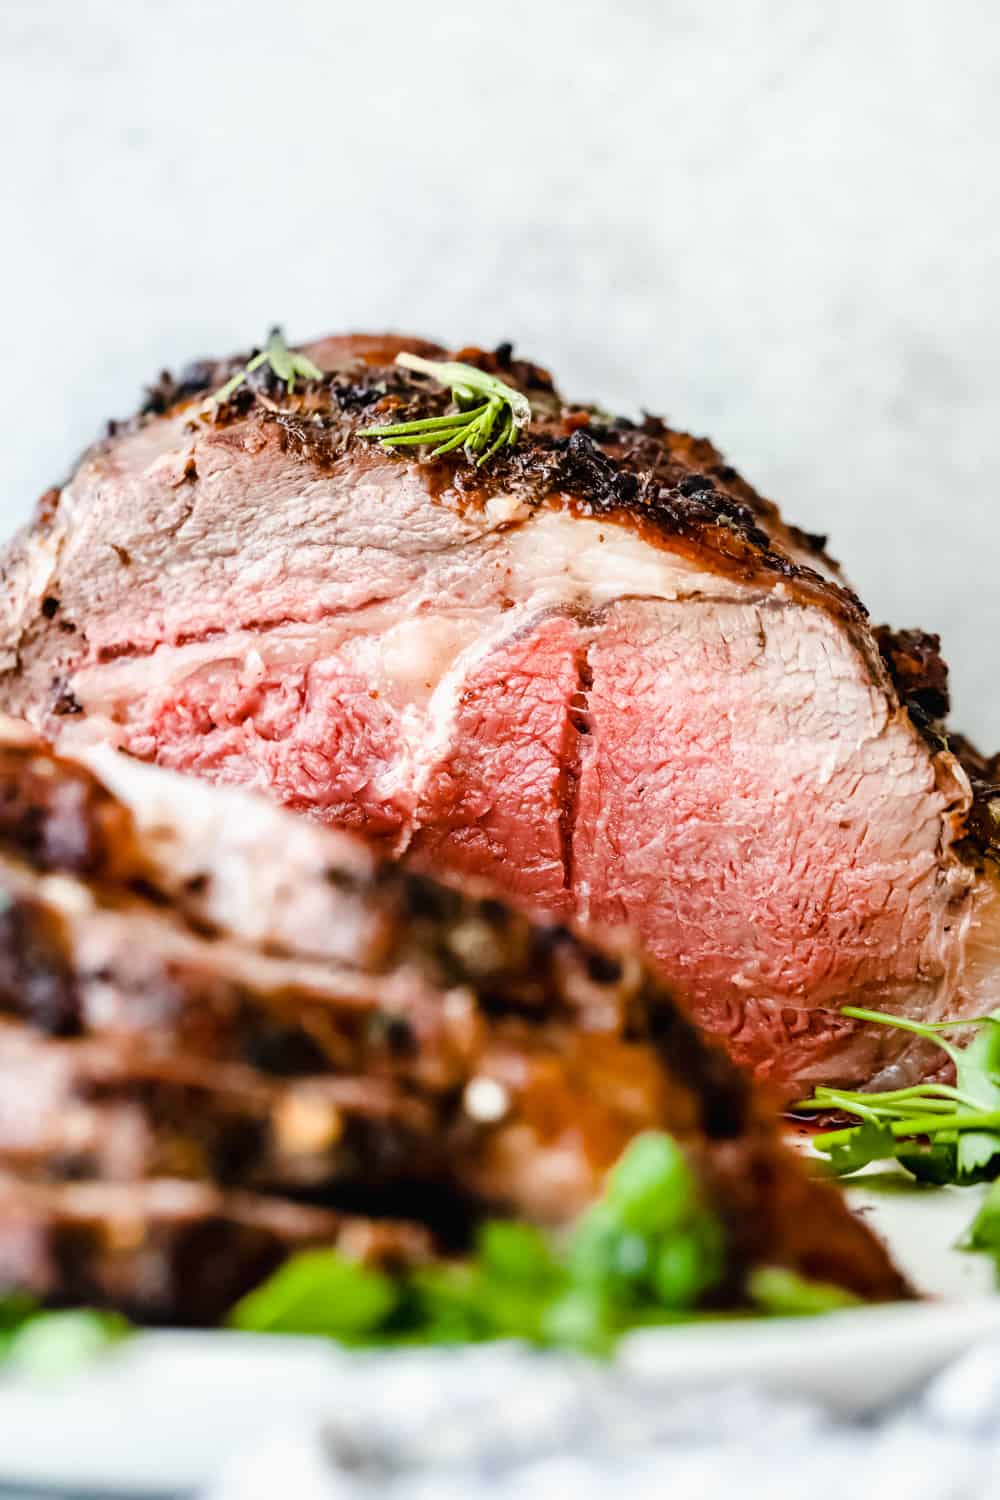
  • Medium Rare: 130 to 135 degrees Fahrenheit
  • Medium: 135 to 140 degrees Fahrenheit
  • Medium Well: 145 to 155 degrees Fahrenheit
  • Well Done: 155 degrees Fahrenheit
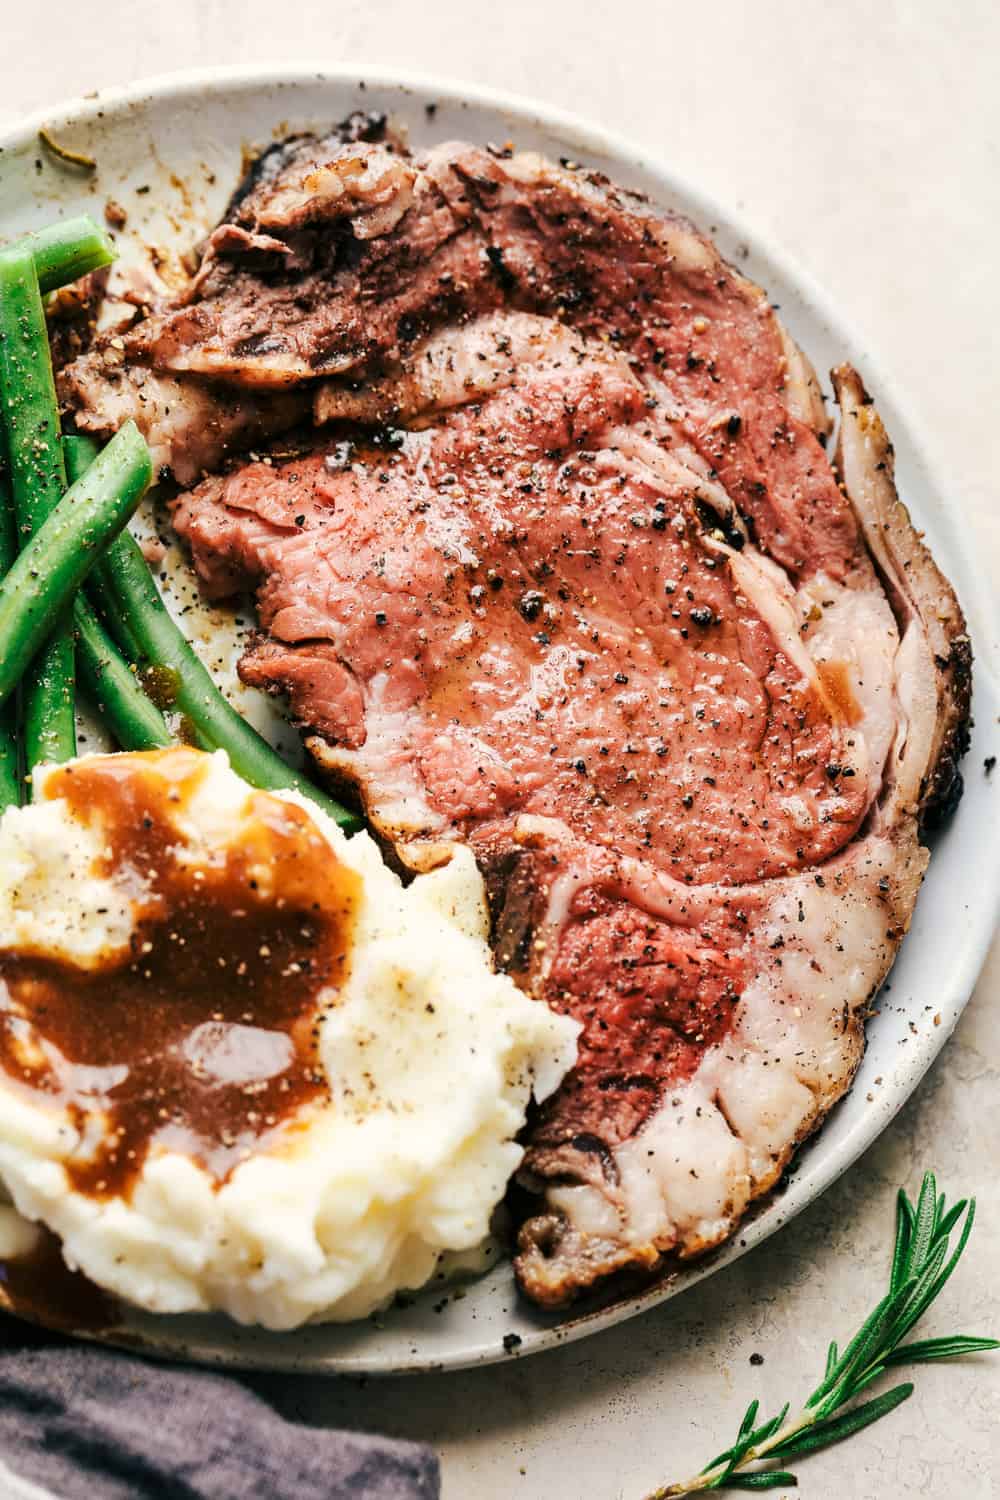
Prime rib sliced with the pink meat showing.

Storing Your Meat

Having leftover meat is just another way to enjoy it a little longer! You still have all the tender, juicy flavors are infused into the prime rib. Enjoy another slice of heaven a second time around with these storing ideas.

  • How long does it last in the refrigerator? It can be stored in an airtight container in the refrigerator for 5 to 7 days.
  • Can you freeze prime rib? Yes! Let it rest until completely cooled. Once it’s cooled then place in an ziplock freezer bag, letting all the air out. Lay flat in the freezer for 1 month. When ready to warm it up to eat it then place in the refrigerator over night until thawed.
  • How to reheat it: If it’s been frozen, let it thaw completely. Place in the oven for 12 to 15 minutes or until it has reached the desire internal temperature. Enjoy!

A Reader’s Review

This was absolutely amazing! The flavor was phenomenal. I like my meat well done and it was still super tender.
Patricia
Print

Garlic Butter Herb Prime Rib Recipe

Garlic butter herb prime rib is melt in your mouth tender and juicy prime rib that is cooked to medium rare perfection and marbled with fat.  The seared garlic butter herb crust is incredible!
Course Dinner, Main Course
Cuisine American
Keyword prime rib, prime rib recipe
Prep Time 5 minutes
Cook Time 1 hour
Total Time 1 hour 5 minutes
Servings 8 people
Calories 548kcal
Author Alyssa Rivers

Ingredients

  • 2-6 pounds bone prime rib boned and tied
  • 1 cup butter softened
  • 5 cloves garlic minced
  • 1 Tablespoon thyme finely chopped
  • 1 Tablespoon oregano finely chopped
  • 1 Tablespoon rosemary finely chopped
  • 1 Tablespoon salt
  • 1 teaspoon pepper

Instructions

  • Remove the prime rib from the refrigerator at least 30 minutes before to bring it to room temperature. Preheat the oven to 450 degrees.
  • In a small bowl mix butter, garlic, thyme, oregano, rosemary, salt and pepper. Rub all of the butter on the outside of your prime rib and place in a roasting pan or large skillet with the fat side up.
  • Cook for 15 minutes and reduce the temperature to 325 degrees. It is about 15 minutes per pound of meat. Bake until it reaches an internal temperature of 110 degrees.
  • Remove from oven and let it rest with foil for at least 20 minutes. The temperature will rise to 130 degrees for a medium rare prime rib.

Video

Notes

Updated on December 2, 2021
Originally Posted on November 17, 2017

Nutrition

Calories: 548kcal | Carbohydrates: 2g | Protein: 16g | Fat: 53g | Saturated Fat: 27g | Cholesterol: 130mg | Sodium: 1126mg | Potassium: 278mg | Fiber: 1g | Sugar: 1g | Vitamin A: 769IU | Vitamin C: 2mg | Calcium: 36mg | Iron: 2mg


from The Recipe Critic https://ift.tt/2JYaCP2
https://ift.tt/2CuYRtX