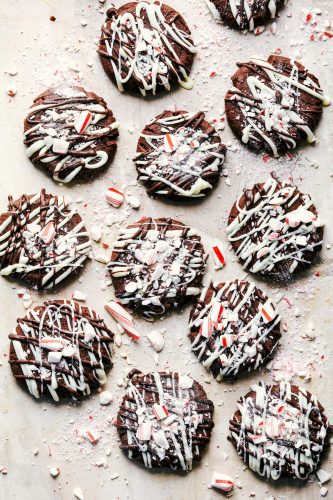
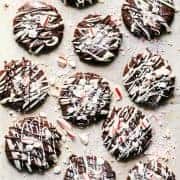
Triple chocolate peppermint cookies are soft and chewy cookies that get drizzled with white and dark chocolate. They are topped with crushed candy canes and are the perfect treat for the holidays!
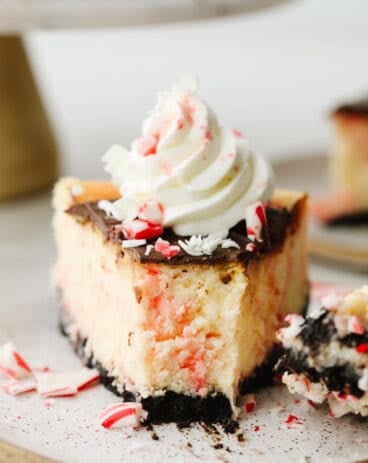
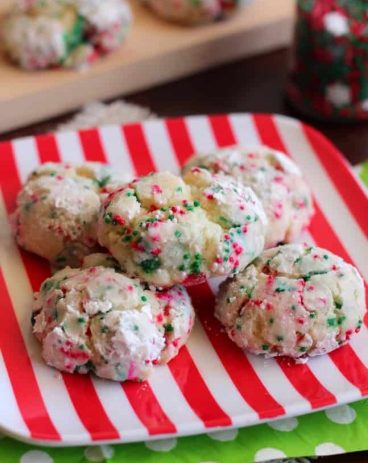
I love a good cookie and holiday ones are the BEST! Try out these Grinch Cookies, these Italian Christmas Cookies, or these delicious Christmas Gooey Butter Cookies!

Triple Chocolate Peppermint Cookies
Does anyone else feel like the holidays can’t begin until you’ve baked a batch of Christmas cookies? Maybe it’s just me but I LOVE Christmas cookies! I especially love the peppermint flavor that’s a huge part of the holidays. So between chocolate, cookies, and peppermint, these are just about perfect. I mean it doesn’t get much better than a soft chocolate cookie with a hint of peppermint! Plus, they look so pretty drizzled with chocolate and topped with crushed candy canes.
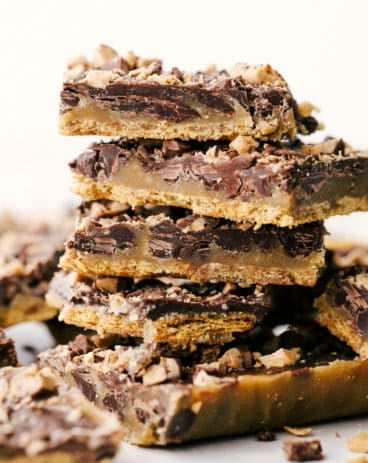
These chocolate peppermint cookies are a tried and true favorite at our house and Christmas just wouldn’t be the same without them! Share these with your neighbors and show them what Christmas in a cookie tastes like! In fact, Christmas treats make the perfect neighbor gift. Bake up some of these along with some Red Velvet White Chocolate Chip Cookies, Madeleines, and some Homemade Toffee. Your neighbors will love you forever!
Ingredients for Triple Chocolate Peppermint Cookies
These cookies are simple and easy to make! In fact, make them with your kids. My daughter LOVES helping me with them! Her favorite part is crushing up all of the candy canes! See the recipe card below for a list of exact measurements.
- Butter: If you can set this out so that it gets to room temperature before you bake it then that will work the best! softened
- Sugar: This is used to sweeten up the cookies!
- Egg: I used a large egg that was at room temperature for this recipe.
- Peppermint extract: This is the perfect way to flavor these cookies and make them taste just like Christmas!
- Flour: I use all purpose flour in this recipe and it works great!
- Baking cocoa: This is used to get that delicious, chocolatey flavor!
- Baking soda: When you use baking soda in a recipe it helps so that your cookies are soft and not chewy.
- Salt: This will enhance all of the other flavors in these yummy cookies!
- Baking chocolate: Use white and semisweet baking chocolate to drizzle on top!
- Candy canes: Crushing these is my kids favorite part! Sprinkle them on top and then you have yourself a Christmas cookie!
Let’s Bake Some Cookies!
These triple chocolate peppermint cookies just might end up being your favorite of the season! They are a MUST TRY for everyone during the holidays!
- Preheat oven and mix butter, sugar and eggs: Preheat the oven to 350 degrees. In a medium-sized mixing bowl cream the butter and sugar until light and fluffy. Add the egg and peppermint extract and mix until incorporated.
- Whisk dry ingredients, then combine: In another mixing bowl whisk the flour, cocoa, baking soda and salt. Slowly add to the creamed mixture.
- Shape dough, bake and cool: Shape dough into 1 inch balls and place 2 in. apart on ungreased baking sheets. Flatten to 2 in. rounds with the bottom of a glass. Bake 6-8 minutes or until set (do not overbake). Let cool completely on pans and transfer to a wire rack.
- Melt chocolates, drizzle and add crushed candy canes: In the microwave in a microwave-safe bowl, add the white chocolate and cook for 30 seconds at a time stirring until melted. Drizzle over the cookies. Repeat for the semisweet chocolate and drizzle. Top with crushed candy canes and let set.

Baking Tips
There are a few extra things to pay attention to when baking cookies! Here are a few tips that will make these triple chocolate peppermint cookies turn out just right!
- Room temperature ingredients: I know that this can take a bit of thought beforehand but it really helps! Make sure to take all of your refrigerated ingredients out and put them on the counter a few hours before you plan on baking. Bringing your ingredients to room temperature really helps them mix nicely together and makes the dough really smooth!
- Don’t open the oven door: I know that it’s tempting to open the oven door while you are baking your cookies. After all, you just want to see how they are doing! But when you open the door while you are baking, you let a lot of the heat out. This makes it so that your cookies will bake unevenly.
- Underbake: Remove the cookies from the oven while they still look gooey in the center. They will continue to bake on the hot tray after they have been removed from the oven!

How to Store (and Freeze!) Leftovers
Whether you have extra or you baked these ahead of time, storing them is easy! Here is how you should store these chocolate peppermint cookies to make them last the longest!
- On the counter: Once your cookies have cooled then you should place them in an airtight container. Put it in the counter and they can last up to 3 days!
- In the freezer: If you want to freeze these cookies then you totally can! After your cookies cool (and before you put on the chocolate and the crushed candy canes) then place them on a baking sheet that is lined with parchment paper and put it in your freezer. Once the cookies are fully frozen then transfer them to a ziplock bag (labeled with the date) and they will last 8-12 months in your freezer! When you are ready to eat them then just set them out on the counter to thaw. Once they are at room temperature then drizzle on the chocolate and candy canes and they will taste as good as fresh!
More Holiday Desserts to Try!
Triple Chocolate Peppermint Cookies
Ingredients
- 3/4 cup butter softened
- 1 cup sugar
- 1 large egg
- 1/4 teaspoon peppermint extract
- 1 3/4 cups flour
- 1/2 cup baking cocoa
- 1/4 teaspoon baking soda
- 1/4 teaspoon salt
- 1 cup white baking chocolate
- 1 cup semisweet baking chocolate
- 1/4 cup candy canes crushed
Instructions
-
Preheat the oven to 350 degrees. In a medium-sized mixing bowl cream the butter and sugar until light and fluffy. Add the egg and peppermint extract and mix until incorporated.
-
In another mixing bowl whisk the flour, cocoa, baking soda, and salt. Slowly add to the creamed mixture.
-
Shape dough into 1 inch balls and place 2 in. apart on ungreased baking sheets. Flatten to 2 in. rounds with the bottom of a glass. Bake 6-8 minutes or until set (do not overbake). Let cool completely on pans and transfer to a wire rack.
-
In the microwave in a microwave-safe bowl, add the white chocolate and cook for 30 seconds at a time stirring until melted. Drizzle over the cookies. Repeat for the semisweet chocolate and drizzle. Top with crushed candy canes and let set.
Notes
Nutrition
from The Recipe Critic https://ift.tt/3ddpmGR
https://ift.tt/3xQT1iu