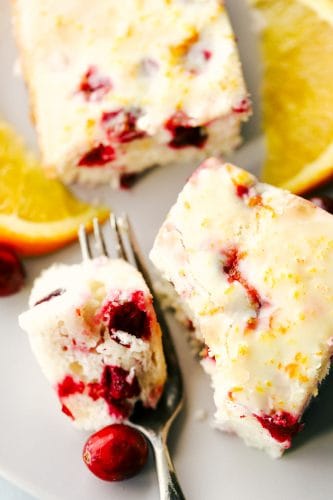
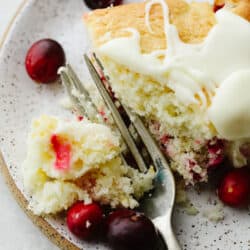
This cranberry cake is soft, fluffy and full of delicious cranberry flavor! Drizzled with an orange glaze on top, this cake is perfect for the holidays!
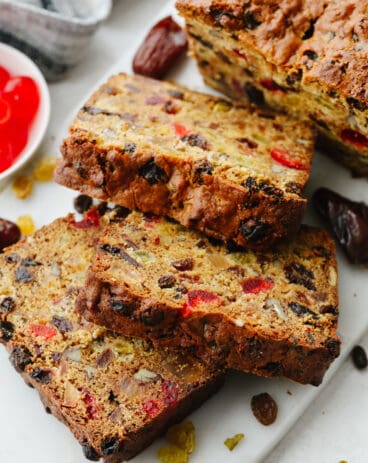
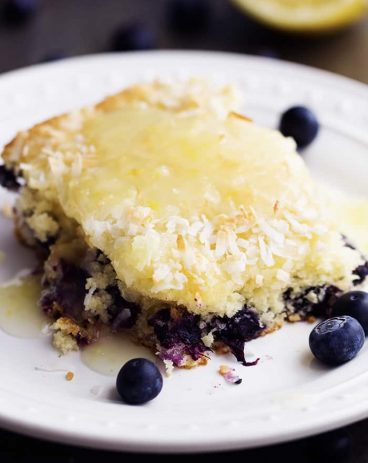
I’m all about eating cake for breakfast, brunch and dessert! Try out this Coffee Cake, this Blueberry Lemon Pound Cake or these amazing Orange Cranberry Muffins!

Delicious Cranberry Cake
So, the big question is do I eat this for breakfast, brunch, or dessert? Well… because of the fruit taste and delicious orange glaze, I totally think this can be eaten at any time of the day! I love a cake that mixes and matches flavors! This one has that cranberry taste mixed into the batter and onto you add in a creamy, slightly orange flavored glaze. When you mix the two together… It’s SOO GOOD!!
Not only do I think that this cake is amazing but I love how easy it is to make!! It only takes 15 minutes to put together and then all you have to do is pop it in the oven and wait! I know, I make that sound easy but when you’re hungry, waiting is the hardest part. It is so good and I love serving it at brunch along with some Apple Streusel Muffins, Blueberry Scones, and this amazing Cherry Almond Cream Cheese Breakfast Braid! Try them all, everyone will go crazy over them!
Ingredients You Need to Make Cranberry Cake
This cake is quick and easy to make! You probably have most of these ingredients in your pantry. Especially around the holidays because that’s when we all have cranberries in our fridge already! See the recipe card at the bottom of the post for exact measurements.
- Butter: I like to use unsalted butter that has been softened to room temperature!
- Orange zest: This fresh flavor really takes this recipe to the next level.
- Granulated sugar: The sugar helps sweeten this up and gives a delicious contrast to the tart cranberries.
- Egg: The egg helps to bind all of the ingredients together!
- Vanilla: This adds a slight flavor to the sweet sugar!
- Flour: All purpose flour is what I used and it works great in this recipe.
- Salt: The salt in the recipe enhances all of the flavors of the other ingredients!
- Baking powder: This is what helps the cake rise and stay soft and fluffy.
- Fresh cranberries: Using fresh cranberries adds a delicious tart flavor to this cake. You can’t have cranberry cake without them!
- Buttermilk: You can use store bought buttermilk but if you don’t have any on hand then try making this homemade Buttermilk instead!
- Coarse sugar: This is for topping on your cake!
Glaze
- Powdered sugar: I use powdered sugar instead of granulated sugar because this dissolves much faster and creates that delicious and smooth texture.
- Heavy cream: This will mix in with the powdered sugar making it thick and creamy.
- Fresh orange juice: My favorite part of the glaze! This flavor combined with the cranberries is SOO GOOD.
Let’s Make Some Cake!
I love the flavor and the texture of this cranberry cake. It’s perfect for the holidays because of the festive cranberries. But let’s be honest, I bake this all year long!
- Preheat oven and combine: Preheat the oven to 350°. Grease an 8 or 9 inch square pan and set aside. In a medium bowl cream together the butter, orange zest and sugar. Add the egg and vanilla and beat until combined.
- Whisk: In a separate mixing bowl whisk together 1 ¾ cup of flour, salt and baking powder. Toss the cranberries in the remaining ¼ cup of flour.
- Combine and fold in cranberries: Add the flour mixture to the creamed mixture a little at a time, alternating with the buttermilk, until fully combined. Gently fold in the cranberries.
- Add batter to pan, bake and let it rest: Spread the batter into the prepared baking pan. Sprinkle with coarse sugar. Bake for 35-40 minutes or until a toothpick comes out clean from the center. Let rest for 15 minutes before topping with the glaze and serving.
Glaze
- Mix and drizzle: Mix the powdered sugar, heavy cream and orange juice together until smooth. Drizzle across the top of the slightly cooled cake.

Baking Tips
This cranberry cake is easy enough that anyone can make it! Here are a few tips to help you make it turn out just right!
- Don’t overmix: When you over mix or set your mixer to mix on high then you add more air to your batter! Use room temperature ingredients so that you don’t have to mix so many lumps and do it on a lower speed.
- Don’t open the oven door: I know that it’s tempting to open the oven door while you are baking your cake. But when you open the door while you are baking, you let a lot of the heat out. This makes it so that your cake will bake unevenly. Use the oven light instead of opening the door!
- Room temperature ingredients: I know that this can take a bit of thought beforehand but it really helps! Make sure to take all of your refrigerated ingredients out and put them on the counter a few hours before you plan on baking. Bringing your ingredients to room temperature really helps them mix nicely together and makes the dough really smooth!

Varitations
This cranberry cake is so easy and delicious! And, you can mix a few things up to make this cake work just for you! Here are a few ideas.
- Cut the cranberries in half: I like to leave the cranberries whole in this recipe but if you like more, smaller bites of cranberries then you can cut them all in half before mixing them in the batter! Then you are sure to get that tart cranberry taste in every single bite!
- Frozen cranberries: I love using fresh ingredients every chance that I can but you can use frozen cranberries in a pinch! You can leave them whole or chop them up.
- Buttermilk: No buttermilk, no problem! You can make this Homemade Buttermilk instead!
- Sugar topping: You can use demerara, turbinado or raw sugar for the topping of sugar. Some will have more crunch than others but they will all taste delicious!
- Add a topping! If you want, you can try adding in some sliced almonds, pecans or walnuts to the top of your cake!

How to Store Leftovers
This cranberry cake is great to make ahead and eat later! Here is how you can do that or store any leftovers that you may have.
- On the counter: Once your cake has cooled then wrap it tin plastic wrap or store it in an airtight container. It can last on your counter for up to a week.
- Freeze: To freeze this cake, wrap it up in plastic wrap and then a layer of foil. Write the date on the foil and this cake can last in your freezer for up to 2 months. When you are ready to eat, thaw it overnight at room temperature (keep it wrapped while thawing). Enjoy!

More Delicious Cakes to Try

Cranberry Cake
Ingredients
- ½ Cup Unsalted Butter Softened
- Zest from 1 Orange
- ½ Cup Granulated Sugar
- 1 Egg
- 1 Teaspoon Vanilla
- 2 Cups Flour Divided
- 1 Teaspoon Salt
- 2 Teaspoons Baking Powder
- 2 Cups fresh cranberries
- ½ Cup Buttermilk
- 1 Tablespoon coarse sugar for topping
Glaze
- 1 Cup Powdered Sugar
- 1 Tablespoon Heavy Cream
- 2 Tablespoons Fresh Orange Juice
Instructions
-
Preheat the oven to 350°. Grease an 8 or 9 inch square pan and set aside. In a medium bowl cream together the butter, orange zest and sugar. Add the egg and vanilla and beat until combined.
-
In a separate mixing bowl whisk together 1 ¾ cup of flour, salt and baking powder. Toss the cranberries in the remaining ¼ cup of flour.
-
Add the flour mixture to the creamed mixture a little at a time, alternating with the buttermilk, until fully combined. Gently fold in the cranberries.
-
Spread the batter into the prepared baking pan. Sprinkle with coarse sugar. Bake for 35-40 minutes or until a toothpick comes out clean from the center. Let rest for 15 minutes before topping with the glaze and serving.
Glaze
-
Mix the powdered sugar, heavy cream and orange juice together until smooth. Drizzle across the top of the slightly cooled cake.
from The Recipe Critic https://ift.tt/3IvJJxo
https://ift.tt/3EoUOOk