रविवार, 28 नवंबर 2021

Delicious Taco Pie

This taco pie is the ultimate Mexican casserole! It’s a seasoned homemade crust filled with taco meat, cheese, beans, and tomatoes. It’s a MUST TRY recipe for sure! 

I love a good Mexican recipe and if you do too then you have to try out this Shrimp Skillet, these Mexican Shells, or these amazing Street Tacos!

A taco pie garnished with toppings.

What’s a Taco Pie?

A taco pie is taking your favorite tacos to the next level! It’s a delicious combination of meat, cheese, and beans in a pie crust! And this one is not just any pie crust. It’s made with Mexican corn flour and flavored with spices! And once you add that to some taco meat and toppings then you are for sure going to have a meal to remember. I love tacos and I love pie so this taco pie meal is so much fun! Plus, I love that you don’t see it every day!

My kids love this recipe and they love joking about eating “pie” for dinner! It’s a fun and different dinner option but simple enough that they don’t question the taste. It’s so easy and delicious that it’s a no-brainer to add this to your weekly meal menu! Plus, you can switch it up with all sorts of toppings to make this be exactly what your family loves! Try it out, it’s delicious!

Ingredients for Taco Pie

This taco pie uses classic Mexican ingredients that will keep you coming back for more! See the recipe card below for exact measurements.

  • Hot water: This will be used to bind all of the crust ingredients together so that you can form it into a pan.
  • Masa harina: This is corn flour that you can find in the Mexican section of most grocery stores.
  • Salt: This enhances the flavor of the crust!
  • Garlic powder: Adding some flavor to the crust makes it so tasty!
  • Ground cumin: This will add some great flavoring to the pie.

Taco Filling

  • Olive oil: You can use vegetable oil instead if you only have that on hand!
  • Meat: You can use ground beef or ground turkey for the meat in this taco pie.
  • Onion powder: This gives a great flavor without needing to chop up any onions!
  • Garlic powder: I love the added flavor that this garlic powder brings to this meat!
  • Cumin: This complements the cumin in the crust!
  • Chili powder: This adds that classic taco flavoring without adding much heat.
  • Salt and pepper: Add in some seasoning with these to taste.
  • Cornstarch: This will thicken up the sauce.
  • Beans: You can use pinto or black beans. Make sure that you drain them!
  • Diced tomatoes with green chilies: Don’t drain this can! The juices carry a lot of the flavor!
  • Cheese: You can use cheddar or Mexican blend cheese that’s shredded.

Let’s Bake a Pie!

This taco pie recipe is so simple that you will want to make it again and again! I can’t wait for you to try it!

  1. Preheat: Preheat oven to 350°F.
  2. Mix ingredients and add water: In a bowl mix together masa harina, salt, garlic powder, and cumin until combined. Pour the hot water on top of the powders.
  3. Stir to make dough: Stir the ingredients until it is fully combined. The dough should come together and be soft like cookie dough. If the dough seems to be sticky or wet, add in a tablespoon more of masa flour at a time until the batter is no longer sticky.
  4. Press dough into pan: Transfer the dough into a 9″ pie dish. Pat the dough into an even layer. You can use the bottom of a cup to help press the dough evenly. Work the dough up the sides and edges of the pie dish. Even out the top edges of the dough. Prick the dough with a fork to prevent the dough from puffing up while it bakes. Lightly brush the edges with olive oil if the edges start to dry out while it bakes.
  5. Bake: Bake in preheated oven for 25 min or until dough is baked through.

For the Filling

  1. Add oil: Add oil to a large skillet over medium high heat.
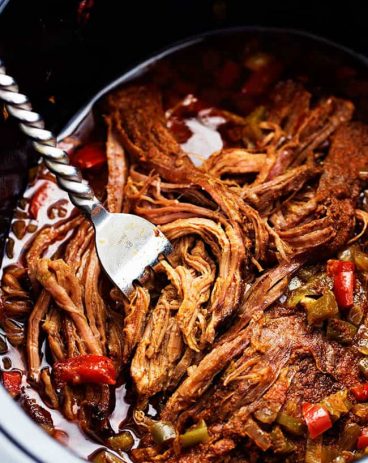
  2. Cook meat: Add ground beef and heat until cooked through, about 6 minutes.
  3. Drain grease: Drain the grease from the skillet. 
  4. Add beans: Stir in the drained beans to the cooked ground beef.
  5. Mix seasinings: In a small bowl, mix together the onion powder, garlic powder, cumin, chili powder, salt, pepper, and cornstarch. 
  6. Add in can of diced tomatoes (don’t drain): Add the seasonings and 1 can of diced tomatoes and green chilies to the beef mixture. Make sure not to drain the can.
  7. Stir, cook and thicken: Stir and cook over medium heat until the ingredients come together and slightly thicken, about 1 minute.
  8. Pour into crust, add cheese: Pour the filling into the baked crust. Top the taco pie with 1 cup shredded cheddar or Mexican cheese.
  9. Bake: Bake in the oven at 350°F for 15 minutes, or until cheese is melted.
  10. Add toppings: Garnish with your favorite taco toppings like lettuce, tomatoes, sour cream, cilantro, olives, green onion, avocado, etc.
2 pictures showing how to fill a crust with meat and cheese.

Other Ingredients That You Can Mix In!

This taco pie is amazing because you can constantly change it up to change out the taste. Then, you can eat this ALL the time! Here are some ideas for other mix-in ingredients that you can try!

  • Rice: Add in some delicious Mexican rice, spanish rice or yellow rice!
  • Salsa: After it’s baked and before you add on your other toppings then spoon some salsa on top! It adds more of that delicious and classic Mexican flavor. Plus, you can add in some heat to individual servings!
  • Toppings: Put a bunch of different toppings out on the table. Then everyone can add their own and make their pie exactly what they want! Try some lettuce, tomatoes, sour cream, cilantro, olives, green onion and avocado!
A slice of taco pie being taken out of the pan.

How to Store Leftovers (Or Make This Ahead!)

This taco pie is a fantastic meal to make ahead and freeze for later! Or, if you have leftovers then you can store them too and have them later in the week for lunch! It almost tastes better the next day!

  • Refrigerate: Once your pie has cooled then place it in an airtight container. Put it in your fridge and it will last 3-4 days!
  • Freeze: If you want to make extra of this to freeze for later, you totally can! Put together the entire pie as directed but don’t bake it! (And don’t add your toppings). Wrap it in plastic wrap and then cover it with tinfoil. Label it with the date. It can stay frozen for 1-2 months.
  • Reheat: To reheat your refrigerated pie then you can place it in the microwave on high for 1-2 minutes or until heated through. To reheat your frozen pie then thaw it completely in your fridge overnight. Then, add in the cheese and bake it at 350 degrees for 15 minutes. Add your toppings and it’s ready to serve!
A slice of pie on a plate with toppings.
Print

Delicious Taco Pie

This taco pie is the ultimate Mexican casserole! It's a seasoned homemade crust filled with taco meat, cheese, beans, and tomatoes. It's a MUST TRY recipe for sure! 
Course Dinner
Cuisine Mexican
Keyword taco pie
Prep Time 15 minutes
Cook Time 40 minutes
Total Time 55 minutes
Servings 8 people
Author Alyssa Rivers

Ingredients

Crust

  • 1 1/2 cups hot water
  • 1 ½ cups masa harina
  • 1 tsp salt
  • ½ tsp garlic powder
  • 1/2 tsp ground cumin

Taco Filling

  • 1 tbsp olive oil
  • 1 pound ground beef or ground turkey
  • 1 teaspoon granulated onion powder
  • 1/2 teaspoon garlic powder
  • 1 teaspoon cumin
  • 1 teaspoon chili powder
  • 1/2 teaspoon salt
  • 1/4 teaspoon pepper
  • 1/2 teaspoon cornstarch
  • 1 15.5 ounce can pinto or black beans drained
  • 1 10 ounce can diced tomatoes with green chilies undrained
  • 1 cup cheddar or Mexican blend shredded

Instructions

For the crust

  • Preheat oven to 350°F.
  • In a bowl mix together masa harina, salt, garlic powder, and cumin until combined. Pour the hot water on top of the powders.
  • Stir the ingredients until it is fully combined. The dough should come together and be soft like cookie dough. If the dough seems to be sticky or wet, add in a tablespoon more masa flour at a time until the batter is no longer sticky.
  • Transfer the dough into a 9" pie dish. Pat the dough into an even layer. You can use the bottom of a cup to help press the dough evenly. Work the dough up the sides and edges of the pie dish. Even out the top edges of the dough. Prick the dough with a fork to prevent the dough from puffing up while it bakes. Lightly brush the edges with olive oil if the edges start to dry out while it bakes.
  • Bake in preheated oven for 25 min or until dough is baked through.

For the filling

  • Add oil to a large skillet over medium high heat.
  • Add ground beef and heat until cooked through, about 6 minutes.
  • Drain the grease from the skillet.
  • Stir in the drained beans to the cooked ground beef.
  • In a small bowl, mix together the onion powder, garlic powder, cumin, chili powder, salt, pepper, and cornstarch.
  • Add the seasonings and 1 can of diced tomatoes and green chilies to the beef mixture. Make sure not to drain the can.
  • Stir and cook over medium heat until the ingredients come together and slightly thicken for about 1 minute.
  • Pour the filling into the baked crust. Top with 1 cup shredded cheddar or Mexican cheese.
  • Bake in the oven at 350°F for 15 minutes, or until cheese is melted.
  • Garnish with your favorite taco toppings: lettuce, tomatoes, sour cream, cilantro, olives, green onion, avocado, etc.

Notes

Masa Harina is corn flour found in the Mexican section of most grocery stores.

Nutrition

Serving: 8g


from The Recipe Critic https://ift.tt/3ppKm2T
https://ift.tt/2Zv5v2u

शनिवार, 27 नवंबर 2021

Yule Log Cake

Show off your holiday spirit by baking this amazing yule log cake! A chocolate cake rolled with a cream cheese filling and topped with a chocolate ganache. It doesn’t get much better than this!

I can’t get enough of all things chocolate so if you’re like me then you MUST TRY this cake, these cupcakes, and this delicious chocolate lasagna! You will go crazy over all of them!

A yule log cake on a platter with garnish.

Yule Log Cake

Is it just me or do you think that Christmas brings out the BEST desserts!? I can’t get enough of all of the Cinnamon Roll Wreaths, the delicious Eggnog Fudge, or the classic Fruit Cake. Yes, I know that there are other holidays that bring out the sweets but I really think that Christmas takes the (Yule Log) cake… I couldn’t resist that pun!

This yule log cake is to die for!! It’s a classic dessert that I’m sure that you’ve seen, if not eaten, before. If you’ve had a pumpkin roll then it’s similar to that! Except this one is made of a moist chocolate cake. And before you frost it, you actually cut it apart and arrange it so that it looks like an actual log! It’s super festive and delicious. It’s a dessert that your friends and family will go crazy over!

Ingredients You Need for a Yule Log Cake

This cake uses pretty simple ingredients. Take a look in your kitchen, I bet you already have most of them ready to go! See the recipe card below for exact measurements.

  • Flour: I used all purpose flour in this recipe.
  • Cocoa Powder: Dark cocoa powder will give you the most depth and flavor
  • Baking powder: This baking powder is what will help your cake rise and be soft.
  • Instant coffee: Your cake won’t taste like coffee, this just brings out the chocolate flavor more!
  • Salt: This is used to enhance the flavors of all of the other ingredients.
  • Eggs: If you get your eggs to room temperature beforehand then they will mix better!
  • Granulated sugar: This is used to sweeten up the cake!
  • Sour cream: The secret ingredient to getting your cake super moist is this sour cream!
  • Butter: use unsalted butter so that you don’t have to adjust the added salt!
  • Vanilla extract: This adds a bit of flavor to the sweet taste.

Filling

  • Cream cheese: Make sure that your cream cheese is softened before you mix it. It will make the filling so much more smooth.
  • Powdered sugar: This is used instead of granulated sugar because it dissolves so much better and helps keep the filling smooth and not grainy.
  • Vanilla Extract: This adds a sweet flavoring.
  • Heavy cream: When you mix this in, it makes everything so thick and creamy.

Whipped Ganache

  • Chocolate Chips: Use semi sweet chocolate chips for this ganache!
  • Heavy cream: When you use heavy cream it makes the ganache super creamy.

Let’s Bake a Cake!

Now that you have all of your ingredients ready to go, it’s time to bake this amazing yule log cake!

  1. Preheat oven and prep baking sheet: Preheat the oven to 350° and prep a 17×12 inch rimmed baking sheet by spraying it with non-stick baking spray and lining it with parchment paper. Be sure to let the parchment paper have at least 1 inch overhang on all sides. Spray the parchment lightly with the non-stick baking spray.
  2. Whisk dry ingredients: In a medium bowl whisk together the flour, cocoa powder, baking powder, instant coffee and salt. Set aside.
  3. Mix wet ingredients and combine with dry ingredients: In a large bowl whisk together the egg yolks and sugar until well combined and light in color. Add in the sour cream, butter and vanilla extract and whisk until combined. Fold in the dry ingredients until just combined.
  4. Whip and beat egg whites: In another bowl whip the egg whites until stiff peaks form. Fold ⅓ of the whipped egg whites into the batter until combined and then add the rest and fold until just barely combined and no white streaks remain.
  5. Spread cake batter and bake: Spread the cake batter evenly into the prepared pan and bake for 10-12 minutes, until the center of the cake springs back when gently pressed on.
  6. Let cake cool for 2 mintues, then turn cake out of pan onto towel: Let the cake cool for just about 2 minutes. Meanwhile prepare a clean kitchen towel by dusting it lightly with powdered sugar. Once the cake has cooled for 2 minutes and is still pretty hot, run a knife around the edges and then very carefully and quickly turn the cake out onto the kitchen towel. Carefully and slowly peel back the parchment paper from the cake, making sure not to tear the cake at all. Dust the cake with more powdered sugar.
  7. Roll and let cool: Starting from the short end, use the towel to roll the warm cake snuggly so the towel is being rolls up inside it. Place the towel with the cake’s seam side down and let it cool completely, about an hour.
4 pictures showing how to mix up and bake chocolate cake.

Filling Instructions

  1. Mix cream cheese and powdered sugar: Add the softened cream cheese and powdered sugar to the bowl of a stand mixer and use the whisk attachment to mix at medium speed for about 1 minute. Remove to a small bowl and set aside.
  2. Add cream and vanilla. Mix and set aside: Add the heavy cream and vanilla to the stand mixer and whip on high speed until medium soft peaks form. Add the cream cheese mixture and whip on medium until creamy and fluffy. Set aside until you’re ready to assemble your yule log cake.
6 pictures showing how to roll and fill a yule log cake.

Whipped Ganache

  1. Heat up chocolate and combine with cream: Place the chocolate in the bowl of a mixer. Heat the cream in the microwave until steaming but not boiling, about 1 minute. Pour the hot cream over the chocolate and let it sit for a few minutes. Use a whisk to combine the chocolate and cream.
  2. Let cool, then whip ganache: Let the ganache cool to room temperature, or chill in the fridge for about 20 minutes. Using the mixer and the whisk attachment, whip the cooled ganache on high speed for about 3-4 minutes, until light in color and thick and fluffy.

Cake Assembly

  1. Unroll cake: Gently unroll the cake from the kitchen towel. Make sure none of the cake sticks to the towel as it’s unrolled.
  2. Spread filling and reroll: Spread the whipped cream filling evenly over the cake, leaving a/4 inch border around the edges. Re-roll the cake using the towel to help roll it. Cover the cake tightly with plastic wrap and refrigerate for at least 1 hour, up to overnight before frosting.
  3. Cut off branch and angle it on side of cake roll: When you’re reach to frost the cake, remove it from the fridge and unwrap the cake. Cut off about 3 inches of one end of the cake at a sharp angle to use as a branch. Place the branch on one side of the cake with the angled edge against it.
  4. Spread the ganache: Spread the whipped ganache all around the cake, smoothing with a frosting spatula. You can use a fork or the frosting spatula to give the ganache a bark-like texture.
  5. Dust and garnish: Dust with powdered sugar and decorate with rosemary or thyme and sugared cranberries.
4 pictures showing how to make a chocolate ganache and spread it onto a cake.

Baking Tips

This yule log cake just takes some time but it’s not hard! And, it will look and taste amazing when you are all done! Here are a few tips to help make this cake turn out perfectly.

  • Room temperature ingredients: I know that this can take a bit of thought beforehand but it really helps! Make sure to take all of your refrigerated ingredients out and put them on the counter a few hours before you plan on baking. Bringing your ingredients to room temperature really helps them mix nicely together and makes the dough really smooth! 
  • Don’t open the oven door: I know that it’s tempting to open the oven door while you are baking your cake. After all, you just want to see how it’s doing! But when you open the door while you are baking, you let a lot of the heat out. This makes it so that your cake might bake unevenly.
  • Wait for it to cool: It’s super important to follow the directions closely so that this cake doesn’t fall apart when you are rolling it. Make sure that you are allowing it to cool so that it rolls easily. Also, you want to wait for the ganache to cool before spreading it so that it stays thick!
A yule log cake with a slice showing the inside swirl.

How to Store Leftovers

If you have leftovers of this yule log cake then you should call yourself lucky! It’s so good that I bet your leftovers don’t last too long. This is how you can store it to eat later:

  • Refrigerate: Cover your yule log cake loosely with plastic wrap. Then, store it in your fridge! It will last for up to 3 days (if you don’t eat it all before then!)
A close up of a yule log cake.
Print

Yule Log Cake

Show off your holiday spirit by baking this amazing yule log cake! A chocolate cake rolled with a cream cheese filling and topped with a chocolate ganache… It doesn't get much better than this!
Course Dessert
Cuisine American
Keyword yule log cake
Prep Time 2 hours 30 minutes
Cook Time 12 minutes
Total Time 2 hours 42 minutes
Servings 12 slices
Calories 567kcal
Author Alyssa Rivers

Ingredients

Cake

  • ¾ Cup All-Purpose Flour
  • 1/3 Cup Dark Cocoa Powder
  • 1 tsp baking powder
  • 1 teaspoon instant coffee
  • ½ tsp salt
  • 4 large eggs divided
  • ¾ cup granulated sugar
  • 5 tablespoons sour cream
  • ¼ cup unsalted butter melted
  • 1 teaspoon vanilla extract

Filling

  • 8 ounces Cream Cheese softened
  • 1 Cup Powdered Sugar
  • 1 Tablespoon Vanilla Extract
  • 2 Cups Heavy Cream

Whipped Ganache

  • 8 Ounces Semi Sweet Chocolate Chips
  • 1 Cup heavy cream

Optional Garnish

  • Sugared cranberries
  • Rosemary or Thyme

Instructions

Cake

  • Preheat the oven to 350° and prep a 17×12 inch rimmed baking sheet by spraying it with non-stick baking spray and lining it with parchment paper. Be sure to let the parchment paper have at least a 1-inch overhang on all sides. Spray the parchment lightly with the non-stick baking spray.
  • In a medium bowl whisk together the flour, cocoa powder, baking powder, instant coffee, and salt. Set aside.
  • In a large bowl whisk together the egg yolks and sugar until well combined and light in color. Add in the sour cream, butter, and vanilla extract and whisk until combined. Fold in the dry ingredients until just combined.
  • In another bowl whip the egg whites until stiff peaks form. Fold ⅓ of the whipped egg whites into the batter until combined and then add the rest and fold until just barely combined and no white streaks remain.
  • Spread the cake batter evenly into the prepared pan and bake for 10-12 minutes, until the center of the cake springs back when gently pressed on.
  • Let the cake cool for just about 2 minutes. Meanwhile prepare a clean kitchen towel by dusting it lightly with powdered sugar. Once the cake has cooled for 2 minutes and is still pretty hot, run a knife around the edges and then very carefully and quickly turn the cake out onto the kitchen towel. Carefully and slowly peel back the parchment paper from the cake, making sure not to tear the cake at all. Dust the cake with more powdered sugar.
  • Starting from the short end, use the towel to roll the warm cake snuggly so the towel is being rolled up inside it. Place the towel with the cake’s seam side down and let it cool completely, about an hour.

Filling

  • Add the softened cream cheese and powdered sugar to the bowl of a stand mixer and use the whisk attachment to mix at medium speed for about 1 minute. Remove to a small bowl and set aside.
  • Add the heavy cream and vanilla to the stand mixer and whip on high speed until medium-soft peaks form. Add the cream cheese mixture and whip on medium until creamy and fluffy. Set aside until you’re ready to assemble your cake.

Whipped Ganache

  • Place the chocolate in the bowl of a mixer. Heat the cream in the microwave until steaming but not boiling, about 1 minute. Pour the hot cream over the chocolate and let it sit for a few minutes. Use a whisk to combine the chocolate and cream.
  • Let the ganache cool to room temperature, or chill in the fridge for about 20 minutes. Using the mixer and the whisk attachment, whip the cooled ganache on high speed for about 3-4 minutes, until light in color and thick and fluffy.

Cake Assembly

  • Gently unroll the cake from the kitchen towel. Make sure none of the cake sticks to the towel as it’s unrolled.
  • Spread the whipped cream filling evenly over the cake, leaving a/4 inch border around the edges. Re-roll the cake using the towel to help roll it. Cover the cake tightly with plastic wrap and refrigerate for at least 1 hour, up to overnight before frosting.
  • When you are ready to frost the cake, remove it from the fridge and unwrap the cake. Cut off about 3 inches of one end of the cake at a sharp angle to use as a branch. Place the branch on one side of the cake with the angled edge against it.
  • Spread the whipped ganache all around the cake, smoothing with a frosting spatula. You can use a fork or the frosting spatula to give the ganache a bark-like texture.
  • Dust with powdered sugar and decorate with rosemary or thyme and sugared cranberries.

Nutrition

Serving: 1slice | Calories: 567kcal | Carbohydrates: 41g | Protein: 7g | Fat: 42g | Saturated Fat: 25g | Polyunsaturated Fat: 2g | Monounsaturated Fat: 12g | Trans Fat: 1g | Cholesterol: 178mg | Sodium: 211mg | Potassium: 257mg | Fiber: 2g | Sugar: 30g | Vitamin A: 1377IU | Vitamin C: 1mg | Calcium: 101mg | Iron: 2mg


from The Recipe Critic https://ift.tt/32xcrgB
https://ift.tt/3nVARIT

Amazing Breakfast Enchiladas

These easy breakfast enchiladas are SO GOOD! They are filled with sausage, eggs, and salsa and are covered with the best sauce. You won’t be able to stop at just one!

I am a huge fan of yummy foods for breakfast! If you are too then you should definitely try out these Sandwiches, Burritos, and Casserole!

A plate with breakfast enchiladas garnished with cilantro, avocado and tomatoes.

Breakfast Enchiladas

I love a good savory breakfast option! These enchiladas really hit the spot with all of the eggs, sausage, and salsa! Plus. they are so easy and delicious that my kids ask for them ALL the time. And when my kids ask for something then I deliver! Not only are these enchiladas so good but you can easily change them up to make them exactly what you need! You can make them with all veggies, change up the meat, add some bacon and change up the type of salsa that you use!

Because these are so easy to make and change them up! They are on our breakfast rotation all the time! Use these homemade tortillas to make them extra delicious. And not only that, they are super filling so I am not wanting to snack by 10:00 am. Go ahead and give these a try. Your kids will thank you for them later! Oh, and did I mention that you can make these the night before? It doesn’t get much better than that! See the box below to find out how to prepare them ahead of time!

Ingredients in Breakfast Enchiladas

Like I said before, you can add or take away whatever ingredients you want and make these perfect just for you! But here is a good place to start. See the recipe card below for exact ingredient measurements.

  • Turkey sausage: I used turkey sausage but you can use any pork or breakfast sausage that you love!
  • Salsa: I like to use chunky salsa because then I can taste the individial veggies in every bite!
  • Eggs: The eggs get scrambled and mixed in and are so delicious!
  • Salt: This is used to enhance the flavor of all of the other ingredients!
  • Pepper: This brings all the flavor but isn’t enough to have any heat.
  • Onion powder: I like using this instead of regular onions because it blends so well.
  • Mexican cheese: You can use Monterey Jack cheese if you have that instead!
  • Four tortillas: You can use storebought or these amazing homemade tortillas!
  • Heavy cream: This is what makes the sauce soo creamy!
  • Salsa verde: You can also use a can of green enchilada sauce.
  • Cilantro: This is optional!
  • Avocado, diced tomatoes, green onion, cilantro: These are a few ideas that you can put on top!

Let’s Make Some Enchiladas!

These breakfast enchiladas are super easy and take less than an hour to make… and that includes baking time!

  1. Coat with salsa: Coat the bottom of the prepared pan with ¼ cup salsa verde.
  2. Warm and fill tortillas: You can warm the tortillas for 20 seconds in the microwave to make rolling easier! Then, fill each tortilla with about ½ cup of the sausage and egg mixture. Sprinkle a small amount of shredded cheese over the filling before rolling the tortilla tightly. Place the rolled tortilla into the prepared pan with the seam side down. Repeat until the baking dish is full. You might have leftover filling depending how full you fill the tortillas.
  3. Add sauce and cheese to top: Pour the enchilada sauce evenly over the enchiladas and then top with the remaining shredded cheese.
  4. Bake and garnish: Bake for 25 minutes or until golden and bubbly. When they are done, take them out and garnish with avocado, green onion, diced tomatoes, and cilantro!
4 pictures showing how to cook filling and put it in a tortilla.

Variation Ideas

If you’re like me then you will love these breakfast enchiladas and make them a LOT! And the reason why I do is that I can change it up to be different every time! Here are some ideas that you can try to do the same.

  • Toppings: Change up what you put on top! I love using red or orange bell peppers, diced mango, red onions, roasted cauliflower, or zucchini!
  • Use different tortillas: If you don’t love flour tortillas then you can use corn tortillas instead! Here is a recipe for homemade corn tortillas.
  • Change up the meat: The beauty of this recipe is that you can mix and match with whatever you have on hand! Use ground turkey, Italian sausage or pork or ground beef. You could even use cooked bacon!
A casserole dish filled with breakfast enchiladas.

How to Make These Ahead of Time

It’s super easy to make these breakfast enchiladas ahead of time! Just follow the recipe but before you bake it (and WITHOUT the sauce), put it in a sealed, airtight container and put them in the fridge. When you are ready to cook them, mix up the enchilada sauce and put it on. Bake it according to the directions and voila! You have a delicious breakfast that is ready to eat in less than 25 minutes!

A close up of a breakfast enchilada with a fork cutting into it.
Print

Amazing Breakfast Enchiladas

These easy breakfast enchiladas are SO GOOD! They are filled with sausage, eggs, and salsa and are covered with the best sauce. You won't be able to stop at just one!
Course Breakfast
Cuisine Mexican
Keyword breakfast enchiladas
Prep Time 25 minutes
Cook Time 25 minutes
Total Time 50 minutes
Servings 8 people
Calories 353kcal
Author Alyssa Rivers

Ingredients

  • 1 pound turkey sausage (any pork or breakfast sausage)
  • 1/2 cup jarred chunky salsa
  • 8 large eggs beaten
  • 1/2 teaspoon salt
  • 1/4 teaspoon pepper
  • 1/2 teaspoon granulated onion powder
  • 2 cups shredded Mexican or monterey jack cheese divided
  • 8 8-inch flour tortillas additional if needed
  • 1/3 cup heavy cream
  • 1 1/4 cups salsa verde or green enchilada sauce divided
  • 1/4 cup fresh cilantro

Desired toppings

  • avocado
  • diced tomatoes
  • green onion
  • cilantro

Instructions

Enchilada Filling

  • Preheat oven to 375°F. Spray a 13×9 inch baking dish with cooking spray. Set aside.
  • In a large saucepan, cook the sausage over medium-high heat until fully cooked. About 5-7 minutes. Drain the oil from the pan. Add ½ cup chunky salsa to the meat. Stir to combine. Remove the sausage mixture from the pan and set it aside.
  • In a medium bowl, whisk together the eggs, salt, pepper, and onion powder. Add a couple of tablespoons of water to the mixture to help make your eggs fluffy.
  • Cook the eggs in the same pan as the sausage. Cook over medium heat until the eggs are scrambled. Add the cooked sausage mixture to eggs, and stir until all the ingredients are combined.
  • Prepare the enchilada sauce by whisking or blending together the salsa verde, heavy cream, and cilantro.

To assemble:

  • Coat the bottom of the prepared pan with ¼ cup salsa verde.
  • You can warm the tortillas for 20 seconds in the microwave to make rolling easier if you would like. Fill each tortilla with about ½ cup of the sausage and egg mixture. Sprinkle a small amount of shredded cheese over the filling before rolling the tortilla tightly. Place the rolled tortilla into the prepared pan with the seam side down. Repeat until the baking dish is full. Additional filling may be leftover depending on how full you fill the tortillas.
  • Pour the enchilada sauce evenly over the enchiladas, and top with remaining shredded cheese.
  • Bake for 25 minutes or until golden and bubbly. Garnish with avocado, green onion, diced tomatoes, and cilantro if desired.

Notes

-Any type of sausage can be used. Spicy, mild, pork, turkey, seasoned.
-White flour, whole wheat tortillas, or corn tortillas can be used.
-Egg whites or a mixture of eggs and egg whites can be used.
-Look for chunky jarred salsa with green chillies and/or peppers for added flavor.
-This recipe is so versatile.  You can add black beans, cooked onions and peppers, cooked hash browns…any kind of breakfast or Mexican ingredient that you desire.
-An additional pan and tortillas may be needed depending on how much filling is leftover.

Nutrition

Serving: 1enchilada | Calories: 353kcal | Carbohydrates: 28g | Protein: 21g | Fat: 16g | Saturated Fat: 6g | Polyunsaturated Fat: 3g | Monounsaturated Fat: 6g | Trans Fat: 1g | Cholesterol: 242mg | Sodium: 1021mg | Potassium: 354mg | Fiber: 2g | Sugar: 3g | Vitamin A: 570IU | Vitamin C: 2mg | Calcium: 105mg | Iron: 3mg


from The Recipe Critic https://ift.tt/3nUyeXS
https://ift.tt/3E9wiQQ