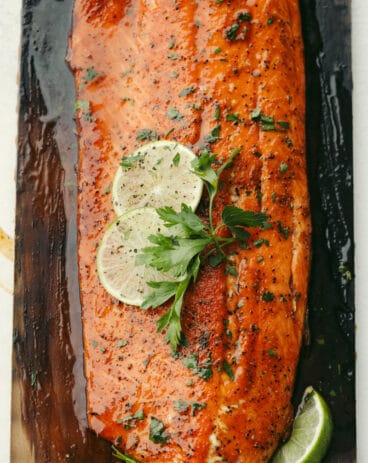
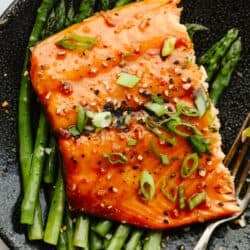
Blanketed with an insanely good soy garlic glaze, this juicy Asian glazed salmon is to die for! With how healthy and delicious it is, it will become your new lunch go-to!
Salmon tastes so amazing with a sweet and savory, Asian-inspired sauce on top. You will love my other Thai, honey sesame, and teriyaki salmon recipes!

Easy and Delicious Asian Glazed Salmon Recipe
Asian glazed salmon is the perfect recipe for when you’re wanting to make something delicious and healthy without spending the whole night doing so. Just a handful of simple ingredients come together to create the most tender and amazing meal! Combine the ease of cooking salmon, its health benefits, a perfect sauce, and you have a knockout dinner. You would never know that this perfectly glazed fish is diet-friendly when it tastes this good! Not only is this Asian glazed salmon low in carbs, but it’s packed with omega 3s, potassium, and vitamins- making it a dish you can feel great about eating!
To add, I love salmon because it is so easy and fast to cook. The best part about this Asian glazed salmon recipe is that you simply put it under the broiler for 5 minutes on each side, and it is cooked perfectly every time! You are going to love the sweet, tangy, garlicky flavor of this sauce. It tastes incredible and complements the tender, flaky texture of broiled salmon so well. Asparagus and brown rice were what I paired this Asian glazed salmon with and it turned out to be a nutritious but satisfying meal. Even if you aren’t a seafood lover, you need to give this recipe a try! It’s time to break out the soy and hoisin sauce sitting in your pantry and get to making this tasty dish!
Simple Asian Glazed Salmon Ingredients
Once you taste how amazing this Asian glazed salmon is, you won’t believe it is made with just a few easy ingredients! Recipes that taste amazing but don’t require me to buy all new ingredients get an A+ in my book. Measurements for each ingredient are listed in the recipe card below.
- Brown Sugar: The sweetness of the glaze comes from brown sugar. Once dissolved, it helps to create the perfect texture as well.
- Soy Sauce: Original Kikkoman soy sauce is typically what I have in my cupboard, but you opt for a low-sodium variety, too. This will help cut down on the salt content of the glaze.
- Hoisin Sauce: Hoisin sauce is the secret ingredient to so many Asian-inspired dishes. If you haven’t tried it before, it is salty with a hint of sweetness, and has strong umami flavor. It comes in handy for other recipes of mine like general tsos and kung pao chicken, so pick some up next time you make a trip to your local Asian market! It will come in handy, I promise!
- Ginger: Ginger is very aromatic and will enhance all of the flavors in the glaze so that they eminate perfectly in your mouth. In this recipe, the ginger I use is peeled and grated.
- Dried Red Pepper Flakes: Add red pepper flakes to taste for slight heat and additional texture.
- Garlic: Minced garlic is going to do a lot of the heavy lifting in the sauce to give you the perfect savory flavor. Don’t skip it!
- Lime Juice: Adds the perfect hint of tart, tangy flavor.
- Salmon: I like to use salmon fillets that are boneless, skinless, and roughly the same thickness. This way, they all cook at the same rate.
How to Make Asian Glazed Salmon
This is the ultimate dish for busy weeknights. You get a tasty, nutritious meal in less than 20 minutes, start to finish! I am sure it will become a regular in your weekly dinner lineup because of how incredibly easy it is to make!
- Whisk Together Sauce Ingredients: In a medium saucepan, whisk together brown sugar, soy sauce, hoisin sauce, ginger, red pepper flakes, garlic and lime juice.
- Boil: Bring to a boil over medium heat until sauce thickens. Set aside.
- Preheat Broiler and Prep Baking Dish: Preheat the broiler to high. Line a baking dish with foil and place salmon on top.
- Brush With Glaze: Baste with glaze and broil for 4 minutes. Remove salmon from the oven, turn over, baste with glaze and return to the oven to broil for 4 more minutes.
- Repeat: Carefully remove salmon from the oven and baste one more time before serving.

Tips for Making the Best Asian Glazed Salmon
These quick tips can help you upgrade this easy dish! Cooked to perfection and smothered in a flavorful sauce, I know you will love this recipe just as much as my family has!
- Salmon: I try to pick wild-caught salmon because it is less fatty and healthier than farmed salmon is. It is also more sustainable! Wild-caught salmon will be darker and more vibrant in color than its farmed counterparts. Try to pick salmon that looks moist and doesn’t have brown spots around the edges.
- Fillet Sizes: The thicker a salmon fillet is, the longer it takes to cook. I recommend choosing fillets that are roughly the same size and thickness so that they all cook up quickly and thoroughly.
- Why Broil: Broiling is one of my favorite ways to cook up salmon. Not only is it easy, it keeps your fish tender while creating the perfect, caramelized top.
- Thickening Glaze: If you want to thicken your sauce, you can add a teaspoon of cornstarch at a time until you have reached your desired consistency.
- Additional Flavors: You can customize your glaze with other ingredients like honey and hot sauce to adjust heat and sweetness to your liking.
- When Salmon Is Done: You will know that your salmon is done cooking when it turns opaque and flaky. Keep in mind, if your fillets are thick it may need a few more minutes of cooking before you reach this point.

What to Serve Asian Glazed Salmon With
My personal favorite way to enjoy this salmon is with sides that can complement its health benefits. Because of this, grilled vegetables and brown rice are usually in the lineup alongside this tasty dish! You can also have an Asian-inspired night and pair your salmon with potstickers, wontons, and fried rice for an easy take-out style dinner at home!


How to Store Asian Glazed Salmon
Being able to reheat in both the oven and the microwave makes this salmon the perfect quick and delicious meal! Great for those of you on the go! Kids can even warm it up for a tasty afternoon snack.
- In the Fridge: Once your salmon has cooled down completely, you can store it in an airtight container for 3 days.
- In the Freezer: Asian glazed salmon will keep for up to 6 months in the freezer. Thaw overnight in the fridge before reheating.
- Reheating: You can microwave your salmon on 50% power for 30 second intervals or until heated through. You can also pop it in the oven, wrap it in tin foil, at 275 degrees Fahrenheit for 10-15 minutes.

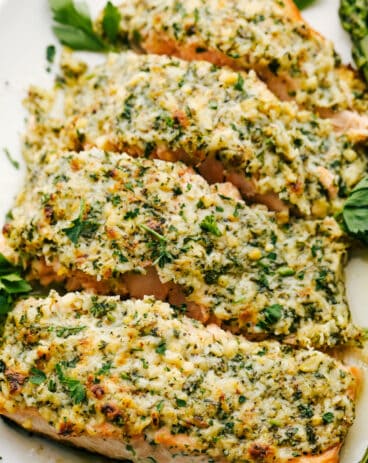
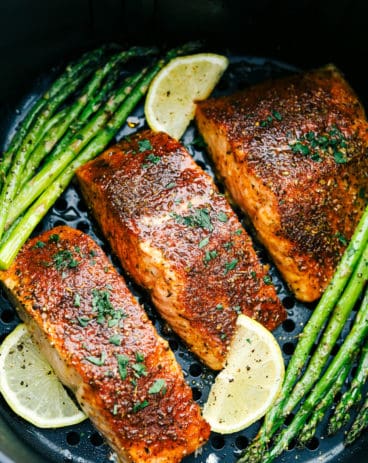
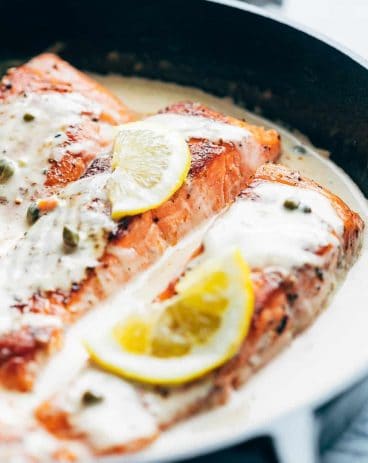
Quick and Delicious Salmon Recipes
Asian Glazed Salmon
Ingredients
- 3/4 cup brown sugar
- 1/3 cup soy sauce
- 2 Tablespoons hoisin sauce
- 2 Tablespoons ginger peeled and grated
- Dried red pepper flakes to taste
- 1/2 teaspoon minced garlic
- 1 Tablespoon lime juice
- 4 1 to 2 pounds salmon fillets boneless, skinless
Instructions
-
In a medium saucepan, whisk together brown sugar, soy sauce, hoisin sauce, ginger, red pepper flakes, garlic, and lime juice.
-
Bring to a boil over medium heat until sauce thickens. Set aside.
-
Preheat the broiler to high. Line a baking dish with foil and place salmon on top.
-
Baste with glaze and broil for 4 minutes. Remove salmon from the oven, turn over, baste with glaze and return to the oven to broil for 4 more minutes.
-
Carefully remove salmon from the oven and baste one more time before serving.
Notes
Nutrition
from The Recipe Critic https://ift.tt/2WzGf9o
https://ift.tt/2VmIZGP