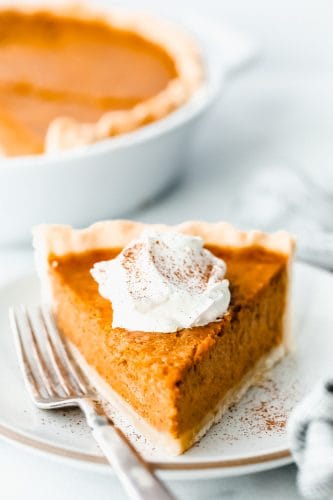
Grandma’s famous pumpkin pie is smooth, thick, and creamy! A MUST for the holidays and the best when served with a big scoop of whipped cream on top!
My grandma would make the best pies ever! If you love pumpkin pie as much as I do then try this Sheet Cake, Pie Bars, or Cupcakes.

Grandma’s Famous Pumpkin Pie
My grandma was an amazing cook but an even better baker! I don’t know anyone that could make better bread, cookies, and pies than her! And her pies… Those were truly a diamond in the rough! Her pies were truly the BEST! I would always go first for her cherry pie followed by pumpkin. Then another slice of cherry. Followed by another slice. There is always room for pie right??
The pie starts with her perfect pie crust! It’s tender and flaky and totally melts in your mouth. Then the pumpkin filling is smooth, thick, and creamy! It’s filled with the most delicious spices and flavors and really makes it the best pie around. While you are at it, you should try these Perfect Mini Pumpkin Pies. They are just as delicious and perfect for the little ones!

Ingredients for Grandma’s Famous Pumpkin Pie
Pumpkin pie is a must for the holiday season! You will love my grandma’s famous pumpkin pie recipe and will use it every time! It will become a family favorite! See the recipe card for a list of exact ingredient measurements.
- Pie crust: I use my grandma’s Perfect Pie Crust for any pie crust recipe.
- Granulated sugar: This is how you sweeten up pumpkin pie.
- Ground cinnamon: This flavoring that makes it taste like fall.
- Salt: You only need to use a dash! This will enhance the flavors of all of the other ingredients!
- Ground ginger: Flavorful spices that make this pumpkin pie even more delicious!
- Ground cloves: These give it a bolder and richer flavor that tastes like fall in a pie with these cloves.
- Eggs: You don’t want to over beat the eggs, just slightly beaten together.
- Canned pumpkin: Libby’s is my favorite! Or, you can make your own using this Homemade Pumpkin Puree recipe!
- Evaporated Milk: This milk makes it rich and creamy.
- Pecans: These are always a great topping for pumpkin pie if you love a crunch!
- Whipped Cream: one of my favorite toppings!

Let’s Bake Grandma’s Famous Pumpkin Pie!
Your holiday season just got better with this pumpkin pie! It is a tried and true recipe that is simple to make and oh. so. delicious! My grandma knew just what to do when baking and made this pumpkin pie PERFECTION every time!
- Make pie crust and filling: Preheat oven to 425 degrees. Prepare this pie crust recipe and set aside. In a large bowl mix together sugar, cinnamon, salt, ginger and cloves. Add eggs, canned pumpkin and evaporated milk. Mix until fully combined.
- Combine and bake: Pour the pumpkin mixture into the prepared pie crust. Bake at 425 degrees for 15 minutes. Reduce heat to 350 degrees and bake for an additional 40-50 minutes or until toothpick inserted comes out clean.
- Cool, top and serve: Cool on wire rack for 2 hours to completely cool. Then, top with pecans and whipped cream if desired. Serve immediately or refrigerate.

Canned or Homemade Pumpkin Puree
Using fresh or canned pumpkin puree does make difference. I have found that fresh pumpkin puree does not set up as well as canned pumpkin. Because of this, I prefer canned pumpkin puree for my pumpkin pie recipe. It sets up nicely and has a thick, creamy, and flavorful texture. The fresh pumpkin puree also has a different texture with a little bit grainy and a little lumpy even after it is pureed. If you do use homemade pumpkin puree then you will want to be sure to drain the liquid using a paper towel. Fresh pumpkin holds in extra water.

How to Make Pie Crust Leaves
You will want to first double my Grandma’s Perfect Pie Crust before making these pie crust leaves. These are so fun and easy to make on top of almost any pie. There are so many other shapes and sizes that you can use too instead of the leaves.
- Roll out dough about ⅛ of an inch thick. Using leaf cookie cutters or any other small shape, simply cut out the shapes in the dough.
- Brush each shape lightly with a beaten egg and milk mixture.
- Place onto parchment paper or greased baking sheet. Bake at 350 degrees Fahrenheit for about 6 to 8 minutes or until lightly browned.
- Let cool completely before adding them to your pumpkin pie.

Tip for Making Pumpkin Pie
Making homemade crust takes an extra step but it is worth it in the end! I love how simple and delicious it is! There are so many flavors that will melt in your mouth and leave you wanting more. These tips will help you come up with the best pumpkin pie this holiday season!
- Pie crust: To make it easier, you can always use store-bought or frozen pie crust. This can save you a little bit of time! If you do make a homemade pie crust then it’s best to first bake your pie crust before adding the pumpkin pie filling.
- Using a pie crust shield: Using a pie crust shield can prevent the edges of your pie crust from being over cooked and turning brown. If you do not have a pie crust shield you can simply use a foil covering on the edges instead.
- Don’t overbake! Make sure to not over bake your pumpkin pie. It will tend to crack if you over bake it. I like to take my pumpkin pie out even if it is a little wobbly and let it finish baking as it cools. The pumpkin pie will slowly firm up leaving no cracks.
- Separation of crust and filling: There tends to be a little separation between the pie crust and the pie after it is baked. Don’t be alarmed this is normal and will still taste delicious!
- Toppings: Add toppings over your pie while it is still warm. Sprinkle brown sugar over top or add any nuts over top. This will give your pie a sweet and crunchy flavor.

How to Store Leftovers of Grandma’s Famous Pumpkin Pie
Day-old pumpkin pie is just as delicious as a fresh-made pumpkin pie! I love the flavors and how rich, bold and creamy this pumpkin pie turns out to be. This pumpkin pie does well fresh, refrigerated, or frozen! You can’t go wrong with this pumpkin pie!
- Make ahead and freeze: luckily pumpkin pie freezes well and up to 1 month. Simply make your pumpkin pie and let cool completely. Once cooled, place in a ziplock bag or airtight container. When ready to eat, thaw overnight in the refrigerator before serving.
- Make ahead and refrigerate: get ahead of the holidays by preparing this pumpkin pie ahead of time. Pumpkin pie can be made about 1 to 2 days ahead of time. Once baked and cooled, completely wrap your pumpkin pie tightly with plastic wrap. Then place in the refrigerator until ready to serve. This will avoid any bacteria getting in the pumpkin pie.
- Ready to serve: when ready to serve, take your pumpkin pie out of the refrigerator for about 15 minutes or eat it a little cold immediately.

More Delicious Pie Recipes to Try
Desserts
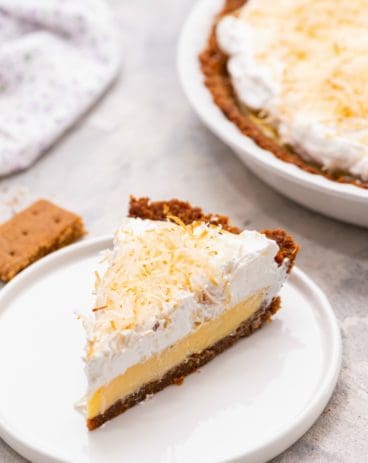
Coconut Cream Key Lime Pie
Desserts
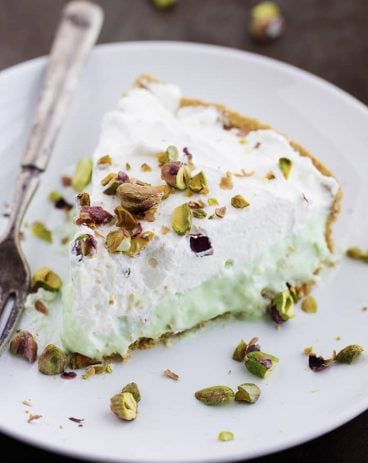
No Bake Pistachio Cream Pie

Desserts
Caramel Apple Pie
Desserts
Strawberry Rhubarb Pie

Grandma’s Famous Pumpkin Pie
Ingredients
- Grandma’s Perfect Pie Crust Recipe
- 3/4 cup granulated sugar
- 1 teaspoon ground cinnamon
- 1/2 teaspoon salt
- 1/2 teaspoon ground ginger
- 1/4 teaspoon ground cloves
- 2 large eggs slightly beaten
- 1 (15 ounce) can pumpkin or homemade puree
- 1 (12 ounce) can Evaporated Milk
- Pecans for garnish optional
- Whipped Cream optional
Instructions
-
Preheat oven to 425 degrees. Prepare pie crust recipe and set aside. In a large bowl mix together sugar, cinnamon, salt, ginger, and cloves. Add eggs, canned pumpkin, and evaporated milk. Mix until fully combined.
-
Pour the pumpkin mixture into the prepared pie crust. Bake at 425 degrees for 15 minutes. Reduce heat to 350 degrees and bake for an additional 40-50 minutes or until the toothpick inserted comes out clean.
-
Cool on a wire rack for 2 hours to completely cool. Serve immediately or refrigerate. Top with pecans and whipped cream if desired.
Video
Notes
Nutrition
from The Recipe Critic https://ift.tt/2pmDfN5
https://ift.tt/2IQiTTg