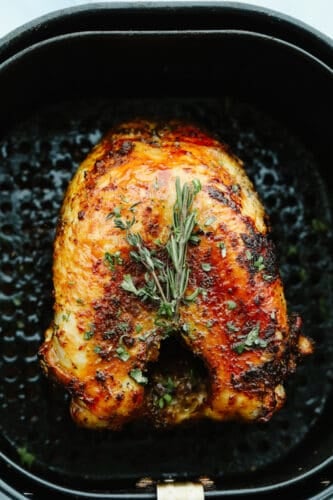
This juicy air fryer turkey is SOO GOOD and will have all of your guests asking for more! It’s perfectly golden brown and dripping in flavor. You will never cook a turkey any other way again!
If you think this turkey is good then you need to try these other amazing side dishes that you can cook in your air fryer! Like these Sweet Potatoes, Brussel Sprouts, or even these super yummy Carrots!

Air Fryer Turkey
I know, I know, cooking a turkey in an air fryer isn’t the most common way to cook it but guess what?! It should be! This turkey turned out AMAZING. I’m talking juicy, lick your fingers to get every last bite good! This air fryer turkey only takes a few ingredients PLUS you don’t have to wait all day for it to cook! It’s the perfect turkey recipe for those who are just starting out because anyone can make it!
This is a great option if you are only serving a few guests. Or, you could use this for your family dinner sometime during the year! I mean, who says that turkey just has to be cooked at Thanksgiving?! Cook this up with some 1-Hour Rolls, this yummy Slow Cooker Sausage Herb Stuffing, this Easy Turkey Gravy, and these Perfect Mini Pumpkin Pies. Then, you will have yourself a delicious feast that everyone will love!!
What You Need to Make an Air Fryer Turkey
This recipe is so quick and easy to prepare! You just need a few herbs and spices that you probably already have on hand! See the recipe card below for exact measurements.
- Bone-in turkey: I used a bone in turkey because it has so much flavor! A 3-4 pound turkey will be just the right size!
- Olive oil: I used olive oil to rub the turkey so that the spices would stick well to it.
- Italian seasoning: This is such a great blend of spices! You can us store bought or, try making this homemade Italian Seasoning. It’s so good and it only takes 5 minutes!
- Paprika: I love the sweet taste that paprkia brings to this turkey!
- Garlic powder: The garlic powder mixes so well with the paprika and Italian Seasoning. The blend will knock your socks off!
- Salt and pepper: You can use more or less of these depending on the flavor that you are looking for!
- Butter: This helps the turkey keep in its moisture and adds a rich flavor!
Let’s Cook a Turkey!
Unlike other turkeys, this one doesn’t have to cook all day! It’s so simple… You are going to love it!
- Rub turkey with oil and spices: Rub the turkey in olive oil. In a small bowl combine italian seasoning, paprika, garlic powder, salt and pepper. Rub on the outside of the turkey.
- Add butter: Slice the butter and put under the skin of the turkey.
- Cook and flip: Lay the turkey skin side down in the air fryer basket. Cook at 350 degrees for 20 minutes. Flip the turkey and cook for and additional 10-15 minutes depending on your size of turkey. Cook until a thermometer reads 165 degrees.
- Let it rest and then slice it: Remove the turkey and let rest for 10 minutes. Slice and serve.

Turkey Cooking Tips
I can’t get over how easy and delicious this air fryer turkey is to make! Here are a few extra trips that will help yours turn out perfect!
- Don’t forget to thaw it! Turkeys can take a while to thaw! Make sure that you put your turkey in your fridge a couple of days before you plan on cooking it. Then, it will be all ready to go when the big day comes!
- Temperature check: Before eating your turkey, it’s important to know if it’s fully cooked of not! A turkey is done when it’s internal temperature reaches 180 degrees if measured in the thigh or 170 degrees in the breast. Use a meat thermometer when it’s done and check it to make sure!
- Let it rest: This step gets skipped so often because everyone is so anxious to eat! Trust me, I totally get it. But this part is SO important! Letting the turkey rest gives it time to absorb all of the juices that it made while it was cooking. If you slice it right aways, they will all just dribble out when you slice it up which means dry turkey meat. And no one wants that! Let it rest, it’s worth it!!

How to Store Leftovers
Turkey makes the BEST leftovers! And this air fryer turkey is no exception. Here is how you can save them for later to make sandwiches, soups, or even this Leftover Turkey Casserole!
- Refrigerate: Once your meat has cooled, place it in an airtight container. Then you can put it in your fridge and it will last for 3-4 days!
- Reheat: If you want to reheat your turkey then you can go ahead and put it on a plate and cook it in the microwave! Cook it on medium power, 30 seconds at a time until it’s heated through.
Amazing Side Dishes to Try
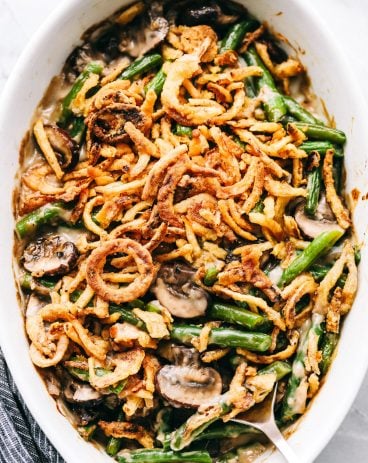
Side Dishes
World’s Best Green Bean Casserole

Side Dishes
1-Hour Rolls

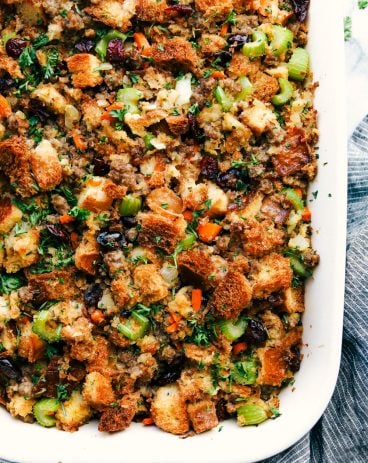
Side Dishes
Grandma’s Sausage Herb Stuffing
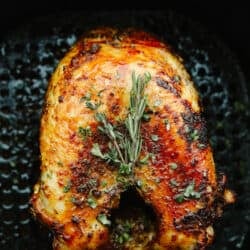
Juicy Air Fryer Turkey
Ingredients
- 3-4 pound bone-in turkey
- 2 Tablespoons Olive Oil
- 1 Tablespoon Italian Seasoning
- 1 teaspoon paprika
- 1 teaspoon garlic powder
- 1/2 teaspoon salt
- 1/4 teaspoon pepper
- 2 Tablespoons butter
Instructions
-
Rub the turkey in olive oil. In a small bowl combine Italian seasoning, paprika, garlic powder, salt, and pepper. Rub on the outside of the turkey.
-
Slice the butter and put it under the skin of the turkey.
-
Lay the turkey skin side down in the air fryer basket. Cook at 350 degrees for 20 minutes. Flip the turkey and cook for and an additional 10-15 minutes depending on the size of your turkey. Cook until a thermometer reads 165 degrees.
-
Remove the turkey and let rest for 10 minutes. Slice and serve.
Nutrition
from The Recipe Critic https://ift.tt/3nFHfE1
https://ift.tt/3CKnKP0