सोमवार, 15 जून 2020

Homemade Peach Pie

Homemade peach pie is one of my favorite things about summer! This homemade peach pie is perfectly sweet with a warm flakey buttery crust. It is the BEST peach pie you will ever have!

Peaches are so sweet and delicious! If you are looking for more recipes using fresh peaches try my Peach Crisp, Peach Cobbler Bars or my Peaches and Cream Pie Bars.
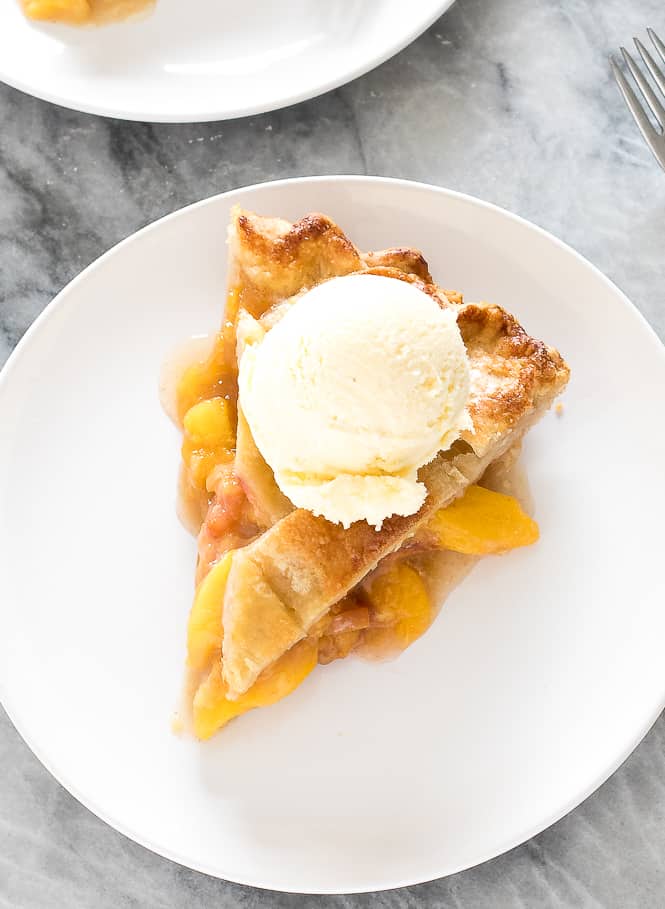
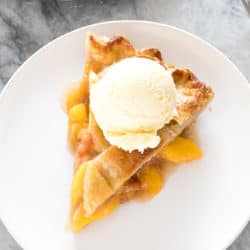
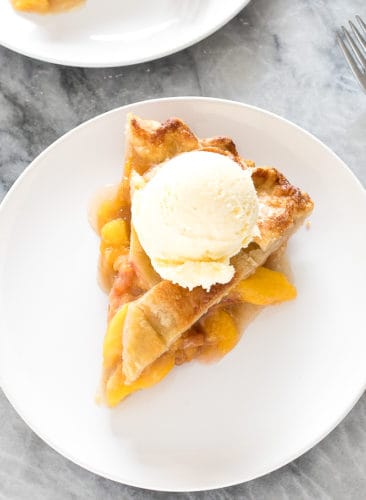
A slice of peach pie on a white plate with a scoop of vanilla ice cream on top.

The Best Peach Pie

There is nothing better than Homemade Peach Pie in the Summer! Warm, gooey peaches in a buttery flaky crust! This peach pie has just the right amount of sweetness with a hint of spice from the cinnamon. The key to this pie is the cornstarch. It’s helps keep the mixture thick and prevents it from being too runny or too dry.

How to Make Peach Pie From Scratch:

  • Prepare the crust: Add flour, sugar, salt and cubed butter to a stand mixer with the paddle attachment. Mix until the butter resembles pea shaped crumbs. Add water to the dough 1 tablespoon at a time until the dough forms a ball. Divide the dough into two balls and shape each into a round flat disk. Place in the refrigerator for 1 hour or overnight to chill.
  • Make the filling: Meanwhile to make the filling simply combine sugar, cornstarch, ginger, cinnamon and salt in a large bowl. Fold in the peaches and coat in the sugar and spices.
  • Assemble: Remove one of the pie discs from the refrigerator. Roll out the pie dough to a circle roughly 12-13 inches in diameter. Transfer to a pie plate. Fill with peach mixture. Place in refrigerator while you work with the top crust. Roll out the second crust into a circle. Either place the dough on top of the pie or using a pizza cutter, cut into 10 strips about 1 inch wide to make a lattice top.
  • Lattice top (Optional): To create a lattice pattern start by laying 5 strips across top of pie. Fold strips 2 and 4 back on themselves. Place a strip overlapping strips 1,3, and 5. Now fold strips 2 and 4 over top of the perpendicular strip. Repeat, alternating the even and odd strips to create a weave pattern. Using finger tips, crimp edges of pie. Trim off excess dough.
  • Egg Wash: In a small bowl whisk together the egg and water. Brush the top of the crust with the egg wash.
  • Bake: At 450°F for 10 minutes. Then reduce temperature to 350°F and bake 45-50 minutes.

Peach pie with a lattice top

Can the skin be left on?

Yes the skin can be left on or off of the peaches just personal preference!

Can this be made with frozen peaches?

Yes! Simply thaw the peaches and strain out any leftover juice!

Can this be made with canned peaches?

Yes! Just like with the frozen peaches make sure to remove as much moisture from them as possible before adding them to the pie.
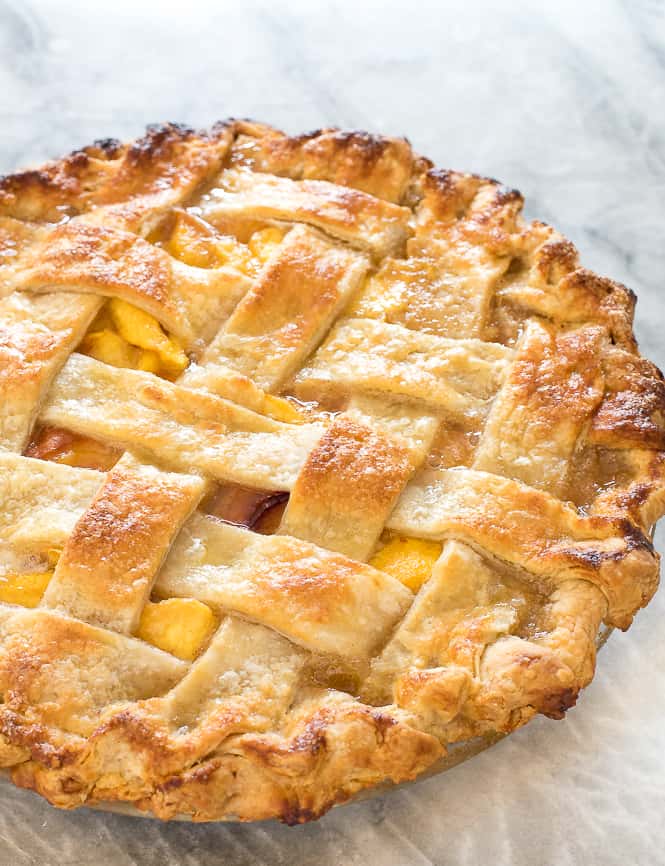
Homemade Peach Pie baked with a lattice top.

More Delicious Pie Recipes:

Print

Peach Pie

Peach Pie is one of my favorite things about summer! This homemade peach pie is perfectly sweet with a warm flakey buttery crust. It is the BEST peach pie you will ever have!
Course Dessert
Cuisine American
Keyword homemade peach pie, Peach Pie
Prep Time 30 minutes
Place dough in the refrigerator for 1 hour or overnight to chill. 1 hour
Total Time 1 hour 30 minutes
Servings 8 Slices
Calories 305kcal
Author Kelley Simmons

Ingredients

Crust

  • 2 1/2 cups all purpose flour
  • 1 tbsp granulated sugar
  • 1 tsp salt
  • 1 cup unsalted butter, cold and cubed
  • 6-8 tbsp ice water

Peach Pie Filling

  • 4 cups peaches, sliced (can be peeled or unpeeled)
  • 1 cup granulated sugar
  • 1/3 cup cornstarch
  • 1/2 tsp ground ginger
  • 1/2 tsp ground cinnamon
  • 1/4 tsp salt
  • 1 large egg
  • 1 tbsp water

Instructions

Crust

  • Add flour, sugar, salt and cubed butter to a stand mixer with the paddle attachment. Mix until the butter resembles pea shaped crumbs.
  • Add water to the dough 1 tablespoon at a time until the dough forms a ball.
  • Divide the ball into two balls and shape each into a round flat disk. Place in the refrigerator for 1 hour or overnight to chill.

Peach Pie Filling

  • In a large bowl whisk sugar, cornstarch, ginger, cinnamon and salt.
  • Fold in the peaches and toss to coat in the sugar and spices.

Assembly

  • Preheat oven to 450 degrees.
  • Remove one of the pie discs from the refrigerator. Roll out the pie dough to a circle roughly 12-13 inches in diameter. Transfer to a pie plate.
  • Fill with peach mixture. Place in refrigerator while you work with the top crust.
  • Roll out the second crust into a circle. Either place the dough on top of the pie or using a pizza cutter, cut into 10 strips about 1 inch wide to make a lattice top.
  • To create a lattice pattern start by laying 5 strips across top of pie. Fold strips 2 and 4 back on themselves. Place a strip overlapping strips 1,3, and 5. Now fold strips 2 and 4 over top of the perpendicular strip. Repeat, alternating the even and odd strips to create a weave pattern.
  • Using finger tips, crimp edges of pie. Trim off excess dough.
  • In a small bowl whisk together the egg and water. Brush the top of the crust with the egg wash.
  • Bake at 450°F for 10 minutes. Then reduce temperature to 350°F and bake 45-50 minutes.
  • Let the pie cool and rest for at least 1 hour before serving to allow filling to firm.

Nutrition

Calories: 305kcal | Carbohydrates: 69g | Protein: 6g | Fat: 1g | Saturated Fat: 1g | Cholesterol: 23mg | Sodium: 374mg | Potassium: 197mg | Fiber: 2g | Sugar: 33g | Vitamin A: 285IU | Vitamin C: 5mg | Calcium: 16mg | Iron: 2mg


from The Recipe Critic https://ift.tt/2UOCNUS
https://ift.tt/3frAtLq

रविवार, 14 जून 2020

Grilled Cajun Garlic Butter Lobster Tails

Grilled Cajun Garlic Butter Lobster Tails are buttery and savory and they make a normal night at home seem so fancy! To elevate your next dinner party be sure to include these in your plans!

Lobster is becoming one of my favorite dinners on special nights. The best lobster tail recipe ever is just as great as this one and makes it just as fun to celebrate!

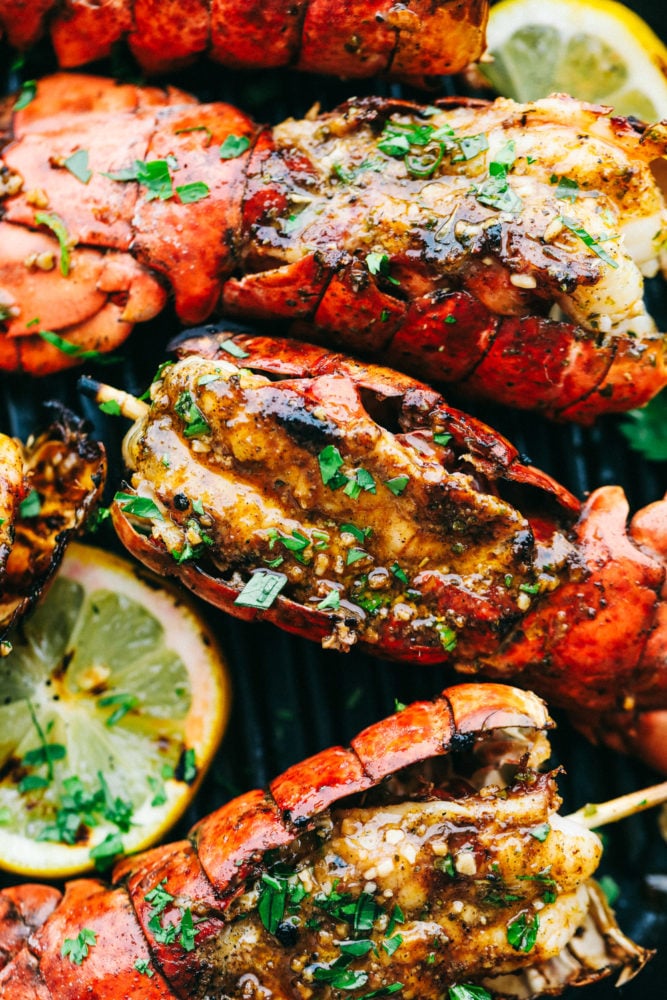
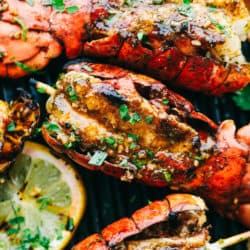
Close up on lobster tail.

Grilled Cajun Garlic Butter Lobster Tails

For years I have thought of lobster tail as a special occasion only meal.  It just seems so fancy!  Maybe that’s because where I am from it is so rare to see it on a menu.  Not living by the ocean makes this meal so unique to me!  So, when I got a hold of some lobster tails I was over the moon excited to try this recipe!

I was not let down one bit! The grilled lobster turned to be as insanely delicious as I thought it would be!  It felt like it melted in my mouth! The spices were so perfect with the grilled meat and gave it just enough kick without taking away from the amazing flavors the lobster meat had on its own!  I enjoyed this meal so much and it took an ordinary night at home and made it feel like something special.  We all enjoyed it so much and will definitely be making this again soon!

Grilled Lobster Tail Ingredients:

The good news about this lobster recipe is that there is a good chance you already have almost all of the ingredients!  Butter, oil, garlic and seasonings are pretty much staples in most kitchens.  So, that will give you time to find great fresh lobster tails.  It is important that you spend the money and take the time to choose a great lobster tail.  You really do get what you pay for with this and since it is the star of the show it is worth the extra effort.

  • Lobster tails: The
  • Butter: Salted or unsalted are both good, just adjust the amount of salt you add in accordingly.
  • Olive oil: Use a high quality olive oil or extra virgin olive oil because it will taste better in the marinade.
  • Garlic Cloves: Minced
  • Salt and Pepper: To taste.
  • Cajun Seasoning

How to Grill the Best Lobster Tails:

As you know I have recently discovered a love of grilling.  So, now I am expanding my horizons and trying lobster on the grill!  It actually was so much easier than I thought it would be! Once the lobster is butterflied, just whisk a quick sauce and head to your grill.  Allow it to cook on each side and marinate as it cooks and you will have a fresh, buttery homemade lobster dinner that is unbelievable!

  1. Prep: Preheat grill to medium high heat.
  2. Butterfly the lobster: Using kitchen shears butterfly the tail by cutting down the center. Loosen the meat and pull the lobster meat upward. Salt and pepper the meat and set on a baking sheet.
  3. Whisk Sauce: In a small bowl combine melted butter, olive oil, garlic and cajun seasoning. Brush on top of the prepared lobster.
  4. Grill: Place lobster on grill flesh side down until lightly charred about 3-4 minutes. Flip over and brush again with marinade and continue to cook for about 5 more minutes until cooked throughout.

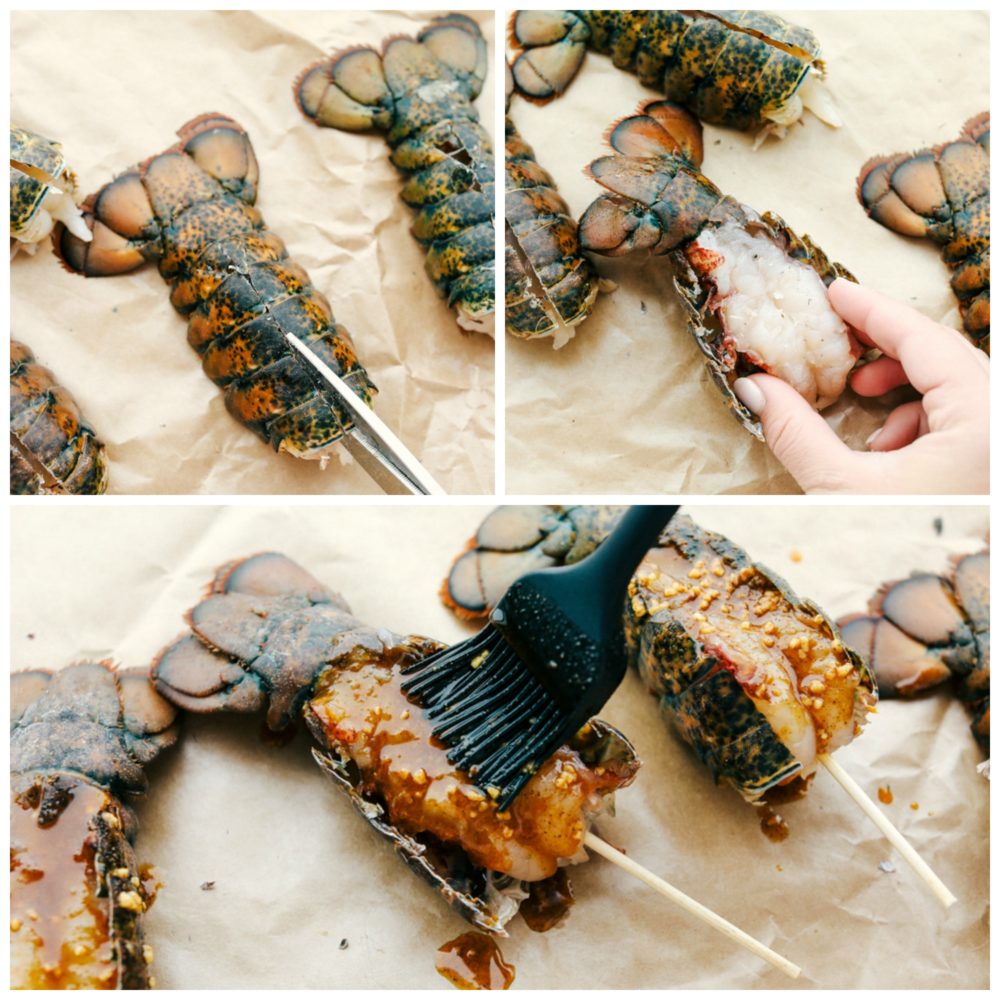
Steps to butterfly the lobster tail and marinate.

How to Butterfly Lobster:

Taking the time to butterfly the lobster tail will make a huge difference in the finished meat.  When you butterfly the tail, the meat is able to absorb more of the flavors from the marinade and the smokiness from the grill.

  1. Cut the shell: Use kitchen shears or a sharp knife to cut the shell down the middle.  Start at the big end where it meets the tail fan, but leave the shell intact.
  2. Pull apart halves: With your fingers, pull apart the shell halves so you can see the tail meat in the shell.

Tips for The Most Amazing Lobster Ever!

This grilled cajun garlic butter lobster is hard to mess up.  Seriously, you can do this! To make it the best ever, I have answered a few questions you may have and given you some of my tips for grilling lobster so that you will feel confident.  Trust me, this lobster dinner is going to be awesome!

  • Close the lid: Its a best practice with any grilled meat.  The heat needs to stay in the grill so keep the lid shut as much as possible.  Lift only to turn the lobster over and baste with more sauce.
  • How do you know when the lobster tails are done? Lobster meat will turn white and be opaque and the shell will turn red.
  • Use a meat thermometer: Lobster needs to cook to an internal temperature of 140 degrees.  If you want the best lobster ever, use a thermometer to make sure your lobster is perfectly cooked.  Pull it off the grill if it is between 135-140 because it will continue to cook after you take it off the grill.
  • How to keep the meat from sticking to the shell? Putting the cooked tail in an ice bath after grilling not only stop it from over-cooking, but it will also help the meat to slide out easier.
  • Grill on medium heat: The only way to make bad lobster is to burn it.  So keep your grill on medium heat so it will turn out perfect!

Storing Grilled Cajun Butter Lobster Tails:

Properly stored, your lobster will save in the shell for up to 2 days in the refrigerator.  If you have removed the meat from the shell it will also store for 2-3 days in the fridge.  If you need to save it for longer it will freeze well for up to 6 months.

  • To store: Allow the grilled lobster to cool completely before storing, but do not wait more than 2 hours as bacteria grow rapidly at room temperature.  Place lobster in a Ziploc bag or container where it is submerged it in liquid.  Saltwater is what I usually use, but you could also use milk or cream.  Remove as much air as possible before sealing the bag or container.
  • Reheating from frozen: Thaw overnight in the refrigerator or for a quick thaw leave the lobster in the container and put it under cool water.  Then, place the lobster in an oven safe dish with a little bit of water or butter and cover it with aluminum foil.  Finally, place it in the oven at 350 degrees until it is warm.

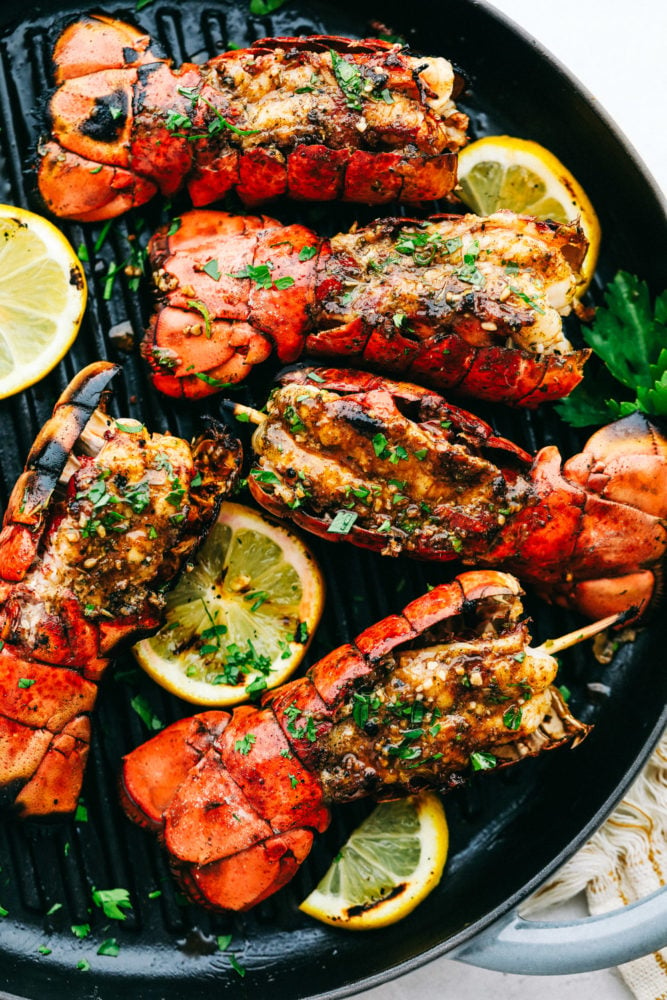
Lobster tail on grill pan.

More Seafood Favorite Recipes:

Cajun seasonings pair so well with the more mild flavors found in seafood.  For grill friendly cajun seafood recipes try Cajun Shrimp and Sausage Skewers and Cajun Shrimp and Sausage Veggie Skewers.

Print

Grilled Cajun Garlic Butter Lobster Tails

Grilled Cajun Garlic Butter Lobster Tails are buttery and savory and they make a normal night at home seem so fancy! To elevate your next dinner party be sure to include these in your plans!
Course Dinner, Main Course
Cuisine American, Mediterranean
Keyword grilled lobster tail, lobster, lobster tail, lobster tail recipe
Prep Time 10 minutes
Cook Time 10 minutes
Total Time 20 minutes
Servings 4 People
Calories 190kcal
Author Alyssa Rivers

Ingredients

  • 4 lobster tails
  • salt and pepper
  • 1/4 cup butter melted
  • 1 Tablespoon olive oil
  • 3 garlic cloves minced
  • 1 Tablespoon Cajun Seasoning

Instructions

  • Preheat grill to medium high heat. Start by preparing the lobster. Using kitchen shears butterfly the tail by cutting down the center. Loosen the meat and pull the lobster meat upward. Salt and pepper the meat and set on a baking sheet.
  • In a small bowl combine melted butter, olive oil, garlic and cajun seasoning. Brush on top of the prepared lobster.
  • Place lobster on grill flesh side down until lightly charred about 3-4 minutes. Flip over and brush again with marinade and continue to cook for about 5 more minutes until cooked throughout.

Nutrition

Calories: 190kcal | Carbohydrates: 2g | Protein: 11g | Fat: 16g | Saturated Fat: 8g | Cholesterol: 111mg | Sodium: 371mg | Potassium: 175mg | Fiber: 1g | Sugar: 1g | Vitamin A: 1216IU | Vitamin C: 1mg | Calcium: 65mg | Iron: 1mg


from The Recipe Critic https://ift.tt/2YxrAZQ
https://ift.tt/2UIYLZh

शनिवार, 13 जून 2020

Grilled BBQ Chicken

This grilled BBQ chicken is a simple to make tender chicken that’s coated in a sweet homemade barbecue sauce that comes through with great flavor in every bite!  You will be making this weekly after you see what a huge hit it is!

Grilled Hawaiian BBQ chicken or honey chipotle BBQ chicken are two other easy grilled chicken recipes I find myself using over and over! They are made of many of the same tried and true flavors that I never get tired of!

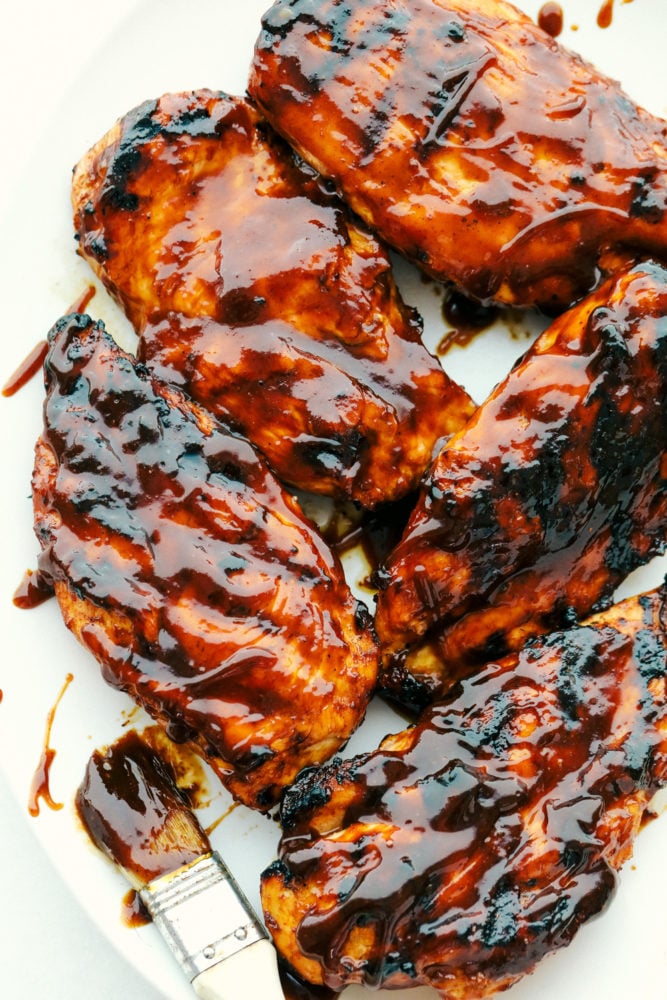
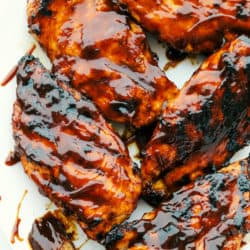
Grilled BBQ chicken covered in barbecue sauce.

Easy Grilled BBQ Chicken

BBQ season is now in full force, and I love BBQ’s. They make me so happy! I love the smell of the grill heating up outside!  I’m not sure why I usually reserve using my grill for having people over and an official barbecue?  So, lately I have been stepping out of my comfort zone and making more and more of my family’s meals outside on my grill even during the week.  This simple recipe is one reason why!

We had friends over last week and I made this easy grilled bbq chicken. It was perfect!  The chicken was so moist and grilled perfectly. My hubby has always had awesome BBQ skills, but after that night I can definitely say I do too!  Now, I feel confident to use the grill any night of the week.  It is especially nice that I’m not heating up my kitchen on these hot summer nights! My mouth is watering just thinking about this yummy chicken! I am definitely going to make it again soon!

BBQ Chicken Ingredients:

It’s amazing how two simple ingredients that are so simple and easy to find make such a stand out meal!  I love that I can come up with this meal at the last minute too, because these are two staple ingredients I always have on hand.  Either I use store bought BBQ sauce or often I have my homemade BBQ sauce ready to go because I can make it ahead and it lasts up to 2 weeks in the refrigerator.  So, if unexpected company comes or if we are just looking for a weeknight meal for the family, this is one I am always ready to make!

  • Chicken: I prefer to use chicken breasts.  I pound it out or cut it lengthwise to make even, thin pieces.
  • Homemade BBQ sauce: Stir together ingredients then split into two parts. Use one for marinating chicken for at least 2 hours. The second reserved part will be used for basting while grilling. (If you are in a pinch using pre-made barbecue sauce works fantastic too!)

How to Grill Chicken:

Grilling chicken is such a quick and easy way to cook a hearty chicken dinner.  I get tired of always baking chicken in the oven.  And lets me honest, it is so hot in the summer I am just not excited about heating up my oven!  It is so nice to heat up the grill outside and let it do its thing!  Just flip it over halfway through and don’t forget to baste it as it cooks with your delicious BBQ sauce!

  1. Combine ingredients from Homemade BBQ Sauce: In a medium sauce pan stir together ketchup, molasses, brown sugar, cider vinegar, Worcestershire sauce, paprika, chili powder, onion powder, salt and liquid smoke.
  2. Bring to a simmer over medium heat and cover with a lid.  Let cook stirring occasionally until the sauce thickens about 10-15 minutes.
  3. Reserve Sauce:  Set aside 1/2 cup of BBQ sauce reserve for basting the chicken as it is grilling.
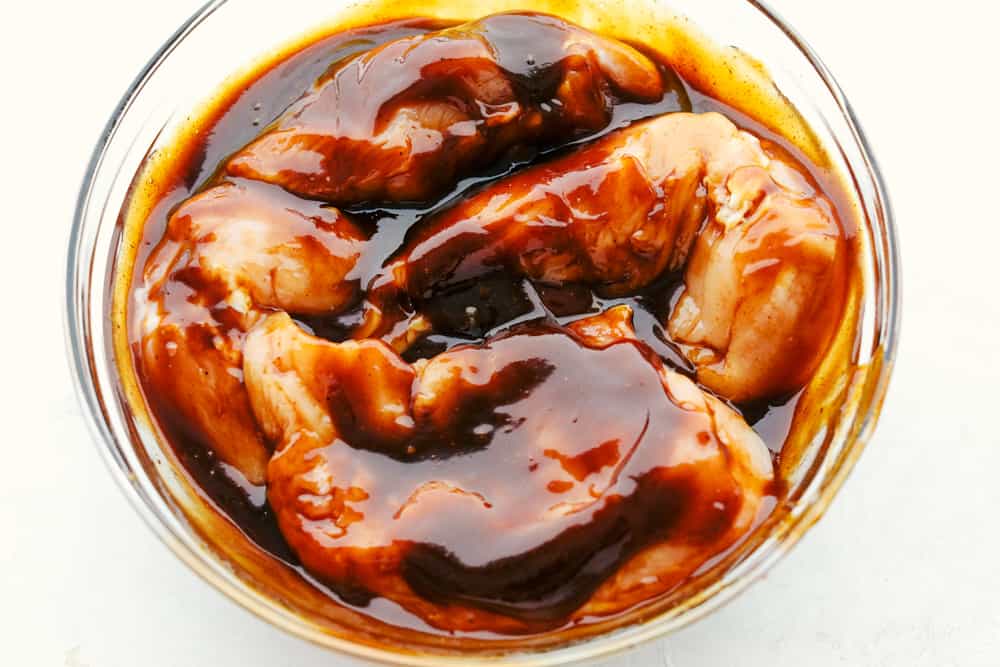
  4. Marinate Chicken: Place chicken in a ziplock or airtight container. Pour the other part of your homemade BBQ sauce over top of the chicken and seal or close the container for 2 hours.
  5. Grill BBQ Chicken: Preheat grill to medium heat. Place the marinated bbq chicken in the center of the grill. Grill in homemade BBQ sauce for 12 to 15 minutes.  Flip the chicken over halfway through and finish grilling on the other side until the internal temperature of the chicken reaches 165 degrees Fahrenheit.  *Don’t forget to use the 1/2 cup of reserve bbq sauce for basting on the chicken as it is cooking.

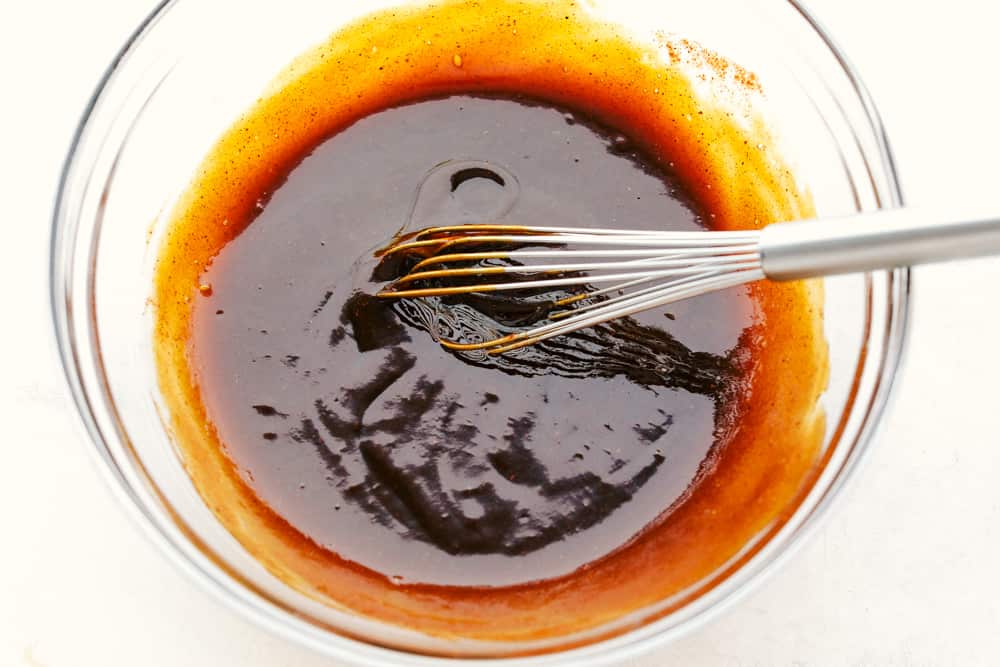
Barbecue sauce with a whisk in a clear bowl.

Homemade BBQ Sauce Ingredients:

This may seem like a long list, but trust me, you have most of these things already!  Just dig around in that spice cabinet and in the door of your refrigerator.  You will most likely have them.  If you do need to grab a few things, buy them in bulk because you will be making this homemade sauce a lot once you see how amazing it is!!

  • Ketchup: Adds sweet and tangy flavor to the sauce.
  • Molasses: For sweetness and a warm, smoky flavor.
  • Brown sugar: Rich sweetness
  • Cider vinegar: Balances out all the sweetness with its tartness.
  • Worcestershire sauce: Savory and sweet tangy sauce.
  • Paprika: Adds an unmistakable red color and very mild pepper flavor.
  • Chili powder: For spice!
  • Onion powder: Sweet and savory flavor of onions are perfect in this sauce.
  • Salt: To taste
  • Liquid smoke: I love the smokiness the BBQ sauce gets from adding this!

Chicken marinating in barbecue sauce in a glass bowl.

Grilling the Perfect Chicken:

I am taking all the guesswork out of grilling for you.  After writing many grill recipes, responding to your comments and questions, and some of my own trials and errors, I have compiled everything you need to know to make the perfect grilled chicken!

  • Which chicken works best on a grill? Any chicken can be great, but I stick to chicken breasts because they are lean and cook quickly.  I butterfly them and pound them out so I have nice, thin, evenly sliced pieces to work with, which also helped me determine cooking time.
  • How hot does my grill need to be? Your grill needs to be at least 350 degrees before you begin cooking your chicken.
  • Where do I place the chicken on the grill? You want to aim for an indirect heat on the chicken, so do not place it directly over a flame.  The inside of the chicken needs to have time to cook completely without burning the outside.
  • How long do I cook my chicken? Depending on the size or thickness of your chicken, every piece will be different. The average is 5-8 minutes per side.  For example, a 3/4 inch thick breast would cook 5 minutes per side.  Add more time for a thicker piece or a bone-in chicken.
  • Do I need to turn chicken as it cooks? Flip once while cooking, any more than that and your chicken may start to break apart or stick to the grates.
  • How do I know when my chicken is done? When your chicken is done the juices will run clear.  However, it is best to just trust a meat thermometer when it comes to deciding if your chicken is done.  The internal temperature of the chicken needs to reach 165 degrees.

What do I serve with grilled chicken?
I love to serve grilled chicken with other sides I can cook on the grill like corn on the cob, grilled coconut lime pineapple.  It is also great served over simple rice or a summer salad.

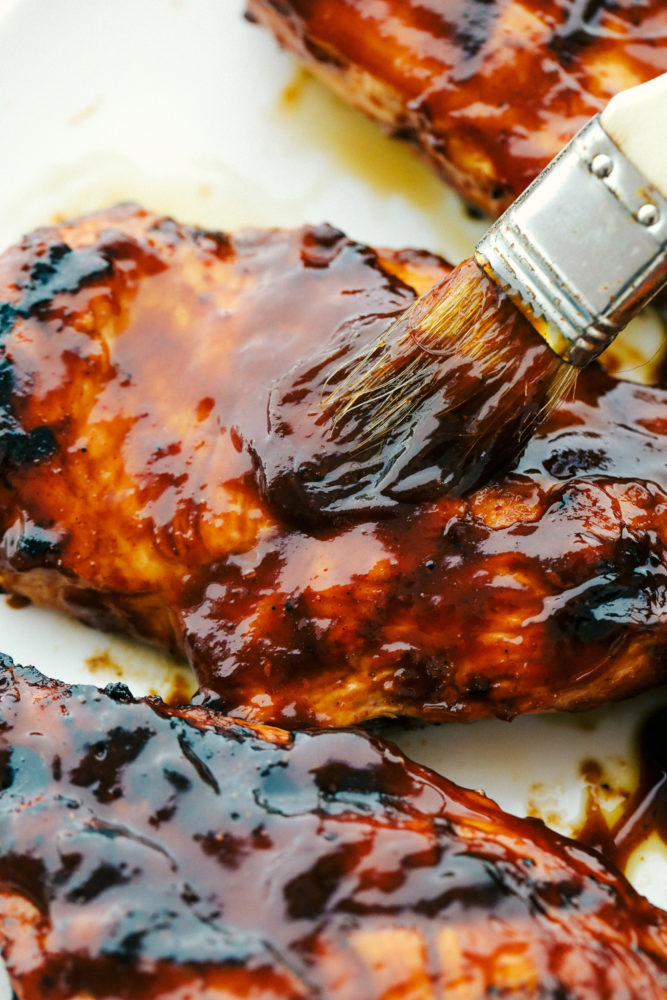
Brushing barbecue sauce on grilled chicken.

Tips for Grilling:

I used to leave all the grilling to my husband, but that was several grill recipes ago 😊.  Now, I have learned that the grill is nothing to be feared.  After learning a few easy tricks and tips, I can grill anything! And so can you!

  • Grill care: Taking care of your grill will help it to last longer and your food will turn out better. So, be sure to clean your grill before and after using it.  To clean it just turn it on and let the grates get hot.  Then using a wire brush, clean of any debris on the grates. Coat the grill rack with oil before placing meat on it to prevent any sticking and also make it easier to clean later.
  • Keep the lid closed: Resist the urge to check on your chicken often. Just as with our oven in the kitchen, the more you open the lid, the more heat you lose.  Containing the heat will cook your meat quickly and more evenly.  Only open the grill to flip once halfway through cook time.
  • Baste: Take the opportunity when your grill is open to flip your chicken to baste it with some of the sauce you set aside.  Remember to discard any sauce that was used to marinate chicken and only baste with the sauce that has not been used.
  • Grill temperature: Keep the grill at a lower temperature when cooking chicken so that it does not burn the outside while the inside is still raw.
  • Oil your grates: To keep your meat from sticking, brush the grill racks with oil before putting the meat on the grill.

Storing Grilled Chicken:

The number one thing about storing this chicken is to make sure you do not leave it out at room temperature (or hotter if you are outside) for more than 2 hours.  This can be hard when everyone is busy talking and enjoying the evening, but it needs to be stored right away or discarded.

  • Refrigerator: Store in a shallow airtight container or bag for 3-4 days.
  • Freezer: Pack as tightly as possible in a freezer safe bag or heavy duty foil and freezer wrap for up to 4 months.
  • Re-heating:  To prevent your chicken from drying out, wrap it in aluminum foil and heat at a very low temperature (between 170-250 degrees).

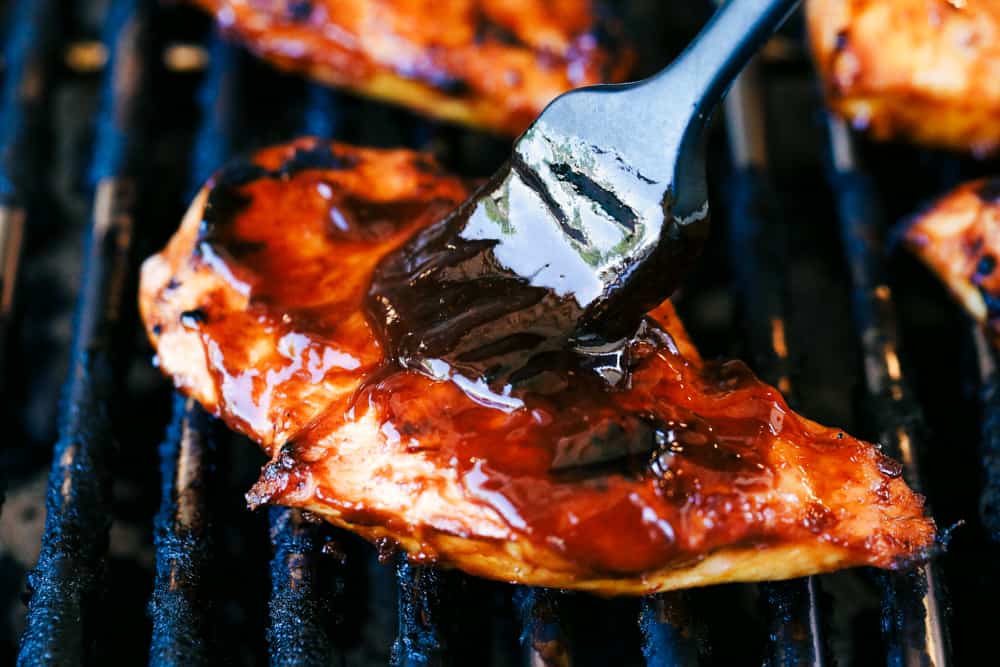
Brushing barbecue sauce on chicken while it is grilling.

More Delicious Grilled Chicken Recipes:

Print

Grilled BBQ Chicken

This grilled BBQ chicken is simple to make tender chicken coated in sweet barbecue flavor that comes through in every bite!  You will be making this weekly after you see what a huge hit it is!
Course Dinner, Main Course
Cuisine American
Keyword bbq chicken, bbq chicken grilled, chicken bbq, chicken grilled, grilled bbq chicken
Prep Time 15 minutes
Cook Time 15 minutes
Total Time 30 minutes
Servings 4 People
Calories 191kcal
Author Alyssa Rivers

Ingredients

  • 1 pound chicken breast
  • Homemade BBQ sauce
  • 1/2 cup BBQ Sauce Reserve used for basting while grilled

Instructions

Combine ingredients from Homemade BBQ Sauce:

  • In a medium sauce pan stir together ketchup, molasses, brown sugar, cider vinegar, Worcestershire sauce, paprika, chili powder, onion powder, salt and liquid smoke. 
  • Bring to a simmer over medium heat and cover with a lid.  Let cook stirring occasionally until the sauce thickens about 10-15 minutes.  

Marinate Chicken:

  • Place chicken in a ziplock or airtight container. Pour homemade BBQ sauce over top of the chicken and seal or close the container for at least one hour.
  • Leave 1/2 cup of BBQ sauce reserve for basting the chicken as it is grilling.

Grill BBQ Chicken:

  • Preheat grill to medium heat. Place the marinated bbq chicken in the center of the grill. Grill in homemade BBQ sauce for 12 to 15 minutes.
  • Flip the chicken over and finish grilling on the other side until the internal temperature of the chicken reaches 165 degrees Fahrenheit.
  • *Use the 1/2 cup of reserve bbq sauce for basting on the chicken as it is cooking.

Notes

Updated on June 13, 2020
Originally Posted on May 28, 2012

Nutrition

Calories: 191kcal | Carbohydrates: 15g | Protein: 24g | Fat: 3g | Saturated Fat: 1g | Cholesterol: 73mg | Sodium: 499mg | Potassium: 503mg | Fiber: 1g | Sugar: 12g | Vitamin A: 114IU | Vitamin C: 2mg | Calcium: 17mg | Iron: 1mg


from The Recipe Critic https://ift.tt/3fok4Ya
https://ift.tt/2ztShpP

शुक्रवार, 12 जून 2020

Incredible Bacon Ranch Pasta Salad

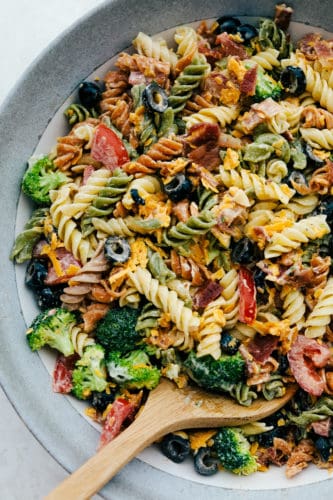
This bacon ranch pasta salad is filled with colorful veggies and perfectly contrasting textures and flavors! Every bite is so satisfying it will be an incredible hit with anyone lucky enough to enjoy it!

If you love the flavors in this pasta salad, enjoy them as the main dish too! To turn these flavors in to a delicious, warm dinner try Cheesy Chicken Bacon and Broccoli Ranch Pasta or Slow Cooker Creamy Ranch Chicken.

Bacon Ranch Pasta salad on a plate.

Incredible Bacon Ranch Pasta Salad

Trust me when I say this is the best pasta salad ever!  My son and his friends ate the entire thing in 5 minutes and agreed that it was the best pasta salad that they have had.  I wasn’t surprised, because these flavors together are so amazing!  The combination of the bacon, pasta, veggies, and ranch flavor is to die for!

The crisp bacon and veggies are so nice in contrast to the al dente pasta.  The creamy ranch sauce coats every groove of this salad leaving no bite without its delicious flavor!  And, as if it couldn’t get any better, the cheese and olives bring their sharp and unmistakable tastes to this vibrant meal.  This is the only pasta salad I will take to potlucks from now on!

Easy Bacon Ranch Pasta Salad Ingredients:

Seriously, filling a fork with all these delicious ingredients is insanely good! Even my kids will eat this because of the creamy ranch dressing.  Finally, I found an easy way for them to get in their veggies!

  • Fusilli Tri-Color Pasta: I love using this colorful pasta to bring even more interest to this dish!
  • Bacon: Adds crunch and a savory element.
  • Roma Tomatoes: I love biting into the tomatoes for a burst of sweet flavor!
  • Broccoli: Adds crisp and fresh earthy flavor
  • Sliced Olives: Adds pieces of salty smooth richness.
  • Cheddar Cheese: Shredded (freshly shredded will give a stronger cheese flavor)
  • Mayonnaise: Mix together with ranch seasoning to make a creamy sauce to coat the veggies and pasta.
  • Dry Ranch Seasoning: Combines with mayonnaise to add the classic ranch flavor.

How to Make Cold Pasta Salad:

In just a few simple steps you can enjoy an amazingly nutritious and satisfying meal!  Cook your pasta, make your ranch sauce, then toss all the ingredients together with the creamy sauce and you are ready to enjoy a great combination of flavors and textures.  This is a great recipe to make with kids because there are so many easy ways for them to learn and help!

  1. Cook the pasta: Follow package directions to cook pasta. Drain and rinse in cold water.
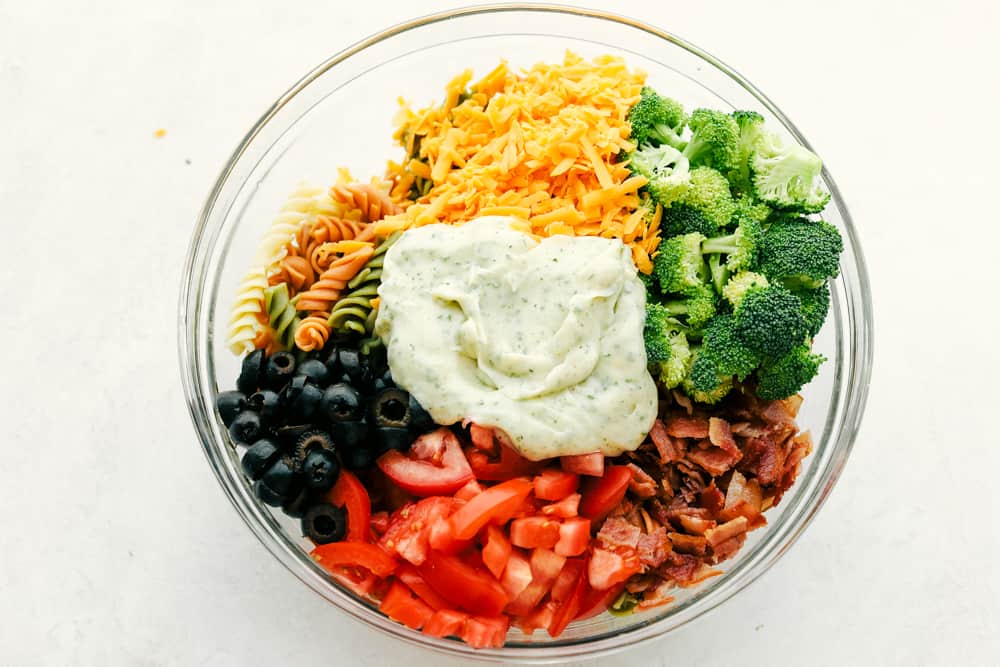
  2. Combine: In a large bowl combine pasta, bacon, tomatoes, broccoli, olives, and cheese.
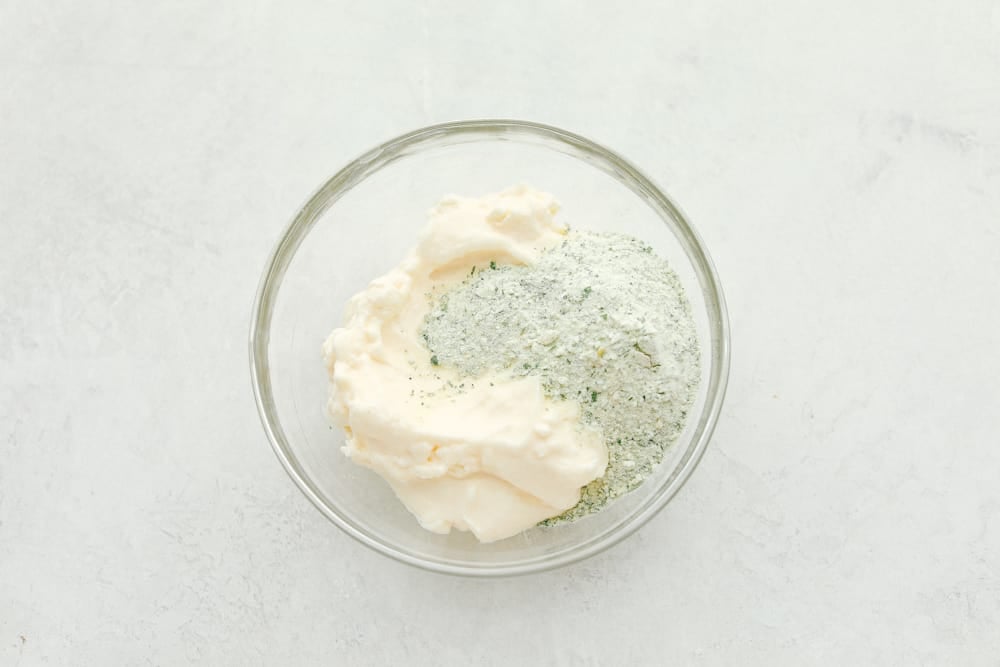
  3. Whisk: In a small bowl whisk the mayonnaise and dry ranch seasoning.
  4. Toss: Add the mayonnaise mixture to the bowl of pasta and veggies and mix until combined.

Mayonnaise mixture ingredients in a clear bowl.

Variations for Delicious Pasta Salad:

The thing I love most about this pasta salad is how versitile it is! If you are short on time or are out of an ingredient, this salad can easily be adapted to fit your needs and still taste amazing! Here are some recommendations of swaps and additions I have loved.

  • Add a protein: To make this a complete meal you could add in some proteins like shrimp or cubed deli ham or turkey.
  • Veggies: Add in anything you love like peas, red onion, or peppers.
  • Shortcuts: If you are in need of some corner-cutting, try grabbing these items from the store: shredded cheese, ranch dressing, or pre-cut veggies instead of preparing them yourself.
  • Allergies: If you have certain dietary restrictions this recipe works great with gluten free noodles or zucchini noodles.
  • Cheese: If you are cheese obsessed like me use a larger cut of cheese like a crumble or cubed cheese instead of shredded.  This will give more of the cheese flavor than a thinner shredded version.
  • Ranch dressing: Want to cut down on the mayonnaise?  Use ½ cup sour cream and ½ cup mayonnaise or replace it entirely by using ranch dip with a little bit of milk to thin it out.
  • Pasta: Use any bite size pasta you love.  My kids love Farfalle in anything or shells.  Use whatever you have on hand and brings a smile to the faces at your house!
  • Low Calorie/Low Fat options: Use plain greek yogurt instead of mayonnaise or a low fat version of the mayonnaise or sour cream in the dressing.  Also, you could leave out the cheese.


Bacon Ranch Pasta Salad ingredients in a clear bowl.

How to Store a Cold Pasta Salad:

If taking this to a BBQ or potluck of any kind you will want to double or triple this recipe.  Seriously, trust me, this stuff will go fast!  Also, I also recommend preparing it a little ahead of time so that it has time to chill in the refrigerator for at least an hour before serving.  The flavors will have time to settle together and it will be so much better.   If you are in the very rare situation of finding your self with leftovers use these guidelines.

  • Storing: Place in an airtight container in the refrigerator within 2 hours
  • Expiration: Pasta will be good in the refrigerator for a maximum of 5 days.
  • Note: If using Gluten free noodles, they do not last as long in the refrigerator.

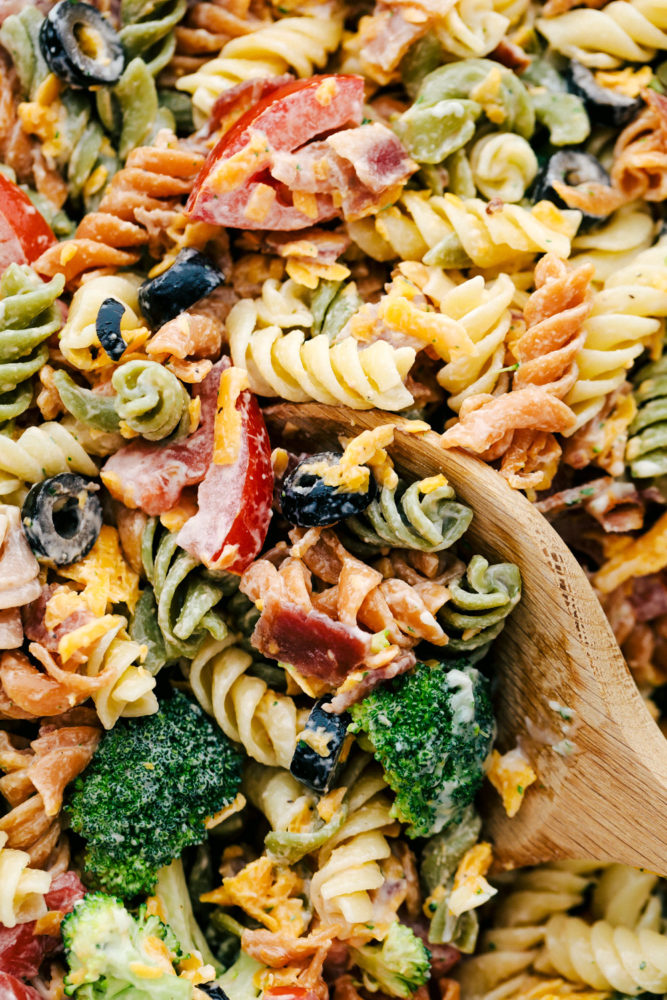
Close up on bacon ranch pasta salad ingredients being scooped up with a wooden spoon.

More Amazing Pasta Salad Recipes to Try:

Print

Incredible Bacon Ranch Pasta Salad

Incredible Bacon Ranch Pasta Salad is filled with colorful veggies and perfectly contrasting textures and flavors! Every bite is so satisfying it will be an incredible hit!
Course Salad, Side Dish
Cuisine American
Keyword bacon ranch pasta salad, Pasta Salad, ranch pasta salad
Prep Time 10 minutes
Cook Time 10 minutes
Total Time 20 minutes
Servings 12 People
Calories 304kcal
Author Alyssa Rivers

Ingredients

  • 16 ounce fusilli tri-color pasta or pasta of choice
  • 10 slices bacon cooked and crumbled
  • 3 roma tomatoes diced
  • 2 cups broccoli chopped
  • 5 ounce sliced olives
  • 2 cups cheddar cheese shredded
  • 1 cup mayonnaise*
  • 1 packet dry ranch seasoning

Instructions

  • Cook the pasta according to package directions. Drain and rinse in cold water.
  • In a large bowl combine pasta, bacon, tomatoes, broccoli, olives, and cheese.
  • In a small bowl whisk the mayonnaise and dry ranch seasoning. Add it to the bowl of pasta and veggies and mix until combined.

Notes

*Can sub with greek yogurt

Nutrition

Calories: 304kcal | Carbohydrates: 3g | Protein: 8g | Fat: 29g | Saturated Fat: 9g | Cholesterol: 40mg | Sodium: 546mg | Potassium: 148mg | Fiber: 1g | Sugar: 1g | Vitamin A: 478IU | Vitamin C: 16mg | Calcium: 153mg | Iron: 1mg


from The Recipe Critic https://ift.tt/3cWfiPZ
https://ift.tt/2YrSySC