Chili Dogs are usually what you get at amusement parks or college cafeterias. And who hasn’t eaten one too many with messy hands and extra tissue to wipe off your face. I love them because they really take hot dogs to the next level. And these are incredibly easy to make at home. If you are soaking up all the sun and spending all your time outdoors grilling with your family, these chili dogs should be on your must make list.
These Chili Dogs are such an American classic and with our favorite fast and easy chili recipe, I bet your whole family will love them! Don’t forget the extra napkins!
Easy Homemade Chili:
Start with an easy chili recipe. You can use your house favorite, try out our Chipotle Chili recipe or use my extra easy recipe below. Make the chili a day ahead which really allows the flavors to become better. On the day, just heat it up on the grill if you like (let it simmer while you grill all the other stuff), or heat it on the stove. And you are ready to start layering your chili dogs.
Making Hot Dogs:
Choose to boil, pan fry or grill your hot dogs. Grilled hot dogs are a personal favourite plus those char marks look so good when you assemble your chili dogs.
We prefer our buns toasted most of the time, but there are people in the family who like theirs untoasted too. Toasted buns hold up better under the chili and hot dogs. And you can butter them and throw them on the grill for a minute or two for a quick toast.
Chili Dog Toppings:
I know toppings are a personal affair. Everyone likes what they like.
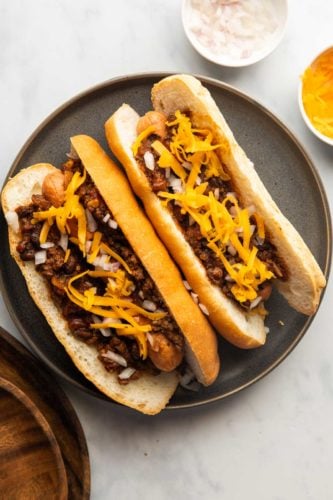
Taking hot dogs to the next level, these Chili Dogs are messy, fun and the perfect backyard barbecue food! Making these at home is so EASY!
CourseDinner
CuisineAmerican
Keywordcheesy chili dog, chili dog, hot dog, hot dog recipes
Prep Time20minutes
Cook Time40minutes
Total Time1hour
Servings8Hot Dogs
Calories456kcal
AuthorRicha Gupta
Ingredients
For the chili
1tablespoonButter
1tablespoonOlive Oil
1poundGround Beef
1/2Onionfinely chopped
3Garlic Clovesminced
115 ounce canPasta Sauce
1teaspoonChili Powder
1/2teaspoonground Cumin
1teaspoonSalt
Other Ingredients
8Hot Dog Buns
1tablespoonButter
8Beef Hot Dogs
Instructions
Making Chili:
To make the chili, heat olive oil and butter in a skillet and add the ground beef, onions and garlic. Break it up with the back of a spoon and cook till the beef started browning. Add the remaining ingredients for the chili and cook for 15 minutes on a slow simmer.
Grilling Hot Dogs:
To grill the hot dogs, heat the grill to medium high heat. Brush the grill grates with oil and place the hot dogs on the grill. Grill until char marks form and the hot dogs are heated through. Turn off the heat, butter the buns and if you like, grill them too.
Make a Chili Dog:
To assemble, place a hot dog on the buns and top with chili and your favourite toppings. Enjoy!
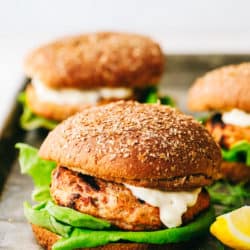
Salmon Burgers are light and tasty burgers that are easy to make ahead and enjoy all summer! The homemade salmon patty is flavorful and quick and easy to grill!
Salmon burgers are so satisfying and healthy. Those two words don’t usually go together, but this nutrient packed burger is both good for you and just good! It is one of the best salmon burger recipes, including restaurant versions. The fresh taste of seafood and the tangy and bright seasonings are perfection in every hearty bite.
Making a salmon burger from scratch is easy to do and it comes together in under 30 minutes. Make these patties in bulk and freeze them to grill later, or grill them freshly made. Either way, the result is a must try salmon burger that is impressive and crowd-pleasing!
Ingredients in Salmon Burgers:
Most of the ingredients in these from-scratch salmon burgers are already in your pantry, spice cabinet, or refrigerator door. They are staple ingredients that take your salmon and turn it into an insanely delicious burger.
Salmon: Buy a center cut filet that has skin and pin bones removed.
Dijon: Adds moistness and flavor.
Worcestershire sauce: Tangy taste and binding ingredient.
Green Onion: Mild onion flavor and crunchy texture.
Fresh dill: Adds more depth of flavor and pairs well with the salmon.
Lemon juice: A bit of freshness.
Salt and Pepper: To taste!
Bread crumbs: Holds the patty together while its grilling.
Optional: Serve with butter lettuce and tartar sauce.
How to Make Salmon Burgers from Scratch:
Salmon burgers are so fresh and satisfying and easy to make from scratch at home. They are better than anything you can buy at a restaurant and are ready in just minutes!
Prep: Preheat the grill to medium high heat. Cut the salmon into one-inch cubes.
Mix ingredients: Place salmon in a food processor with dijon, Worcestershire sauce, green onion, dill, lemon juice, salt and pepper. Pulse until combined. Meanwhile, in a medium sized bowl add the salmon and breadcrumbs then add it to the mix.
Form patties: Shape meat mixture into four patties.
Grill: Let patties cook on grill for 3-4 minutes on each side.
Serve: Remove from grill and place on buns and desired toppings.
Tips for the Best Salmon Burgers:
Salmon is a versatile fish that goes well with both bold and subtle flavors. So, when building your salmon burger there are many ways to get creative!
Toppings: Keep your burger simple or load it with flavorful toppings like avocado, tomato, onion, lettuce.
Sauces: Pesto, dill sauce, honey mustard, or tartar are my favorite sauces to pair with a salmon burger.
Perfect Temperature: A finished salmon burger should have a golden-brown color on the outside and an opaque pink color on the inside as it cooks. Salmon must reach an internal temperature of 145 degrees to be safe to eat.
Can Salmon Burgers Be Made Ahead?
Salmon patties are so easy to make ahead and store. They are great way to use up any leftover salmon too! Cover them tightly in aluminum foil or plastic wrap before storing. Be sure to separate each patty with parchment paper so that they can easily be pulled apart to re-heat later.
Refrigerator: Cooked salmon patties will last for up to 4 days in the refrigerator. While raw patties should not be left in the refrigerator longer than 2 days.
Freezer: Both grilled and raw salmon patties can be frozen for up to 3 months.
Re-heat: To thaw, place in a pan on medium-high heat until heated through.
Salmon Burgers are light and tasty burgers that are easy to make ahead and enjoy all summer! The homemade salmon patty is flavorful and quick and easy to grill!
CourseDinner, Main Course
CuisineAmerican
Keywordgrilled burger, salmon burger
Prep Time10minutes
Cook Time10minutes
Total Time20minutes
Servings4Burgers
Calories219kcal
AuthorAlyssa Rivers
Ingredients
1poundsalmonskin removed
1Tablespoondijon
1teaspoonWorcestershire sauce
2Tablespoonsgreen onionchopped
1Tablespoonfresh dill
Juice of half a lemon
1teaspoonsalt
1/4teaspoonpepper
1/2cupbreadcrumbs
Optional for serving:
tarter sauce
butter lettuce
Instructions
Preheat the grill to medium high heat. Cut the salmon into one inch cubes. Place in a food processor with dijon, Worcestershire sauce, green onion, dill, lemon juice, salt and pepper. Pulse until combined. In a medium sized bowl add the salmon and breadcrumbs and mix.
Shape into four patties and place on the grill. Grill for 3-4 minutes on each side. Remove from grill and place on buns and desired toppings.
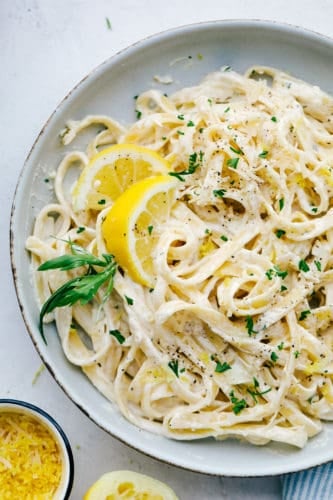
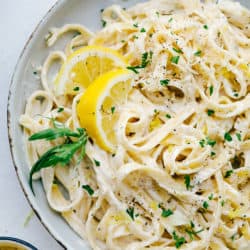
Lemon Garlic Cream Fettuccini is a quick meal that is loaded with rich flavors that taste like they took all day to create, but are ready in under 30 minutes. This will be a huge hit recipe that your entire family will go crazy over!
For a lighter version of this creamy favorite try Skinny Fettuccini Garlic Alfredo. It has half the calories, but you won’t even be able to tell!
Lemon Garlic Cream Fettuccini
This recipe has been around in my home for years and it has been a tried and true meal we all enjoy. The creamy sauce with the fresh lemon flavor is incredibly delicious. The lemon garlic bursts through in every bite. It is the perfect twist on the classic homemade alfredo sauce that we all love.
Lemon garlic cream fettuccini feels like a gourmet meal with rich garlic and perfectly cooked fettuccini, but it is really a simple pasta recipe that even a beginning cook can prepare. Since it is ready to serve in under 30 minutes, it makes a quick weeknight meal, but is luxurious enough for a homemade celebration. Add in some grilled chicken or shrimp for a full meal or let it shine by itself, and soon this recipe will become a family favorite in your home as well!
Lemon Garlic Fettuccini Ingredients:
These ingredients are all must have items that you will find yourself using again and again. They are simple to prepare and easy to find in the grocery store, but are loaded with incredible flavors you will start to crave.
Fettuccini: Use whichever pasta you have on hand. I just love how these thick noodles hold up to the cream sauce.
Butter: Melt unsalted butter in the pan to sauté onion in until tender.
Onion: Chopped onion smells so amazing as it cooks with the butter to form a great flavor base for the sauce.
Garlic cloves: Adds rich garlic flavor.
Lemon peel: The peel is where most of the lemon flavor comes from so add more or less to your taste.
Heavy whipping cream: Gives the sauce its rich creamy texture.
Salt and Pepper: To taste!
Cream cheese: Allow cubes of cream cheese to come to room temperature before adding them in.
Lemon juice: Fresh and bright flavor twist to a classic cream sauce.
Fresh parsley: Minced parsley on top adds great color and flavor.
Grated parmesan cheese: Optional but highly recommended for the perfect nutty flavor at the end.
How to Make Homemade Fettuccini:
This super easy recipe is perfect when you are wanting to satisfy a pasta craving quick! It is ready in under 30 minutes. While your fettuccini cooks, you can prepare the sauce and have it ready to toss with the pasta when it is al dente. A vibrant and rich dinner has never been so easy!
Cook Pasta: Cook the fettuccine according to package directions and drain.
Make the sauce: In a large skillet over medium high heat melt the butter. Add the onion and cook for 3-4 minutes until tender. Add the garlic and lemon peel. Slowly stir in the heavy cream, salt and pepper. Whisk in the cubed cream cheese and stir until melted. Remove from heat and allow to cool slightly. Add in the lemon juice.
Combine pasta and sauce: Add pasta, and parsley to the sauce. Toss to coat.
Serve immediately: Garnish with lemon peel, parsley, parmesan cheese if desired.
Tips for the BEST Creamy Fettuccini:
This is one of the best pasta dishes because it is easy, delicious and versatile. Here are my pro tips for making this pasta dish an over the top success.
Ingredients: Use the freshest ingredients possible for the most vibrant flavors. For example, freshly grated parmesan cheese will give you the best melt into your lemon garlic cream sauce. The store bought kind is coated with preservatives that do not allow the cheese to melt properly. Fresh garlic will have a stronger flavor too.
Salt the pasta water: Adding salt to the pasta water will bring out the flavor of the pasta as it cooks.
Garnish: For more color and a punch of flavor add in chopped plum or cherry tomatoes at the end or even sprinkle some red pepper flakes in for a bit of heat.
Protein: Add in shrimp or chicken to make this a complete protein-packed meal.
The best thing about pasta for dinner is the leftovers. They store well and still taste amazing the next day for a hearty lunch. Just be sure to store in an airtight container after the pasta has cooled, but no longer than 2 hours after preparing it.
Refrigerator: 5-7 days in the refrigerator.
Freezer: 4-6 months if properly stored in a freezer bag. However, due to the nature of cream sauces, freezing is not ideal. The sauce may break and it can be hard to regain the creamy texture after thawing.
Reheat: To warm leftovers in the microwave, heat for 30-45 seconds then stir and repeat until heated throughout. If the sauce is not as creamy, add a bit of liquid to return it to its original creamy texture. Try milk, broth, or cream and stir vigorously.
Cook the fettuccini according to package directions and drain.
Lemon Garlic Cream Sauce:
To make the sauce, In a large skillet over medium high heat melt the butter. Add the onion and cook for 3-4 minutes until tender. Add the garlic and lemon peel. Slowly stir in the heavy cream, salt and pepper. Whisk in the cubed cream cheese and stir until melted. Remove from heat and allow to cool slightly. Add in the lemon juice.
Add pasta, and parsley to the sauce. Toss to coat. Serve immediately and garnish with lemon peel, parsley, parmesan cheese if desired.
Notes
Updated on July 22, 2020Originally Posted on March 6, 2014
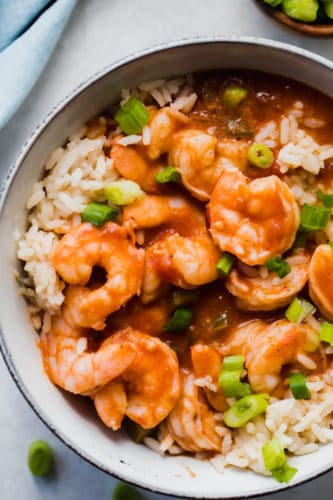
Creole Shrimp Étouffée is a classic southern stew is full of tender shrimp, the “Holy Trinity” of veggies, and flavored with a decadent golden roux. This stew has a subtle heat thanks to seasoning, but served over rice is the ultimate in Louisiana comfort food!
Celebrate Louisiana and their food culture with this comforting stew. Simple ingredients are used to create a masterpiece thanks to taking some time to prepare them. To complete your Southern experience make sure you try out this New Orleans Gumbo, Shrimp Creole, and this Cajun Garlic Butter Shrimp.
Shrimp Étouffée
Louisiana is an area of our country that is rich in history and that history shines in the foods that are made and enjoyed there! Due to being on the gulf coast, shrimp is a popular option as a protein when it comes to cooking. And the shrimp truly shine in this deeply flavorful stew broth.
Etouffee is a French word meaning “smothered” which refers to the protein being smothered in a sauce. Etouffee is a dish that can be found in both Cajun and Creole cooking that are both highlights of Louisiana cuisine.This particular recipe I’m sharing today is a creole style Shrimp Etouffee. It is a thick stew, loaded with tender shrimp and served over rice.
How to Make Shrimp Étouffée:
Prepare Shrimp: peel and devein the shrimp, plus remove the tails to make enjoying the meal easier. Cover and place the shrimp in the refrigerator until ready to add to the stew.
Make broth: this is an optional step. If making your own broth, save the shells from the shrimp and add to a large stock pot or dutch oven. Add in scraps from the celery, onion and bell pepper, a wedge of lemon, garlic cloves and water. Bring this to a boil and simmer for 45 mins to 1 hour. Strain and use the broth in the recipe.
If NOT making your own broth: a combination of chicken broth and clam juice gives a seafood style broth and uses store bought ingredients, this saves time if needed. Plus you can buy shrimp that has already been peeled, deveined and tails removed which saves time when prepping the recipe.
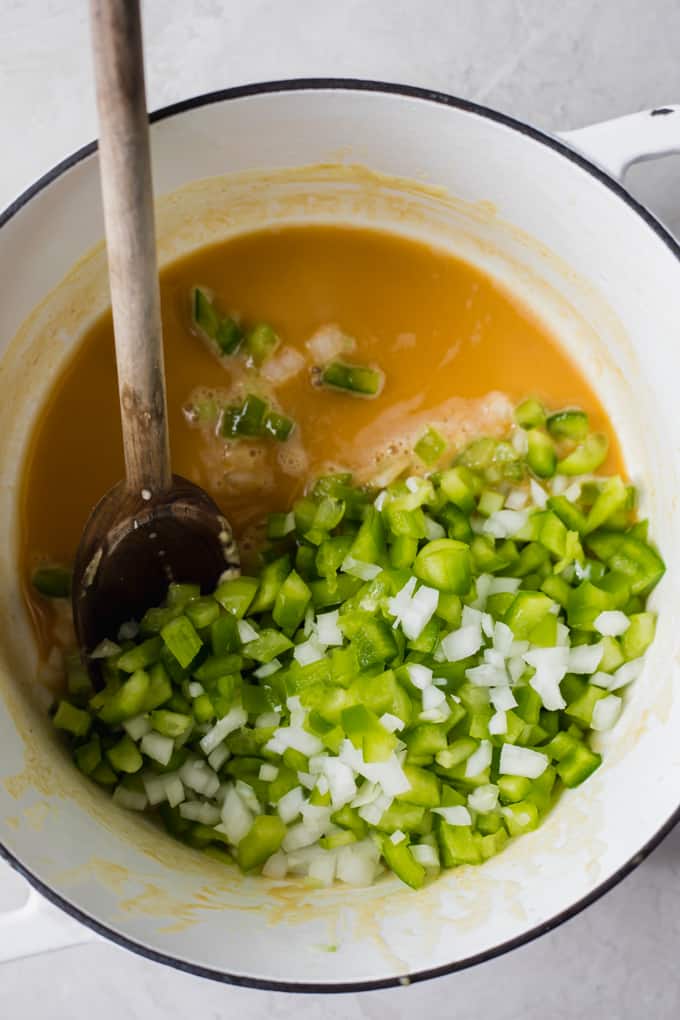
Lightly Brown Roux: the base of the étouffée sauce is made by lightly browning a combination of flour with butter or other fat, like oil. The longer the roux cooks, the darker it becomes. For our étouffée we want a nice golden roux. This is what gives a thick gravy like texture to the sauce, and gives a depth of flavor to the stew. Make sure you stay close and stir this while it cooks, the roux can burn very easily.
Add “Holy Trinity”: this is a phrase that describes the classic combination of onion, celery and bell pepper that is a staple in most cajun and creole cooking. Let these veggies cook in the roux until softened.
Add broth and simmer: add the broth to the veggies and roux and mix together, add additional seasonings. Bring to a low simmer and let this cook for 10-15 minutes.
Cook Shrimp: the shrimp can be cooked in a skillet with some creole seasoning and served on top of the finished dish. OR you can add the shrimp to the stew and let them cook in the stew for about 10 minutes. This is my preferred method.
Does Étouffée Have Tomato?
This is purely preference. Creole cooking typically does have a tomato based sauce. Cajun cooking on the other hand does not. If you are not sure which style you would prefer, add all of the ingredients for the sauce minus the tomatoes, bring to a simmer, taste and decide if you want tomato to be added.
What is the Difference Between Étoufféeand Gumbo?
Etouffee is a thicker stew since we are only cooking our roux to a nice golden color. Gumbo involves cooking the roux to a deep brown coloring, which also affects the thickening power of the roux.
Gumbo also will traditionally have more than one protein included, shrimp and sausage or some other type of meat.
Creole Shrimp Étouffée. This classic southern stew is full of tender shrimp, the "Holy Trinity" of veggies, and flavored with a decadent golden roux. This stew has a subtle heat thanks to seasoning, but served over rice is the ultimate in Louisiana comfort food!
CourseMain Course
CuisineAmerican
Keywordshrimp etouffee
Prep Time15minutes
Cook Time40minutes
Total Time55minutes
Servings8People
Calories370kcal
AuthorSerene Herrera
Ingredients
2lbsshrimpmedium to large
¼cupbutter
¼cupall purpose flour
½cupyellow oniondiced
1celery stalkdiced
1green bell pepperseeds and membranes removed, diced
Prepare the shrimp by peeling, deveining, and removing the tails. Place the shrimp in a medium size bowl, cover and store in refrigerator. If making your own shrimp broth save the shells, instructions are in notes below to make your own Shrimp Broth.
Melt butter in a large pot or dutch oven over medium heat. Sprinkle with flour and stir to combine.
Cook this roux over medium heat for 12-15 minutes until the roux is a golden brown color. Stir constantly while cooking to prevent burning.
Add in the onion, celery and bell pepper. Stir to coat in the roux. Continue to cook another 5 minutes or until the veggies have softened. Add in the garlic and stir.
Pour in the broth and clam juice, stir to combine. Then add in the additional seasonings, worcestershire sauce and hot sauce. Stir in the tomatoes. Let this come to a simmer, cooking for 8-10 minutes.
Add the shrimp to the broth, cover and let cook for 10 minutes.
Serve the shrimp etouffee over cooked white rice. Garnish with fresh parsley or sliced green onion if desired.
Notes
Homemade Shrimp Stock: if desired make your own shrimp stock to use in this recipe! Make sure you purchase Unpeeled shrimp.
Shells from peeling shrimp
Scraps from celery, onion, and bell pepper
lemon wedge
2 quarts water
Bring this to a boil, cover and let simmer for 45 mins to an hour. Strain out the veggies and shells. Use this broth in the recipe above.