सोमवार, 17 अगस्त 2020

Butter Chicken

If you’ve never had Butter Chicken, you’re in for a treat! This classic Indian dish takes chicken thighs and simmers them in a creamy tomato sauce packed with spices until the chicken is irresistibly tender. Serve over steamed jasmine rice and serve with warm naan bread!

If you love butter chicken, don’t miss out on our Slow Cooker Chicken Tikka Masala, this Coconut Curry Soup, or these Thai Chicken Skewers.

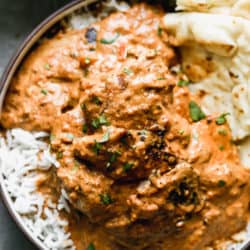
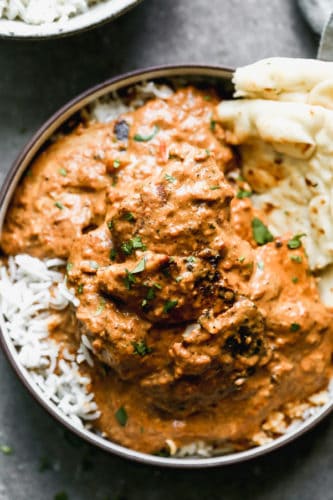
Butter chicken in a bowl covering white rice with naan bread on the side.

Classic Butter Chicken

If you’re a fan of Indian food, then chances are you’ve had classic Butter Chicken before. And if you have, chances are even higher that you have become a cult follower much like myself. If you’re not familiar, Butter Chicken is a classic Indian dish consisting of chicken thighs simmered in a creamy tomato sauce until the chicken is super tender and infused with the most delicious, creamy spice-infused tomato sauce.

If you’re a novice to the Indian food game, the spice the spice list we use may be unfamiliar to you, but don’t worry, because these days, you can find all of them at pretty much any grocery store. Garam masala is the dominant spice used in butter chicken (we will talk about the other spices below), and it has the most wonderful curry-like taste to it. It’s packed with spices, but it’s not “hot” spicy, in it you’ll find notes of coriander, cinnamon, cloves, cumin, and pepper. It’s quite heavenly.

Spices in Butter Chicken:

  • Garam masala. We talked about garam masala up above, but the full list of ingredients includes cinnamon, mace, peppercorns, coriander seeds, cumin seeds, and cardamon pods. So if you don’t have any of the spices below, you can always double up on the garam masala instead.
  • Cumin. Ground cumin adds a nice smoky note to the butter chicken.
  • Fenugreek. While this ingredient is definitely optional if you can’t find it, it does add a lovely savory element to the butter chicken.
  • Coriander. Ground coriander is actually the seed version of cilantro, so it has a similar flavor profile to it. I find that ground coriander is a little more smoky in flavor and love the way it compliments ground cumin.
  • Tumeric. If you’ve never used turmeric before, now is a great time to start. This vibrant orange spice give dishes a lovely yellow hue and has a nice warm ginger-like flavor to it.
  • Brown sugar. To balance out all those spices, you need a little bit of sweetness and brown sugar is my sugar of choice.

Ingredients in Butter Chicken:

  • Chicken. Classic butter chicken is made with chicken thighs. Chicken thighs are a lot more flavorful than chicken breasts and they can hold up to a long-simmered sauce. Unlike chicken breasts, chicken thighs become super tender and shred really well when they’ve cooked for a semi-long period of time.
  • Yogurt. Whole-milk yogurt is a classic ingredient in a lot of Indian dishes. Here, we use it to marinate the chicken, since it helps to tenderize it in the process.
  • Garlic, onion, and ginger. I mean, is any dish complete without a little garlic and onion?
  • Crushed tomatoes. You could also use whole tomatoes and crush them yourself, but buying them pureed already is such a time-saver.
  • Lemon juice. I love the acidic bright flavor lemons adds to butter chicken, it’s a must!
  • Heavy cream. A classic component of butter chicken is the cream sauce, and to achieve that, we use a good amount of heavy cream. It’s what makes butter chicken so luxurious.
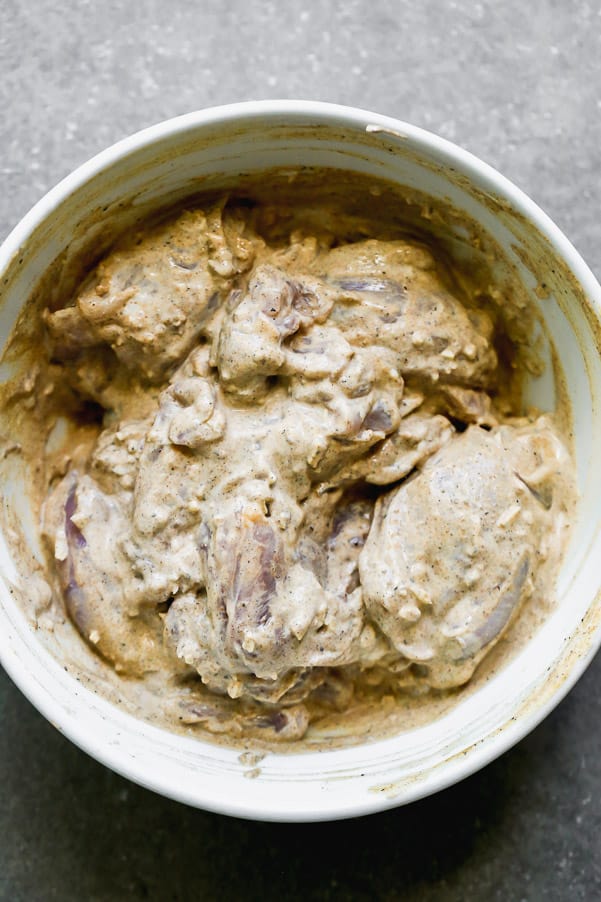
Chicken in a marinate in a white bowl.

Let’s make Butter Chicken!

  1. Marinate the chicken. Marinating is a really important part of making butter chicken.Here’s what we do: Add chicken to a large plastic baggie. Add in yogurt, garam masala, cumin, tumeric, garlic cloves, ginger, and salt. Zip the bag shut and massage marinade into the chicken. Marinate for at least three hours, but no longer than 12. I find that you don’t need to marinate the chicken much longer than a few hours, but of course, if you’re prepping ahead of time, you can do it further in advance.
  2. Cook the chicken. Heat a large non-stick or cast-iron skillet to a medium-high heat. Add a little bit of olive oil and then sear the chicken. Sear for 3-4 minutes until brown and crusty, flip over and do the same on the other side.
  3. Make the sauce. Once the chicken is brown, remove from the pan. Turn the heat down to medium and add more olive oil, onions and garlic. Sauté until slightly softened. Stir in tomato sauce, remaining garam masala, remaining cumin, remaining salt, and tumeric, fungeek, coriander, lemon juice, and brown sugar. Bring to a boil and then reduce to a simmer. Add the chicken back to the pan and simmer until chicken is cooked through, about 4-5 minutes.
  4. Finish it off! Stir in the cream. Simmer another 2-3 minutes. Serve over rice with naan.
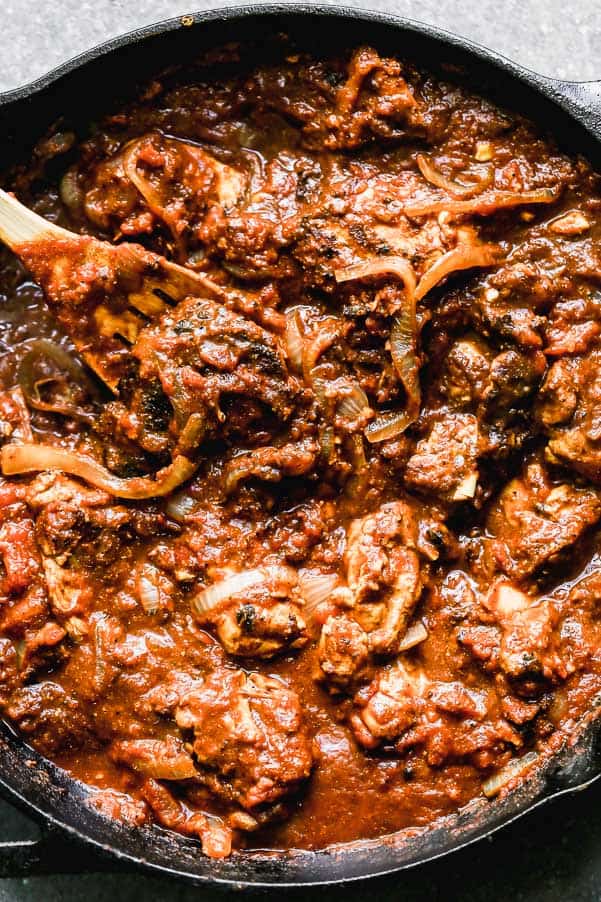
Butter chicken in a skillet with a wooden spoon stirring it.

Substitutions and Tips and Tricks for Recipe Success

  • Make sure to get all the excess marinade off before searing the chicken otherwise, the bottom can burn.
  • If you don’t want to use heavy cream, you can swap out coconut milk or even light coconut milk.
  • If you’re really not into chicken thighs, you can use chicken breasts, but make sure you don’t overcook them.
  • Any kind of whole-milk plain yogurt will work, it doesn’t matter if it’s regular or Greek.
  • To add some sweetness and texture, I love to add in a handful of raisins and cashews. So yummy.
  • When searing the chicken, don’t try to flip it until it easily releases from the pan.

What to Serve with Butter Chicken:

  • The classic partners to butter chicken are steamed Jasmine rice and warm naan.
  • If you want a more substantial side, you could whip up a batch of these super crispy egg rolls.
  • Cilantro Lime Rice would be a nice update to plain steamed rice and would soak up all that delicious sauce wonderfully.
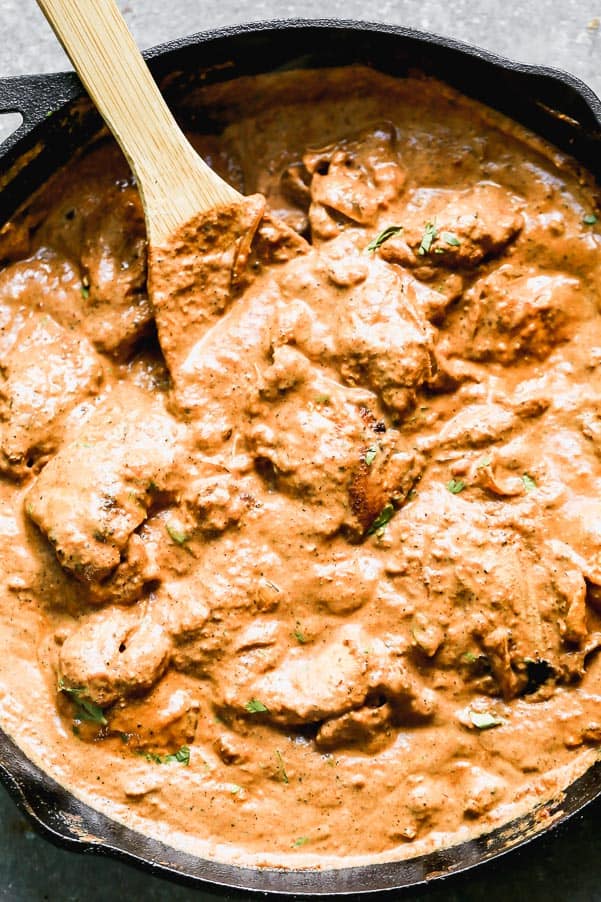
Butter chicken in a black skillet being stirred by a wooden spoon.

Can I make Butter Chicken in Advance?

Yes!!! In fact, this is just as good if not better the next day. Just make from start to finish, cool completely and store the chicken and sauce in one container and the rice in another container. Re-heat over a low heat until the chicken is up to temperature.

A bowl of white rice with butter chicken over top with a side of naan bread.

More Delicious Chicken Recipes to Try:

Print

Butter Chicken

If you've never had Butter Chicken, you're in for a treat! This classic Indian dish takes chicken thighs and simmers them in a creamy tomato sauce packed with spices until the chicken is irresistibly tender. Serve over steamed jasmine rice and serve with warm naan bread! 
Course Main Course
Cuisine Indian
Keyword butter chicken, indian chicken
Prep Time 10 minutes
Cook Time 35 minutes
3 hours
Total Time 3 hours 55 minutes
Servings 4 people
Calories 565kcal
Author Nicole Leggio
Cost $25

Equipment

  • Cast iron skillet

Ingredients

  • 1 and 1/2 pounds boneless skinless chicken thighs
  • 1/2 cup plain whole-milk yogurt (greek is fine)
  • 1 tbsp garam masala, divided
  • 1 tsp cumin, divided
  • 6 large garlic cloves, grated and divided
  • 1 tbsp minced ginger, divided
  • 2 tsp kosher salt, divided
  • 2 tbsp olive oil
  • 28 ounces crushed tomatoes
  • 1/2 lemon juiced
  • 1/2 tsp ground coriander
  • 1/2 tsp ground tumeric
  • 1/2 tsp feungeek
  • 1 tbsp brown sugar
  • 1 cup heavy cream

Instructions

  • Add chicken to a large plastic baggie. Add in yogurt, 2 tsp garam masala, 1/2 tsp cumin, tumeric, 3 garlic cloves, 2 tsp grated ginger, and 1 teaspoon salt. Zip the bag shut and massage marinade into the chicken. Marinate for at least three hours, but no longer than 12.
  • Once the chicken marinates. Heat a large non-stick or cast-iron skillet to a medium-high heat. Add 2 tablespoons of olive oil. Once the oil is hot, sear the chicken. (Make sure there isn't a lot of excess marinade on the chicken.) Sear for 3-4 minutes until brown and crusty, flip over and do the same on the other side. The chicken should release easily from the pan when it's ready to turn. If needed, sear chicken in batches, you don't want to overcrowd the pan.
  • Once the chicken is brown, remove from the pan. Turn the heat down to medium and add remaining olive oil, onions and garlic. Saute for 2-3 minutes until slightly softened. Stir in tomato sauce, remaining garam masala, remaining cumin, remaining salt, and tumeric, fungeek, coriander, lemon juice, and brown sugar. Bring to a boil and then reduce to a simmer. Add the chicken back to the pan and simmer until chicken is cooked through, about 4-5 minutes. *If you want a cream sauce, add the sauce to a blender before adding the chicken back in, blend until smooth, return to the pan and then simmer the chicken.
  • Stir in the cream. Simmer another 2-3 minutes. Serve over rice with naan.

Nutrition

Serving: 1serving | Calories: 565kcal | Carbohydrates: 21g | Protein: 38g | Fat: 38g | Saturated Fat: 17g | Cholesterol: 247mg | Sodium: 1614mg | Potassium: 1090mg | Fiber: 4g | Sugar: 13g | Vitamin A: 1372IU | Vitamin C: 19mg | Calcium: 159mg | Iron: 4mg


from The Recipe Critic https://ift.tt/3kVbF1F
https://ift.tt/348ARf5
रविवार, 16 अगस्त 2020

Apple Dump Cake

Apple Dump Cake is a sweet and savory warm apple dessert that is pure goodness! Easy to dump all ingredients together and enjoy an irresistible fall treat.

Apples are in season and these desserts are delicious! For more apple favorites, try this Caramel Apple Slab Pie, Apple Skillet Cake or Old Fashioned Apple Cobbler.

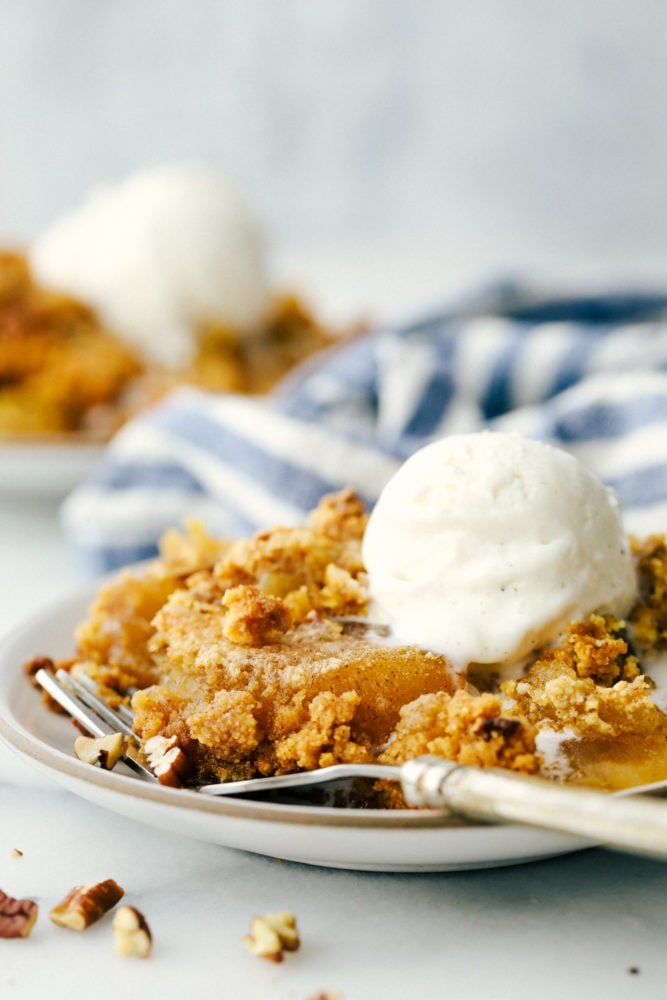
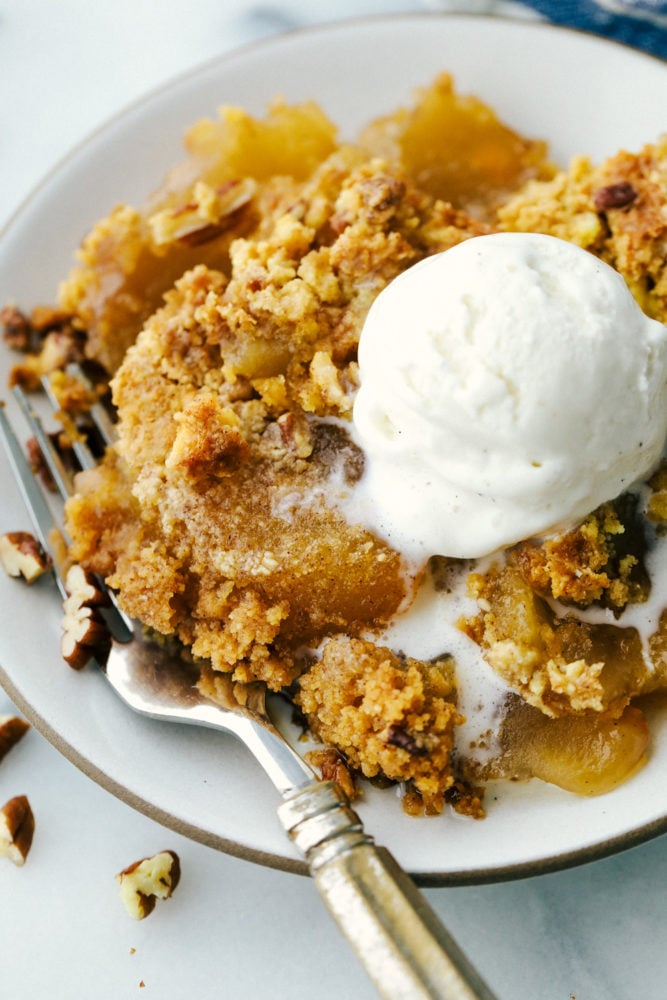
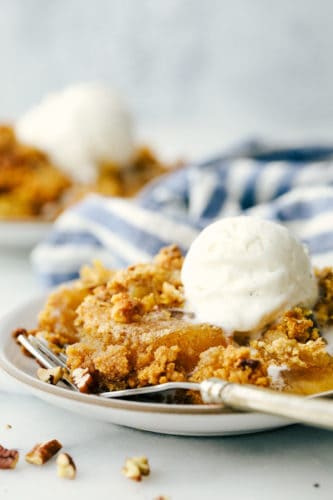
Apple dump cake on a plate with a fork.

Easy Apple Dump Cake

Fall is upon us and apples are falling from trees. This favorite apple dump cake is perfect to enjoy this fall. It is simple to combine all the ingredients and bake. Easy recipe that only has five ingredients. Warm delicious dessert is a family favorite and can feed a crowd!

Gooey apple fruit filling satisfies every sweet tooth out there. Make this with fresh or canned apples this fall season. Add an extra touch by adding toppings or having a few variations with fruit mixtures.

What is the Difference Between a Dump Cake and a Cobbler?

A dump cake is very similar to cobbler dessert. They both have baked fruit dessert topping with a type of crust. Fruit is the main ingredient that can be fresh, frozen or canned and baked in a baking pan all together. Cobblers have more of a crumb topping compared to a dump cake.

Dump cake is a cake with a cake box mixture in the ingredients. Both are a favorite fall dessert and can be made year round. Dutch oven, slow cooker or baked are a few ways that a cobbler is cooked whereas a dump cake is usually cake like and baked in the oven.

Apple Cake Ingredients:

Only five ingredients that are easy to have on hand makes this a simple cake recipe that is heavenly! Sweet and savory in every bite topped with vanilla ice cream or caramel to enhance the dessert even more.

  • Apple Fruit Filling: Pick your favorite cans of apple filling or peel fresh apples.
  • Yellow Cake Mix: Box yellow cake mix is perfect to
  • Cinnamon: Added for flavor and a hint of spice.
  • Pecans: Chopped and mixed together.
  • Butter: This is placed on top of the crust while being baked.

How to Make a Dump Cake from Scratch:

Simply combine the ingredients together and bake until golden brown. This is a perfect dessert to share with friends and family. It is ooey and gooey right out of the oven and ready to be served right away!

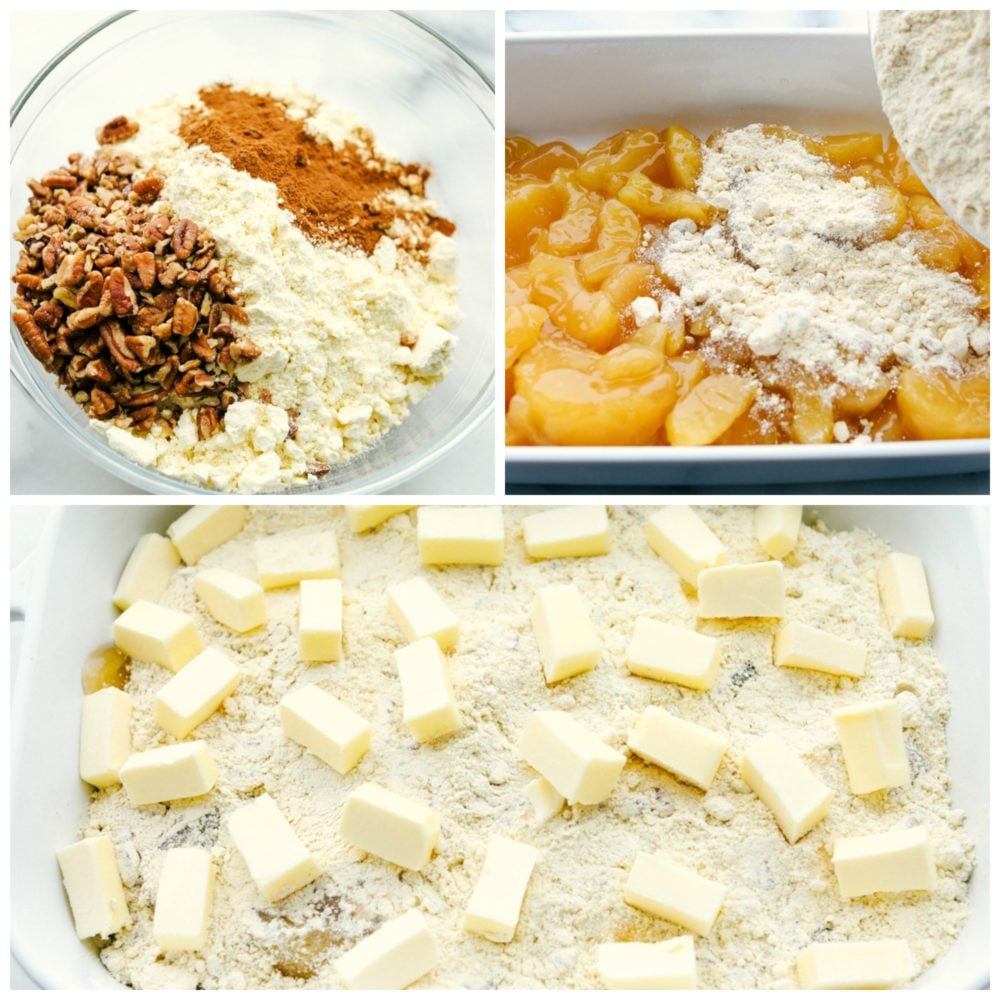
  1. Prepare Baking Pan: Preheat oven to 350 degrees. Grease a 9×13 inch pan and place apples evenly into the bottom.
  2. Combine Ingredients: In a medium sized bowl combine the cake mix, cinnamon and chopped pecans. Sprinkle evenly over the top of the cake.
  3. Bake Dump Cake: Add the cubed butter to the top of the cake.  Bake for 50-60 minutes or until golden brown and bubbly.

The process of making apple dump cake.

Add a Topping to the Apple Dump Cake:

This apple dump cake is perfect by itself of add a few fun and delicious toppings to. Some favorites that we have enjoyed are homemade salted caramel sauce, vanilla ice cream or keeping it simple with whipped cream. Garnish with a few more pecans and your apple dump cake dessert is ready to WOW your friends and family!

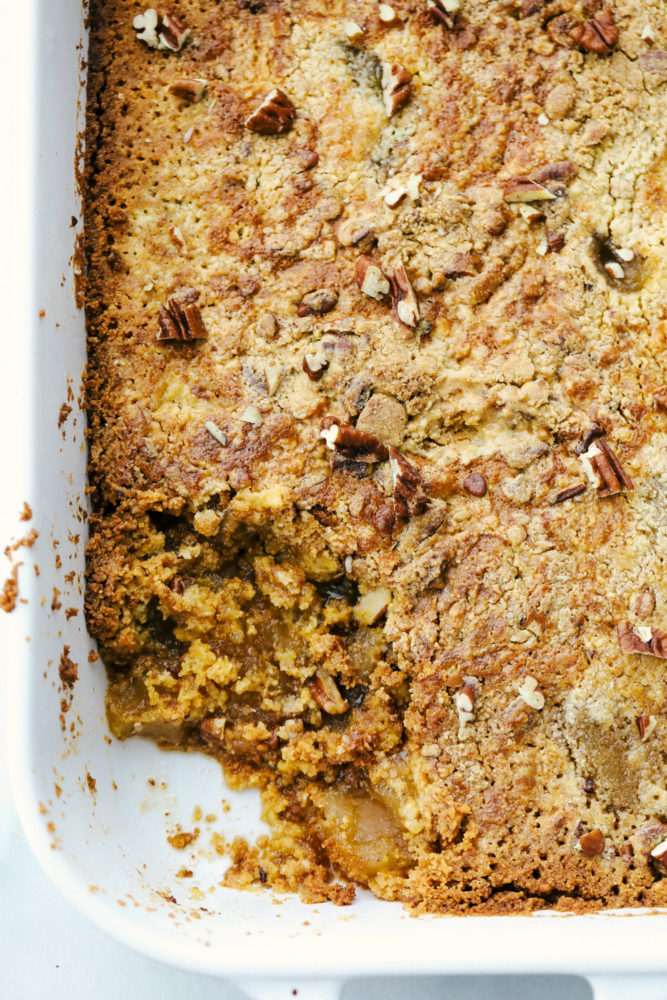
Baked apple dump cake in a baking pan with a slice taken out.

Tips and Variations:

You can’t go wrong with this delicious dump cake recipe. It is a Tried and True favorite and loved by all. My kids beg for this recipe every fall season and we love to enjoy it as the temperatures are cooling down and we can warm up to a fresh tasting apple dessert!

  • Cake Mix: Enjoy spice cake mix for a fall/halloween dessert recipe.
  • Fresh Apples: For a different texture and taste use fresh apples that are peeled and sliced for adding to the baking pan.
  • Best Apples: Gala, honey crisp, granny apple or a mixture of all.
  • Spread the Cake: Be sure to evenly spread the cake batter in the cake pan so that the cake bakes evenly.
  • Clumps while Baking: If you have clumps in the cake mix carefully shake and more the cake pan around until it appears more even. Using a fork also helps break up the clumps.

Storing Apple Dump Cake Recipe:

I will be shocked if you have any apple dump cake left overs! If you do, you are in luck because it does store very well to enjoy for another day.

  • Room Temperature: Simply leave the cooked dump cake on the counter for 1 to 2 days long. Warm up using the microwave or oven to reheat.
  • Refrigerate: Place the leftover apple dump cake in a dish and place in the refrigerator for 2 to 3 days long. When ready to warm up use a microwave or bake tin the oven at 350 degrees Fahrenheit.
  • Freeze: It is best not to freezer this apple cake recipe. Cakes are harder to freeze and this cake tends to fall apart and become crumbly after it has been sitting in the freezer.

Apple dump cake on a white plate with a fork on the side. Topped with ice cream.

More Delicious Apple Recipes:

Print

Apple Dump Cake

Apple Dump Cake is a sweet and savory warm apple dessert that is pure goodness! Easy to dump all ingredients together and enjoy an irresistible fall treat. 
Course Dessert
Cuisine American
Keyword apple cake, apple dump cake, dump cake
Prep Time 10 minutes
Cook Time 1 hour
Total Time 1 hour 10 minutes
Servings 12 Slices
Calories 324kcal
Author Alyssa Rivers

Ingredients

  • 2 cans Apple fruit filling
  • 1 box Yellow cake mix
  • 2 teaspoons Cinnamon
  • 1/2 cup Pecans chopped
  • 1 cup Butter cubed

Instructions

  • Preheat oven to 350 degrees. Grease a 9x13 inch pan and place apples evenly into the bottom.
  • In a medium sized bowl combine the cake mix, cinnamon and chopped pecans. Sprinkle evenly over the top of the cake.
  • Add the cubed butter to the top of the cake. Bake for 50-60 minutes or until golden brown and bubbly.

Nutrition

Calories: 324kcal | Carbohydrates: 36g | Protein: 2g | Fat: 20g | Saturated Fat: 11g | Cholesterol: 41mg | Sodium: 449mg | Potassium: 42mg | Fiber: 1g | Sugar: 19g | Vitamin A: 473IU | Calcium: 102mg | Iron: 1mg


from The Recipe Critic https://ift.tt/3auSqqZ
https://ift.tt/2Y7YeBN

शनिवार, 15 अगस्त 2020

Honey Butter Baked Chicken

Honey Butter Baked Chicken is a rich and flavorful dinner that has tender baked chicken made with only four ingredients! The blend of honey and butter is the perfect combination for a flavorful chicken dinner.

Chicken is always a favorite protein for dinner in our home. Some of our favorite chicken recipes recently is this Chicken Margherita, Skillet French Onion Chicken and using my Absolutely Perfect Chicken Marinade to make the BEST chicken every time.
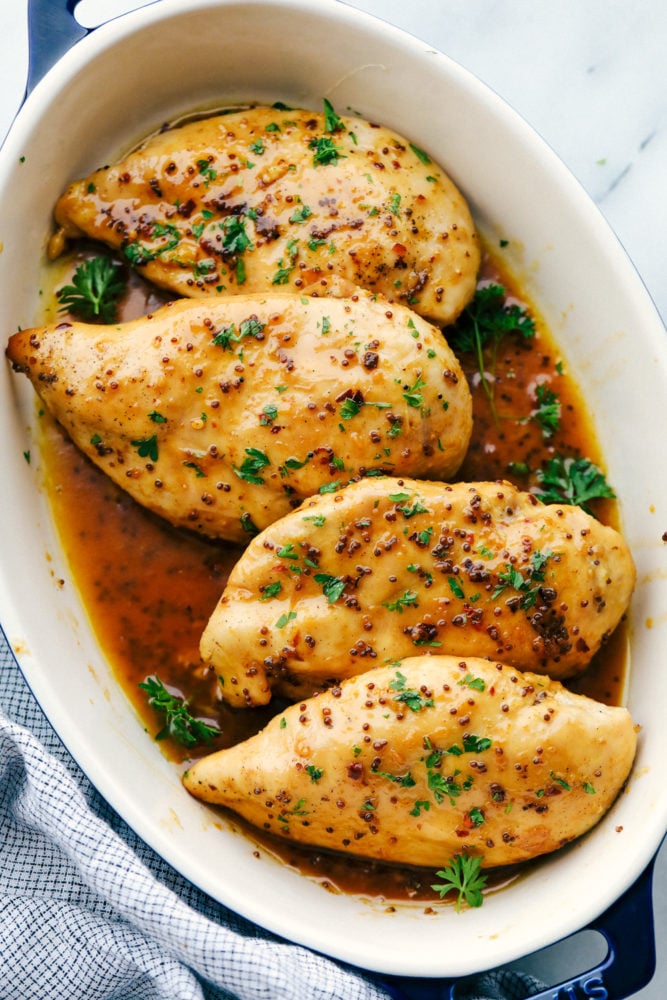
Honey butter baked chicken in a pan ready to be baked.

Honey Butter Baked Chicken

This is one of those recipes that is good to bring out of the archive every once in a while to change it up. It is super easy to put together and has a really good honey flavor to it. Honey butter chicken is the perfect combination of sweet and savory chicken that bakes it perfectly. Every bite is tender and juicy packed with so much flavor.
Baked chicken is always a favorite of mine during the busy week. It is simple to whisk together all the ingredients, pour over top of the chicken and bake while I am able to help with other things around the house. My girls love how easy this chicken recipe is and knows just how to help me in the kitchen to make it. Add a couple side dishes and make this baked chicken dinner a complete meal.

Honey Butter Chicken Ingredients:

Seriously, only four ingredients to make this simple baked chicken recipe! It comes together so quickly and easily, even you will be amazing at the flavors and tenderness this chicken dinner has to offer.

  • Chicken Breasts: Fresh, thawed chicken ready to be baked.
  • Honey: Thickens the sauce and adds a hint of sweetness!
  • Margarine or Butter: Melted and stirred in for a buttery flavor blend.
  • Mustard: Adds a tangy mustard taste to the chicken while cooking.
  • Salt: Just a pinch!

How to Bake Chicken:

Simply add all the ingredients together and pour over the chicken. Bake it for one hour and dinner is made! It is perfect for a busy weeknight or a simple dinner your family can help with in the kitchen.

  1. Prepare oven: Preheat oven to 350 degrees Fahrenheit.
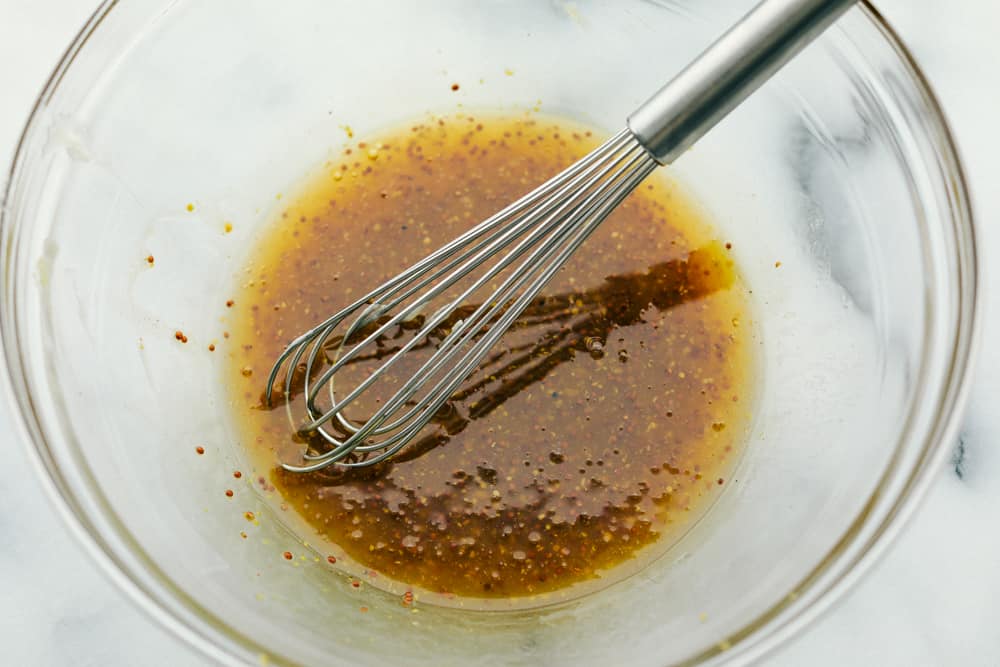
  2. Whisk Together: Combine honey, butter, mustard and salt in a mixing bowl.
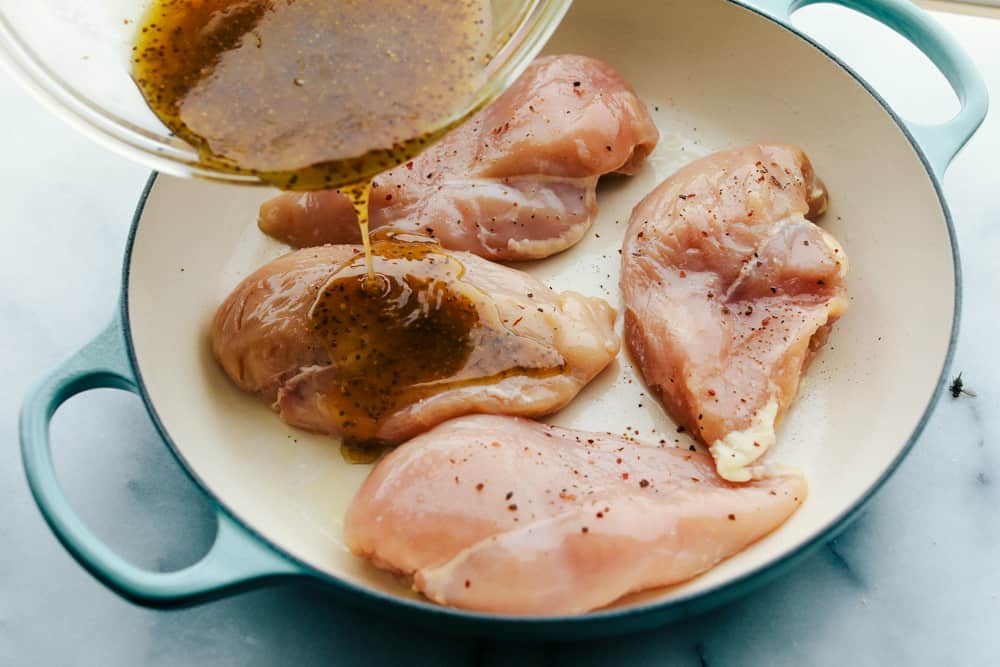
  3. Chicken: Arrange chicken breasts in a shallow baking pan laying flat. Pour whisked ingredients over chicken evenly.
  4. Bake: Bake for 1 hour, basting the chicken every 15 minutes.
A glass bowl of ingredients being whisked together.

What to Serve with Honey Butter Chicken:

Adding side dishes with this baked chicken is a great idea to make this a complete meal. Bread, salad and a vegetable or fruit is always a great balance for dinner time. I love to serve this chicken recipe with a various of side dishes that are quick and easy to make while the chicken is baking for one hour.

Chicken breasts in a pan being glazed with the whisked ingredients.

Storing Baked Chicken:

Baked chicken is easy to make with the perfect blend of honey, butter and mustard. It is simple to bake and clean up is even easier. Let the chicken completely cool before adding it to the bag or airtight containers. This dinner will reheat easily and quickly when ready!

  • Refrigerator: Add the left over chicken to a ziplock bag or airtight container and place in the refrigerator for 2 to 3 days long.
  • Freezer: Place the chicken in a ziplock bag releasing all the air. Laying the chicken flat, place the chicken on in the freezer for about a month long. When ready to reheat, move the chicken into the refrigerator over night and let it thaw completely before warming up.
  • Warming Up: Bake it in the oven at 350 degrees Fahrenheit or place in the microwave flipping it every minute until it is warmed through. Add a side salad or some potatoes and you have a delicious meal all over again!
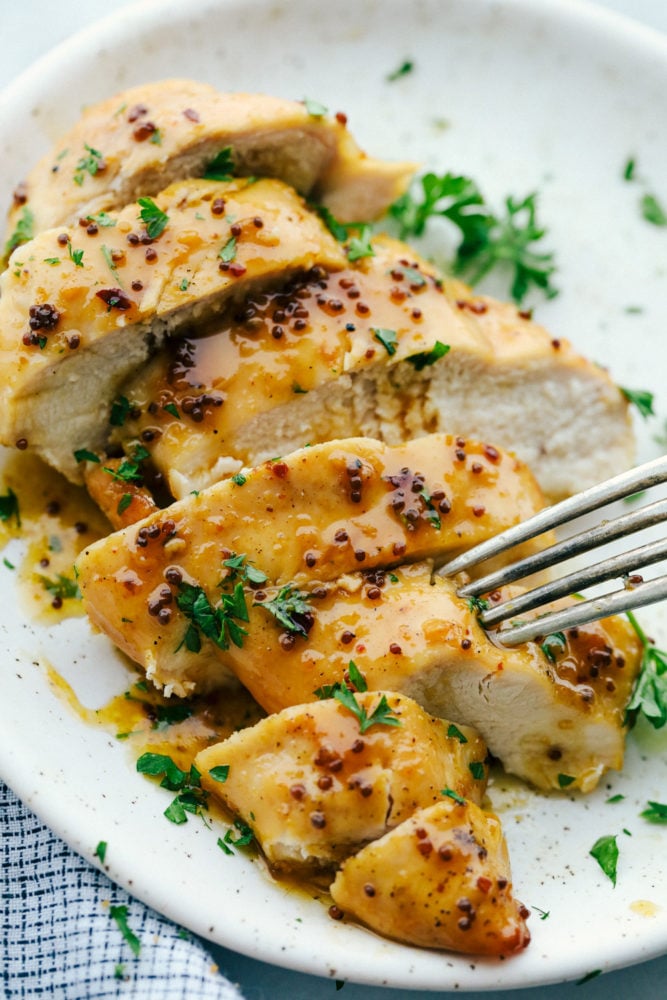
Baked honey butter chicken cut up on a white plate with a fork stabbing a piece of chicken.

More Amazing Baked Chicken Dinners:

Print

Honey Baked Chicken

Honey Butter Baked Chicken is a rich and flavorful dinner that has tender baked chicken made with only four ingredients! The blend of honey and butter is the perfect combination for a flavorful chicken dinner. 
Course Dinner, Main Course
Cuisine American
Keyword baked chicken, chicken recipes
Prep Time 10 minutes
Cook Time 1 hour
Total Time 1 hour 10 minutes
Servings 4 Servings
Calories 227kcal
Author Alyssa Rivers

Ingredients

  • 4 Chicken Breast
  • 1/3 cup Honey
  • 1/3 cup Margarine or Butter
  • 2 Tablespoons Mustard
  • 1/4 Teaspoon Salt

Instructions

  • Preheat oven to 350 degrees Fahrenheit
  • Combine honey, butter, mustard and salt in a mixing bowl.
  • Arrange chicken breasts in a shallow baking pan laying flat. Pour whisked ingredients over chicken evenly.
  • Bake for 1 hour, basting the chicken every 15 minutes.

Notes

Updated on August 15, 2020
Originally Posted on June 4, 2012

Nutrition

Calories: 227kcal | Carbohydrates: 24g | Protein: 1g | Fat: 16g | Saturated Fat: 3g | Sodium: 410mg | Potassium: 25mg | Fiber: 1g | Sugar: 23g | Vitamin A: 677IU | Calcium: 10mg | Iron: 1mg


from The Recipe Critic https://ift.tt/30WkzEm
https://ift.tt/3atVO5j

शुक्रवार, 14 अगस्त 2020

White Chocolate Oreo Cookies

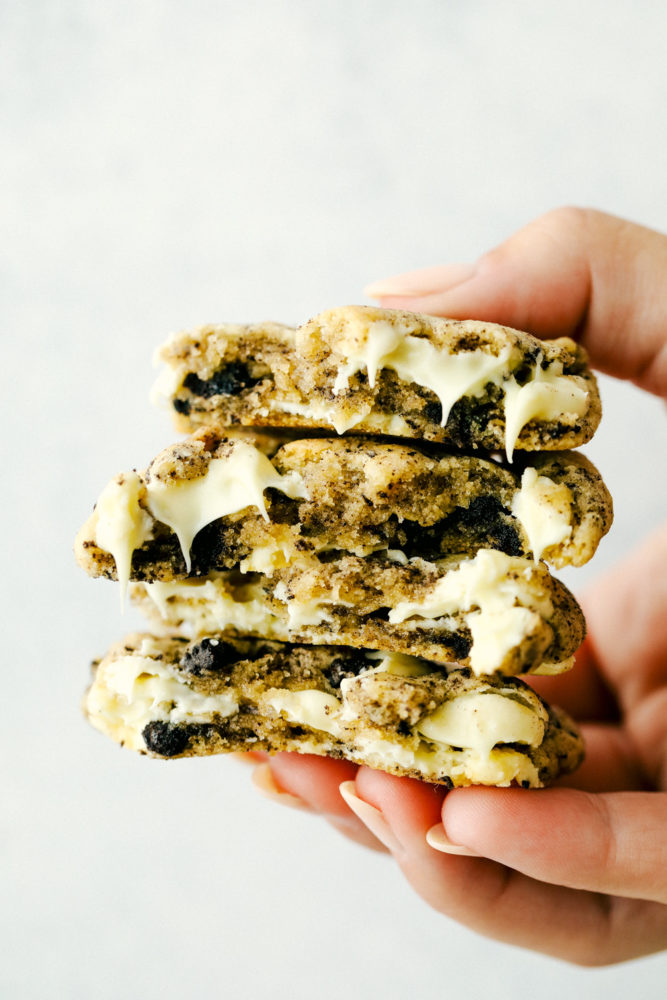
White Chocolate Oreo Cookies are perfectly soft and chewy cookies loaded with slightly melted white chocolate chips and crushed Oreo cookies. These are warm and delicious cookies with just the right amount of sweetness!

Oreos are so fun to create recipes with. If you are a lover of Oreos try this Gooey Oreo Brownies, Oreo Fluff Dessert Salad or No Bake Oreo Balls.

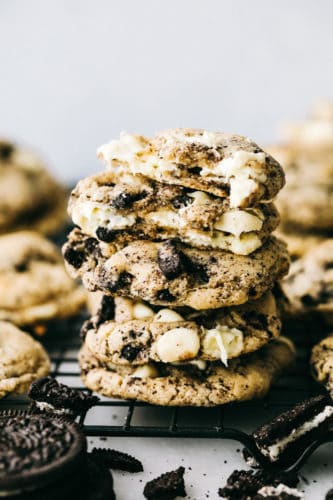
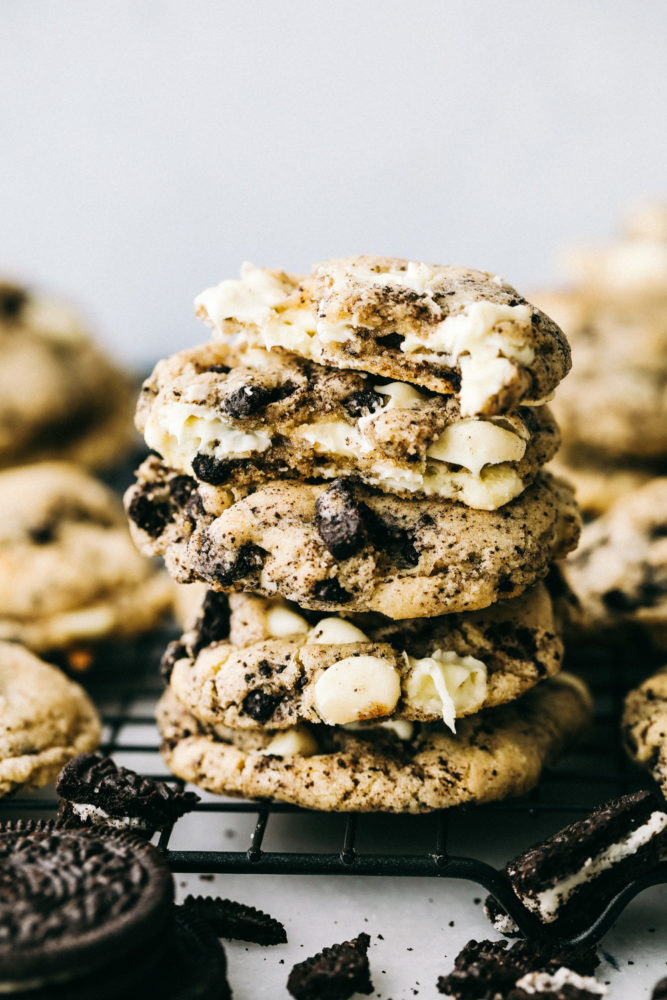
Oreo cookies stacked on top of each other on a cooling rack garnished with oreos surrounding them.

White Chocolate Oreo Cookies

I declare these the best cookies ever! These are the cookies that become an instant favorite. You know the kind of cookies that you can’t stop eating? And just when you think you can’t eat another cookie you do? And then you fall asleep thinking about them and wake up and eat one for breakfast. These are those cookies.

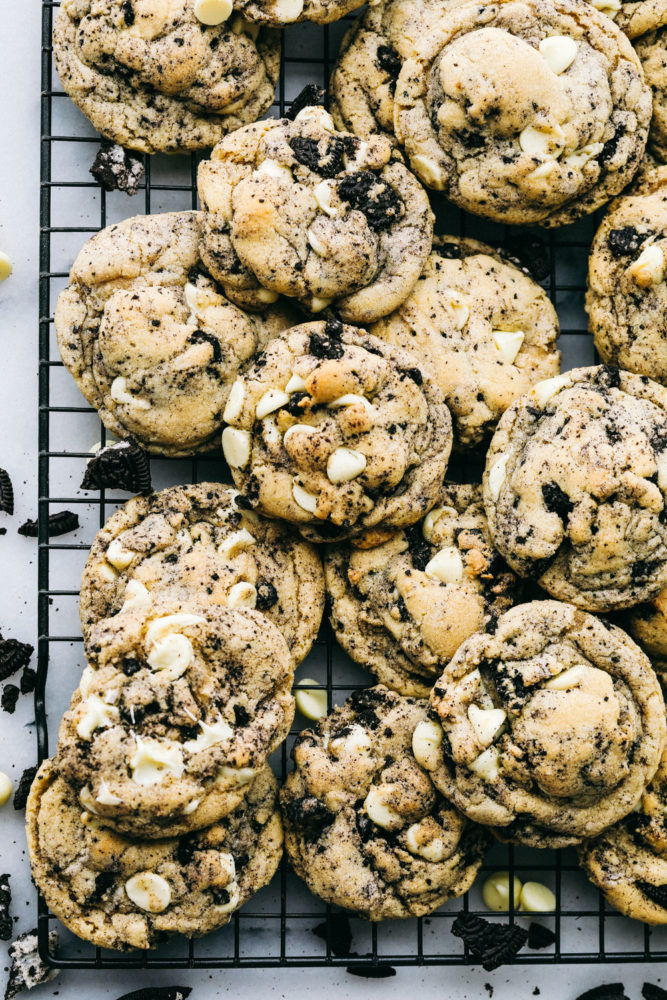
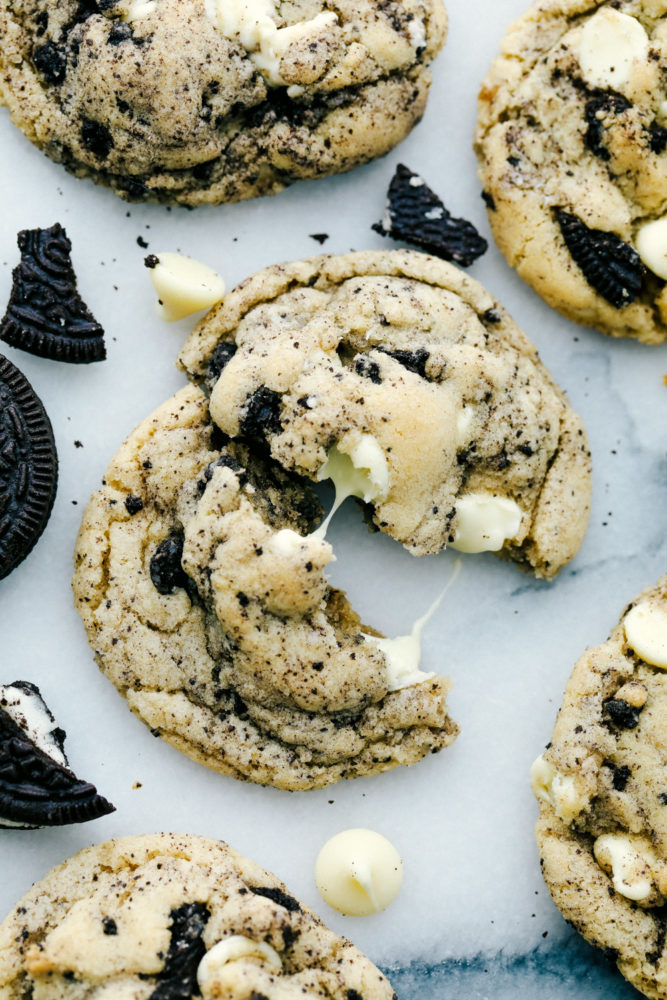
So perfect that I couldn’t stop at just one. I took the recipe from my favorite chocolate chip cookie dough and added loads of white chocolate chips and crushed oreo pieces. The cookie dough was speckled with oreo cookie pieces throughout and it was incredible! I loved the melty white chocolate and my first bite was amazing. The cookies had a crunch on the inside but were soft, ooey, gooey and chewy in the middle. Perfection!

Oreo Cookie Ingredients:

If you love cookies, Oreos and white chocolate chips these will become your new bff. Trust me. You have got to make them! These cookies have it all. The gooey white chocolate,  and chunks of oreo cookies baked inside a soft and chewy cookie. The cookies turn out perfect every time!

  • Butter: Cream this butter for a smooth batter.
  • Brown Sugar and Sugar: A hint of sweetness and softness using both types of sugar.
  • Eggs: Gives the cookies a nice soft and creamy texture. Plus helps it stick together and bakes evenly.
  • Vanilla: Added for flavor!
  • Flour, Baking Soda, Baking Powder and Salt: Combined these create a softer, more fluffier cookie that will rise high when whisked together.
  • Oreo Cookies: Crush them up and add them into the cookie mixture.
  • White Chocolate Chips: Sprinkle them in at the end!

Let’s Bake Some Cookies!

It took me a while to become an oreo lover. I just didn’t like eating them plain. I loved them baked in something or even used as a crust. But I wasn’t a huge fan. I am more of an eat the middle of an oreo type of person. But when you bake them in something I am in heaven!

  1. Prepare for Baking: Preheat oven to 350 degrees. Line a cookie sheet with parchment paper or lightly spray with cooking spray.
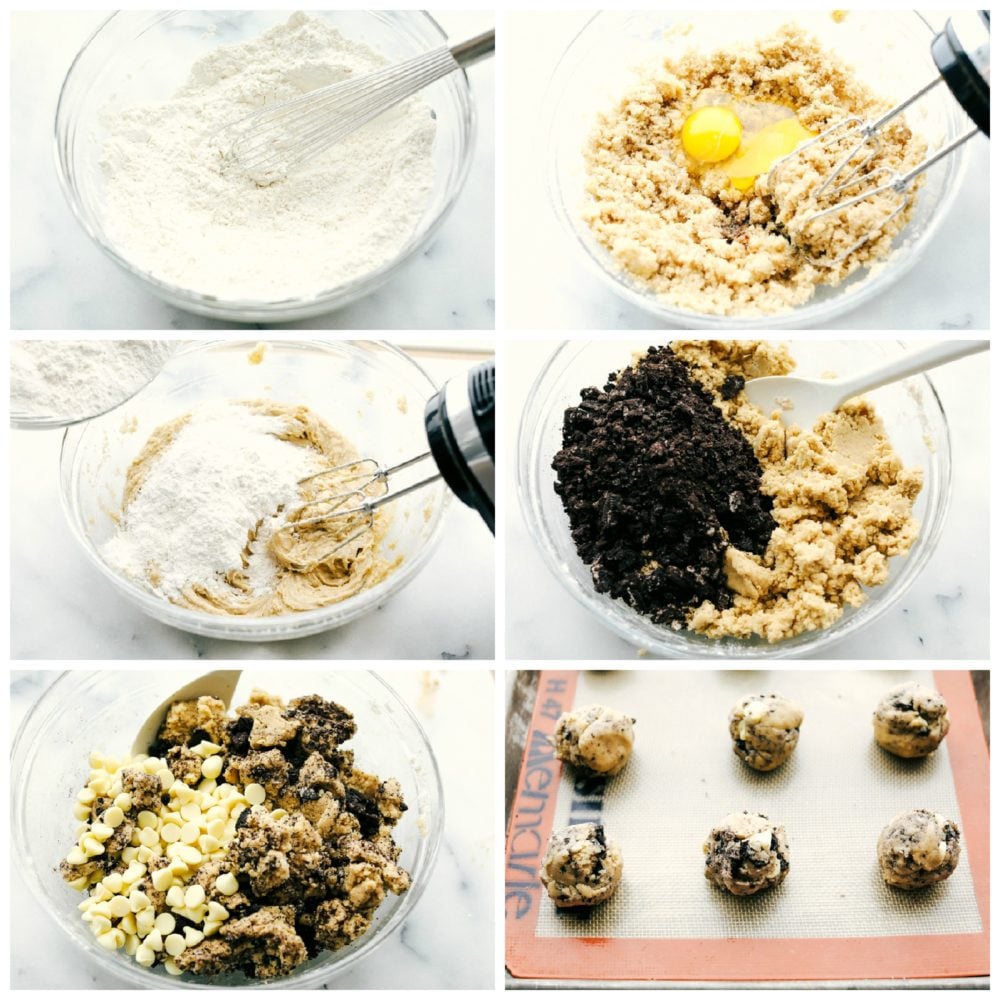
  2. Mix Together: In a medium sized mixing bowl, whisk together the flour, baking soda, baking powder, and salt. Set aside.
  3. Blend Ingredients: In a stand mixer or medium sized mixing bowl, beat together butter, sugar, and brown sugar about 2 minutes until fluffy. Beat in the eggs and vanilla. Slowly beat in the dry ingredients until incorporated. Mix in the crushed oreos until combined and lastly add the white chocolate chips.
  4. Create Cookies: Roll into 1 1/2 inch balls and place 2 inches apart on the cookie sheet. Bake for about 7-9 minutes until just starting to lightly brown.

How Do You Crush Oreo Cookies? 

Crushing oreo cookies is a simple process but can be a bit messy. Luckily, it is best to not overly crush the Oreos so there is some texture and consistency in the cookies. Larger chunks of oreo is great and a MUST in these cookies to taste all the flavor.

  • Plastic Ziplock Bag: Place the oreo cookies into the ziplock bag and using a rolling pin or something hard, break the Oreos up into smaller chunks.
  • Blender or Food Processor: You will want to be careful not to over blend the Oreos. Simply add the oreos into the blender and pulse a few times, stirring in between. Try not to over blend.

Tips and Variations: 

  • Lining Baking Sheet: Using parchment paper or reusable silicone baking mats are the best way to ensure the cookies are baked evenly and perfectly. This will also help lift the cookies off without them sticking to the pan.
  • Mixing: When creaming the butter and sugars together, add an extra 2 to 3 minutes to enrich that creamy texture. It will help improve the consistency of the cookies.
  • Flour: It is important to have enough flour in the dough. If your dough seems too sticky or wet, simply add in 1 to 2 Tablespoons of flour until it is more creamy texture.
  • Chocolate Chips: For a more chocolatey cookie, add in chocolate chips instead of white chocolate chips.
  • Cookie Scoop: For more evenly made cookie dough balls, using a cookie scoop will help ensure they are all the same size. Once they are scooped then roll into a ball and place on the baking sheet.
  • Baking Cookies: It is best to not over bake the cookies. Remove the baking sheet from the oven and allow the cookies to cool on the baking sheet while they are still slightly under baked. Once they are cool, place on a cookie rack to finish cooling and hardening.

More Delicious Cookie Recipes:

Print

White Chocolate Oreo Cookies

Perfectly soft and chewy cookies loaded with white chocolate chips and oreo cookies!  
Course Dessert
Cuisine American
Keyword cookie recipes, cookies, oreo cookies, white chocolate oreo cookies
Prep Time 10 minutes
Cook Time 8 minutes
Total Time 18 minutes
Servings 24 Cookies
Calories 268kcal
Author Alyssa Rivers

Ingredients

  • 3/4 Cup butter softened
  • 3/4 Cup brown sugar
  • 3/4 Cup sugar
  • 2 eggs
  • 1 teaspoon vanilla
  • 2 1/2 cups flour
  • 1 teaspoon baking soda
  • 1/2 teaspoon baking powder
  • 1 teaspoon salt
  • 14 oreo cookies coarsely crushed
  • 2 cups white chocolate chips (12 oz) bag

Instructions

  • Preheat oven to 350 degrees. Line a cookie sheet with parchment paper or lightly spray with cooking spray.
  • In a medium sized mixing bowl, whisk together the flour, baking soda, baking powder, and salt. Set aside.
  • In a stand mixer or medium sized mixing bowl, beat together butter, sugar, and brown sugar about 2 minutes until fluffy. Beat in the eggs and vanilla. Slowly beat in the dry ingredients until incorporated. Mix in the crushed oreos until combined and lastly add the white chocolate chips.
  • Roll into 1 1/2 inch balls and place 2 inches apart on the cookie sheet. Bake for about 7-9 minutes until just starting to lightly brown.

Notes

Updated on August 14, 2020
Originally Posted on April 9, 2015

Nutrition

Calories: 268kcal | Carbohydrates: 37g | Protein: 3g | Fat: 12g | Saturated Fat: 7g | Cholesterol: 32mg | Sodium: 246mg | Potassium: 96mg | Fiber: 1g | Sugar: 25g | Vitamin A: 202IU | Vitamin C: 1mg | Calcium: 46mg | Iron: 1mg


from The Recipe Critic https://ift.tt/2PRxyAH
https://ift.tt/2CviJkq