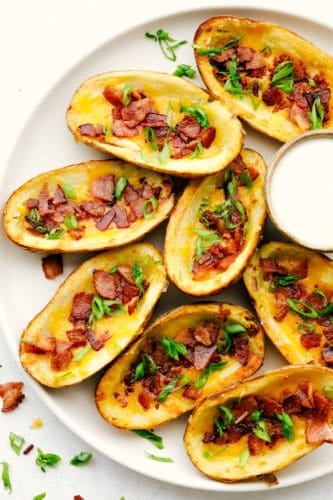
Baked Potato Skins have a crispy outer shell that is loaded with a cheddar cheese, bacon and green onion combination. These potatoes are everyones favorite appetizer or side dish!
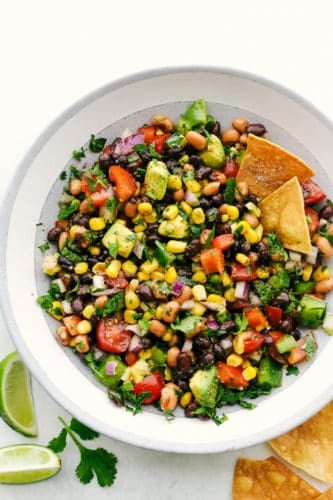
Bring on the appetizers with these delicious skins and watch them disappear quickly! For more classic appetizers try this Crispy Onion Rings, Spinach Artichoke Dip or Mouthwatering Cowboy Caviar.

Crispy Potato Skins
These homemade potato skins are so simple to make and come together so quickly for your next dinner or party. Make the perfect side dish with all the flavor and watch them disappear quicker than you made them. Potato skins are a MUST make!
Serve these skins as a fun game night appetizer or enjoy them with as a side with your favorite meat. The crispy outside gives a nice shell that is easily hand held for dipping or tender enough to cut through with a fork. This appetizer is one of the best and so delicious!
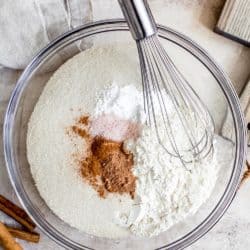
Homemade Potato Skins Ingredients:
Russet potatoes are known to be thicker and hold together the best for these potatoes. They are a stronger potato to cut and hollow out. Stuff your potato with all the goods and bake until perfection!
- Potatoes: Russet potatoes are the best because there larger and
- Olive Oil: This coats the skins of the potatoes and creates a crispy outside.
- Salt and Pepper: To Taste!
- Cheddar Cheese: Sprinkle over top of the baked potato.
- Bacon: Cook and crumble pieces.
- Green Onions: Chop and add to the top.
- Ranch or Sour Cream: Great for dipping or loading the potato skins.
How to Make a Classic Appetizer:
This appetizer or side dish is one of the best and easiest recipes to make for a quick dish to serve. Cut and carefully hallow out each potato skin. This recipe is great even for doubling!
- Prepare Potatoes: Wash and scrub the potatoes. Preheat oven to 400 degrees. Prick with a fork and bake for an hour or until tender. Or cook in the microwave for 5 minutes each potato. Let the potatoes cool to the touch.
- Bake: Cut the potatoes in half. Scoop out the potatoes leaving about 1/4 inch along the sides. Place the potatoes on a baking sheet skin side up and brush with olive oil. Salt and pepper. Bake for about 10 minutes. Flip to the other side and bake an additional 10 minutes or until they start looking golden brown.
- Remove and Garnish: Remove from the oven and add the cheese. Add back to the oven for 2-3 minutes until the cheese has melted. Top with bacon, green onions and favorite toppings.

Toppings for Baked Potato Skins:
Load your potato skins up with all your favorite toppings! Keep it simple with cheese and bacon or go all out with some of these choices.
- Classic: Bacon, cheese and onions are always the favorite.
- Taco Style: Ground beef with taco seasoning, cheese and garnished with cilantro.
- Southern: Pulled pork with barbecue sauce.
- Kid Approved: Sloppy Joe meat, cheese and chopped bun to top it off with.
- Spicy Skins: Jalapeño poppers are a hot appetizer that makes a fun twist.
Tips for Making the Best Potato Skins:
Here are some quick and easy ways to make homemade crispy potato skins easier for you to make. These will turn out to be the best appetizer you make!
- Size of Potatoes: It is best to choose large potatoes and russets if possible. These will be the strongest and hold up best when baked.
- Cool: Let the potatoes cool completely before cutting into them. They will fall apart if they are cut too soon.
- Cutting: Cut lengthwise on the potato skin. Carefully spoon out the inside of the potato. Leave about 1/4 inch of the potato to help for stability.
- More recipes! Keep the hollowed potato parts for more recipes like this garlic ranch smashed potatoes or making mashed potatoes.

More Delicious Appetizers:
- Crispy Parmesan Fried Parmesan
- Awesome 7 Layer Dip
- Guacamole
- Grilled Honey Buffalo Chicken Wings
- Stuffed Pizza Bites

Crispy Potato Skins
Ingredients
- 4 small Russet Potatoes
- 2 Tablespoons olive oil
- salt and pepper
- 2 cups cheddar cheese shredded
- 6 slices bacon chopped and cooked
- green onions sliced
- Ranch or sour cream for serving optional
Instructions
-
Wash and scrub the potatoes. Preheat oven to 400 degrees. Prick with a fork and bake for an hour or until tender. Or cook in the microwave for 5 minutes each potato. Let the potatoes cool to the touch.
-
Cut the potatoes in half. Scoop out the potatoes leaving about 1/4 inch along the sides. Place the potatoes on a baking sheet skin side up and brush with olive oil. Salt and pepper. Bake for about 10 minutes. Flip to the other side and bake an additional 10 minutes or until they start looking golden brown.
-
Remove from the oven and add the cheese. Add back to the oven for 2-3 minutes until the cheese has melted. Top with bacon, green onions and favorite toppings.
Nutrition
from The Recipe Critic https://ift.tt/3lgcF0P
https://ift.tt/2Elc1Op