मंगलवार, 8 सितंबर 2020

Fajita Style Quesadillas

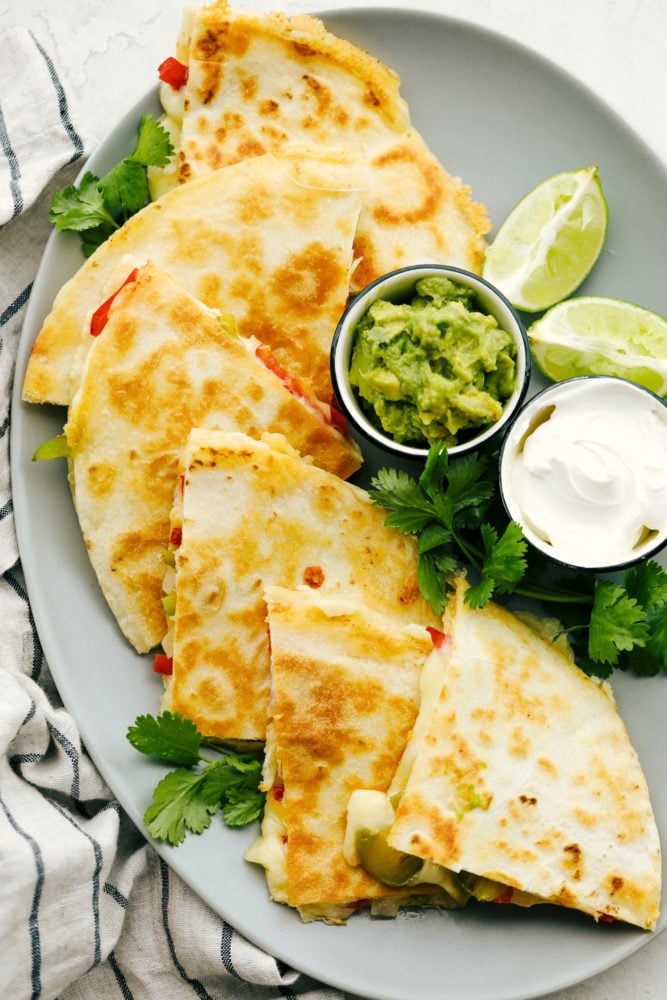
Fajita Style Quesadillas are sautéed peppers and onions with melted cheese in a crisp tortilla. These are a Tex-Mex twist on a classic, with colorful, crisp- tender veggies sandwiched between oozy, melty cheese, seasoned and cooked to perfection. This will be sure to satisfy your craving for fajitas or quesadillas that is super easy and super fast.
Pair these with a side of Homemade Guacamole, Restaurant Style Salsa and Easy Mexican Rice for a quick anytime meal. These Quesadillas will the spot whether it’s a snack, lunch or dinner!
Fajita Style Quesadillas are sauted peppers and onions with melted cheese in a crisp tortilla.

Quick Fajita Style Quesadillas

This vegetarian version is a perfect combination of what is best about fajitas and quesadillas. Sauted veggies are a traditional staple in fajitas and bring a unique taste and texture to these hand held cheesy beauties. Tortillas smothered with cheese and toasted till golden brown are an irresistible quick satisfying meal. This is taking quesadillas to a whole new level.

Fajita Style Quesadillas are a no-brain-er. Combining Mexican flavors and interchanging ingredients is so easy and always seems to turn out divine.  Peppers and onions are having their moment as  it’s their peak producing time of the year and I can’t think of a better way to use them up.

Fajita Style Quesadilla Ingredients:

With few ingredients these will whip up in no time.

  • Red Pepper: These are slightly sweeter than green peppers and add vibrant color.
  • Green Pepper: Thinly slice the same size as the red pepper for even cooking.
  • Onion: Try a sweet Onion for a more mild flavor:
  • Canola Oil: essential for cooking, can use Olive Oil.
  • Monterey Jack Cheese: I like to shred my own so that it doesn’t have the coating on it which can prevent an even melt.
  • Sour Cream, Salsa, Guacamole, cilantro, lime: These are all optional, but also all exquisite on any Mexican dish.

How to Make Fajita Quesadillas:

There is truly no wrong way to make a quesadilla but here are a few steps.

  1. Saute: In a large skillet over medium-high heat add the onion and peppers and saute stirring constantly until they are just tender but still crisp. Remove from pan and set aside.
  2. Assemble: In the same skillet, coat one side of a tortilla with cooking spray and place oil side down in the pan. This helps to crisp the tortilla and keep it from sticking. Layer cheese followed by vegetables followed by even more cheese. Sandwich the insides with another tortilla, spraying the top again with cooking spray.
  3. Cook: Cook each quesadilla for about 2 minutes on each side, till the insides are melted and the outside is a toasty brown.
  4. Cut: Slice each quesadilla into four pieces and serve with toppings of your choice.
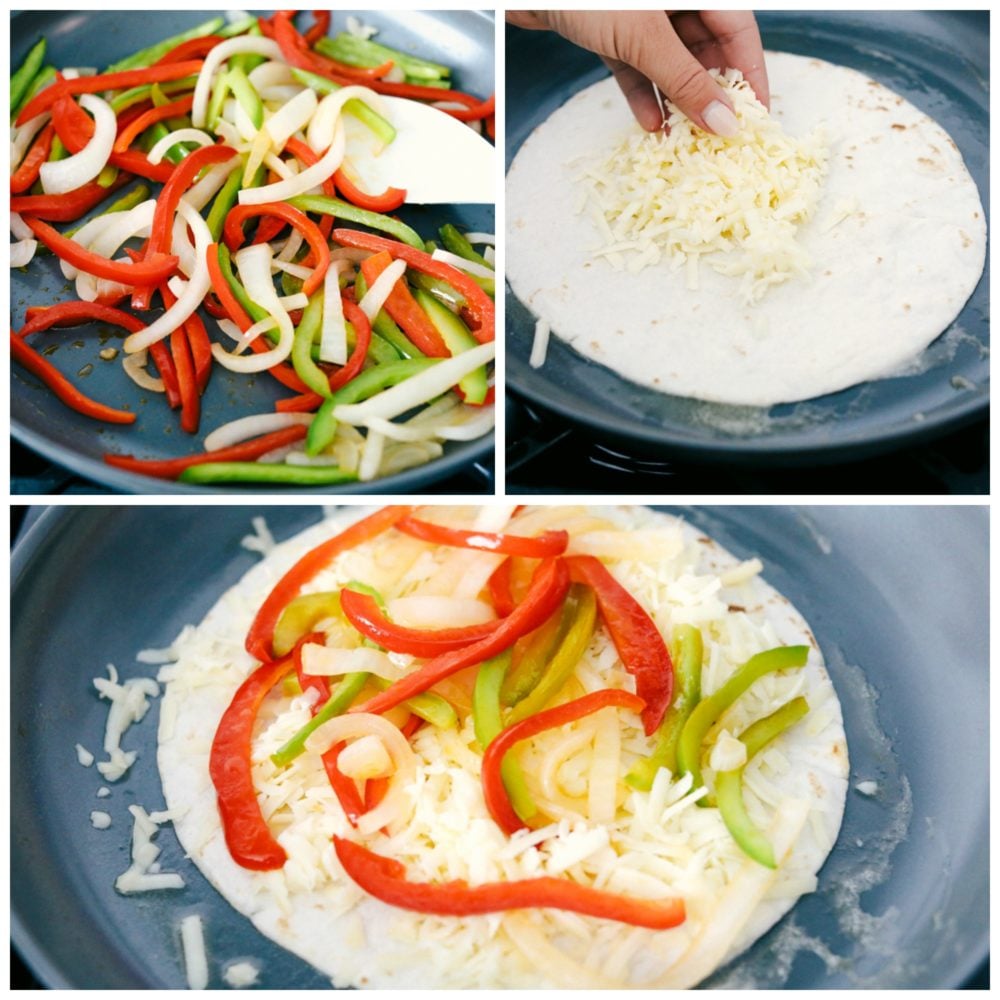
Sauteing vegetables and assembling tortillas and cheese for fajita style quesadillas.

Variations of Fajita Style Quesadillas:

These quesadillas are so versatile, you can create them to fit your taste buds and your cravings.

  • Cheese: You can use almost any cheese here or even combination of cheeses. Try cheddar, colby jack, or for a kick jalapeno cheddar.  For a more authentic Mexican cheese use asadero or oaxaca cheeses. These are semi hard cheese with excellent mild flavor.
  • Meat: These are vegetarian but you can easily add in chicken, steak, pork or even Mexican chorizo for a heartier meal.
  • Spice: Intensify the flavors by adding in powdered garlic, cumin, chili powder or your favorite fajita or taco seasoning.
  • Add ins: To mix it up even more you can add in rice, corn and, or beans.
  • Vegetables: Use orange and yellow peppers to add more color. Try a red onion for a little bit more zing. Add chopped fresh spinach, chopped zucchini or shredded carrots even more of a veggie kick

How to Store Quesadillas:

Leftovers of any meal make for quick snacks or meals and these are no exception.

  • Store: Place leftovers in an airtight container in the fridge for up to 3 days. I like to separate them with paper towels to help them not get soggy.
  • Freeze: Wrap the quesadillas individually in parchment paper and then place in a freezer safe ziploc bag for up to 3 months.
  • Reheat: You can reheat them in the microwave but the tortilla will become soft. To keep the crisp outside reheat in the oven or toaster oven at 375 for about 10 min. Or for about 10 min in a skillet over medium heat.
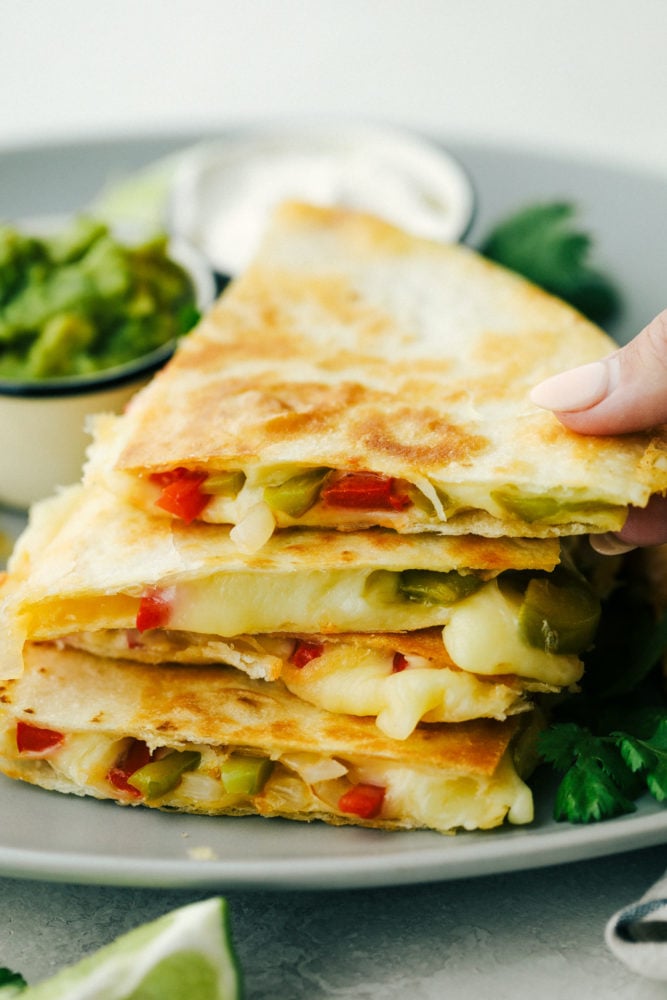
Fajita Style Quesadillas are sauted peppers and onions with melted cheese in a crisp tortilla.

More Tempting Fajita Recipes:

If you love fajitas like I think you do, try these other twists on the classic to spice up your menus

Print

Fajita Style Quesadillas

A fun and delicious twist on quesadillas with fresh ingredients added to taste like a fajita!
Course Appetizer
Cuisine Mexican
Keyword fajita style quesadillas, quesadilla recipes, quesadillas
Prep Time 5 minutes
Cook Time 20 minutes
Total Time 25 minutes
Servings 4 Servings
Calories 269kcal
Author Alyssa Rivers

Ingredients

  • 1 red pepper seeded, halved and cut into thin strips
  • 1 green pepper seeded, halved and cut into thin strips
  • 1 onion halved and cut into thin strips
  • 1 tablespoon canola oil
  • 8 ounces Monterey Jack cheese shredded
  • sour cream salsa, guacamole, cilantro, limes (optional)

Instructions

  • Heat oil in a large skillet over medium-high heat. Add onion and peppers and cook, stirring, for 4 minutes until vegetables are just tender but still crisp and slightly browned. Remove vegetables from pan onto a plate and set aside.
  • Lightly coat one side of a tortilla with cooking spray and place oiled side down in a skillet over medium heat. Add 1/8 of the cheese to the tortilla and 1/4 of the vegetables on top. Add another 1/8 of the cheese and place a second tortilla sprayed with cooking spray on top.
  • Cook quesadillas about 2 minutes on each side until cheese is melted and tortillas are lightly browned and slightly crunchy. Repeat with remaining ingredients.
  • Cut each quesadilla into four pieces and serve warm along with sour cream, salsa, guacamole, cilantro, and limes if desired.

Notes

Updated on September 8, 2020
Originally Posted on June 26, 2013

Nutrition

Calories: 269kcal | Carbohydrates: 6g | Protein: 15g | Fat: 21g | Saturated Fat: 11g | Cholesterol: 50mg | Sodium: 307mg | Potassium: 201mg | Fiber: 2g | Sugar: 3g | Vitamin A: 1478IU | Vitamin C: 64mg | Calcium: 432mg | Iron: 1mg


from The Recipe Critic https://ift.tt/333Lfmm
https://ift.tt/3jXTJ5j
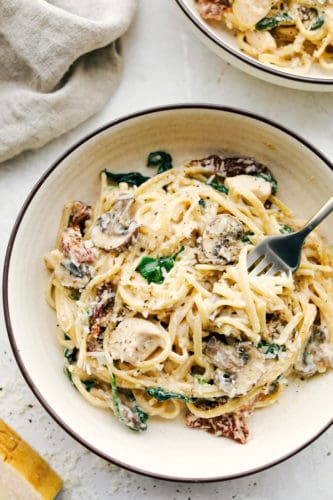
One Pot Creamy Chicken Mushroom Florentine

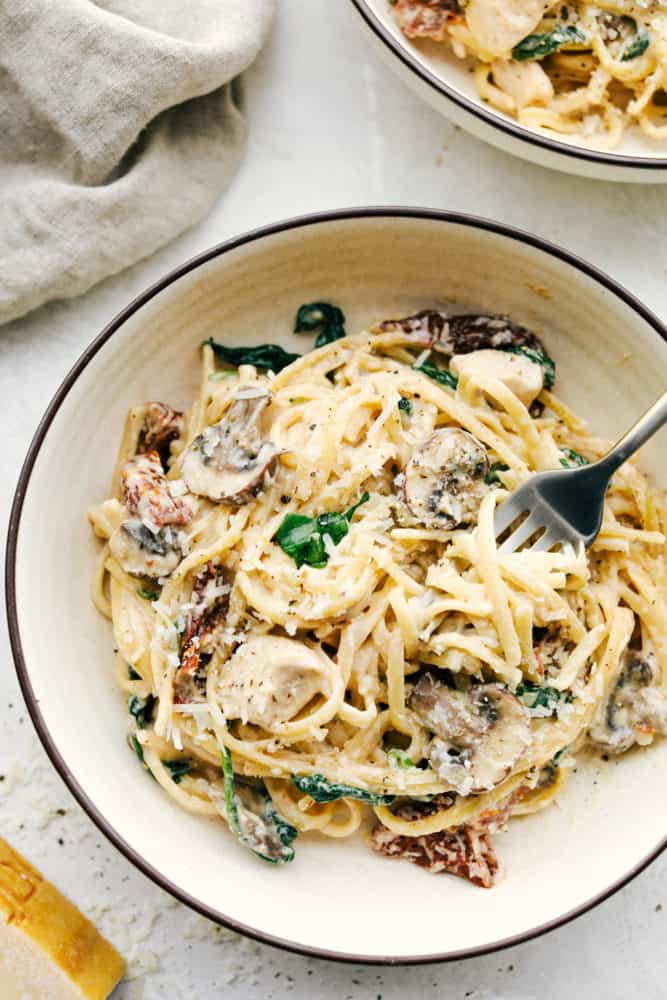
One Pot Creamy Chicken Mushroom Florentine is ready in under 30 minutes! Everything is made in just one pot and it is filled with sun dried tomatoes, spinach, mushrooms and the creamiest pasta!

For a similar recipe to this one, I also make an excellent skillet creamy chicken mushroom Florentine.  Its not one pot but it has the same delicious flavors I love!

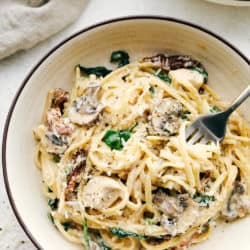
One pot creamy chicken mushroom Florentine in a bowl with a fork in it.

One Pot Creamy Chicken Mushroom Florentine

It’s that time of the year when I am trying to eat healthy, but I’m craving pasta. I still choose to enjoy a pasta meal at least once a week.  So, when I do indulge, I want to know it is going to be worth it!!  Well, let me tell you, this creamy chicken mushroom florentine is so worth every carb gram!  The creamy pasta sauce with fresh mushrooms and spinach is so perfect with the chicken.  The sun dried tomatoes give the final hit of flavor and texture! It is insanely delicious and not super hard to make!

This chicken florentine looks and tastes like a fancy gourmet meal, but is really simple and easy to cook in one pot!  I love to make it when I am entertaining because the flavors are crowd pleasing and everyone is so impressed with the dish. If you are looking for a meatless option, you can even make this as a creamy mushroom florentine without the chicken and it is just a delicious that way as well. Whether it is a weeknight at home, or an elegant dinner party, this recipe is one I find myself pulling out time and again!

Chicken Mushroom Florentine Ingredients:

This meal is so flavorful and filled with so many delicious ingredients. Sun Dried Tomatoes, mushrooms, chicken, and spinach all cook in the creamy sauce and get tossed in the pasta.

  • Boneless skinless chicken breasts: Cut into one-inch pieces so they will cook easily and quickly.
  • Butter: Unsalted or salted will work, just adjust your salting at the end accordingly.
  • Olive oil: Use a high quality oil to cook the sun-dried tomatoes, garlic, and mushrooms.
  • Garlic cloves: Minced garlic gives a rich, nutty taste to the cream sauce.
  • Sun dried tomatoes: I love the intense sweet and tart flavor of these tomatoes!
  • Small mushrooms: Sliced and cooked with the garlic and tomatoes in olive oil.
  • Flour: Add a small amount of flour to the garlic and oil.
  • Chicken broth:  This is in place of the white wine that many use in cooking this dish.
  • Half and half:  Sweetens this creamy sauce.
  • Salt and pepper: To taste!
  • Garlic powder: Even more garlic flavor? Always!
  • Linguine: Break in half for easier cooking and serving.
  • Grated parmesan cheese: Fresh grated makes a huge difference, trust me!
  • Fresh baby spinach:  Thawed frozen spinach works in a pinch, but fresh is best.

 How to Make a One Pot Meal:

It is ultra creamy and absolutely delicious! I know that you will not regret making this meal for your family. It is going to be a huge hit!

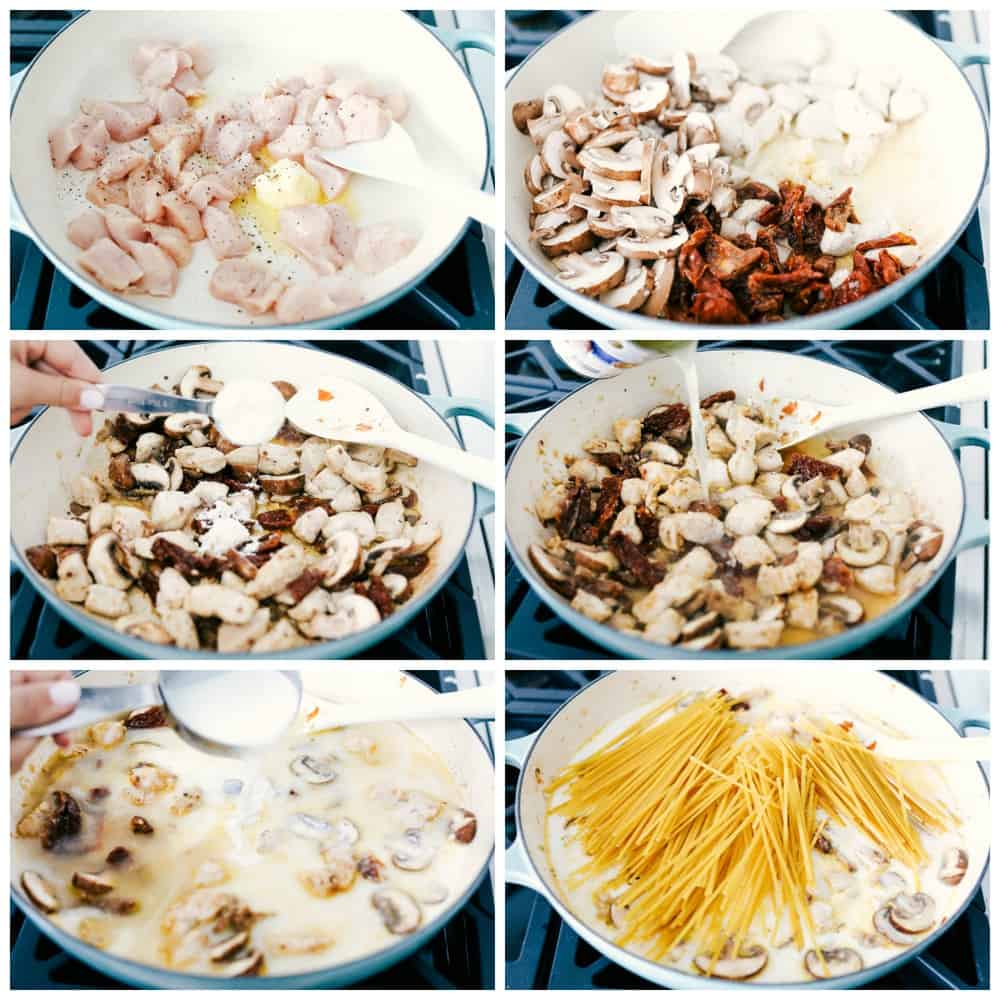
  1. Cook the chicken breasts: In a large skillet over medium high heat add the butter and cook the chicken until golden brown and no longer pink.
  2. Add ingredients to same pan to cook: Add the olive oil and cook the garlic, sun dried tomatoes, and mushrooms until tender. Add in the flour and cook for another minute.
  3. Wisk sauce and simmer: Slowly add the chicken broth, half and half, salt, pepper, and garlic powder and whisk until incorporated.
  4. Cook pasta: Cover and cook for 10-15 minutes or until the pasta is tender.
  5. Garnish and Serve: Remove from the heat and add the parmesan cheese and spinach and stir until the spinach starts to wilt. Serve immediately.

The process of making chicken mushroom Florentine.

Tips for One Pot Recipes:

Can I just get a hallelujah for one pot meals? They have saved me this week and this one is ready in under 30 minutes and one of the most delicious meals you will ever make!

  • Assemble the ingredients before you start.  Keeping your ingredients organized helps to keep cooking time down and you can verify you have everything you need before beginning.
  • Start by cooking the meat first.  The flavors the meat leaves in the bottom of the pan get incorporated through all the layers to come after.
  • Add ingredients in descending order of cooking time.  Things that need the longest cooking time should go in first.
  • Chop sun-dried tomatoes in smaller pieces so that they are not too overpowering.

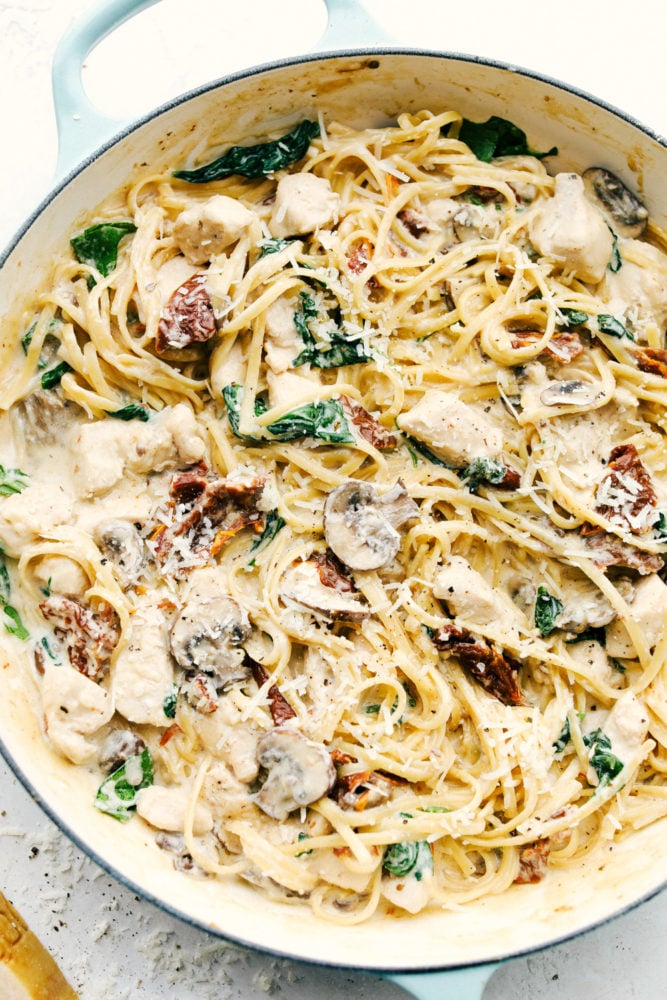
One pot of chicken mushroom Florentine in a skillet.


Variations or Substitutions:

  • Whole milk works great in place of half and half.
  • If you love black or green olives, now’s your chance! Add a 1/2 cup to this recipe!
  • Serve with mashed potatoes or pasta on the side if you are good with adding a dish or two to wash in the end.
  • Frozen spinach will work, however I prefer fresh spinach since the flavor and texture are so much better.
  • Switch out the chicken breasts for boneless skinless chicken thighs or even boneless pork chops.
  • Add more of the flavors you love.  This recipe is super easy to adapt to suit your family, so get creative.  The creamy chicken goes great with diced red onion, sliced zucchini, and artichoke hearts too!
  • If you are feeling cheesy, try mixing in other cheeses like mozzrella, asiago or fontina cheeses.  They would give this creamy florentine even more dynamic flavor.
  • Garnish with 1 bunch of green onion (both the green and white parts)

Storing Chicken Florentine

The best part about one pot meals is that you don’t dirty a lot of dishes to make an extraordinary meal. The less dishes I have to do, the more happier of a mom I am. Everything cooks in one pot and even the pasta cooks in the creamy sauce.  Store your chicken florentine within 2 hours of cooking in airtight containers.  Then, leftovers can be stored in the refrigerator for up to 3 days.

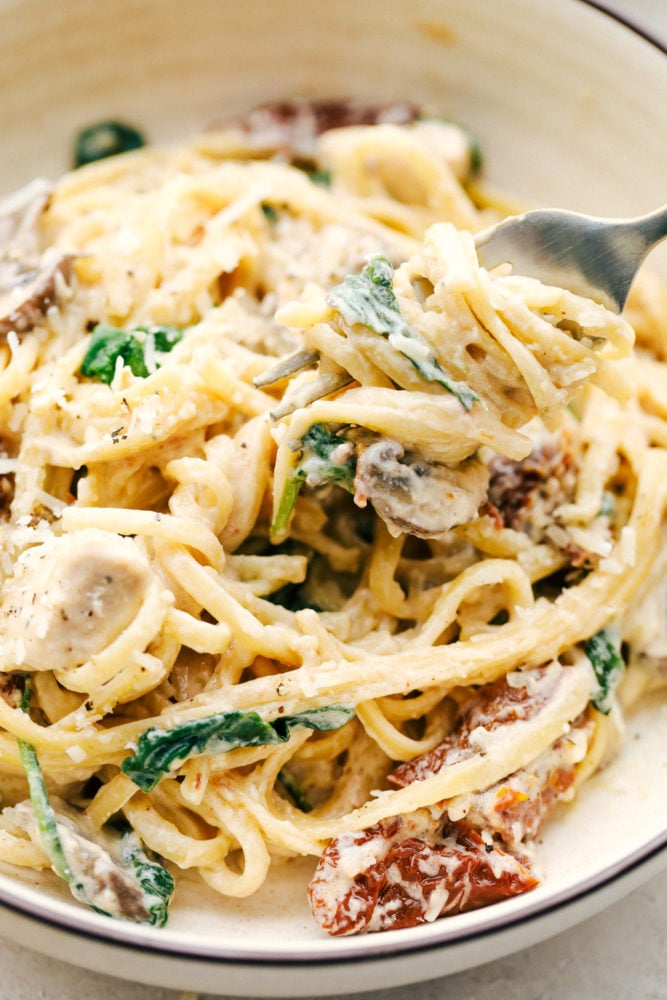
A bowl full of chicken mushroom Florentine with a fork.


More One Pot Meal Recipes You will Love!

Save

Print

One Pot Creamy Chicken Mushroom Florentine

One Pot Creamy Chicken Mushroom Florentine is ready in under 30 minutes! Everything is made in just one pot and it is filled with sun dried tomatoes, spinach, mushrooms and the creamiest pasta!
Course Dinner, Main Course
Cuisine French, Italian, Italian American
Keyword florentine, one pot creamy chicken meal, one pot creamy chicken mushroom
Prep Time 5 minutes
Cook Time 15 minutes
Total Time 20 minutes
Servings 4 People
Calories 553kcal
Author Alyssa Rivers

Equipment

  • Staub Cast Iron Skillet
  • Microplane Grater
  • Cuisinart Stainless Steel Chopper

Ingredients

  • 1 pound boneless skinless chicken breasts cut into one inch pieces
  • 1 tablespoon butter
  • 1 teaspoon olive oil
  • 2 cloves garlic minced
  • 1/4 cup sun dried tomatoes
  • 4 ounce small mushrooms sliced
  • 1 tablespoon flour
  • 2 cups chicken broth
  • 1 1/2 cup half and half
  • 1 teaspoon salt
  • 1/4 teaspoon pepper
  • 1/2 teaspoon garlic powder
  • 8 ounces linguine broken in half
  • 1/4 cup grated parmesan cheese
  • 2 cups fresh baby spinach

Instructions

  • In a large skillet over medium high heat add the butter and cook the chicken until golden brown and no longer pink. Add the olive oil and cook the garlic, sun dried tomatoes, and mushrooms until tender. Add in the flour and cook for another minute.
  • Slowly add the chicken broth, half and half, salt, pepper, and garlic powder and whisk until incorporated. Add the linguine and bring to a simmer. Cover and cook for 10-15 minutes or until the pasta is tender.
  • Remove from the heat and add the parmesan cheese and spinach and stir until the spinach starts to wilt. Serve immediately.

Video

Notes

Updated on September 7, 2020
Originally Posted on November 6, 2016

Nutrition

Calories: 553kcal | Carbohydrates: 53g | Protein: 38g | Fat: 20g | Saturated Fat: 10g | Cholesterol: 119mg | Sodium: 1322mg | Potassium: 994mg | Fiber: 3g | Sugar: 4g | Vitamin A: 557IU | Vitamin C: 14mg | Calcium: 200mg | Iron: 2mg


from The Recipe Critic https://ift.tt/2wE2kUJ
https://ift.tt/3h5GLAB

सोमवार, 7 सितंबर 2020

Homemade Butter Cookies

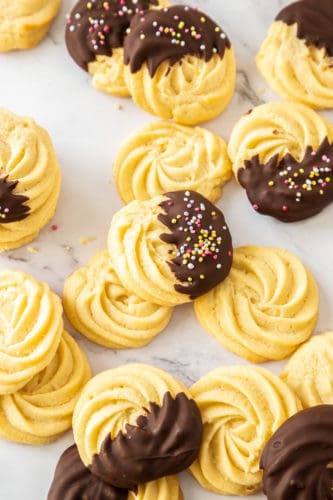
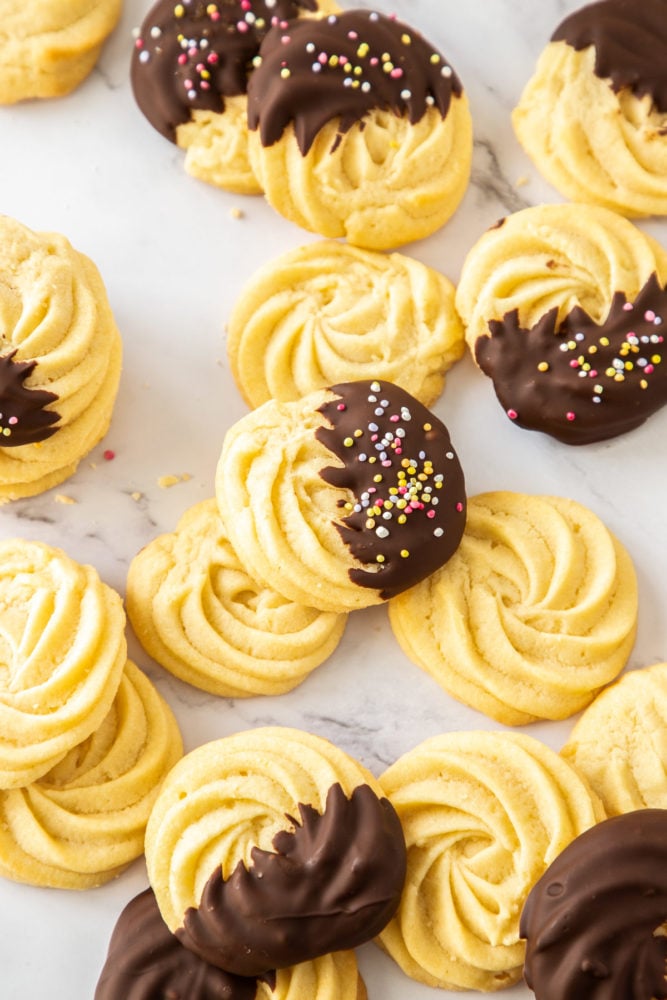
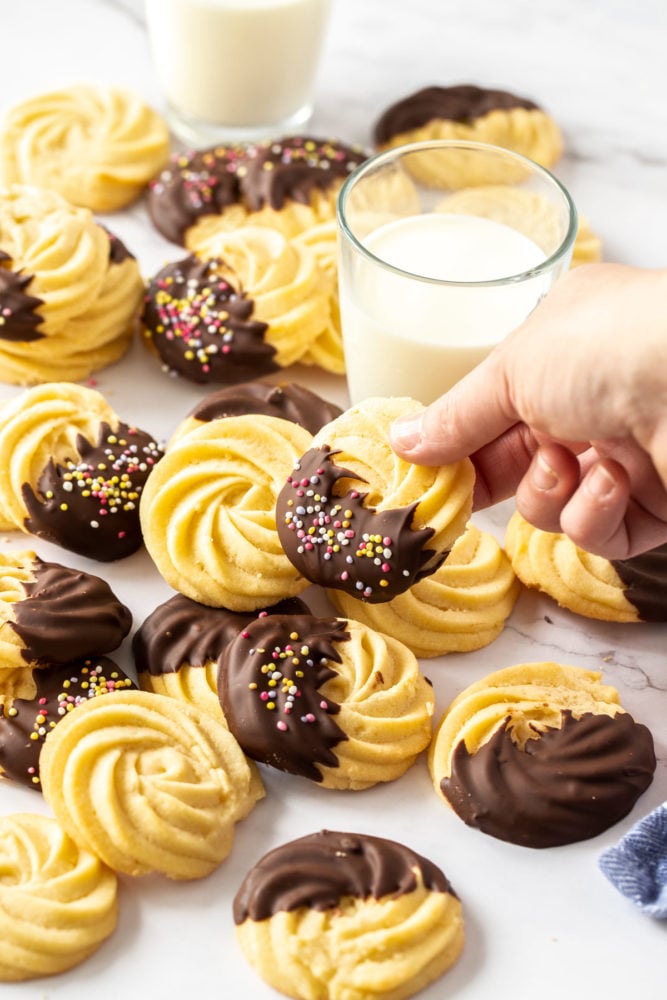
A batch of butter cookies, some chocolate coated, spread over a marble bench top

Buttery, tender and unbelievably light these homemade Danish Butter Cookies are so much better than the tinned version. Loaded with flavor, they’ll literally melt in your mouth and are so easy to make.

Just a few slight changes from my Melting Moments Cookies, you’re going to love these. Why not make up a batch to gift to those you love with some Peppermint Meltaways and Snow Kiss Cookies too.

A batch of butter cookies, some chocolate coated, spread over a marble bench top

Homemade Butter Cookies

Danish butter cookies are an absolute classic holiday cookie but why wait for the holidays when you can make them all year round? This recipe takes just 6 ingredients and a few minutes to put together.

There are so, so many reasons to enjoy these cookies;

  • Soft and tender
  • Melt in your mouth
  • Buttery and flavourful
  • Just 6 ingredients
  • Easy to make
  • Pipe or press them into pretty designs
  • Decorate to your hearts content.

A stack of butter cookies, some chocolate coated, sitting next to a glass of milk

Ingredients in Butter Cookies:

With the buttery flavour of shortbread but with a soft melt-away texture, these cookies have definitely earned their name.

  • Butter – a large amount and since this is the most dominant flavour, use a quality brand.
  • Sugar – regular white granulated sugar will do the trick here.
  • Vanilla extra – make sure to use extract (not essence). You could even go the extra mile and use vanilla bean paste or vanilla bean seeds so you get that gorgeous little black speckles.
  • Egg yolk and milk – both are used for richness and they also allow the dough to be soft enough to be piped.
  • All purpose flour – of course you need some sort of flour to create cookies and these ones just need the regular all purpose variety.

How To Make Danish Butter Cookies:

This incredibly simple dough is the work of minutes using a stand mixer, definitely my prefer way to mix this thick dough.

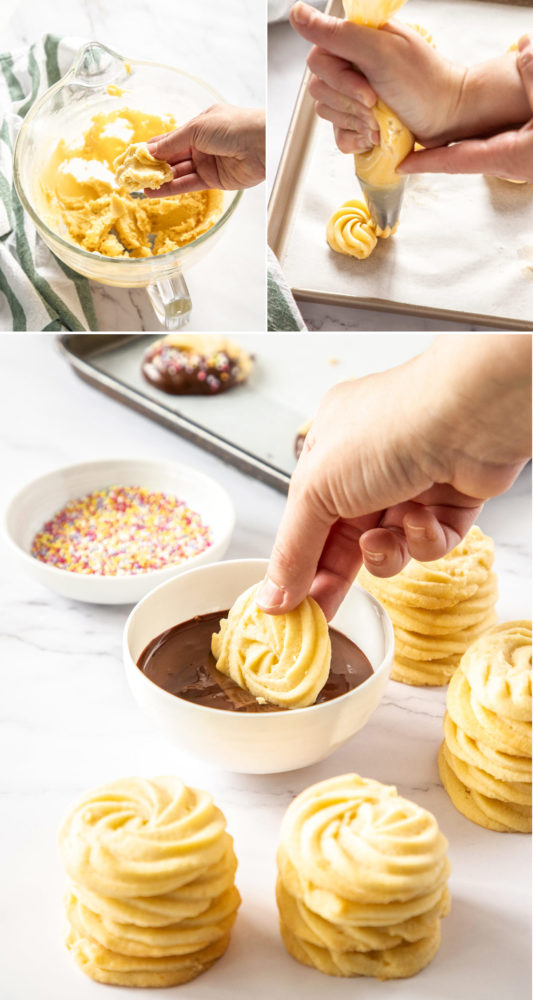
  1. Wet ingredients: mix together the butter, vanilla, egg yolk, most of the milk and the sugar in a stand mixer – just using a paddle attachment.
  2. Add flour: Add the flour in 3 parts, then give it a good beat until it’s forms a soft dough.
  3. Pipe: Transfer the dough to a piping bag, then pipe in any shape you like – see my tips below.
  4. Bake: Bake them at 350F for roughly 14 minutes or until the edges just start turning golden. Let them cool completely before decorating.
  5. Decorate: These are gorgeous dunked in chocolate with some sprinkles. Add any colour to suit the season or whatever you love. You can also sprinkle sugar over them before baking.

3 shots showing dough texture for cookies, piping cookies, then dipping them in chocolate

Tips and Variations:

  • The dough: After adding the flour, you give it good beat for 30 seconds or so until it becomes a nice soft dough and everything is fully combined.
  • Milk: You can add a little more milk if it’s not soft enough to pipe but don’t add too much or they will use their shape as they bake. It should take some pressure to pipe but should not break as you do so.
  • The piping bag: Use a small piping bag. This is quite a thick dough and easier to pipe when you have a small amount to handle at a time.
  • Piping: So they keep their shape, pipe them high with the piping bag completely vertical (not at an angle). Hold the tip ½ inch from the baking tray, use both hands on the bag and press firmly to pipe.
  • Designs: Use a piping bag, cookie press or freeze in logs to make slice and bake cookies. When you pipe use an open star tip like an Ateco 829. Pipe in a small circle so it becomes a rosette. You can also pipe logs of dough or large stars (without making a circle) then add a glace cherry to the centre.
  • Hold down the paper: Quick trick to hold that baking paper down, dot a little of the dough under the corners and it will assist in holding it in place while you pipe.
  • When decorating: Be gentle with the cookies when you’re dipping them as they are very delicate.

A batch of butter cookies, some chocolate coated, next to a glass of milk

How Long Will These Cookies Keep?

These homemade cookies are good at room temperature for up to 7 days. Keep them in an airtight container. You can also freeze them for up to 2 months – perfect for getting ahead if you’re gifting them. Again make sure they are in an airtight container.

  • One last tip: While they’re best known for their pale color, go ahead and ‘over-bake’ a few so they get quite golden – the nutty butter flavor this gives is absolutely amazing.

A batch of butter cookies, some chocolate coated. One being picked up

More Amazing Cookie Recipes:

A batch of butter cookies, some chocolate coated, spread over a marble bench top
Print

Butter Cookies

Buttery, tender and unbelievably light these homemade Danish butter cookies are so much better than the tinned version. Loaded with flavour,they’ll literally melt in your mouth and are so easy to make.
Course Dessert
Cuisine American, Danish
Keyword best butter cookies, butter cookies, butter cookies recipe, danish butter cookies, homemade butter cookies
Prep Time 10 minutes
Cook Time 14 minutes
Total Time 24 minutes
Servings 25 cookies
Calories 154kcal
Author Marie Roffey

Equipment

  • medium piping bag

Ingredients

  • 8 oz unsalted butter, softened (226g / 2 sticks)
  • 1/2 cup granulated sugar (3.5oz / 100g)
  • 1 1/2 teaspoons vanilla extract
  • 1 egg yolk
  • 4-5 teaspoons milk
  • 2 cups all purpose flour (9.2oz / 260g)
  • 5.5 oz semi-sweet chocolate, melted (3/4 cup, chopped)
  • Sprinkles if desired.

Instructions

  • Preheat the oven to 350F. Line two baking trays with baking paper.
  • WET INGREDIENTS: Beat together the butter, sugar egg yolk, vanilla and 3 teaspoons of milk together for a few minutes until well combined and looking a little creamy.
  • DRY INGREDIENTS: Add the flour in two or three parts, beating until well incorporated and it turns to soft dough.
  • PREP FOR PIPING: Transfer a little of the dough to a medium piping bag with an open star piping tip.
  • TEST: Test pipe a rose holding the bag directly upright and about half an inch from the tray. If it cracks or breaks or you can't pipe it, return it to the bowl and beat in a little more milk. Don't add too much. The consistency should be thick and still require some pressure to pipe but should pipe smoothly. See notes.
  • PIPE: Once you're happy with the consistency, pipe rosettes of dough about 2 inches wide, leaving 2 inches space between each so they have room to spread.
  • CHILL: Chilling is optional but doing this for 10-15 minutes may keep your design even more defined.
  • BAKE: Bake for around 14 minutes or until just starting to turn golden on the edges.Transfer to a wire rack to cool completely.
  • DECORATE: Line a baking tray with baking paper. Dip half of each cooled cookie in chocolate, scraping the base on the edge of the bowl, then place on the tray and add sprinkles if you like. Let them set in the fridge for 1/2 an hour.

Notes

  1. There's no need to beat the butter mixture too long as it may soften your piped design on baking.
  2. I find a stand mixer best for this thick dough but a handheld electric beater and some elbow grease at the end will work too.
  3. Different brands of flours will absorb different amounts of moisture which matters in this dough. Only add enough milk that, while still requiring pressure to pipe, you can pipe it smoothly. Too soft and you won't get the defined design on top.
  4. Decorating: You can add a variety of sprinkles to suit the season. You could even sprinkle over granulated or turbinado sugar before baking.
  5. Piping: You don't have to pipe these cookies. You could just scoop like regular cookies, or use a cookie press. You can also roll the dough into logs and place in the freezer for 1 hour. Later, slice and bake.

Nutrition

Serving: 31g | Calories: 154kcal


from The Recipe Critic https://ift.tt/3bB7O5M
https://ift.tt/2ZeRtyS

रविवार, 6 सितंबर 2020

Copycat Texas Roadhouse Rolls

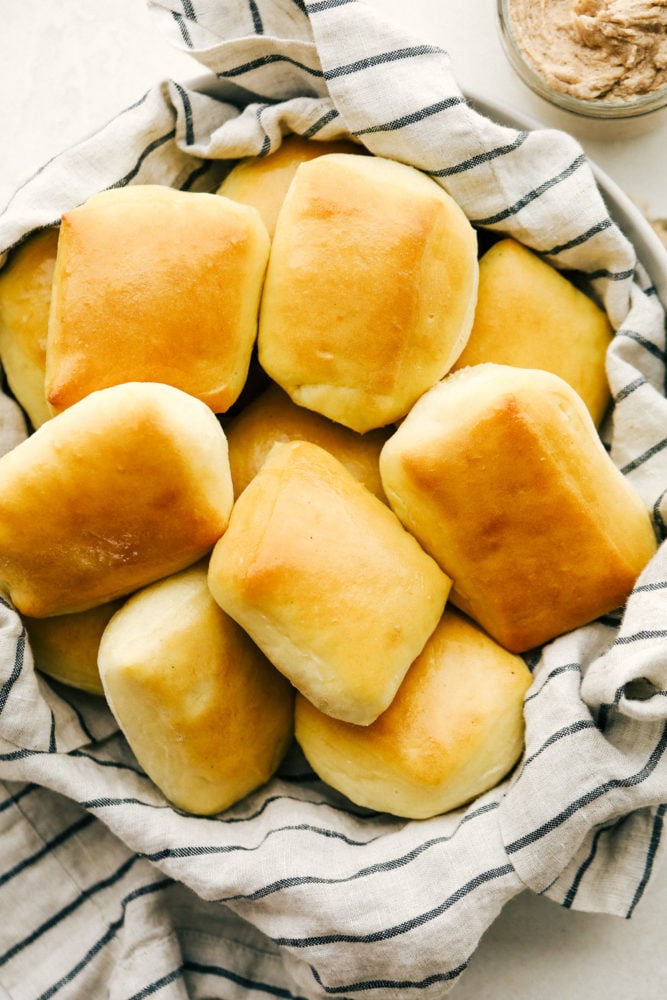
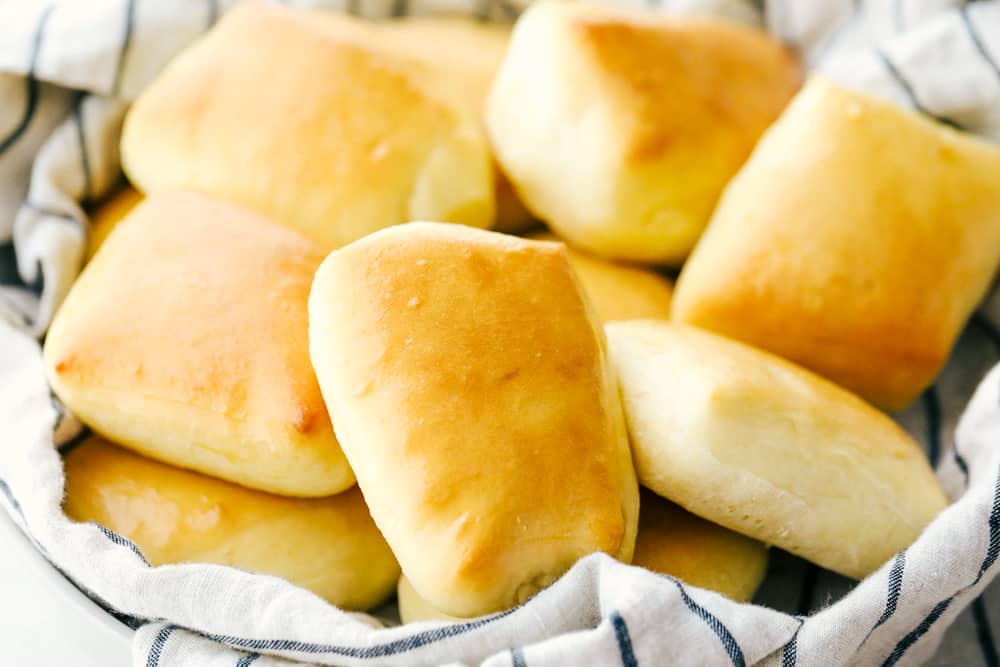
Fluffy, melt in your mouth rolls are the perfect Copycat of Texas Roadhouse Famous Rolls. Watch these rolls disappear as soon as they hit the table!

I declare these the best rolls in the entire world!   Freshly baked, and so soft inside they are perfect, Try with this Cinnamon Honey Butter (which is BETTER than Texas Roadhouse Butter for a heavenly experience.

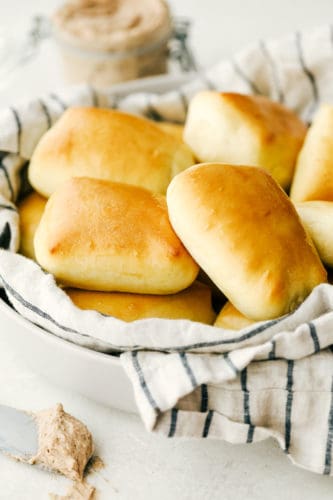
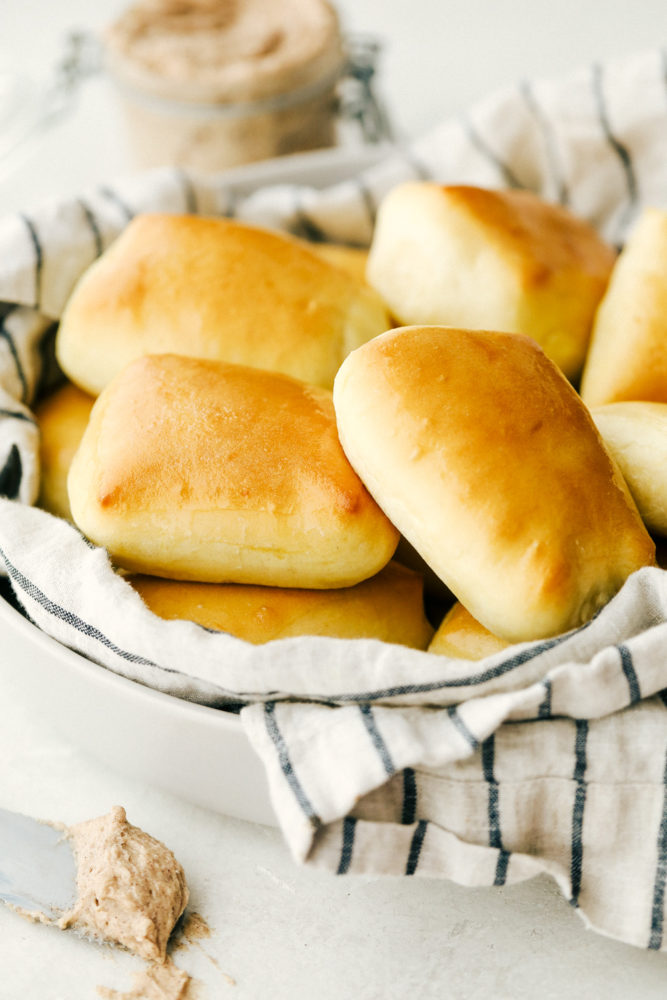
Fluffy soft Copycat Texas Roadhouse Rolls with Cinnamon Honey Butter.

Copycat Texas Roadhouse Rolls

If everyone is truly honest with themselves they would all admit they go to Texas Roadhouse for the rolls. They are so soft and flavorful, with a brush of melted butter on top. Served warm with cinnamon honey butter they are so good and now they can grace your table anytime you get a craving.

It’s an enriched dough slathered with butter and then again with cinnamon honey butter, what’s not to love?! Incredibly simple and even easier to shape, a beginner baker can master this and wow families and friends. The hardest part will be waiting for them to rise and bake!

Roadhouse Roll Ingredients:

Keep these pantry staples on hand to whip these Texas roadhouse rolls up whenever the urge or occasion occurs. These rolls are always a family favorite and can be made in a short amount of time!

  • Active Dry Yeast: There is a difference between active and Instant yeast, you can use either, I’ll explain below.
  • Sugar: The food for the yeast.
  • Warm Water: Necessary to help yeast bloom.
  • Milk: Use whole milk to really create a soft tender roll.
  • Melted Butter: Mixes better when it’s melted and gives incredible flavor.
  • Flour: Unbleached Bread Flour is the best to replicate Texas Roadhouse texture.
  • Egg: Adds more richness to the dough.
  • Salt: Don’t skip the salt, it’s a must to slow the rise and give depth of flavor to dough.

Making Texas Roadhouse Rolls:

Bread can be kind of intimidating to make at times. But seriously. Nothing compares to freshly made bread at home. Surprisingly this recipe is pretty simple! You will be surprised how quick and easy these roadhouse rolls are to make.

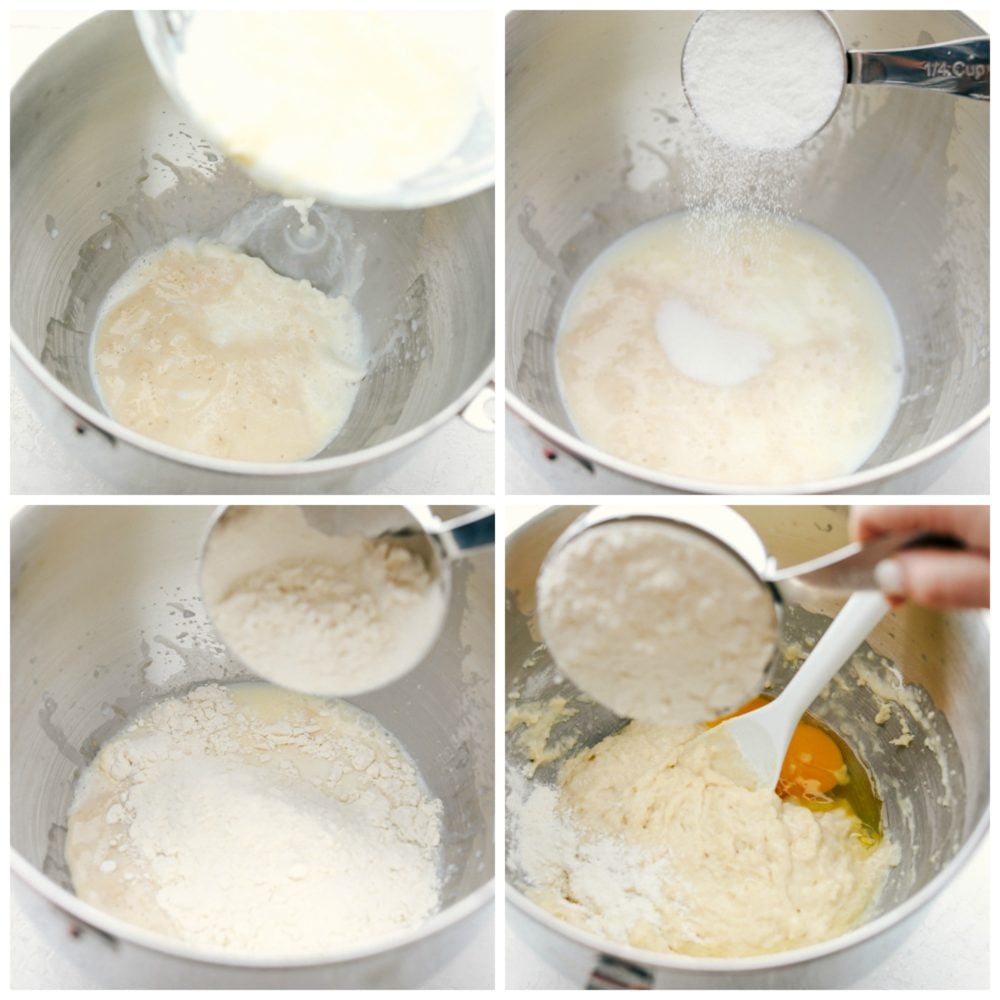
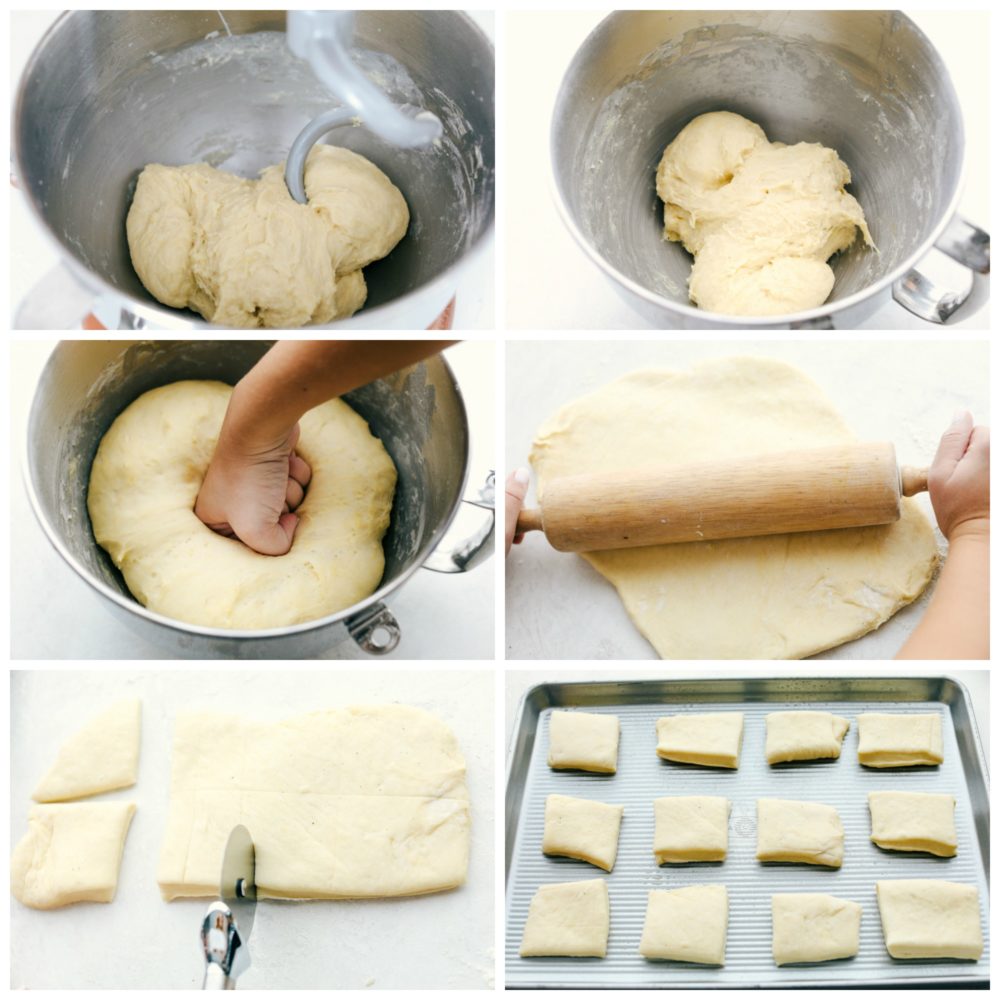
  1. Yeast: Place the yeast, sugar and warm water in your stand mixer and allow to double in size which takes about 5 minutes.
  2. Scald: Meanwhile place your milk in the microwave for 45 seconds. Add the butter and stir till butter is melted. Allow to cool till it’s lukewarm.
  3. Mix: Add the milk to your yeast mixture, along with the sugar and half of the flour. Mix thoroughly, then let it rest for 10 min.
  4. Blend: Next add in the egg and salt, mix well. Followed by the remaining flour mixing till a soft dough has formed.
  5. Knead: Using a dough hook or your muscles knead the dough until it’s smooth and satiny.
  6. Rise: Cover with plastic wrap and let it rise until doubles in size. Punch it down and let it rest for 10 minutes.
  7. Roll: On a lightly floured surface roll the dough in a large rectangle about a 1/2 inch thick. Cut in half then cut each half into 6 square pieces.
  8. Bake: Place on a greased baking sheet and allow to rise again then Bake at 350 for 10-15 minuets.


Making fluffy soft rich rolls

Tips for Working with Yeast:

Yeast breads can be intimidating but if you follow these tips you’ll become skilled and successful every time. Learn the best way to manage yeast and master making these Texas Roadhouse rolls often!

  • What is it? Yeast is a microscopic living cell that can reproduce rapidly creating carbon dioxide which allows the bread to grow and rise.
  • Feed it: Yeast needs a sugar and warm liquid to grow.
  • Warm Water: Water should be about 80 degrees Fahrenheit for optimal yeast growth. Using warm water from the tap works perfectly.
  • Active Yeast: This recipe uses active yeast which needs to be activated, using the sugar and warm water.
  • Instant Yeast: You don’t have to activate Instant yeast so it can be mixed right in.
  • Expired Yeast: Always check your expiration date and store unused yeast in the fridge or freezer to maintain freshness. If you mix your yeast with water and sugar and it does not “grow” don’t use it. Your bread won’t rise.
  • Warm Place to Rise: Dough will rise best if kept in a warm place. If your kitchen is cold, warm your oven to 100-125 degrees then turn it off. Place your dough in an oven safe bowl and place in your oven till it doubles in size.

Making fluffy soft rich rolls and cutting them getting ready to bake.

Hints for the Perfect Texas Roll:

Making these rolls is easy, but here are some sure fire ways to make them perfect every time and some variations as well. This roll recipe is definitely a keeper!

  • Sugar: Sugar is the food for your yeast, it helps make it grow, Use white sugar so as not to change the flavor,
  • Dough: Your dough should be tacky but not sticky. If it’s too sticky you’ll have lots of it on your hands if you touch it. Add a little more flour 1 tablespoon at a time till you get the desired consistency.
  • Milk: Scalding the milk is crucial to helping it break down the proteins, which can keep the gluten from forming properly in your bread. Bringing it down to lukewarm temperature is vital to helping the yeast grow without killing it.
  • Cutting:  Getting that classic square Roadhouse shape, use a pizza cutter for quick easy cutting without tearing the dough which a knife will do.
  • Buttered Tops:  Add extra goodness by waiting till rolls are slightly cooled to brush with melted butter.
  • Storage: Store completely cooled rolls in a sealed container or Ziploc bag for up to 3 days. Freeze in a freezer bag for up to 2 months.
  • Double: This recipe is easy to double for a crowd. Double the ingredients but don’t increase cooking time.

Fluffy soft Copycat Texas Roadhouse Rolls with Cinnamon Honey Butter.

Cinnamon Honey Butter:

Now this cinnamon honey butter is just what these roadhouse rolls love! Spread this butter over top a warm Texas roll and you have the MOST amazing combination ever!

  • Butter: Soften, but don’t melt the butter to make it easier to mix.
  • Powdered Sugar: mixes in smoothly without making it grainy like sugar and provides fluff.
  • Honey: Golden, drippy sweet must helps to thicken the spread.
  • Cinnamon: Adds a nice little spicy punch.

Fluffy soft Copycat Texas Roadhouse Rolls with Cinnamon Honey Butter.

More Amazing Roll Recipes to Try:

Print

Copycat Texas Roadhouse Rolls with Cinnamon Honey Butter

Delicious and soft homemade rolls that taste just like Texas Roadhouse Rolls!
Course Appetizer, Side Dish
Cuisine American
Keyword copycat texas roadhouse roll, roadhouse rolls, rolls, texas roadhouse rolls, texas rolls
Prep Time 25 minutes
Cook Time 10 minutes
Total Time 35 minutes
Servings 12 Rolls
Calories 291kcal
Author Alyssa Rivers

Ingredients

  • 2 tsp active dry yeast
  • 1 tsp sugar
  • ¼ cup warm water
  • 1 cup milk
  • 1 Tbsp. melted butter
  • ¼ cup sugar
  • 3-4 cups flour
  • 1 egg
  • 1 tsp salt
  • Cinnamon Honey Butter

Instructions

  • In the bottom of your stand mixer bowl, add yeast and 1 tsp sugar to 1/4 cup warm water. Allow yeast to proof, or double in size, which takes about 5 minutes.
  • Place milk in microwave for 45 seconds. Add the butter to the milk and stir until it is completely melted. Allow milk to cool until it is lukewarm.
  • Once the yeast has doubled, add the milk to the yeast mixture. Add sugar and about half of the flour until it reaches a muffin batter. Let rest for 10 minutes.
  • Add egg and salt to the mixture. Mix well. Add remaining flour to form a soft dough. Knead the dough until it is smooth and satiny.
  • Cover and let rise until it doubles in size. Once it has doubled, punch the dough and let it rest for 10 minutes.
  • Lightly flour a surface and roll the dough into a large rectangle, about a 1/2 inch thick. Cut the rectangle in half, and then cut each half into 6 square pieces with a pizza cutter.
  • Place on a greased baking sheet and allow to rise until double in size.
  • Bake at 350 for 10-15 minutes or until the tops are golden brown.
  • To make the honey butter, whip together butter, powdered sugar, honey, and cinnamon and serve on warm rolls.

Notes

Recipe Originally posted on November 5, 2013 
Updated on September 6, 2020

Nutrition

Calories: 291kcal | Carbohydrates: 47g | Protein: 5g | Fat: 10g | Saturated Fat: 6g | Cholesterol: 39mg | Sodium: 286mg | Potassium: 79mg | Fiber: 1g | Sugar: 22g | Vitamin A: 320IU | Vitamin C: 1mg | Calcium: 37mg | Iron: 2mg

A bunch of Texas road house rolls in a basket together.


from The Recipe Critic https://ift.tt/3h4I7LV
https://ift.tt/3lYvrK6