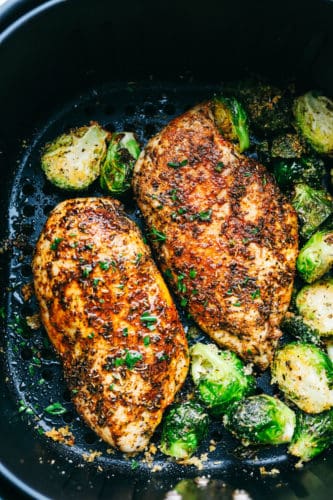
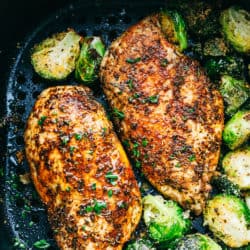
Tender and Juicy Air Fryer Chicken is golden crispy outside and moist and delicate on the inside. This is bursting with flavor and so good!
Air Fryer food is so succulent and easy! Try Perfect Air Fryer Steak with Garlic Herb Butter and Homemade Air Fryer French Fries. Don’t have an Air Fryer? It’s time!

Air Fryer Chicken Breast Recipe
Air Fryers have changed cooking. It’s so quick and easy and everything that comes out tastes amazing. I love it. This is such a healthy way to cook chicken or any other dish for that matter. It uses the same method as a convection oven but this way you don’t have to heat the whole oven for just a few chicken breasts. It’s quick and the clean up is so easy.
Chicken can be finicky sometimes, and hard to get juicy and tender each and every time. The air fryer method takes a lot of the guess work out for you. You will just need to take the Chickens temperature to ensure doneness, and that you don’t overcook it. This is so versatile so change it up as you need to and enjoy.
Chicken Breast Ingredients
Ingredients that we all usually have on hand. So easy and so quick!
- Chicken Breasts: Buying skinless, boneless make it super easy.
- Olive Oil: Perfect mild flavored oil for the air fryer
- Italian Seasoning: Perfect combination of spices
- Garlic Powder: Garlic adds that nice kick of flavor
- Paprika: Adds color and flavor
- Salt and Pepper: Add to taste
- Optional: Brussel sprouts
How Long to Cook Chicken Breast in Air Fryer
You will make your chicken in the air fryer from now on. It’s so easy and fail proof. Never wonder what’s for dinner again!
- Oil: Place the chicken in the fryer and rub with the olive oil to coat
- Combine: In a small bowl combine the spices and rub generously on the chicken
- Air Fry: Bake at 360 for 9 min. Flip (add brussel sprouts if using) Cook for another 9 min or till internal temp is 165.

Tips for the Best Juicy Air Fryer Chicken
- Olive Oil: This helps to crisp the skin and helps the spices and herbs to adhere to the meat.
- Space: Make sure you create room between the chicken breasts to ensure even cooking. Don’t overcrowd. Cook in batches if you need to.
- Check: Check the temp earlier than you think so you don’t accidently over cook the chicken. Appliances can vary so go by temperature of your chicken to ensure it’s done.
- Rest: Let the Chicken rest before cutting into it. About 5 min at least. This allows the juices to reabsorb into the chicken instead of spilling onto your plate.
- Spices: Mix it up depending on your menu. You can use Mexican spices, BBQ spices and sauce, Indian spices etc. Whatever your menu calls for this is a quick delicious way to cook your chicken.
- Moist: Want to make sure your chicken is super moist and tender? Try marinating or brining your chicken for even greater juiciness and flavor.
How and Why do I Brine my Chicken Breasts?
- Why: During brining the salt helps the meat to absorb extra liquid through the process of osmosis. Soaking the chicken in salted water, results in a juicier and more flavorful final dish, because the is able to hold on to more of it’s moisture. This is particularly great for lean cuts of meat, such as chicken breast and turkey breast that tend to dry out during cooking.
- Formula: Basic brine ratio: The basic ratio of salt to water for a brine is 4 tablespoons of salt per 6 cups of water. But size of the salt crystal and type matter. Use Kosher salt because although it dissolves faster and easier in water, it’s slower to dissolve on the surface of meat so less sodium is absorbed by your meat.
- How: Fill a large bowl with about 4 cups of lukewarm water and add 1/4 cup kosher salt, stirring to dissolve. Although this may sound like a lot of salt, only a small amount is absorbed. Add the chicken breasts to the water and let them sit at least 1 1/2 hours or up to 6 hours to brine. Remove from water, pat dry with paper towels and discard the water.
- Continue with the recipe as directed rubbing with oil and spices then baking.

More Chicken Recipes to Try
- Delicious Chicken Divan Recipe
- Butter Chicken
- Slow Cooker Crack Chicken
- Easy Chicken Lombardy
- Awesome Chicken Katsu
Tender and Juicy Air Fryer Chicken
Ingredients
- 2 boneless skinless chicken breasts
- 1 Tablespoons olive oil
- 1 Tablespoon Italian seasoning
- 1 teaspoon garlic powder
- 1/2 teaspoon paprika
- salt and pepper
- optional: brussels sprouts
Instructions
-
Place the chicken in the air fryer basket. Rub olive oil on the chicken.
-
In a small bowl add the Italian seasoning, garlic powder, paprika, salt and pepper. Rub on each sides of the chicken.
-
Cook in the air fryer at 360 degrees for 9 minutes. Open the air fryer and flip the chicken. (Add Brussels sprouts now if using). Cook for another 9 minutes or until internal temperature reaches 165 degrees.
Nutrition
from The Recipe Critic https://ift.tt/35p34xc
https://ift.tt/2FUyZ04