गुरुवार, 29 अक्तूबर 2020

Mummy Hot Dogs

Nothing screams fun, quite like Mummy Hot Dogs for Halloween dinner. Serve these fun little vittles before trick or treating or at your next Halloween party!

Looking for more spooky options to serve with these, try Easy Mummy Mini Pizzas and Mummy Cookie Bites. These are all perfect Halloween treats!

Mummy Hot dogs on a plate with spider webb dip.

Halloween Mummy Hot Dogs

These are super easy to make and even more fun to eat! You will have to make sure you make enough, because these will go fast! But because they were so easy, you can always whip up more in a breeze.

These Mummy dogs are almost too cute to eat! What makes these great is that they are kid friendly to make. Let them help you wrap the hot dogs and put the eyes on. They’ll love it! These mummy dogs will be the hit of the party! They’re easy, quick and a fun finger food for young and old alike.

Crescent Roll Hot Dog Ingredients

Have fun making these hot dog crescent rolls. This dinner is so fun for Halloween and kids will totally approve!

  • Crescent Roll Dough: For best results use regular crescent rolls. Reduced fat dough is stickier and makes wrapping the hot dogs difficult.
  • Hot Dogs: Use your favorite kind of hot dogs

How to Make Mummy Hot Dogs Recipe

These are so simple to make and come together quickly. Each mummy dog is going to be unique and fun looking!

  1. Prep: Preheat the oven to 375 degrees. Spray a baking sheet with cooking spray and set aside. Open the crescent dough and press seams together. Using a pizza cutter, cut 1/4 strips.
  2. Create: Wrap each hot dog creating a bandage look leaving gaps and overlapping the dough. Create a crisscross pattern until the entire hot dog is wrapped.
  3. Bake: Place each mummy dog on the baking sheet and bake for 10-12 minutes. Using ketchup or mustard you can create little eyes for the mummies.
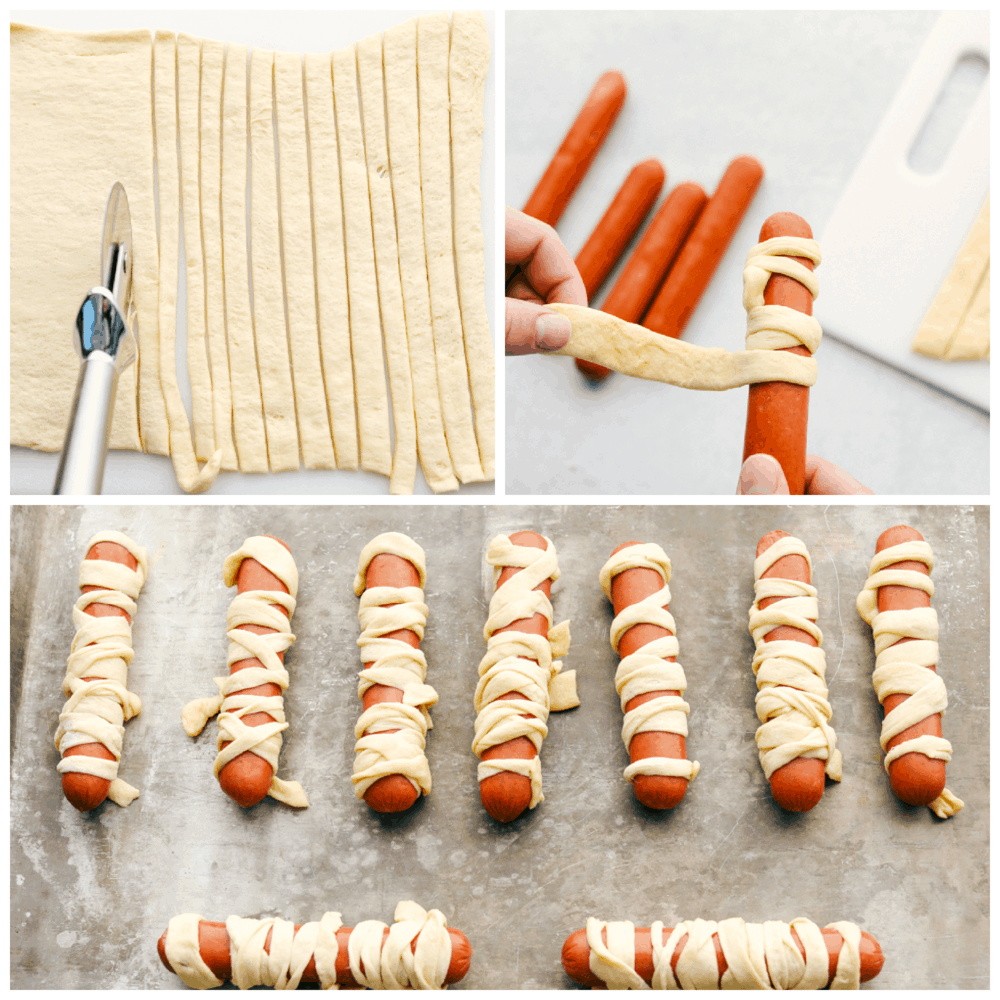
The process of cutting out, wrapping and forming the mummy dogs.

Halloween Mummy Hot Dog Tips

Create a fun, spooky and even scary mummy hot dog with these tips. Anything you do will be a fun surprise for Halloween!

  • Eyes: If you don’t have candy eyes handy you can draw eyes on by adding a a couple of dots of ketchup or mustard to the mummy dogs where the eyes would go.
  • Make it Stick: Press dough at perforations to seal.
  • Mini: Use little smokies and wrap the same way to make baby mummies.
  • Big Guys: Used smoked sausages for bigger beefier ones.
  • Cheese: Place a hot dog sized slice on cheese on the back of the hot dog and wrap with the crescent dough.
  • Butter: Brush the dough with melted butter before placing in the oven for an even buttery flakey finish.

Cooked mummy hot dogs on a pan with eyes.

Spooky Spider Web Sauce

With a little bit of ketchup and mustard you make a fun spooky spider web sauce for dipping. It’s super festive and so easy to prepare. Super easy and the kids love to dip the mummy  hot dogs into it!

  1. Place ketchup in a small bowl.
  2. With the mustard draw a few circles.
  3. Use a toothpick to drag out the circles into a web design.
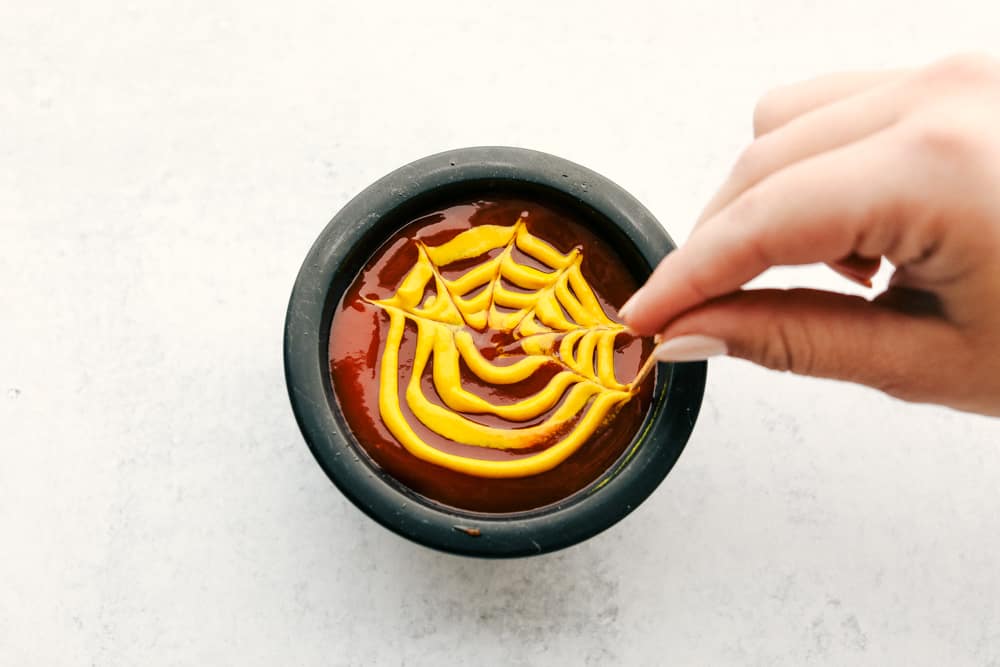
Making Spider Web dipping sauce.

Make Ahead of Time

One of the best parts about this recipe is that you make them ahead of time. Wrap the hot dogs with the dough and then store in an airtight container in the fridge till ready to bake. When ready, pop those mummy hot dogs in the oven.

Dipping a mummy dog into spider web sauce.

More Quick and Easy Recipes Made with Crescent Dough

Having a short cut to make your dishes quick and easy is always convenient!

Print

Mummy Hot Dogs

Nothing screams fun, quite like Mummy Hot Dogs for Halloween dinner. Serve these fun little vittles before trick or treating or at your next Halloween party.
Course Dinner, Main Course
Cuisine American
Keyword halloween mummy hot dogs, mummy hot dogs
Prep Time 5 minutes
Cook Time 12 minutes
Total Time 17 minutes
Servings 8 Hot Dogs
Calories 112kcal
Author Alyssa Rivers

Ingredients

  • 1 8 ounce package crescent roll dough
  • 8 hot dogs

Instructions

  • Preheat the oven to 375 degrees. Spray a baking sheet with cooking spray and set aside. Open the crescent dough and press seams together. Using a pizza cutter, cut 1/4 strips.
  • Wrap each hot dog creating a bandage look leaving gaps and overlapping the dough. Create a criss cross pattern until the entire hot dog is wrapped.
  • Place each mummy dog on the baking sheet and bake for 10-12 minutes. Using ketchup or mustard you can create little eyes for the mummies.

Nutrition

Calories: 112kcal | Carbohydrates: 8g | Protein: 5g | Fat: 7g | Saturated Fat: 2g | Cholesterol: 20mg | Sodium: 309mg | Potassium: 66mg | Sugar: 1g | Calcium: 11mg | Iron: 1mg


from The Recipe Critic https://ift.tt/2TzvYoX
https://ift.tt/2JiAtm4
बुधवार, 28 अक्तूबर 2020

Tender and Juicy Air Fryer Chicken

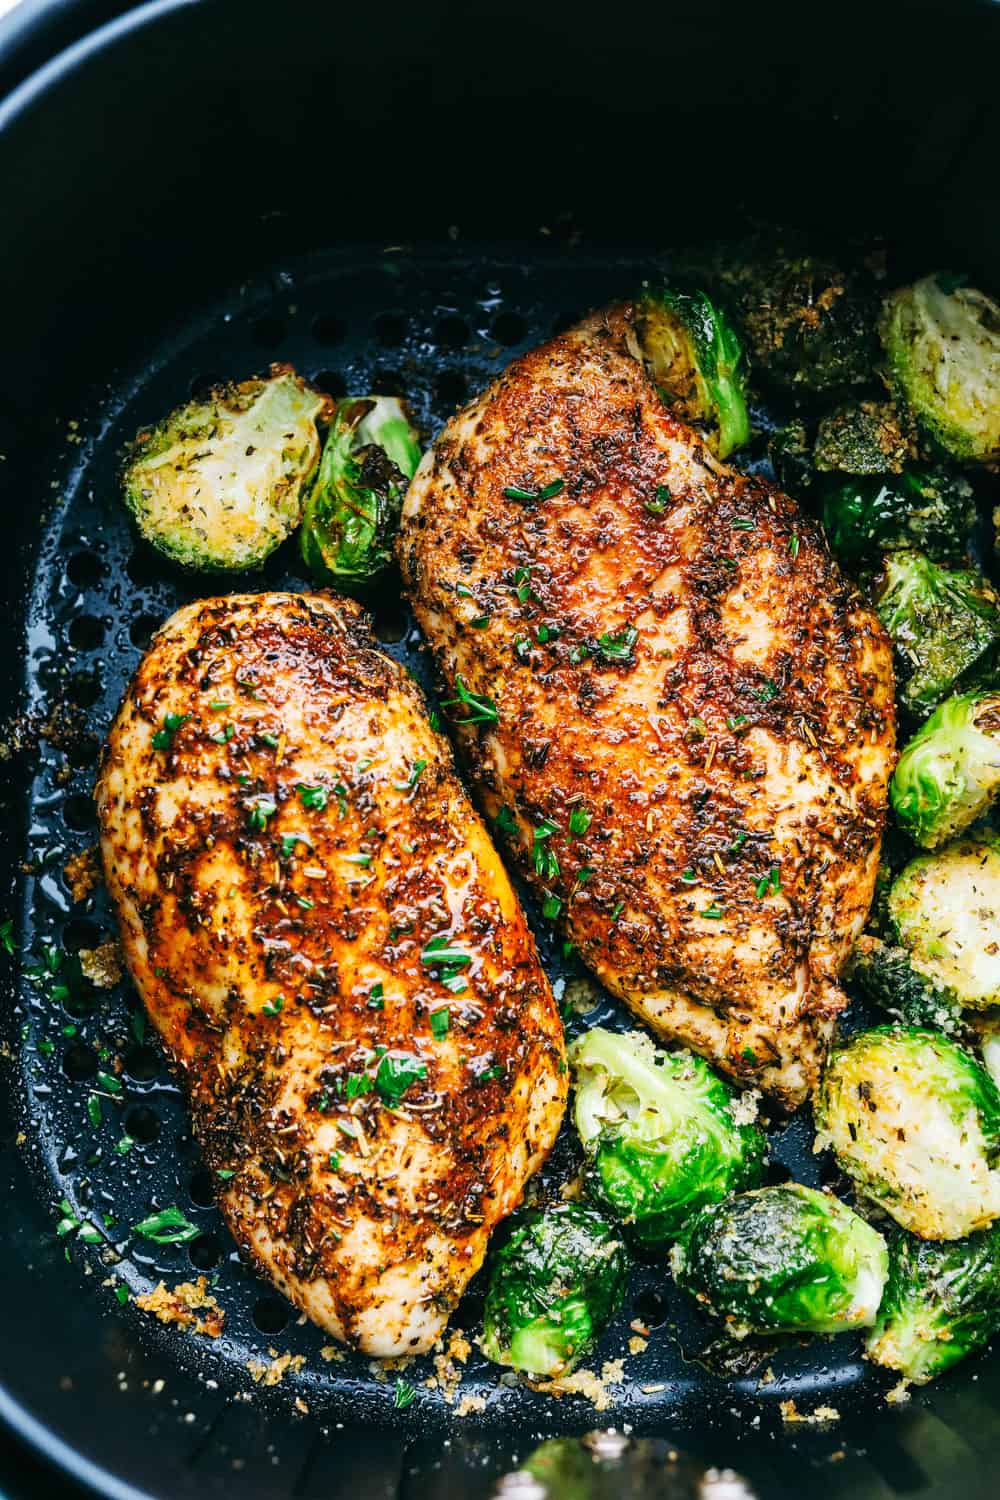
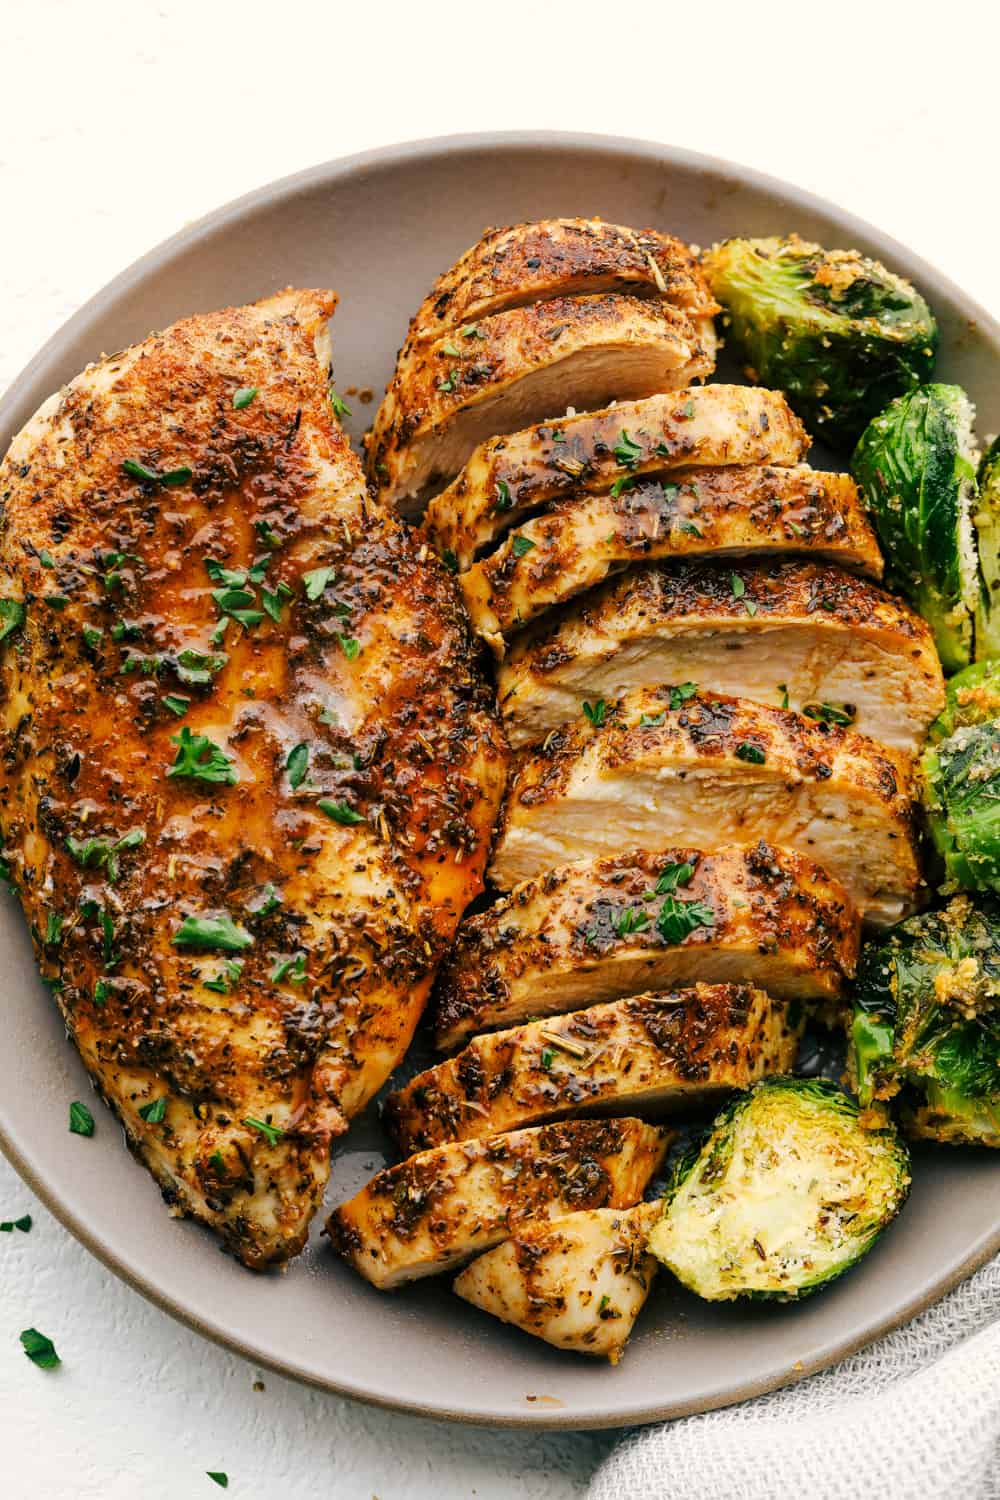
Tender and Juicy Air Fryer Chicken is golden crispy outside and moist and delicate on the inside. This is bursting with flavor and so good!

Air Fryer food is so succulent and easy! Try Perfect Air Fryer Steak with Garlic Herb Butter and Homemade Air Fryer French Fries. Don’t have an Air Fryer? It’s time!

Tender Juicy Chicken Breasts in an Air Fryer

Air Fryer Chicken Breast Recipe

Air Fryers have changed cooking. It’s so quick and easy and everything that comes out tastes amazing. I love it. This is such a healthy way to cook chicken or any other dish for that matter. It uses the same method as a convection oven but this way you don’t have to heat the whole oven for just a few chicken breasts. It’s quick and the clean up is so easy.

Chicken can be finicky sometimes, and hard to get juicy and tender each and every time. The air fryer method takes a lot of the guess work out for you. You will just need to take the Chickens temperature to ensure doneness, and that you don’t overcook it.  This is so versatile so change it up as you need to and enjoy.

Chicken Breast Ingredients

Ingredients that we all usually have on hand. So easy and so quick!

  • Chicken Breasts: Buying skinless, boneless make it super easy.
  • Olive Oil: Perfect mild flavored oil for the air fryer
  • Italian Seasoning: Perfect combination of spices
  • Garlic Powder: Garlic adds that nice kick of flavor
  • Paprika: Adds color and flavor
  • Salt and Pepper: Add to taste
  • Optional: Brussel sprouts

How Long to Cook Chicken Breast in Air Fryer

You will make your chicken in the air fryer from now on. It’s so easy and fail proof. Never wonder what’s for dinner again!

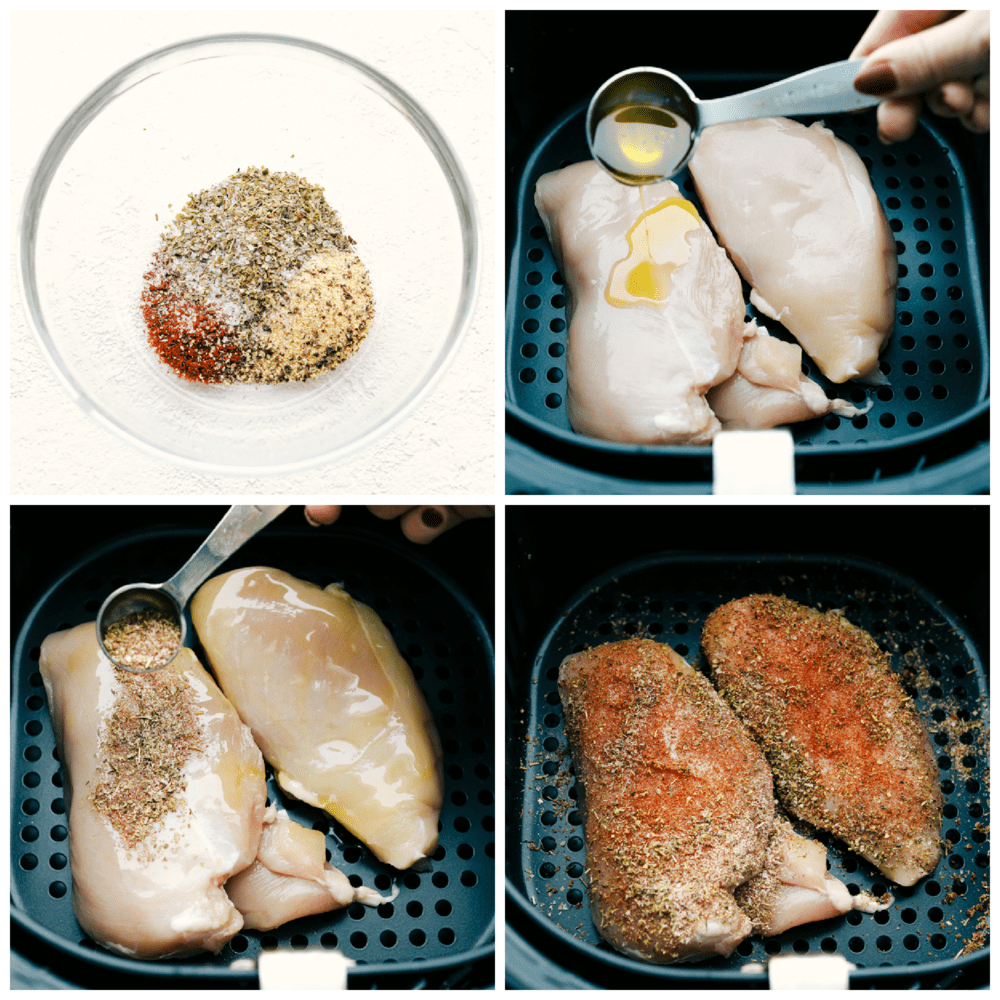
  1. Oil: Place the chicken in the fryer and rub with the olive oil to coat
  2. Combine: In a small bowl combine the spices and rub generously on the chicken
  3. Air Fry: Bake at 360 for 9 min. Flip (add brussel sprouts if using) Cook for another 9 min or till internal temp is 165.

Seasoning, oiling and baking tender juicy air fryer chicken

Tips for the Best Juicy Air Fryer Chicken

  • Olive Oil: This helps to crisp the skin and helps the spices and herbs to adhere to the meat.
  • Space: Make sure you create room between the chicken breasts to ensure even cooking. Don’t overcrowd. Cook in batches if you need to.
  • Check: Check the temp earlier than you think so you don’t accidently over cook the chicken. Appliances can vary so go by temperature of your chicken to ensure it’s done.
  • Rest: Let the Chicken rest before cutting into it. About 5 min at least. This allows the juices to reabsorb into the chicken instead of spilling onto your plate.
  • Spices: Mix it up depending on your menu. You can use Mexican spices, BBQ spices and sauce, Indian spices etc. Whatever your menu calls for this is a quick delicious way to cook your chicken.
  • Moist: Want to make sure your chicken is super moist and tender? Try marinating or brining your chicken for even greater juiciness and flavor.

How and Why do I Brine my Chicken Breasts?

  • Why: During brining the salt helps the meat to absorb extra liquid through the process of osmosis. Soaking the chicken in salted water, results in a juicier and more flavorful final dish, because the is able to hold on to more of it’s moisture. This is particularly great for lean cuts of meat, such as chicken breast and turkey breast that tend to dry out during cooking.
  • Formula: Basic brine ratio: The basic ratio of salt to water for a brine is 4 tablespoons of salt per 6 cups of water. But size of the salt crystal and type matter. Use Kosher salt because although it dissolves faster and easier in water, it’s slower to dissolve on the surface of meat so less sodium is absorbed by your meat.
  • How: Fill a large bowl with about 4 cups of lukewarm water and add 1/4 cup kosher salt, stirring to dissolve. Although this may sound like a lot of salt, only a small amount is absorbed. Add the chicken breasts to the water and let them sit at least 1 1/2 hours or up to 6 hours to brine. Remove from water, pat dry with paper towels and discard the water.
    • Continue with the recipe as directed rubbing with oil and spices then baking.

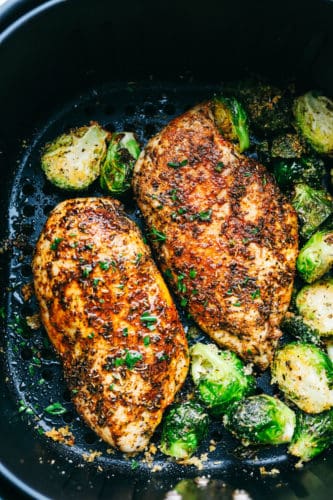
Tender Juicy Air Fryer Chicken with Brussel Sprouts

More Chicken Recipes to Try

Print

Tender and Juicy Air Fryer Chicken

Tender and Juicy Air Fryer Chicken is golden crispy outside and moist and delicate on the inside. This is bursting with flavor and so good! 
Course Dinner
Cuisine American
Keyword air fryer, air fryer chicken, air fryer chicken breast
Prep Time 5 minutes
Cook Time 18 minutes
Total Time 23 minutes
Servings 4 People
Calories 102kcal
Author Alyssa Rivers

Ingredients

  • 2 boneless skinless chicken breasts
  • 1 Tablespoons olive oil
  • 1 Tablespoon Italian seasoning
  • 1 teaspoon garlic powder
  • 1/2 teaspoon paprika
  • salt and pepper
  • optional: brussels sprouts

Instructions

  • Place the chicken in the air fryer basket. Rub olive oil on the chicken.
  • In a small bowl add the Italian seasoning, garlic powder, paprika, salt and pepper. Rub on each sides of the chicken.
  • Cook in the air fryer at 360 degrees for 9 minutes. Open the air fryer and flip the chicken. (Add Brussels sprouts now if using). Cook for another 9 minutes or until internal temperature reaches 165 degrees.

Nutrition

Calories: 102kcal | Carbohydrates: 2g | Protein: 12g | Fat: 5g | Saturated Fat: 1g | Cholesterol: 36mg | Sodium: 67mg | Potassium: 234mg | Fiber: 1g | Sugar: 1g | Vitamin A: 161IU | Vitamin C: 1mg | Calcium: 23mg | Iron: 1mg


from The Recipe Critic https://ift.tt/35p34xc
https://ift.tt/2FUyZ04

मंगलवार, 27 अक्तूबर 2020

Brown Butter Chocolate Chip Cookies

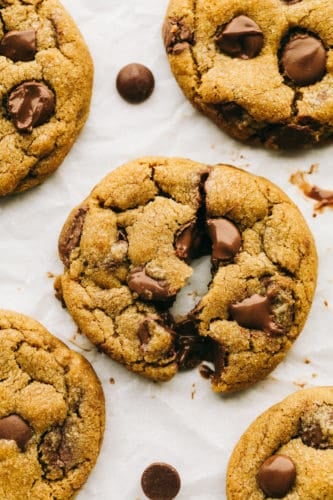
Brown Butter Chocolate Chip Cookies are perfect thick, chewy chocolate chip cookies that are made even better with the unique flavor of browned butter. These are the BEST tasting cookies EVER!

Browned Butter is a special ingredient that makes every sweet a little bit more special. Try it in these other recipes, Browned Butter Snickerdoodles, Brown Butter M&M Cookies, and Maple Cookies with Brown Butter Frosting

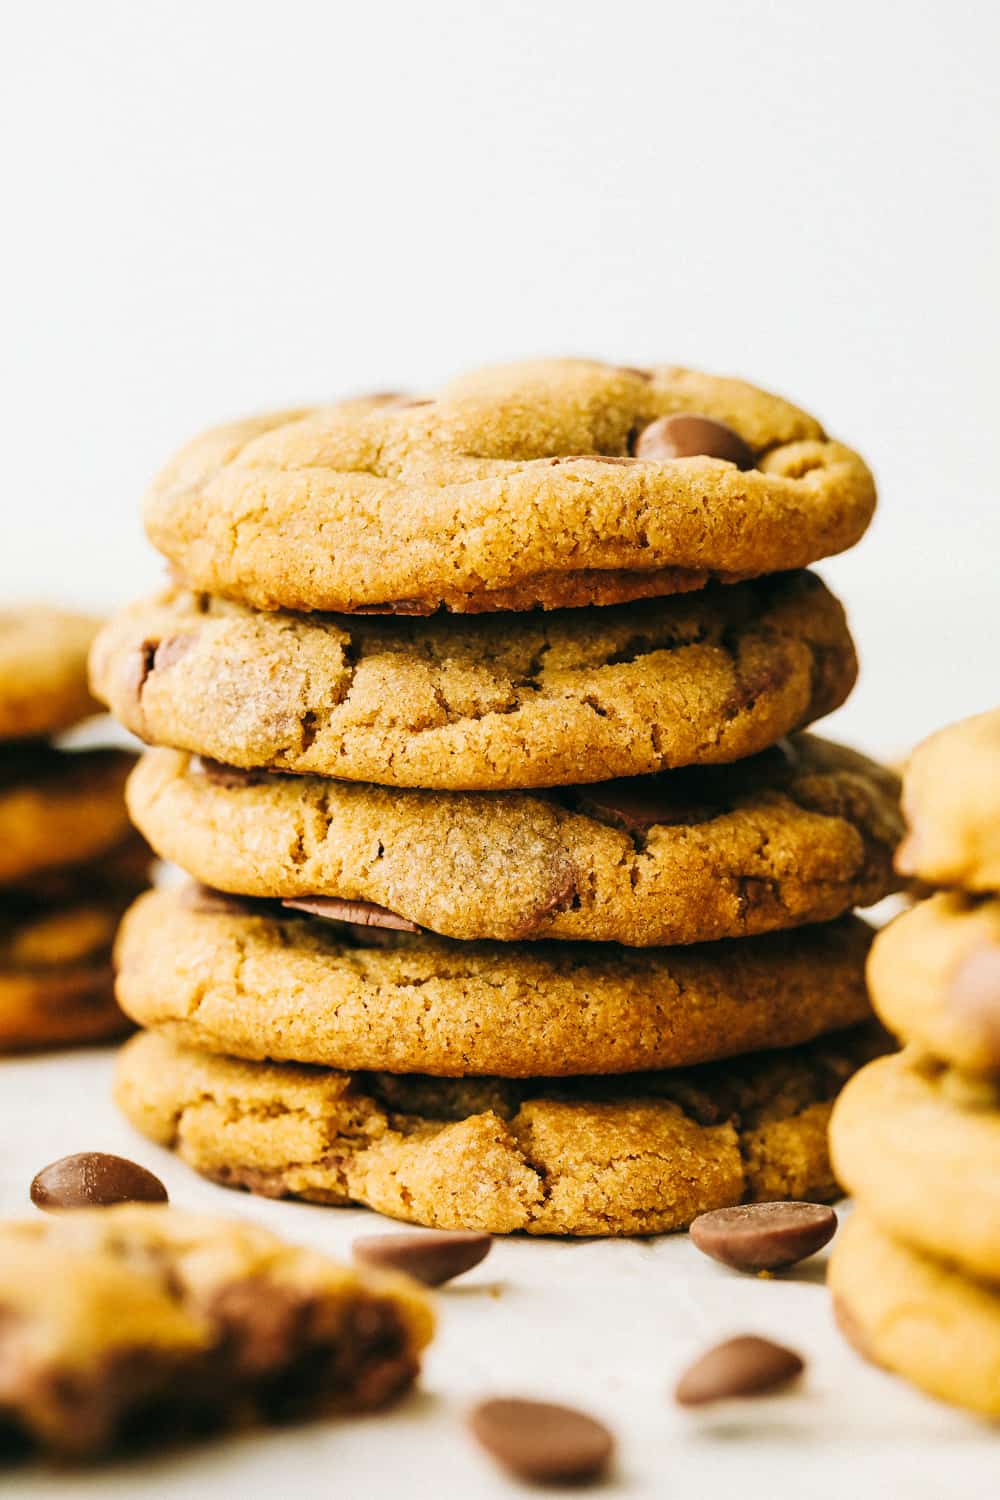
Browned butter chocolate chip cookies, chewy, thick and incredible.

Brown Butter Chocolate Chip Cookie Recipe

Brown butter just makes every cookie recipe better. It gives them a caramelly, nutty flavor that is to die for! Combined with chocolate and a chewy soft center. These will reinvent your chocolate chip cookie forever.

I think that this might just be the best cookie recipe that I have tried! I like when cookie recipes stay soft and chewy after you bake them for days after. They were perfect! I know that you will love them too!

Brown Butter Cookie Ingredients

They cookies take a classic favorite to a whole new level!

  • Butter: Use unsalted butter
  • Flour: All purpose will work
  • Baking Soda: The leavening agent
  • Coarse Sea Salt: Creates pockets of saltiness
  • Brown Sugar: Light or dark will both work
  • Sugar: White granulated
  • Egg: Make sure the Egg is large
  • Egg Yolk: Adds extra moisture
  • Vanilla: Adds classic sweetness and flavor
  • Plain Yogurt: Creates the essential moisture lost by browning the butter.
  • Chocolate Chips: Semi sweet, dark, milk, chunk or a mixture of chocolate works

How to Bake Brown Buttered Chocolate Chip Cookies

There is nothing better than a gooey chewy warm out of the oven chocolate chip cookie. Brown butter just makes every cookie recipe better. They were perfect

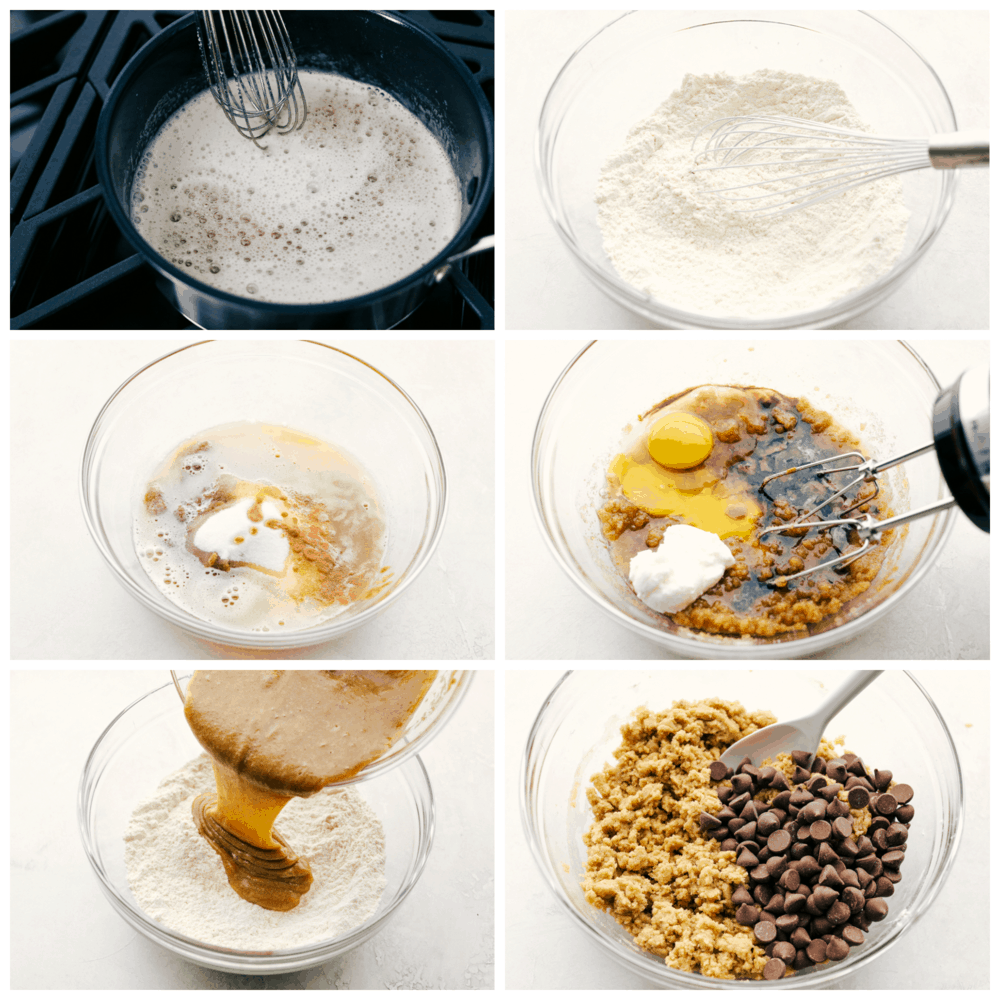
  1. Butter: Cut the butter in piece and place in a saucepan over medium heat. Whisking constantly allow the butter to brown. Remove from heat and let cool to room temp.
  2. Mix: Whisk the flour, baking soda, and sea salt together in a bowl and set aside.
  3. Combine: In a mixer combine sugars and brown butter, blend until smooth. Add in the egg, egg yolk, vanilla and yogurt
  4. Fold: Next fold in the flour mixture into the wet. Stir in the chocolate chips.
  5. Chill: Cover and place in refrigerate for at least 30 min.
  6. Bake: On a baking sheet lined with parchment scoop the dough out by tablespoons about 2 inches apart and bake for 10-12 min. in a 350 degree oven.

Making the perfect browned butter chocolate chip cookie

How to Make Brown Butter Successfully

Browning butter is quite simple but you do have to be careful you don’t burn it. Make it on the stovetop and wait for the nutty aroma to fill your home.

  • Light colored pan: If you have it, use a light colored pan. This will help you see when the butter is browned. This will help you tell the difference between browned and burnt.
  • Stir: Continue to stir as it melts and watch as it turns to an amber color and smells nutty. Then it’s done.
  • Remove: To keep it from continuing to cook, quickly remove from heat and pour into a heat-proof bowl. Make sure to scrape all the dark brown bits from the bottom. Those are the flavor makers.
  • Moisture: When you brown butter, you get incredible flavor but you do lose moisture. That’s why adding yogurt, or milk is necessary.

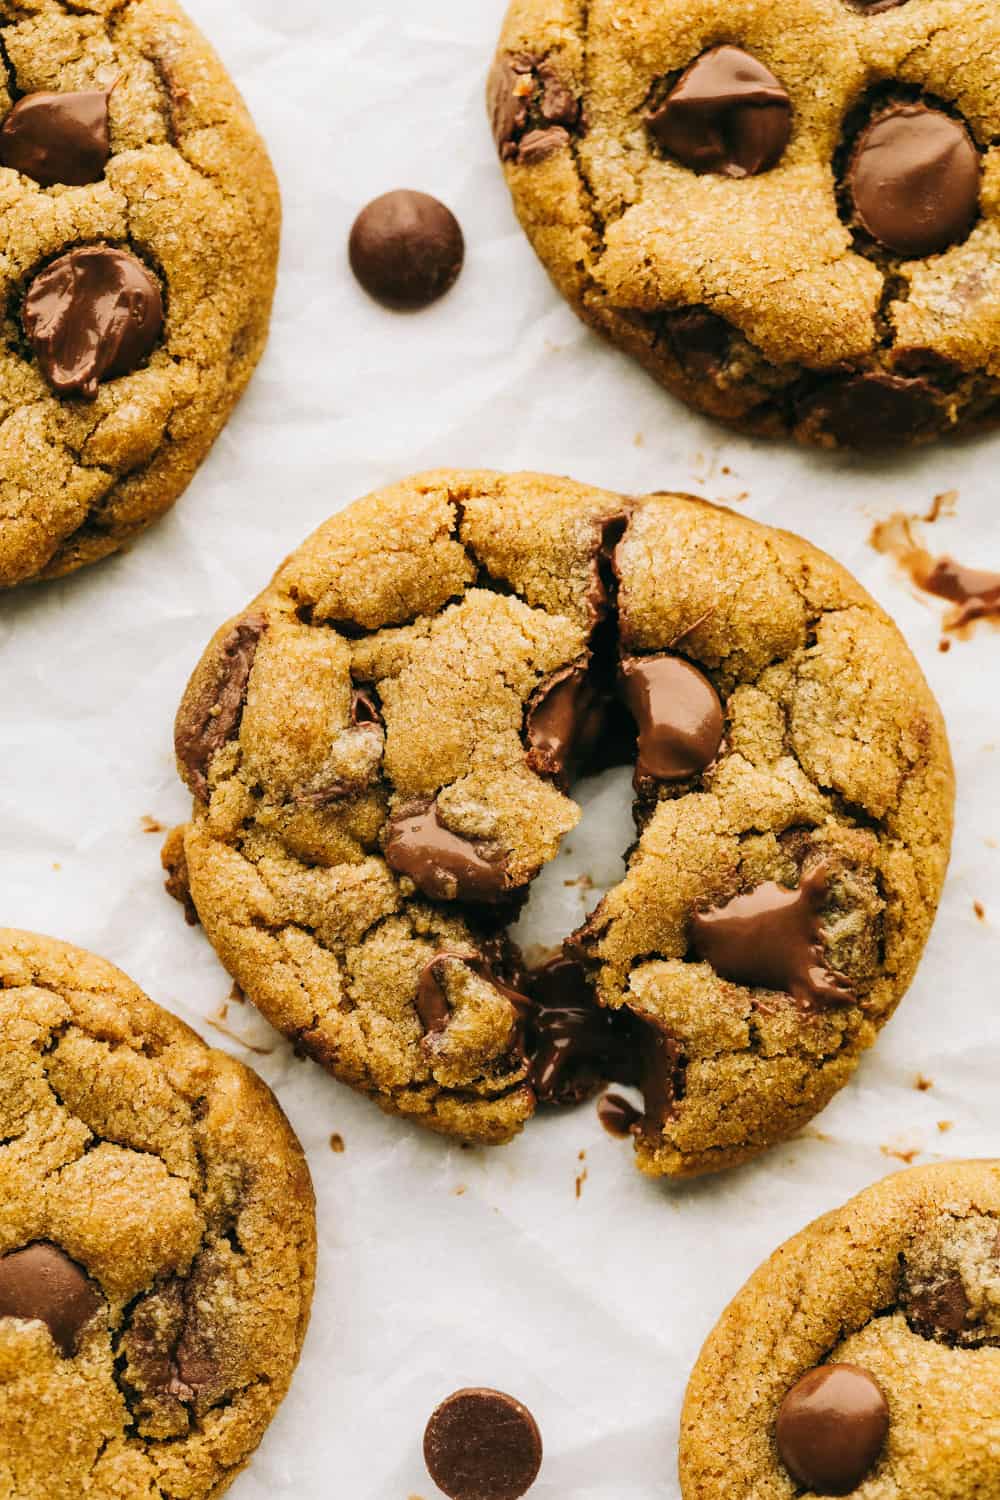
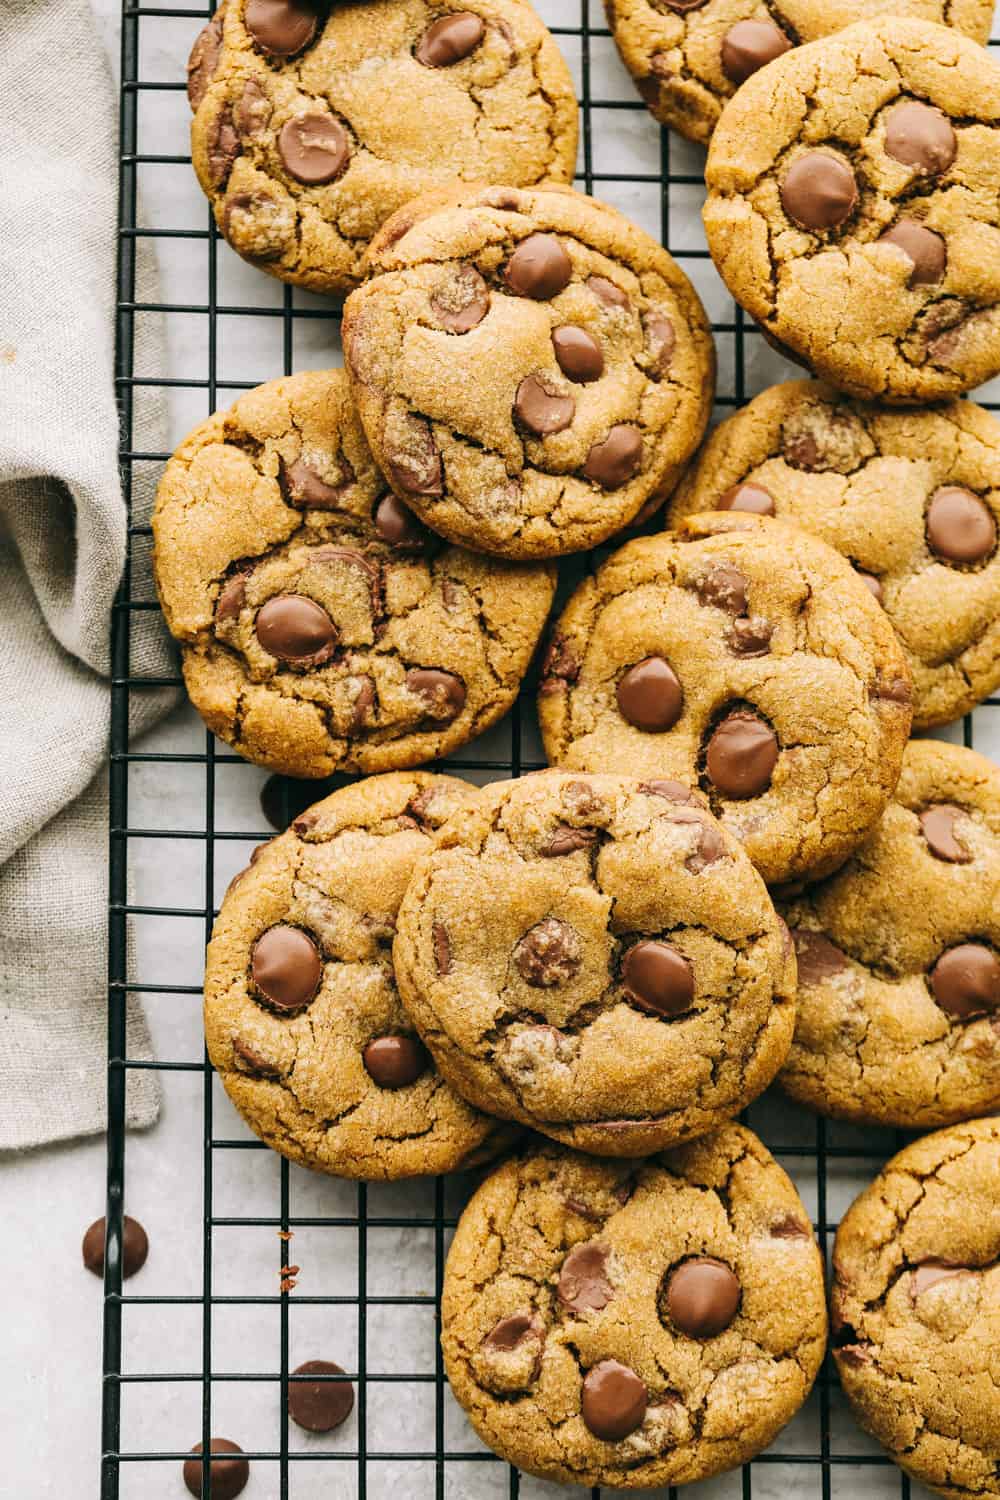
Browned butter chocolate chip cookies are thick, chewy and amazing.

Tips for the Best Browned Butter Chocolate Chip Cookies

  • Chill: It is so important to chill cookie dough. It ensures a thicker cookie and a more intense flavor. It will also heighten the buttery caramel flavor of the browned butter.
  • Nuts: Add chopped nuts for added texture.
  • Sea Salt: The sea salt creates these pockets of saltiness that balances the sweetness, you can add up to 1 teaspoon of the sea salt.
  • Yogurt: Seems weird but it’s necessary since the browned butter loses moisture, so this replaces it.
  • Storage: Keep cookies in a fresh in an airtight container for up to a week.
  • Freeze: You can freeze precooked cookie dough for cookies later. Just roll out and freeze for 30 min. Then transfer to a freezer safe bag, they’ll keep for up to 3 months.
  • Freeze Cooked Cookies:  Cool completely then place in a freezer safe bag and keep for up to 3 months.

Browned Butter Chocolate Chip Cookies that are thick chewy and amazing.

More Browned Butter Recipes to Fall in Love With

Browned butter makes everything taste better!

Print

Brown Butter Chocolate Chip Cookies

Perfect chocolate chip cookies are made even better with brown butter!
Course Dessert
Cuisine American
Keyword brown butter chocolate chip cookies, chocolate chip cookies, cookie recipes
Prep Time 15 minutes
Cook Time 12 minutes
Total Time 27 minutes
Servings 24 Cookies
Calories 212kcal
Author Alyssa Rivers

Ingredients

  • 1 cup unsalted butter
  • 2 1/4 cups all-purpose flour
  • 1 1/4 teaspoon baking soda
  • 1/2 teaspoon coarse sea salt
  • 1 cup light brown sugar
  • 1/2 cup granulated sugar
  • 1 large egg
  • 1 egg yolk
  • 2 1/2 teaspoon vanilla extract
  • 1 Tablespoon plain yogurt I used Greek yogurt
  • 1 cup semisweet chocolate chips I used jumbo

Instructions

  • Preheat oven to 350 degrees. Cut the butter in pieces and place in a saucepan over medium heat. Whisking frequently allow the butter to brown. Remove from heat and let cool to room temperature.
  • In a mixing bowl, whisk together flour, baking soda, and sea salt. Set aside,
  • In your mixer, combine sugars and brown butter. Blend until smooth. Add the egg, egg yolk, vanilla, and yogurt.
  • Next, mix in the dry ingredients. Fold in the chocolate chips until incorporated. Cover and chill in the refrigerator for 30 minutes.
  • On a non-stick baking sheet, or lined with parchment paper, scoop the dough out by tablespoons about 2 inches apart.
  • Bake until golden brown in the preheated oven for 10-12 minutes.

Video

Notes

Updated on October 27, 2020
Originally Posted on July 28, 2013

Nutrition

Calories: 212kcal | Carbohydrates: 26g | Protein: 2g | Fat: 11g | Saturated Fat: 7g | Cholesterol: 36mg | Sodium: 118mg | Potassium: 72mg | Fiber: 1g | Sugar: 16g | Vitamin A: 261IU | Calcium: 19mg | Iron: 1mg


from The Recipe Critic https://ift.tt/35yJoXY
https://ift.tt/3mqfgER

सोमवार, 26 अक्तूबर 2020

Corn Pudding

Corn Pudding is one of our favorite fall sides to serve alongside a roast chicken, hearty stew, or of course, turkey! Our version is ultra creamy, slightly sweet, with a hint of savory and packed with while corn kernels.

For more easy fall sides, don’t miss the best Creamy Scalloped Potatoes, these Creamy Mashed Potatoes, and the Best Green Bean Casserole. These are all perfect for the holiday season too!

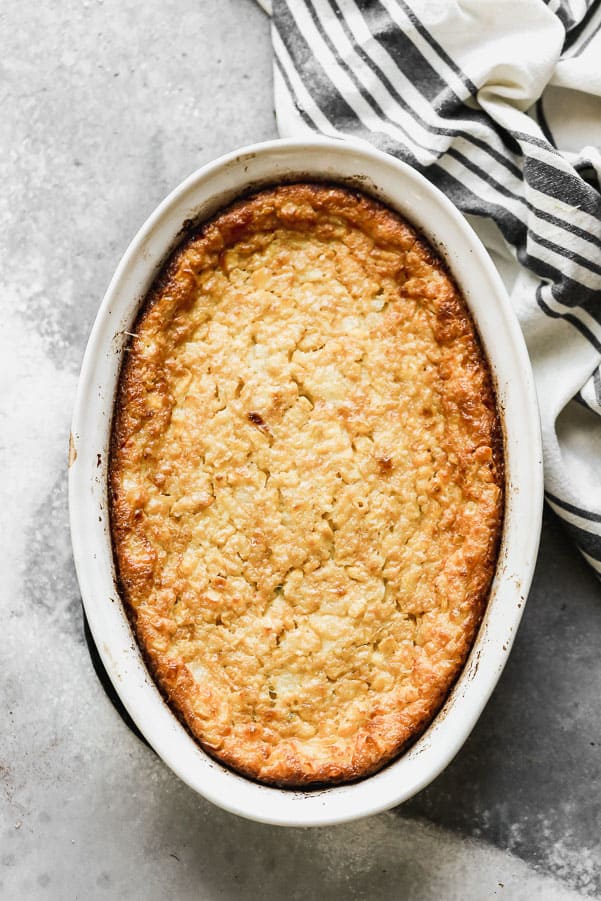
Corn pudding in a white dish.

Jiffy Corn Pudding Recipe

There are a lot of sides I love around this time of year, but corn pudding has to be at the top of the list! Our version is crispy on the outside, warm and creamy on the inside and packed with sweet corn flavor. Because we love to play on a good sweet and salty factor, we try to balance out the sweetness with a little bit of sautéed onion and garlic.

Of course, corn pudding wouldn’t have its namesake without actual corn. Here, we use corn in three ways. First, with a little bit of cornmeal to mimic the texture of cornbread a little bit. Second, with frozen corn. We opt to use frozen corn this time of year since it’s usually frozen at its peak. If you still have fresh corn around, then by all means use that. Third, canned cream of corn for the creamy factor we all love about corn pudding.

Be sure to serve straight from the oven and dig in!

What’s The Difference Between Corn Pudding, Corn Casserole And Cornbread?

Ok, so those are a lot of very similar terms. I would say that corn pudding is obviously more pudding like in texture. Cornbread is very sturdy and bread-like. Corn casserole is somewhere in the middle.

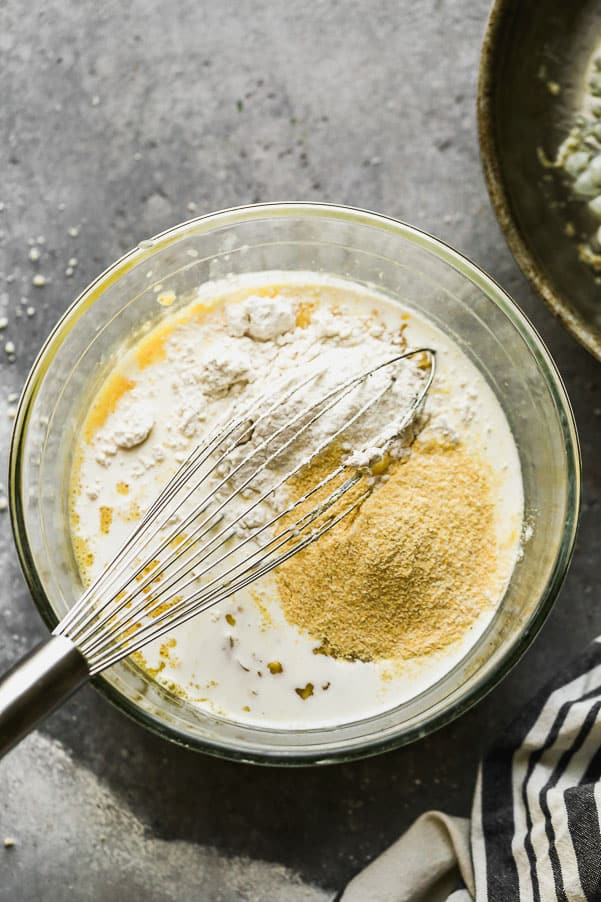
Whisking ingredients into the glass bowl.

Ingredients for Southern Corn Pudding

  • Butter: It’s no secret – corn pudding is an indulgent dish, so let’s not skimp on the butter. We use unsalted butter, and quite a bit of it. One whole stick to be exact. Of course, it adds richness to the corn casserole itself, but it’s also what we use to sauté the onion and garlic.
  • Onion and garlic: This is where the sweet and salty factor comes in with our corn pudding. Adding a little bit of sautéed onion and garlic, gives us just the kick of savory we need.
  • Flour and Cornmeal: Corn pudding is basically just a play off cornbread, but much creamier and less sturdy. All we need is juuuust enough flour and cornmeal to hold the pudding together a little bit.
  • Eggs: Because corn pudding is, as the name implies, a pudding, we want it to have a custard texture and that means a heavy hand of eggs. We use large eggs.
  • Milk: We like to use whole milk, but if you really want to indulge, use heavy cream.
  • Corn: As mentioned before, we like to use frozen or fresh corn instead of canned corn. I find canned corn doesn’t have as much texture and lacks the freshness frozen and fresh corn has. Of course, if that’s all you have on hand, that’s find, just make sure to drain it well.
  • Cream of corn: On the other hand, you can’t get the texture and creaminess of cream of corn with fresh or frozen corn, so we have no qualms using it.

How to Make Homemade Corn Pudding!

Prepare the pan. Butter or grease a 9×9 baking dish really well.

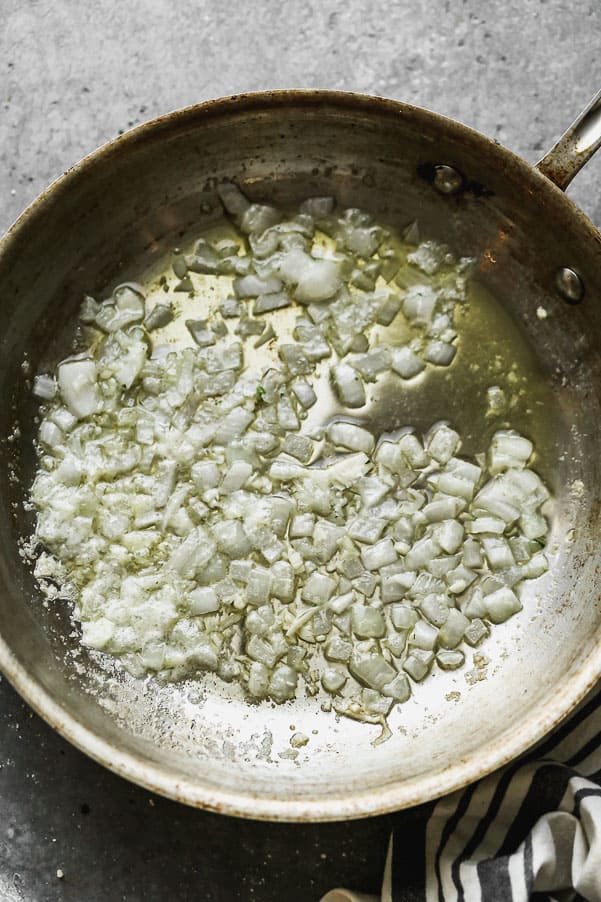
  1. Sauté onion and garlic: Start by melted the butter in a small sauté pan or skillet. Add the onion and garlic. Gently sweat the onion and garlic until soft and fragrant, about 5 minutes. Set aside to cool slightly.
  2. Whisk everything together: Whisk the flour, cornmeal, and salt together. Add in the milk, eggs, cream of corn, butter, onion, and garlic. Whisk to combine. Add in frozen corn. Gently fold into the batter.
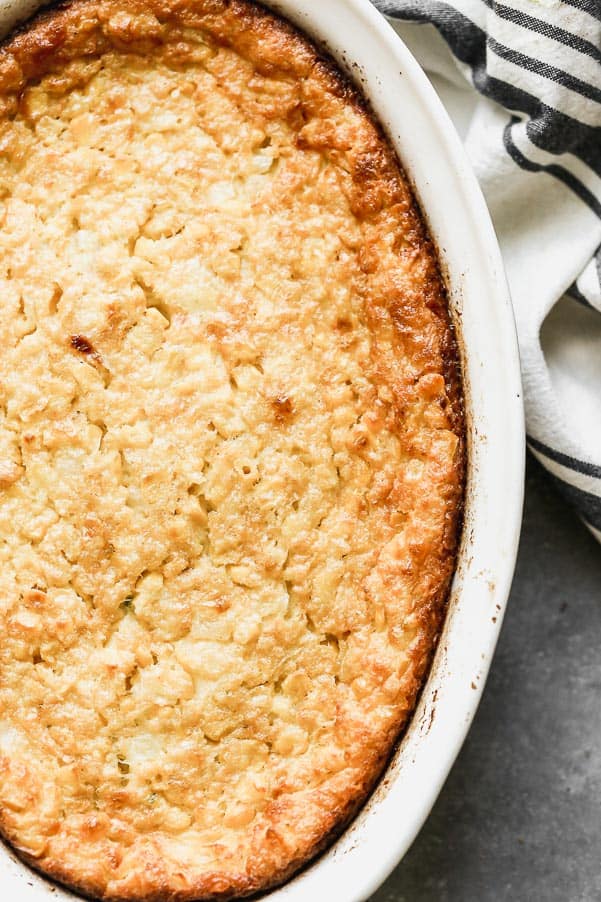
  3. Bake! Pop into a 400 degree oven and bake until golden brown and bubbly on the top. Rest for a few minutes before diving in!

Sautéing onions in butter.

Do You Eat Corn Pudding Casserole Hot Or Cold?

I say hot all the way! Although, once it rests to room temperature, it’s still really delicious.

Corn pudding baked in a white dish.

Can I Make Corn Pudding Ahead of Time?

Yes! If you want to make it ahead of time, I’d suggest under baking it just a touch, and then popping it back into the oven at 325 degrees. about 20 minutes before you’re ready to serve.

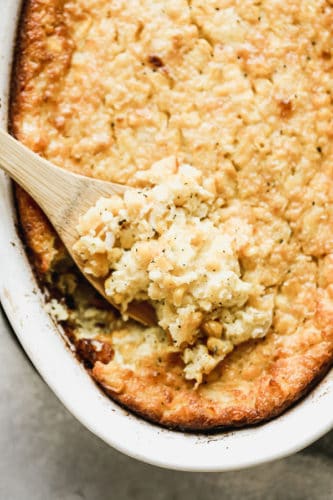
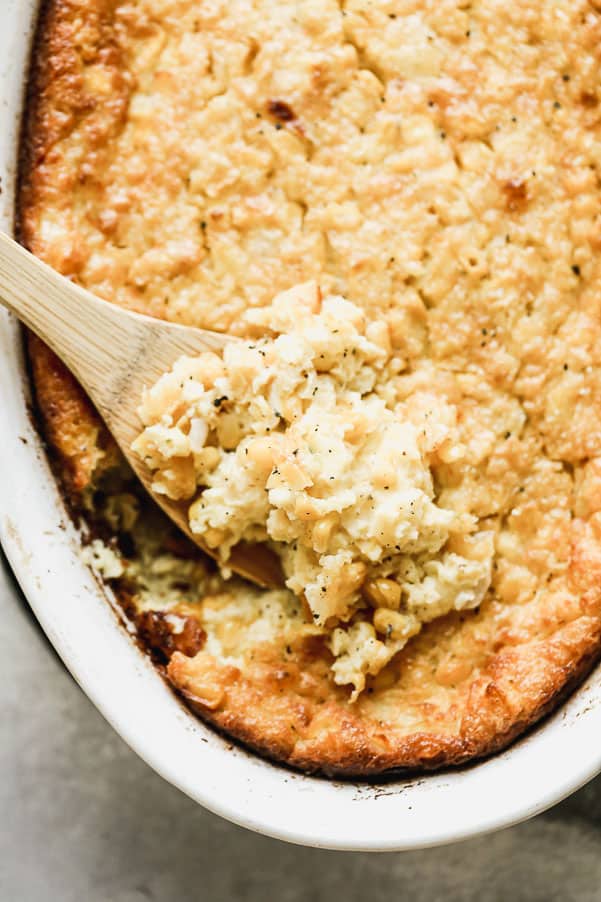
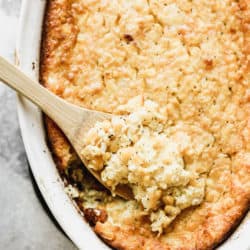
Corn pudding with a wooden spoon.

More Fall Favorite Side Dishes

Print

Corn Pudding

Corn Pudding is one of our favorite fall sides to serve alongside a roast chicken, hearty stew, or of course, turkey! Our version is ultra creamy, slightly sweet, with a hint of savory and packed with while corn kernels.
Course Side Dish
Cuisine American
Keyword corn casserole, thanksgiving sides
Prep Time 15 minutes
Cook Time 30 minutes
0 minutes
Total Time 45 minutes
Servings 10 people
Calories 196kcal
Author Nicole Leggio
Cost $10

Equipment

  • Mixing Bowl
  • Baking dish

Ingredients

  • 1/4 cup unsalted butter
  • 1/2 cup chopped onion (1/2 small onion)
  • 1 large garlic clove, minced
  • 1/4 cup flour
  • 1/4 cup cornmeal
  • 2 teaspoon cornstarch
  • 3 Tablespoon sugar
  • 1/2 cup heavy cream
  • 4 large eggs
  • 14 ounce canned cream style corn
  • 1 cup frozen or fresh corn

Instructions

  • Preheat oven to 400 degrees. Grease a 9x9 baking dish or similar size baking dish with non-stick cooking spray.
  • Heat a small saute pan over a medium heat. Add butter. Once the butter melts, add onion and garlic and turn the heat to medium-low. Sweat the onion and garlic until slightly softened, about 4-5 minutes. Season with a little salt and pepper. Remove from heat and let cool slightly.
  • Add flour, cornmeal, cornstarch, and sugar to a large bowl. Whisk to combine. Add heavy cream, eggs, creamed corn, butter, onion, and garlic. Whisk just until combined. Fold in frozen corn.
  • Pour into prepare baking dish and pop in the oven. Bake until golden brown on top, about 30 minutes. The center should be set, but slightly jiggly. Let the corn pudding rest for 3-4 minutes before serving.

Nutrition

Serving: 1serving | Calories: 196kcal | Carbohydrates: 20g | Protein: 5g | Fat: 12g | Saturated Fat: 6g | Cholesterol: 103mg | Sodium: 147mg | Potassium: 136mg | Fiber: 1g | Sugar: 6g | Vitamin A: 495IU | Vitamin C: 3mg | Calcium: 21mg | Iron: 1mg


from The Recipe Critic https://ift.tt/3mAIMrV
https://ift.tt/3mqQAMq