रविवार, 8 नवंबर 2020

Garlic Herb Crusted Roast Lamb

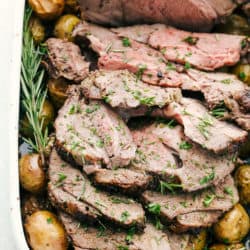
Savory Garlic Herb Crusted Roast Lamb is tender and succulent, perfect for any special occasion. The meat is tender and juicy and the crust gives it such a beautiful flavor. Perfection on a platter!

This juicy decadent dish already has tender potatoes to go with it. So try serving it with a few more veggies and some rolls for the perfect meal.  Try it with a side of Sauteed Garlic Asparagus with Bacon, Honey Orange Glazed Carrots or a nice Caesar Salad.
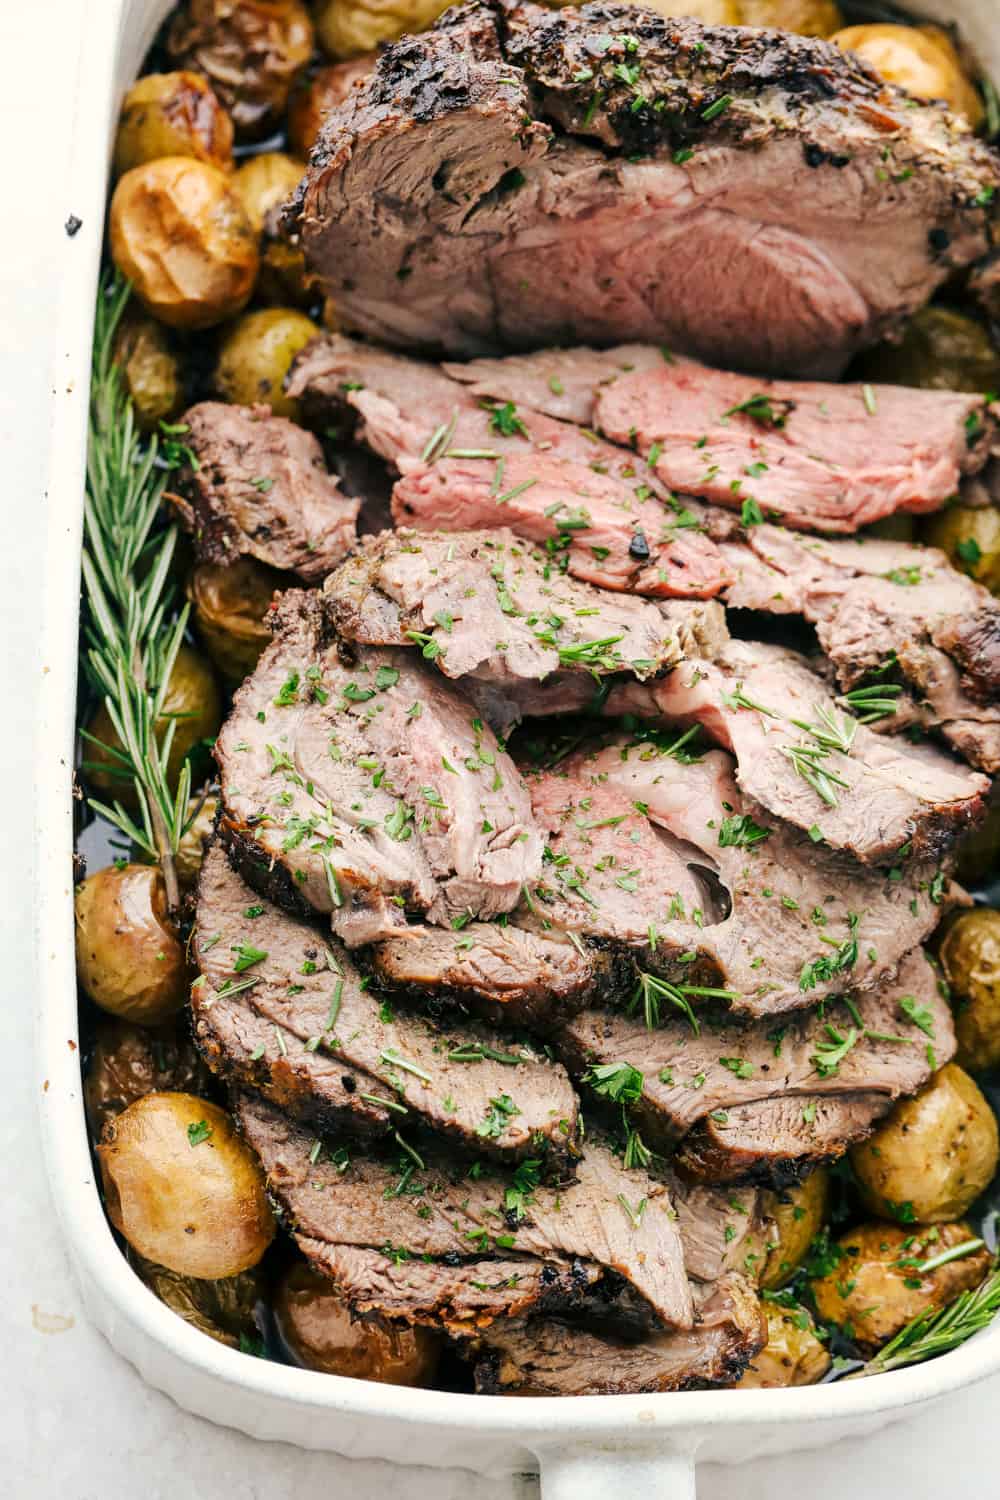
Succulent and savory Garlic Herb Crusted Lamb with potatoes.

The Best Roast Lamb

Most people think Easter when having lamb, but it’s super easy and is perfect for any Holiday meal. Cooking the Lamb on a bed of potatoes does two things here. First it provides the air to actually circulate better around the roast cooking it more evenly. Secondly it gives you a flavorful perfect side dish. Who could ask for more?1

Cooking lamb may seem intimidating, but it’s no different than cooking any kind of meat. Lamb also seems to be reserved for special occasions but you can have it anytime. There are no rules when it comes to when to eat and when not to eat lamb. So if your craving it, don’t wait! Grab this recipe and cook some up tonight!

Ingredients for Roast Boneless Leg of Lamb

These ingredients are not much different then cooking a beef roast. It’s just so simple, but so delicious!

  • Lamb Roast: I bought my boneless from Costco
  • Butter: Soften the butter but don’t melt it.
  • Garlic: mince the garlic
  • Thyme, Oregano, Rosemary: Fresh versions finely chopped
  • Salt and Pepper: Be generous for the meat.
  • Baby Potatoes Use red or yellow for perfect flavor and roasting
  • Olive Oil: Mild flavor

Roast Rack of Lamb!

  1. Prep: Preheat the oven to 400 degrees. In a small bowl mix the butter, garlic, thyme, oregano, rosemary and salt and pepper.
  2. Layer: In a roasting dish, place the potatoes and toss with olive oil and salt and pepper. Place the lamb on top of the potatoes.
  3. Rub: Rub all the butter on the outside of the lamb
  4. Roast: Place in the oven and roast till internal temp reaches 145 degrees. About 1-1/12 hours depending on the size of your roast.
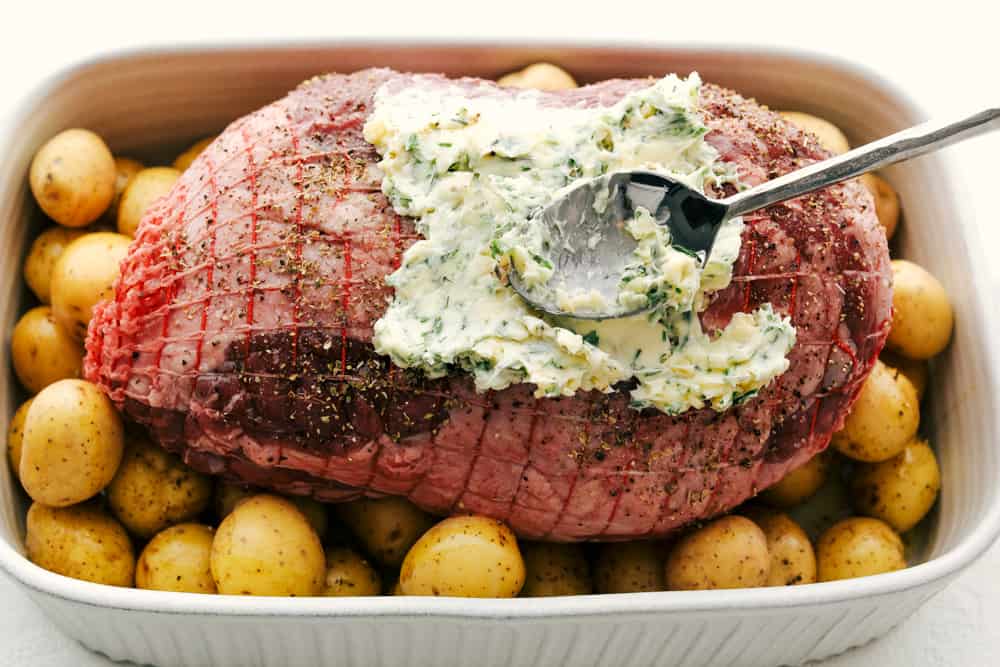
Puting the Garlic Herb Crust on the lamb for roasting.

The Perfect Temperature

The internal temps of lamb are the same as beef. The official done temp is 145 degrees, this will result in a medium well done roast. If you’d prefer your lamb a different doneness here is a reference chart.

  • Rare: 115 to 120°F
  • Medium-rare: 120 to 125°F
  • Medium: 130 to 135°F
  • Medium-well: 140 to 145°F
  • Well-done: 150 to 155°F

Tips for the Perfect Crusted Lamb

  • Lamb: A lamb roast is the same thing as a boneless leg of lamb. So if all you can find is boneless leg of lamb, it’s the same. This recipe will work for both bone-in and boneless leg of lamb. It’s up to you.
  • Bring it to Room Temp:  This is super important to ensure even cooking. Especially if you have a bone-in leg of lamb. The bone will be cold, keeping the meat from cooking at an even rate, over doing the outside or under doing the inside.
  • Rest: Make sure you allow your meat to rest. This allows the meat to reabsorb redistribute the juices for more tender juicier roast. Keep in mind that as it rests it will continue to cook a bit.
  • Flavor:Lamb is the perfect meat to load on the seasonings. Don’t be shy. Add more or different seasonings to your liking.
  • Taste:  If some of your loved ones feel like lamb can taste “gamey” be sure to trim as much as the fat as possible. The “gamey” flavor is carried in the fat.

Storing the Crown Roast of Lamb

  • Serve: A great thing about roasted meat is it can sit at room temperature for up to 2 hours before it needs to be stored. This allows time to visit before you have to put it away.
  • Store: Cooled lamb can be kept in the refrigerator for up to 4 days in an airtight container.
  • Freeze: Cool the lamb completely so no moisture collects which will form ice crystals. Store in the freezer for up to 2 months in a freezer safe container or bag.
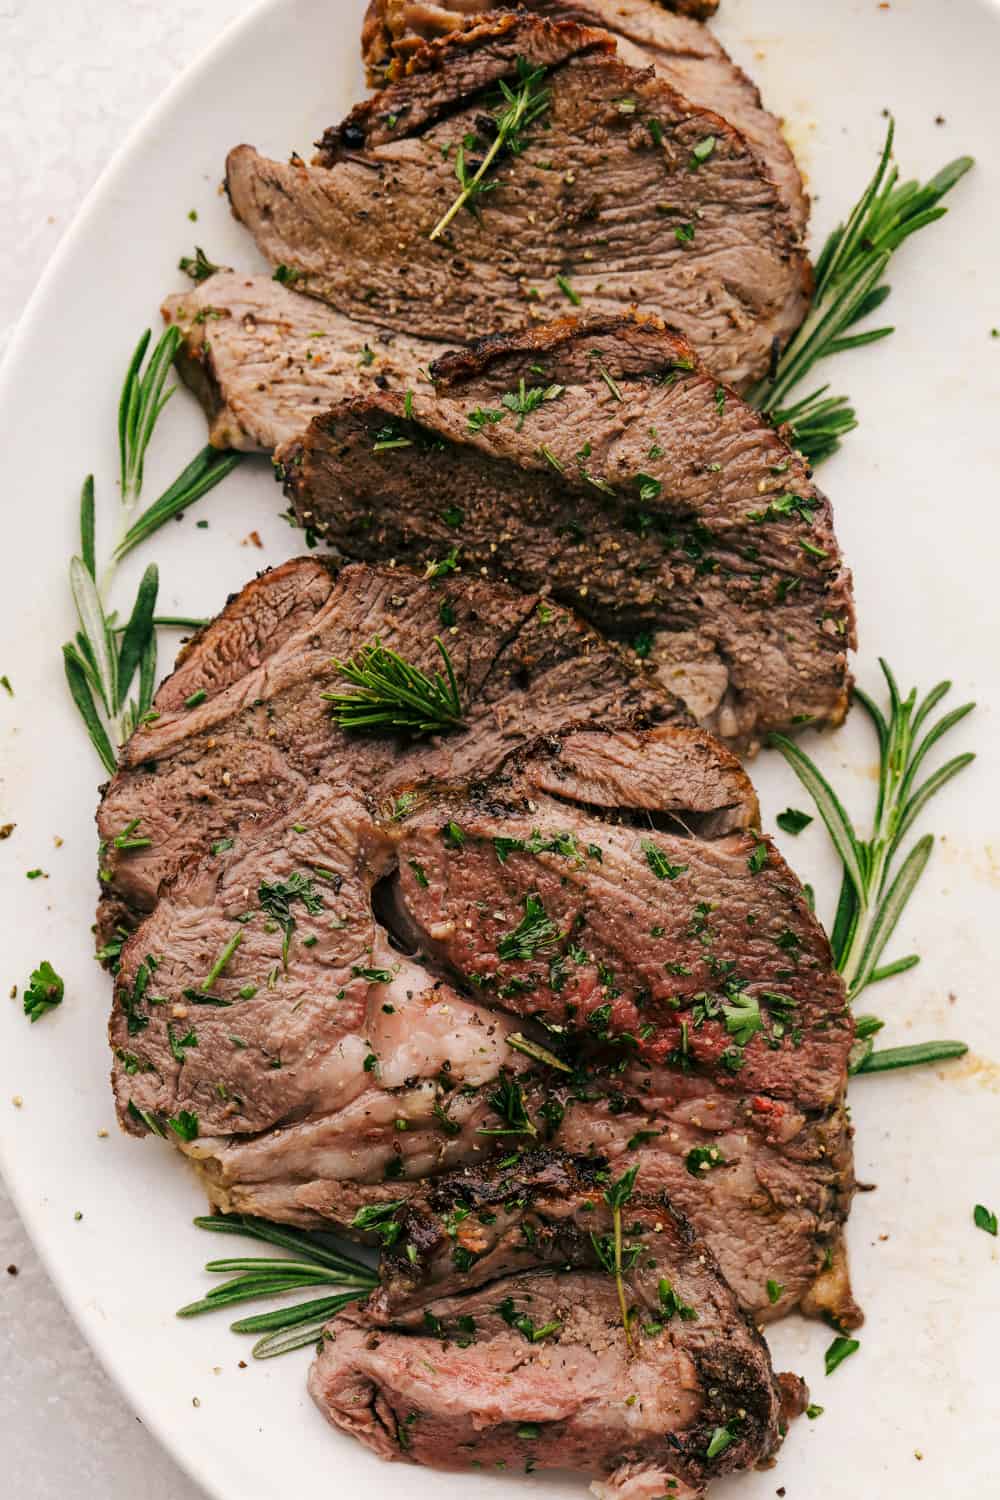
Roasted Garlic Herb Crusted Lamb on a platter.

More “Crusted” Recipes to Try

Anything with the description “crusted” in it is automatically going to taste amazing, you just know it!

Print

Garlic Herb Crusted Roast Lamb

Savory Garlic Herb Crusted Roast Lamb is tender and succulent, perfect for any special occasion. The meat is tender and juicy and the crust gives it such a beautiful flavor. Perfection on a platter!
Course Dinner, Main Course
Cuisine American
Keyword lamb, roast lamb
Prep Time 10 minutes
Cook Time 1 hour 30 minutes
Total Time 1 hour 40 minutes
Servings 10 People
Calories 727kcal
Author Alyssa Rivers

Ingredients

  • 5-6 pounds lamb roast I used a boneless lamb roast
  • 1 cup buttered softened
  • 5 cloves garlic minced
  • 1 Tablespoon thyme finely chopped
  • 1 Tablespoon oregano finely chopped
  • 1 Tablespoon rosemary finely chopped
  • 1 Tablespoon salt
  • 1 teaspoon pepper
  • 2 pounds baby potatoes
  • 1 Tablespoon olive oil
  • Salt and pepper

Instructions

  • Preheat oven to 400 degrees. In a small bowl mix butter, garlic, thyme, oregano, rosemary, salt and pepper. Rub all of the butter on the outside of your lamb.
  • In a roasting dish add the potatoes and toss with olive oil and salt and pepper. Lay the lamb roast on top of the potatoes.
  • Roast in the oven until the internal temperature reaches 145 degrees. About 1 1/2-2 hours. Remove the twine and serve.

Nutrition

Calories: 727kcal | Carbohydrates: 17g | Protein: 40g | Fat: 55g | Saturated Fat: 23g | Cholesterol: 166mg | Sodium: 838mg | Potassium: 902mg | Fiber: 2g | Sugar: 1g | Vitamin A: 48IU | Vitamin C: 20mg | Calcium: 63mg | Iron: 5mg


from The Recipe Critic https://ift.tt/3lbItmP
https://ift.tt/2JOLOKU

Perfect Instant Pot Black Beans

Replace the can and make your own tender savory Perfect Instant Pot Black Beans! These are no soak, which makes them much quicker and you don’t have to worry about starting them the night before.

The instant pot has changed cooking. I love it! It can make so many foods so much easier to cook from Hard Boiled Eggs, to Perfect Rice to Roasted Chicken.

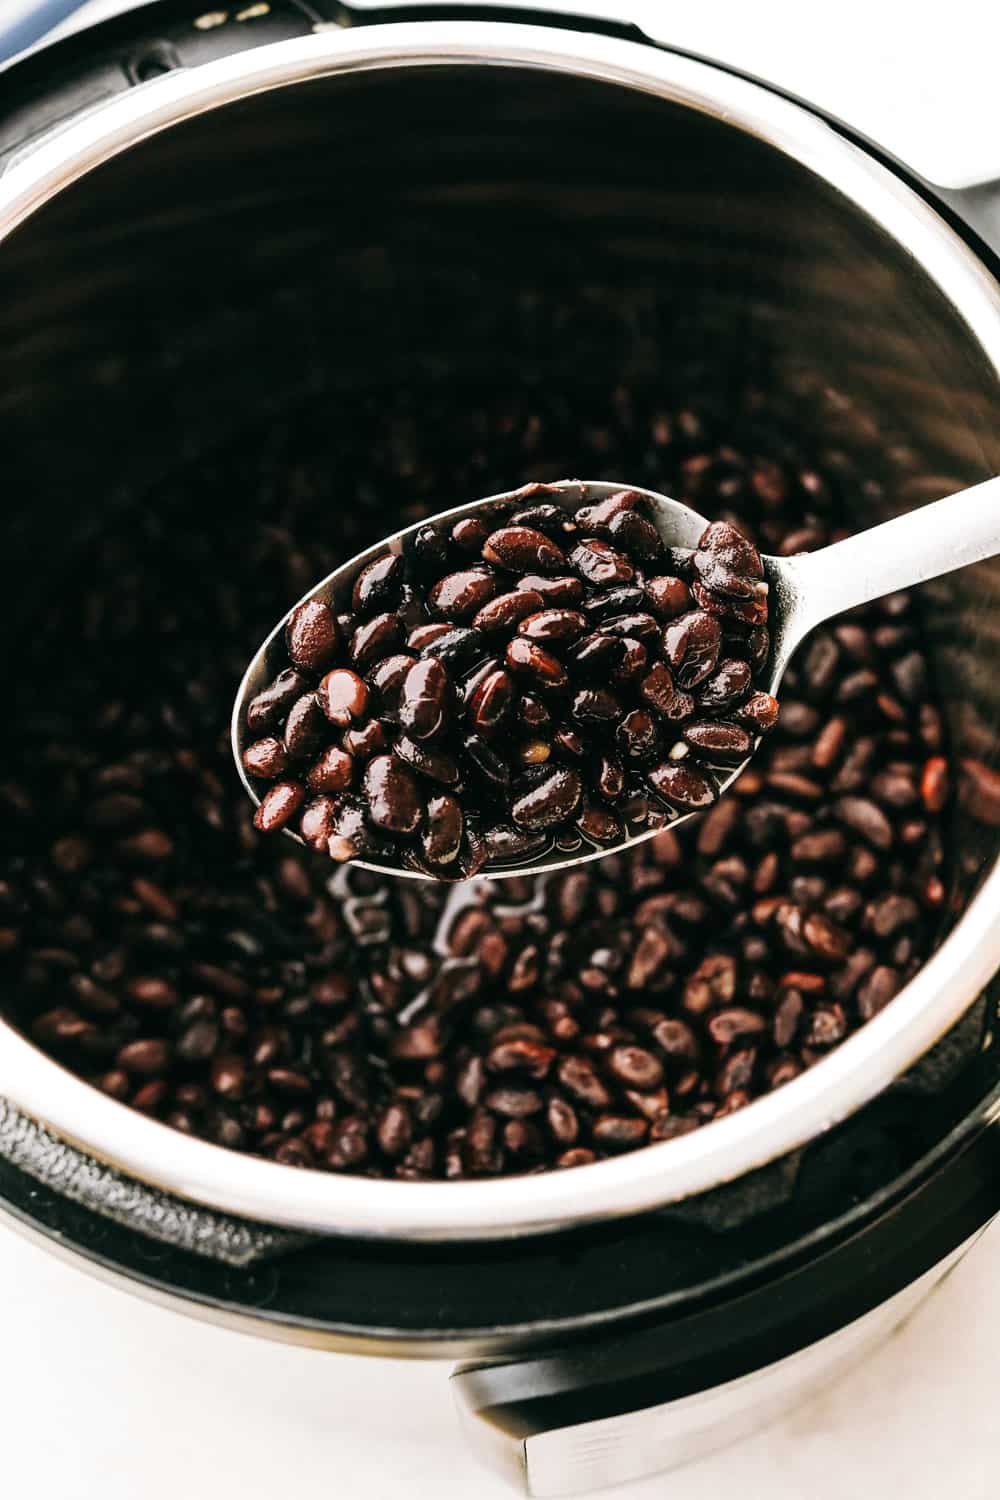
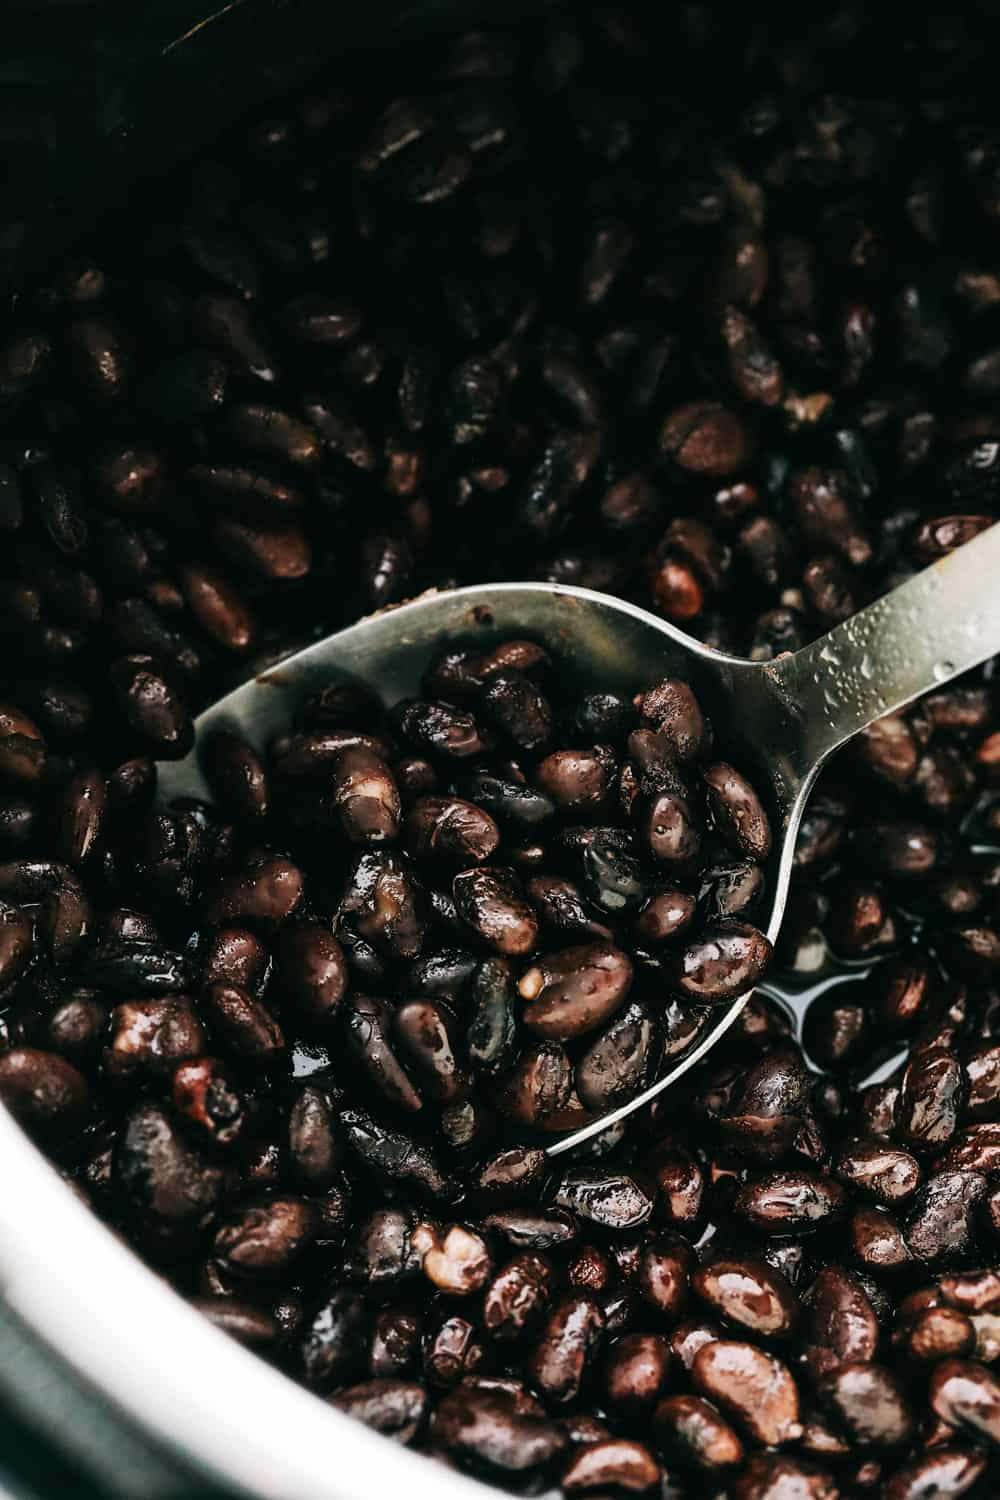
Super easy no soak Instant pot black beans.

Instant Pot Black Beans

This really takes no effort at all. The instant pot does all the work and the result is worth it. These taste so much better than the canned version and give an extra fresh flair to what ever you use them in. It’s always a good thing when you know exactly what’s in your food and nothing gets better than doing something yourself.

The instant pot really is the awesome! Life is busy and it’s hard to take the time to cook your own beans when you have to presoak them. But with the Instant Pot you don’t have to presoak. You can put them in dry and they come out tender, tasty and have the best texture.

Black Bean Ingredients

Two simple ingredients, but so much better than the can! These are so good, and you can customize the flavor to your liking. The instant pot makes cooking beans so easy, you’ll love it!

  • Black Beans: Dried black beans, not from a can.
  • Vegetable Stock or Water: The Vegetable Stock will add flavor, so if you don’t want extra added flavor use water.
  • Optional Seasonings: Add these or other spices if you have a recipe in mind. Salt, Garlic, Cumin, Paprika and Cilantro.

Making Perfect Black Beans

Just a couple of steps to make perfect beans!

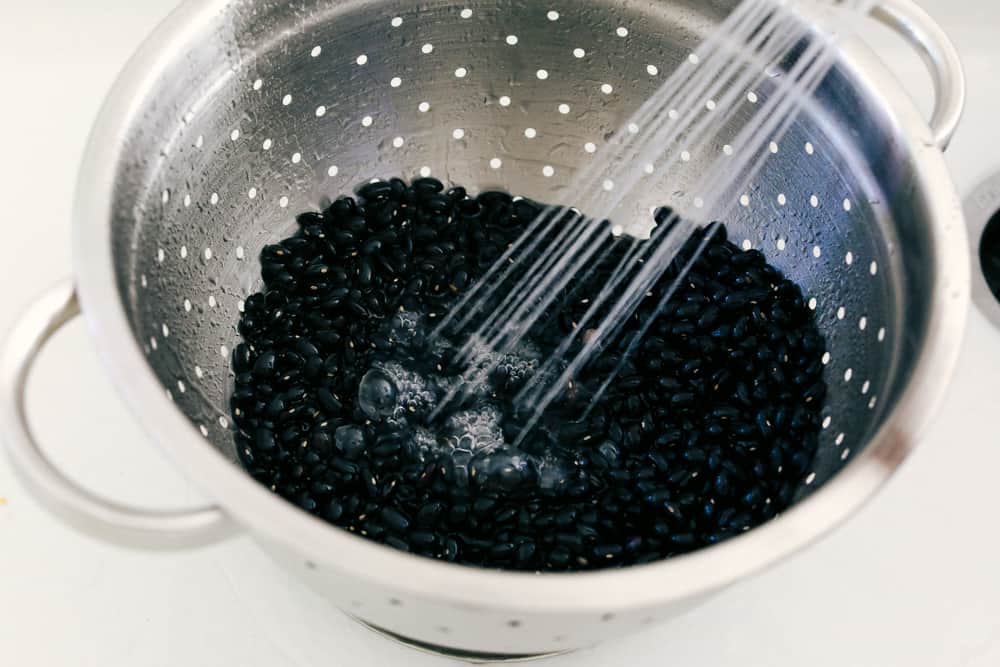
  1. Rinse:  Rinse the dry beans and pick out any bad ones.
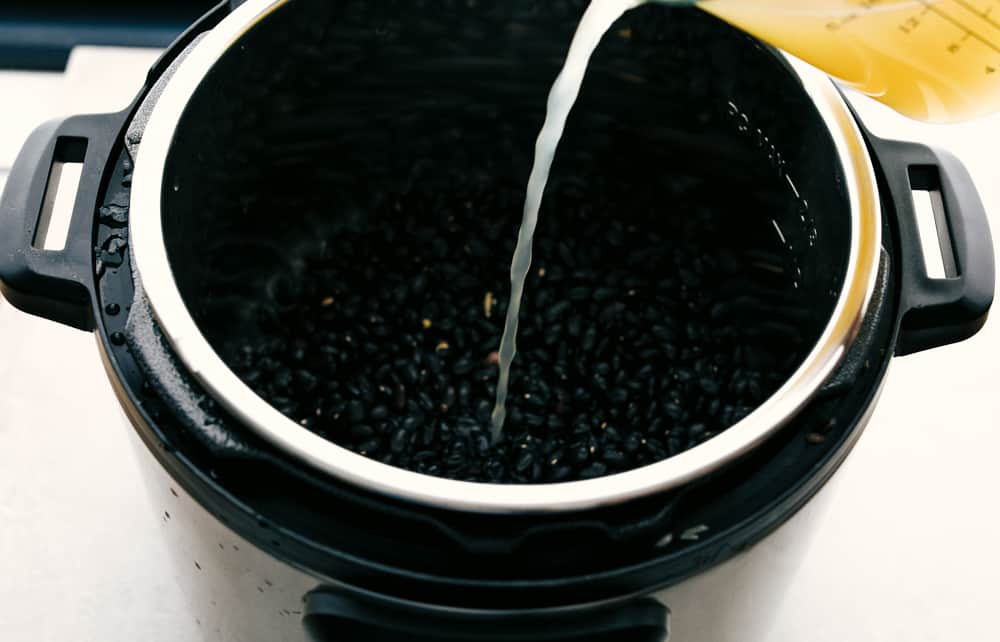
  2. Instant Pot: Place the beans in the pot, add the liquid if desire the optional spices.
  3. Cook: Pressure cook on manual for 25 min. Let it naturally release for 15 min, then quick release the rest of the pressure. Stir and serve.

Rinsing dry black beans for the instant pot.

Good to Know Conversions

You will want to know this when you use your beans in a recipe that calls for canned beans. 

  • 1 pound dried beans = 2 cups dried beans = 5 cups cooked beans
  • 1 (15-ounce) can = 1 ½ cups cooked beans 

Why Make Your Own Beans

  • Taste: Homemade beans offer far more flavor than canned beans and you can season them to your needs and taste
  • Save Money: Dried beans are less expensive than canned beans, and everyone likes to save money.  Dried beans also store longer than canned beans.
  • Less waste: Because you make your own you will also have less waste, no cans to throw away or recycle.
  • Easy: Because you use the Instant Pot, it’s hands off and super easy. No babysitting the pot!
  • Nutrition: Last but not least they are good for you! Black beans are rich in fiber and plant-based protein, and a fantastic source of folate, thiamin (vitamin B1), phosphorus, manganese and magnesium.

Adding broth and spices to the instant pot with the black beans.

Tips For The Perfect Instant Pot Black Beans

  • Firmness: If you find that the beans are too hard or too soft you can adjust the firmness by adjusting your cooking time.
  • Liquid: Use water, chicken, or beef broth instead of veggie if you desire
  • To Spice or Not to Spice: If you don’t plan to use these in a specific recipe you can leave the seasonings out and use water to cook them in. You can also change up the spices to fit your ingredient needs.

How to Store Black Beans

  • Fridge:  Keep these ready to use in the fridge for 4-5 days.
  • Freeze:  Cool completely then store in freezer safe containers or bags in individual portions till ready to use. Thaw in the fridge, microwave or pot.

Savory soft instant pot black beans.

Recipes To Use These Perfect Beans

You can use these beans in so many recipes, here are just a few!

Print

Instant Pot Black Beans

Replace the can and make your own tender savory Perfect Instant Pot Black Beans! These are no soak, which makes them much quicker and you don't have to worry about starting them the night before.
Course Side Dish
Cuisine American
Keyword black beans, instant pot black beans
Servings 8 People
Calories 172kcal
Author Alyssa Rivers

Ingredients

  • 2 cups dry/raw black beans
  • 3 cups vegetable stock or water

optional seasonings:

  • 1/2 teaspoon salt
  • 1 teaspoon garlic
  • 1 teaspoon cumin
  • 1/2 teaspoon paprika
  • chopped cilantro

Instructions

  • In a colander rinse the beans. Add to your instant pot. Pour in vegetable broth and any optional seasonings. Cover and seal with the lid. Turn the steam release valve to the sealing position.
  • Turn on high pressure and cook for 25 minutes. Let the steam release naturally for 15 minutes. Quick release any remaining pressure and serve.

Nutrition

Calories: 172kcal | Carbohydrates: 32g | Protein: 11g | Fat: 1g | Saturated Fat: 1g | Sodium: 501mg | Potassium: 724mg | Fiber: 8g | Sugar: 2g | Vitamin A: 258IU | Vitamin C: 1mg | Calcium: 62mg | Iron: 3mg


from The Recipe Critic https://ift.tt/36cRsOt
https://ift.tt/3llOn4M

शनिवार, 7 नवंबर 2020

Garlic Butter Hasselback Potatoes

Crispy, perfectly seasoned, and so scrumptious, these Garlic Butter Hasselback Potatoes are going to be your new go to favorite! Your family is going to be so impressed when you set these on the table for dinner!

These amazing spuds go perfectly with any sort of protein. Try  Air Fryer Steak with Garlic Herb Butter, Chicken Breast, or Cast Iron Skillet Pork Chops. They are also just fabulous on their own.

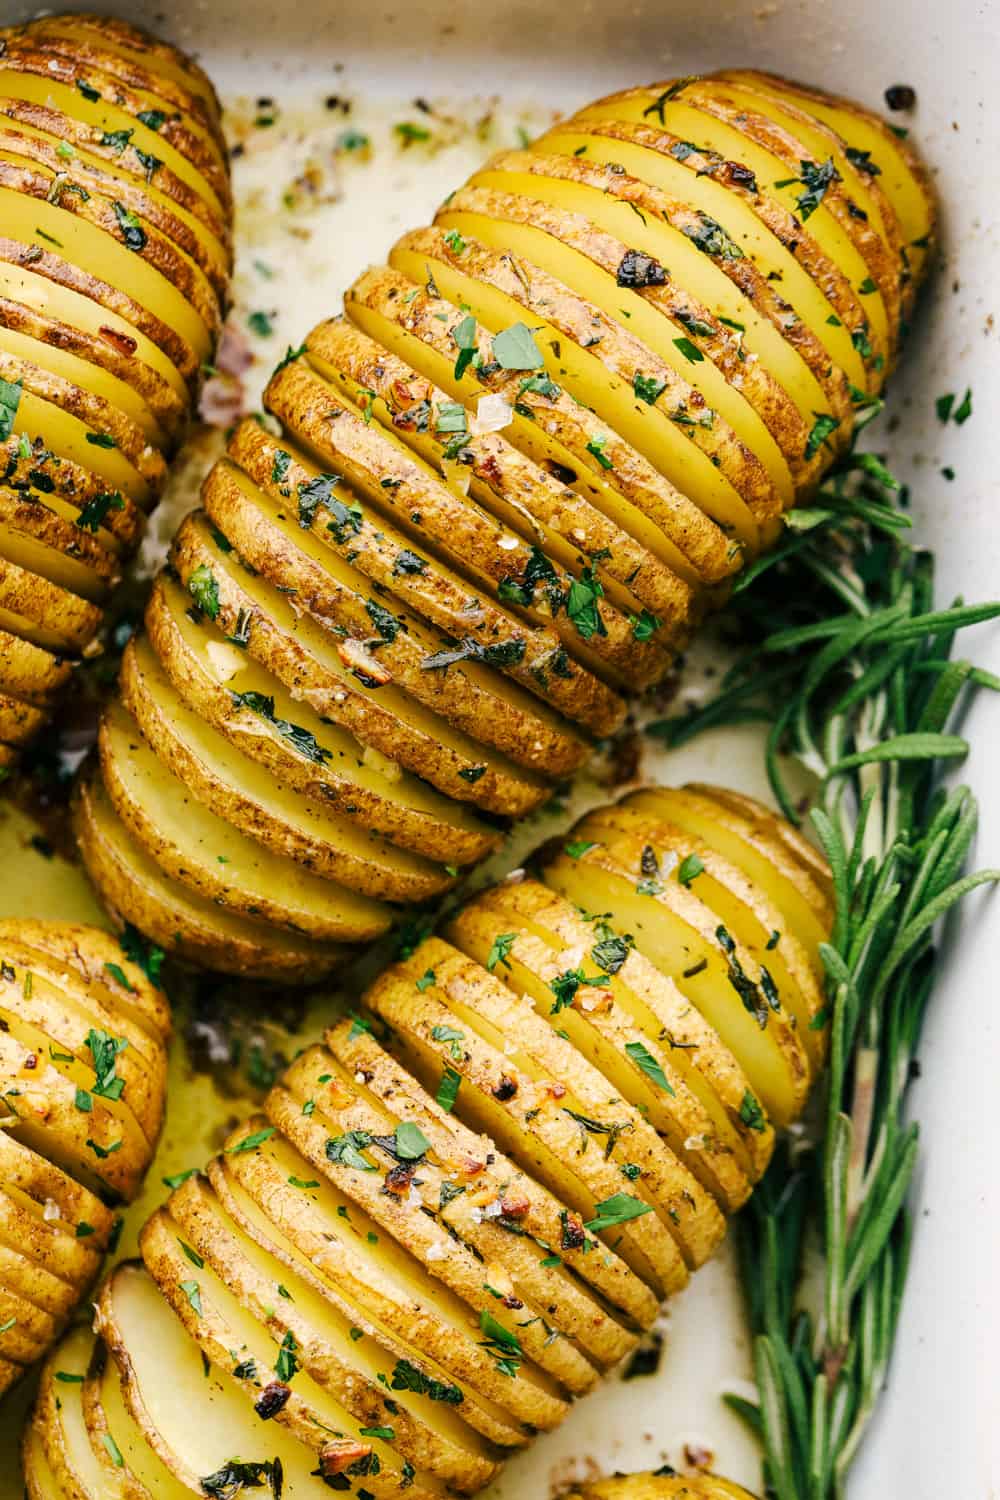
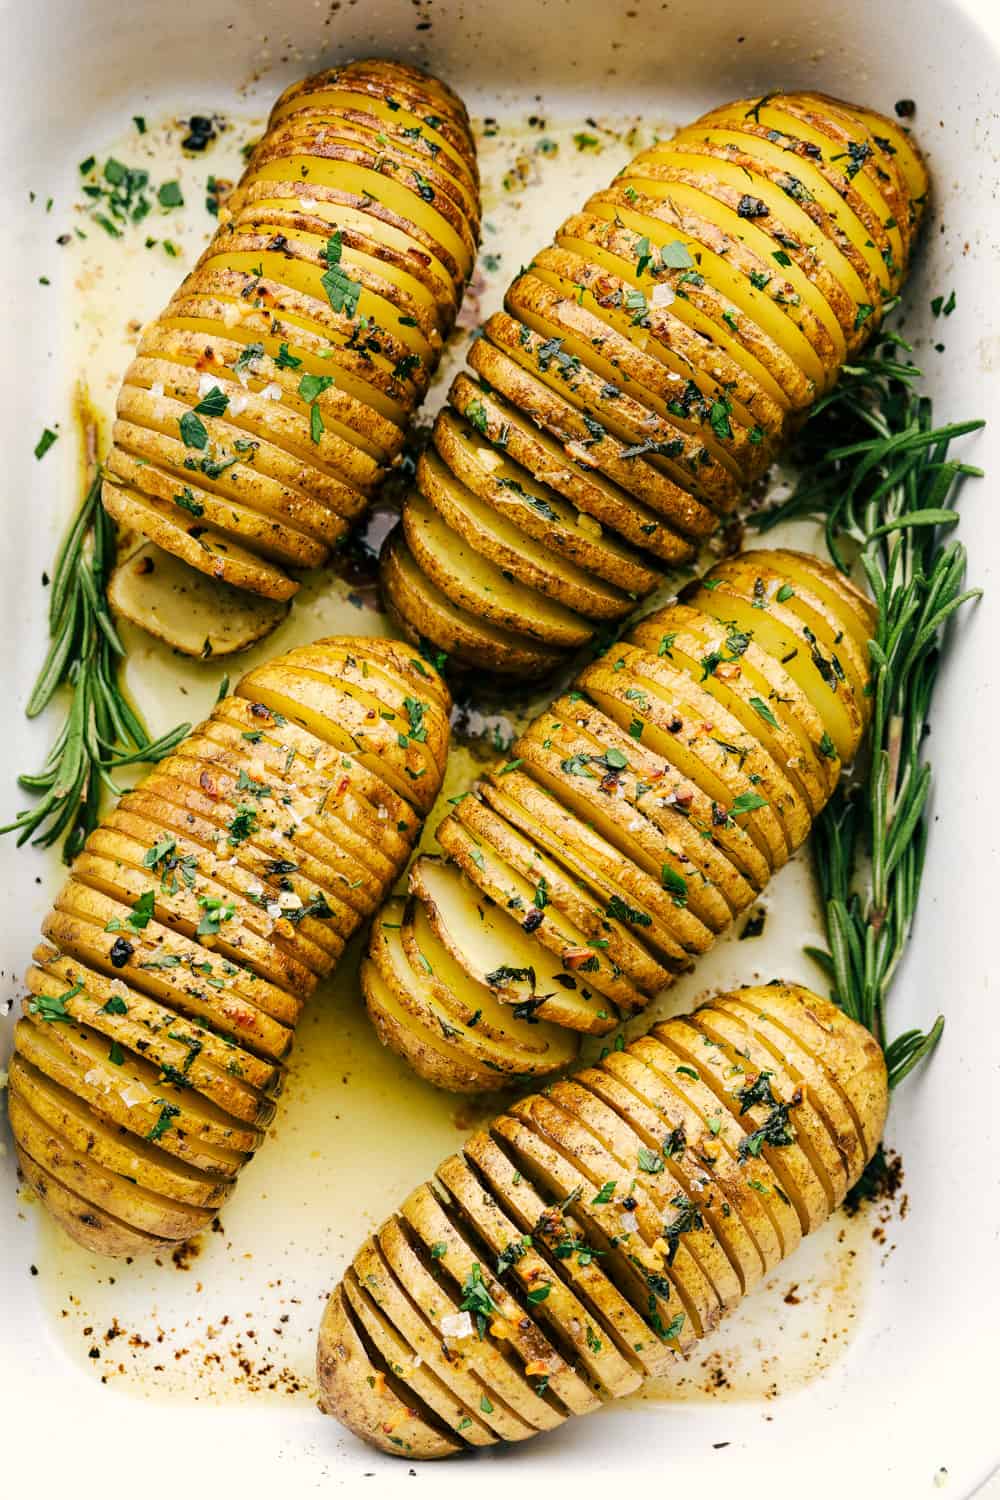
Hasselback Potatoes, crispy and perfectly seasoned on a white platter.

Hasselback Potatoes

Hasselback potatoes are so popular because of their visual appeal, but they also have incredible taste and texture. The thin cuts turn ultra crispy and almost chip like. The inside will be soft and lucious. The garlic, butter and herbs will pool down in between the folds for flavor in every bite.

These dramatic looking potatoes are so easy! That’s the best part. They look so extravagant but they’re so simple it’s almost not fair. There is definitely a WOW factor to the look of these and the garlic butter gives a flavor to match. They are just as much fun to eat as to make. Make them today!

What are Hasselback Potatoes?

What’s in a name? These fanfare potatoes got their start in Sweden in the 1700s at the Hasselbacken Hotel in Stockholm.  Thus their name Hasselback potatoes. They are simply ordinary potatoes thinly slices in such a way that when they bake the slices separate and create a fan like appearance. This allows for butter, herbs and seasonings to sink deep into the cracks and throughout the potatoes. They are crispy, flavorful and super impressive!

Hasselback Baked Potato Ingredients

Everyone assumes that these must be super hard because they look a little fancy. They are so easy! And so good!  It takes just a little bit of time to cut them but it’s totally worth it.

  • Potatoes: About 4-5 russets
  • Butter: Melted
  • Garlic: Fresh is best for this recipe but you can use jarred if your in a hurry.
  • Fresh Rosemary, Thyme and Parsley: Finely chop the herbs.
  • Salt and Pepper: To taste

Making Easy Hasselback Potatoes

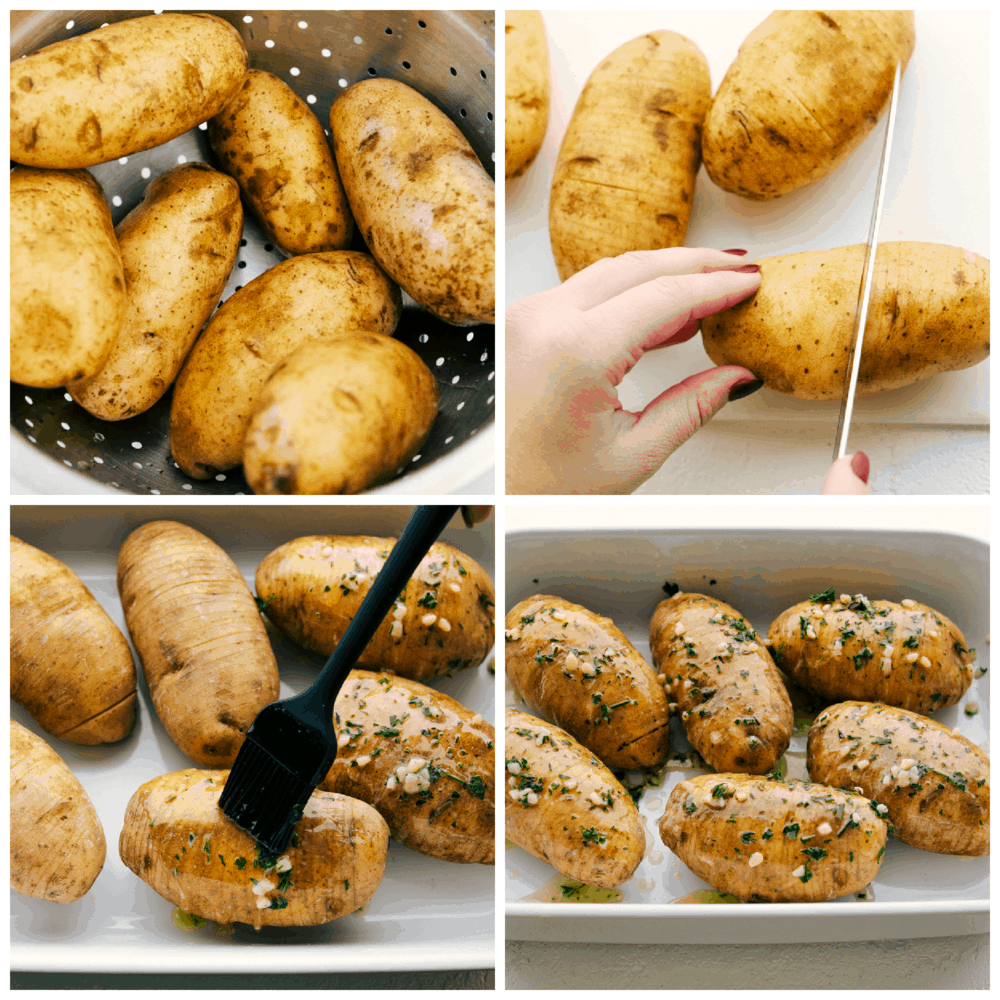
  1. Prep: Preheat the oven to 425 degrees. Wash and pat dry your potatoes.
  2. Cut: Slice the potatoes thinly stopping about half an inch from the bottom. See notes below for best tips. Salt and pepper.
  3. Brush: Melt the butter in a small bowl and stir in the fresh herbs and garlic.
  4. Bake: Place the potatoes in a 9×13 baking dish. Brush with the butter and back for 40-60 min or till done.

Preparing, cutting, and seasoning potatoes.

How to Cut Hasselback Potatoes

There are a couple of different ways to achieve this classic look, and there are a few tips to make it easier.

  1. Sharp knife: Make sure your knife is sharp and do not use a serrated knife. They’re not the right tool for the job
  2. Hasselback Cutter: Yes there is such a thing, and I use this one here found on Amazon.
  3. Spoons: If you don’t have a hasselback cutter never fear. Take two wooden spoons and place them on either side of your potato as you slice them. This will create a natural stop for your knife so you don’t accidently cut all the way through.
  4. Chopsticks:  These will do the same thing as the spoons. Place on either side of the potato and again it will create a natural stop for your knife.

Perfect Garlic Hasselback Potatoes

The hardest part is the cutting, here are a few ideas to make it easier.

  • Flavor: Experiment with flavors and seasonings. You can use chili powder, Italian seasoning, and ranch or create your own mix of flavors.
  • Top it: Top these with cheese, sour cream, bacon, any of your favorite toppings or just a little bit more butter. You can eat them straight from the pan as well.
  • Baste it: For more intense flavor save half of your seasonings and reapply half way through the cooking time. The potatoes will have opened up some and allow for more butter goodness to seep down it.

Perfectly cooked crispy seasoned Hasselback Potatoes

More Amazing Potato Recipes

Potatoes are just so good and good for you. They can be cooked in so many different ways and super filling. Got to love those potatoes.

Print

Garlic Butter Hasselback Potatoes

Crispy, perfectly seasoned, and so scrumptious, these Garlic Butter Hasselback Potatoes are going to be your new go to favorite! Your family is going to be so impressed when you set these on the table for dinner!
Course Side Dish
Cuisine American
Keyword hasselback potatoes
Prep Time 15 minutes
Cook Time 1 hour
Total Time 1 hour 15 minutes
Servings 4 People
Calories 376kcal
Author Alyssa Rivers

Ingredients

  • 4-5 medium size russet potatoes
  • salt and pepper to taste
  • 1/2 cup butter melted
  • 1 teaspoon fresh parsley finely chopped
  • 1 teaspoon fresh thyme finely chopped
  • 1 teaspoon fresh rosemary finely chopped
  • 3 cloves garlic minced

Instructions

  • Preheat the oven to 425 degrees. Wash and scrub the potatoes. Slice the potatoes thinly leaving a half an inch base at the bottom.* Salt and pepper the potatoes.
  • In a small bowl combine melted butter, parsley, thyme, rosemary and garlic. Place the potatoes in a 9x13 inch backing dish. Brush the garlic herb butter along the tops of the potatoes.
  • Roast the potatoes for 40-60 minutes or until fork tender.

Notes

*I used this hasselback cutter from amazon here and it worked great!

Nutrition

Calories: 376kcal | Carbohydrates: 39g | Protein: 5g | Fat: 23g | Saturated Fat: 15g | Cholesterol: 61mg | Sodium: 214mg | Potassium: 897mg | Fiber: 3g | Sugar: 1g | Vitamin A: 733IU | Vitamin C: 14mg | Calcium: 39mg | Iron: 2mg


from The Recipe Critic https://ift.tt/3n1gcjn
https://ift.tt/357c5fx

Easy and Awesome Pimento Dip

Pimento Dip is creamy, cheesy and so good! This is a fantastic tasty spread that is the hit of every party.

Dips are perfect for any occasion. Similar to this 5 Minute Million Dollar Dip, and this Cheesy Olive Bread, this is super EASY, and super Delicious!

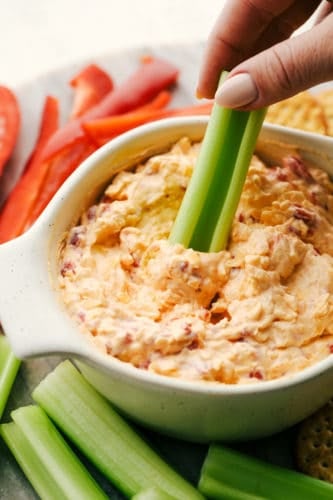
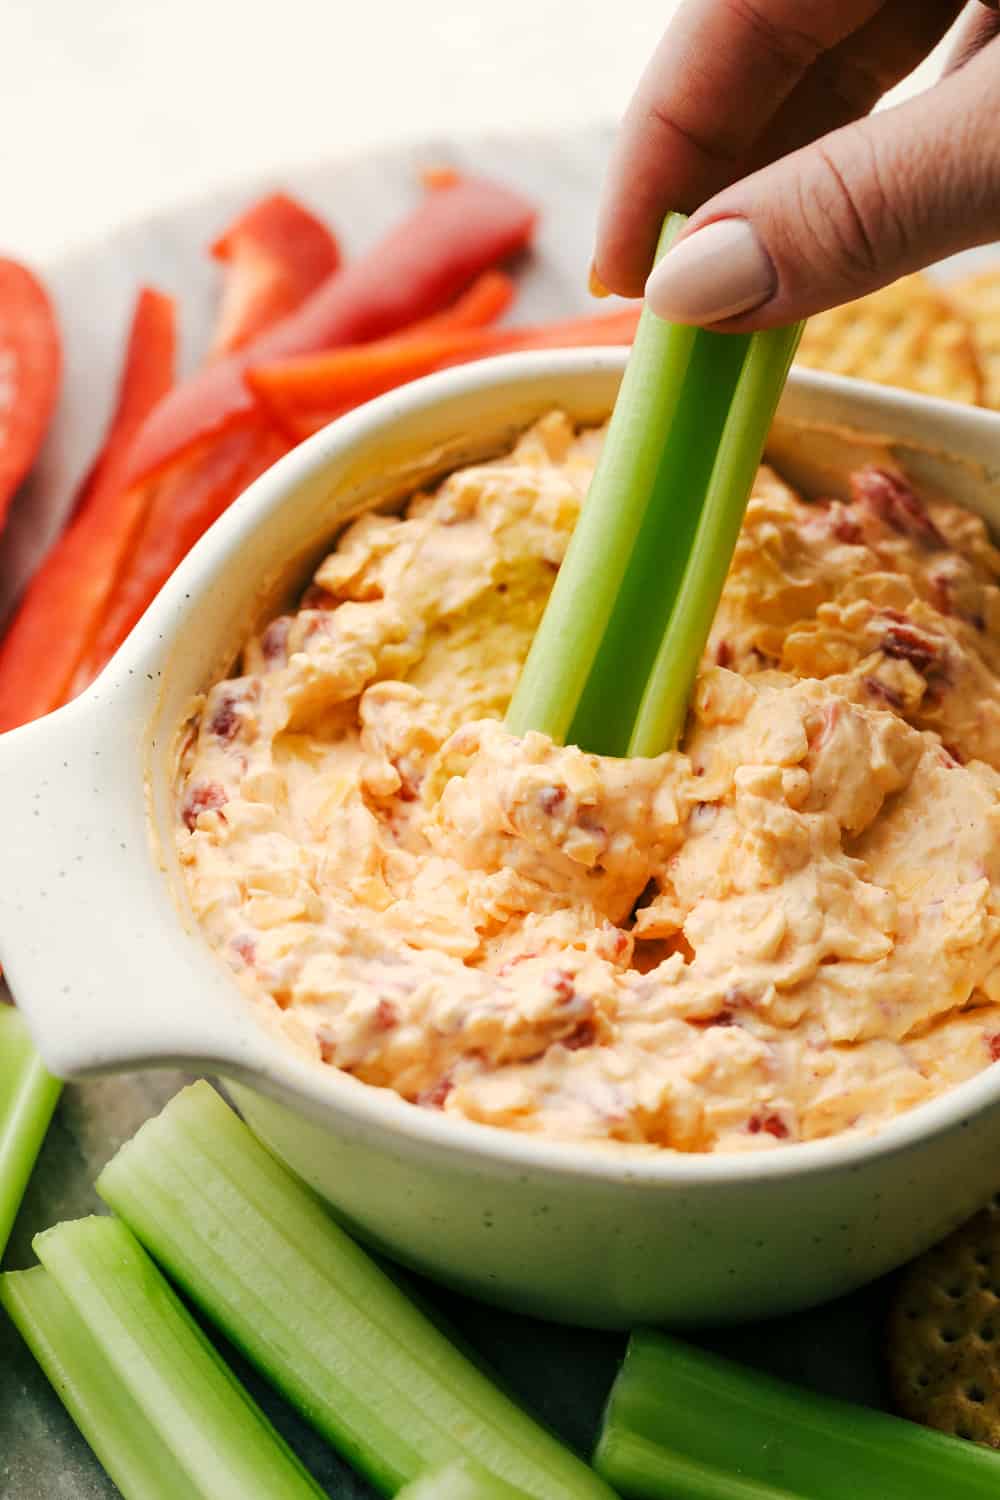
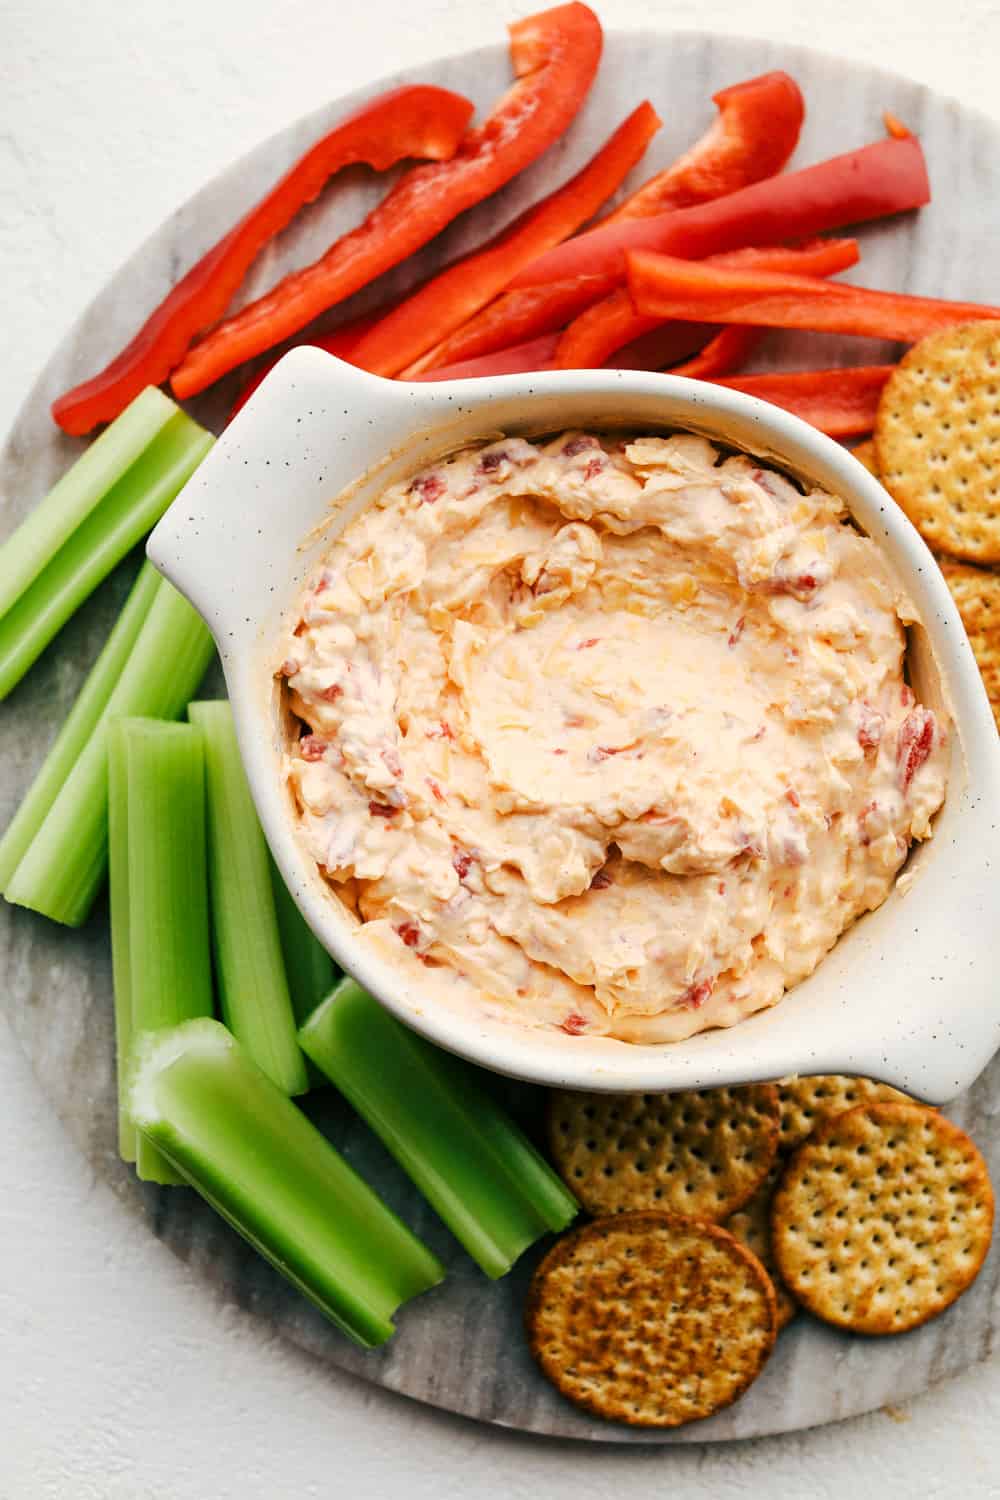
Creamy, cheesy Pimento Dip with veggies.

Pimento Cheese Dip

This well known “Southern” dip actually got its start in the north, New York State to be exact. But the South perfected this creamy dish post WWII, which has won the stomachs of many. This is in fact one of the most popular spreads and most used in the south. With it’s creamy cheesy flavor there’s little wonder why.

Pimento Cheese is one of those dips that adults and kids love alike. It’s also very versatile, you can customize it to your tastes. This is fun to make and delicious to eat! It’s a true favorite. It can be used in so many ways. And it’s so quick and easy to transport. This is perfect for any occasion, whether it’s a party, or snacks for the kids, it’s a winner!

Easy Pimento Dip Ingredients

Just a few ingredients make this scrumptious dip.

  • Cream Cheese: Can use reduced fat cream cheese if you want.
  • Mayonnaise: Do not confuse this for Miracle whip.
  • Cheddar Cheese: Medium or sharp cheddar give the best flavor.
  • Jar Pimentos: Drain before using.
  • Onion, Garlic, and Paprika: The spices that meld it all together.

Dip, Baby Dip!

This is so quick and easy! Have some fun and watch a movie, play a game and enjoy this dip!

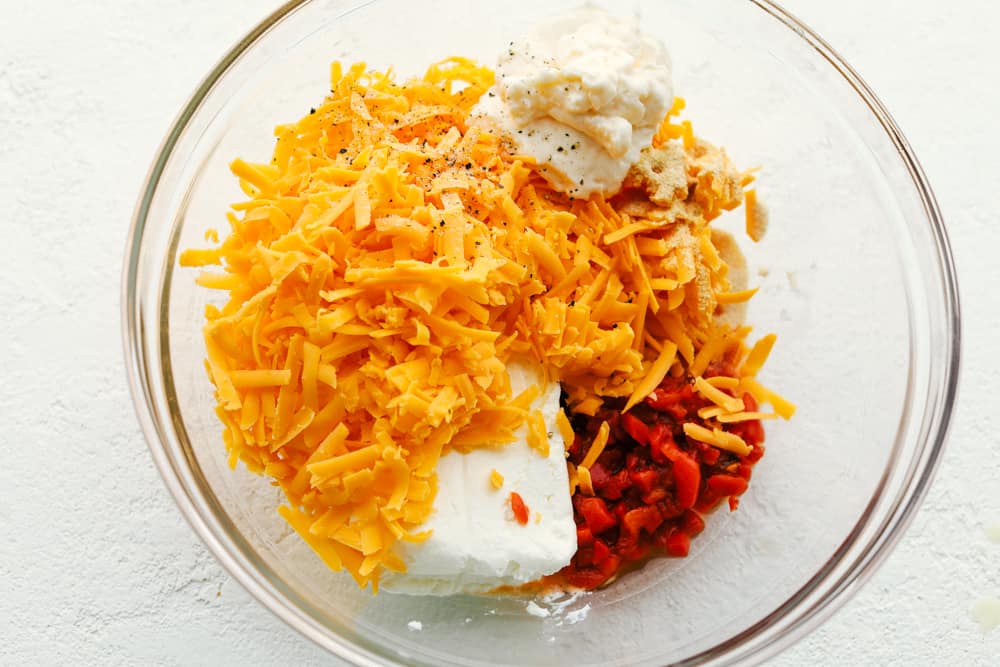
  1. Combine: Place all the ingredients in a medium sized bowl.
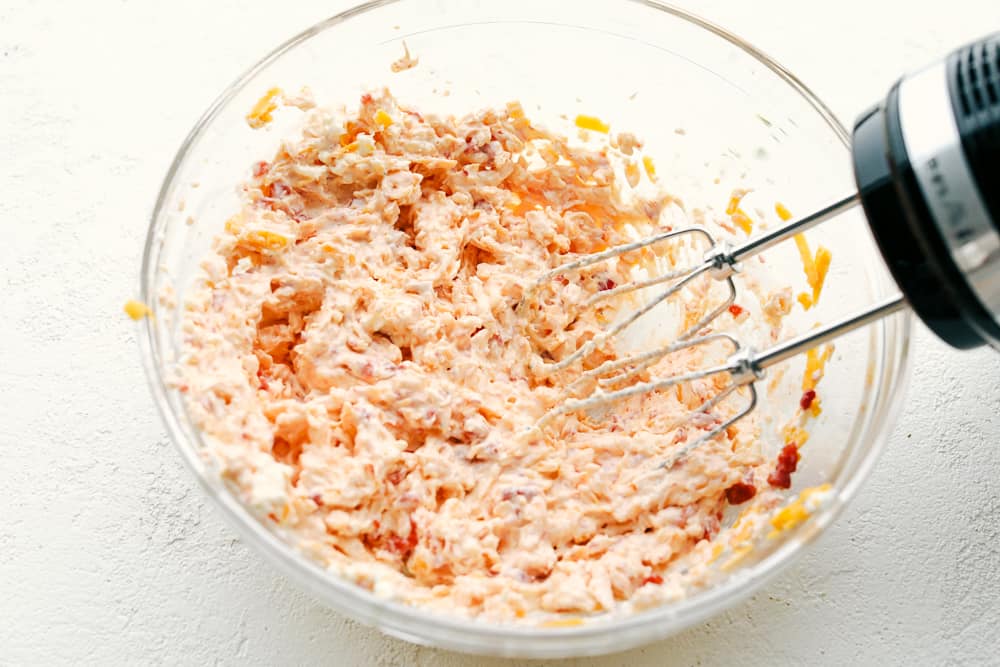
  2. Mix: Using a hand mixer beat the ingredients till combined.

The ingredients for Cheesy pimento dip in a bowl.

What Are Pimentos?

  • Pepper: Well according to those who know, a  pimento, or cherry pepper is a variety of large, red, heart-shaped chili pepper that measures 3 to 4 in long and 2 to 3 in wide. The flesh of the pimiento is sweet, succulent, and more aromatic than that of the red bell pepper.  Pimento peppers aren’t frequently found fresh but are sold jarred in most grocery stores.  You can usually find them near the olives or in the specialty foods
  • Pimento cheese: is just a combination of cheddar, cream cheese, mayo, spices, and the key ingredient, pimento peppers. This recipe was developed in the early 1900’s and perfected after WWII. It’s become an extremely popular spread.

Whipping up the best dip with an electric mixer.

Tips and Variations for Hot Pimento Dip

  • Mayo: Authentic pimento cheese dip is made with a good quality mayo. You can substitute for the mayo with  plain unsweetened yogurt with success, but it will change the flavor.
  • Cheese: Shred your own cheese from a fresh block. Pre shredded cheese often comes coated and will detract from the creaminess.
  • Different Cheese: You can play around with the cheese to your liking. Use a combination of cheeses, or a different flavor. The type of cheese you use will definitely change the flavor.
  • Spice it up: Add hot sauce or buffalo sauce and pepper jack cheese to spice things up. Using different spices can make this dip unique.
  • Not Just a Dip:  This a wonderful on bread and grilled for a grilled pimento cheese sandwich to die for! Use it instead of mayo on sandwiches for extra zing
  • Top it: Put on top of grilled chicken, pork, hamburgers or other meat for a twist on the normal.

Creamy, cheesy pimento dip with veggies and crackers.

More Amazing Easy Dips

These are more dips to try at your next occasion!

Print

Pimento Dip

Pimento Dip is creamy, cheesy and so good! This is a fantastic tasty spread that is the hit of every party. 
Course Appetizer, Snack
Cuisine American
Keyword pimento dip, pimento dip recipe
Prep Time 10 minutes
Total Time 10 minutes
Servings 8 People
Calories 231kcal
Author Alyssa Rivers

Ingredients

  • 8 ounce cream cheese
  • 1/4 cup mayonnaise
  • 1 1/2 cup cheddar cheese shredded
  • 1 4 ounce jar pimentos drained
  • 1/4 teaspoon onion powder
  • 1/4 teaspoon garlic powder
  • 1/4 teaspoon paprika

Instructions

  • In a medium size bowl add the ingredients. Using a hand mixer beat the ingredients until combined. Serve with crackers and veggies if desired.

Nutrition

Calories: 231kcal | Carbohydrates: 2g | Protein: 7g | Fat: 22g | Saturated Fat: 11g | Cholesterol: 56mg | Sodium: 267mg | Potassium: 60mg | Sugar: 1g | Vitamin A: 624IU | Vitamin C: 1mg | Calcium: 181mg | Iron: 1mg


from The Recipe Critic https://ift.tt/32lD5pO
https://ift.tt/38hJciH

शुक्रवार, 6 नवंबर 2020

Cowboy Casserole

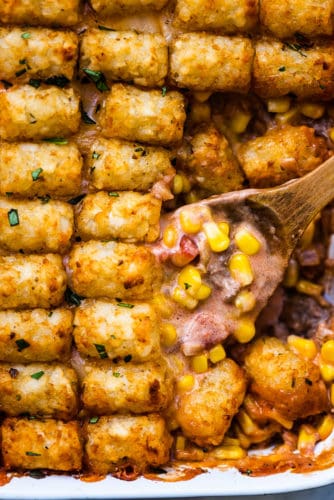
A wooden spoon taking a scoop of cowboy casserole out of a baking dish.

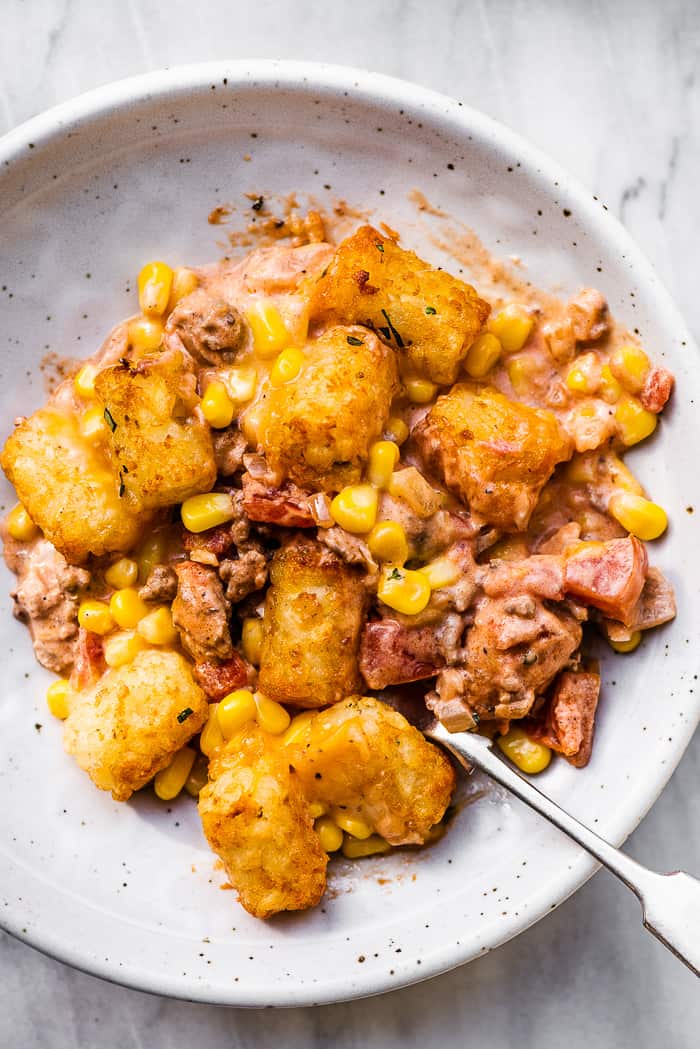
Cowboy Casserole is a family favorite made with seasoned ground beef in a creamy sauce, corn, cheese, and topped with crispy tater tots. It’s irresistible!

If you love easy casserole recipes, also try this Tuna Rice Casserole and this Chicken Divan Casserole.

A wooden spoon taking a scoop of cowboy casserole out of a baking dish.

Tater Tot Casserole

This is a tried and true family favorite. When you need a quick and easy recipe that everyone will love, this is the answer. From the creamy ground beef sauce all the way up to the crispy tater tots, this recipe is as deliciously cozy as it gets. It takes less than 15 minutes to assemble, so you always have time to make a homemade meal for your family. Trust me, they’ll love this one!

What is a Cowboy Casserole?

Cowboy casserole is a true crowd-pleasing recipe. It’s made by layering a creamy ground beef sauce, sweet corn, and cheddar cheese into a casserole dish. Then it’s topped with tater tots and baked until the casserole is bubbly and the tots are nice and crispy. It’s pretty hard to resist.

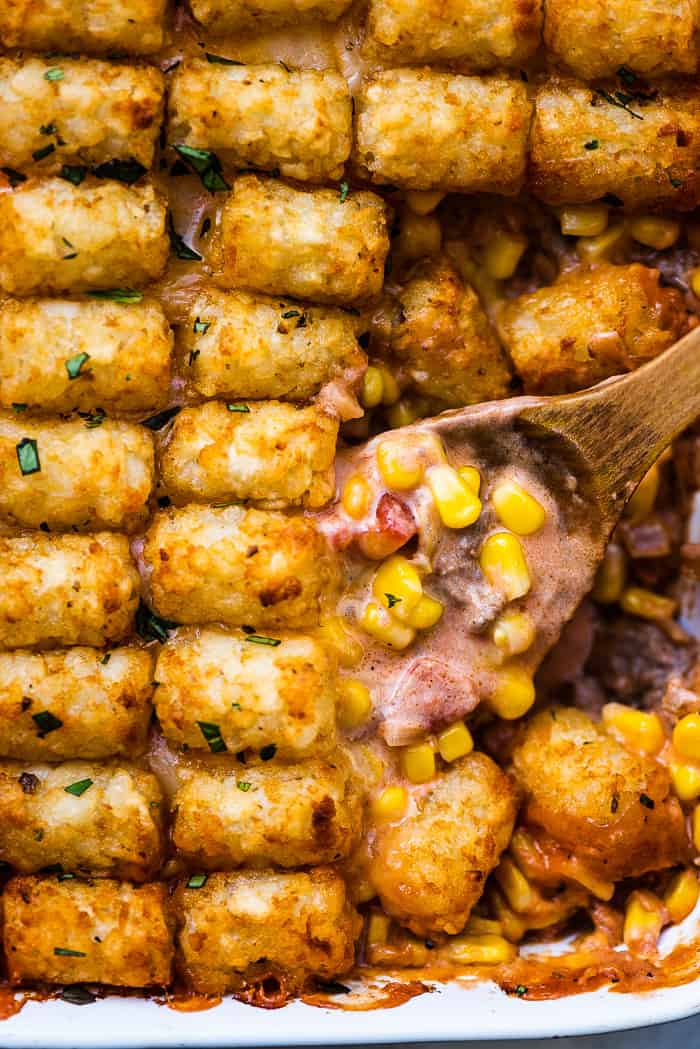
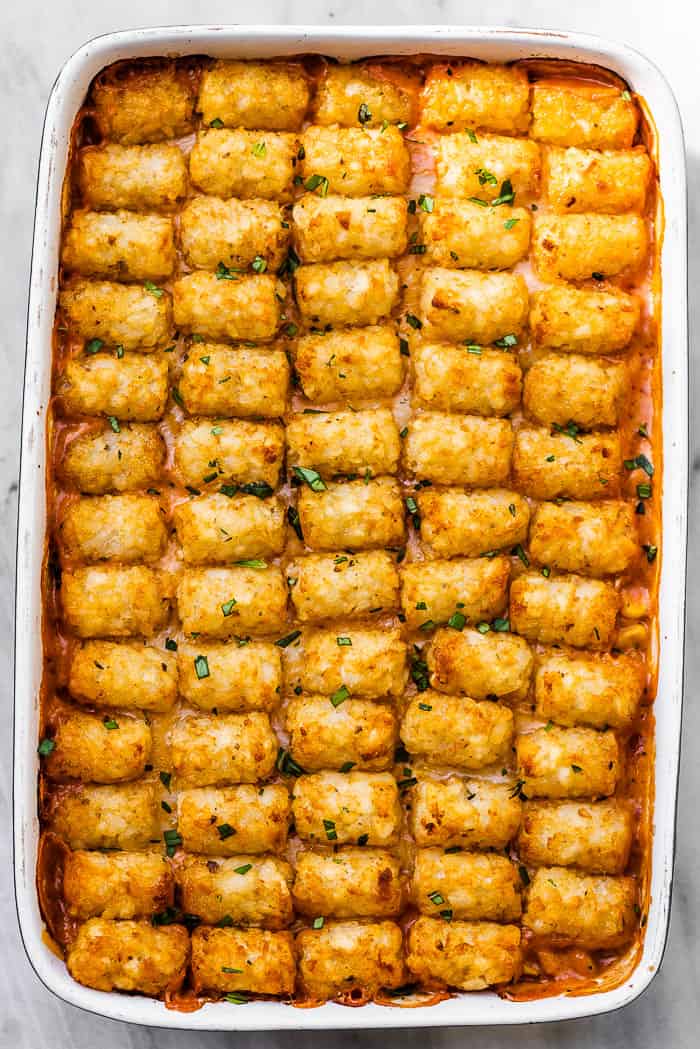
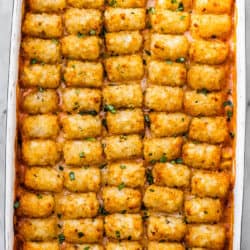
Crispy tater tots lined up on top of a cowboy casserole.

What do you Need To Make Easy Cowboy Casserole?

  • Ground beef: lean is best.
  • Onion and garlic: flavor!
  • Diced tomatoes: we use canned as the juices help create the sauce.
  • Sour cream: makes the sauce so creamy. You can sub plain yogurt if you’d like.
  • Corn: we use frozen corn but canned corn works, too.
  • Cheddar cheese: Use aged for the best flavor. Or try a mix of white and orange cheddar.
  • Tater tots: the crispy topping that is the best part about a cowboy casserole.

Time to Make a Casserole!

This really is such an easy recipe!

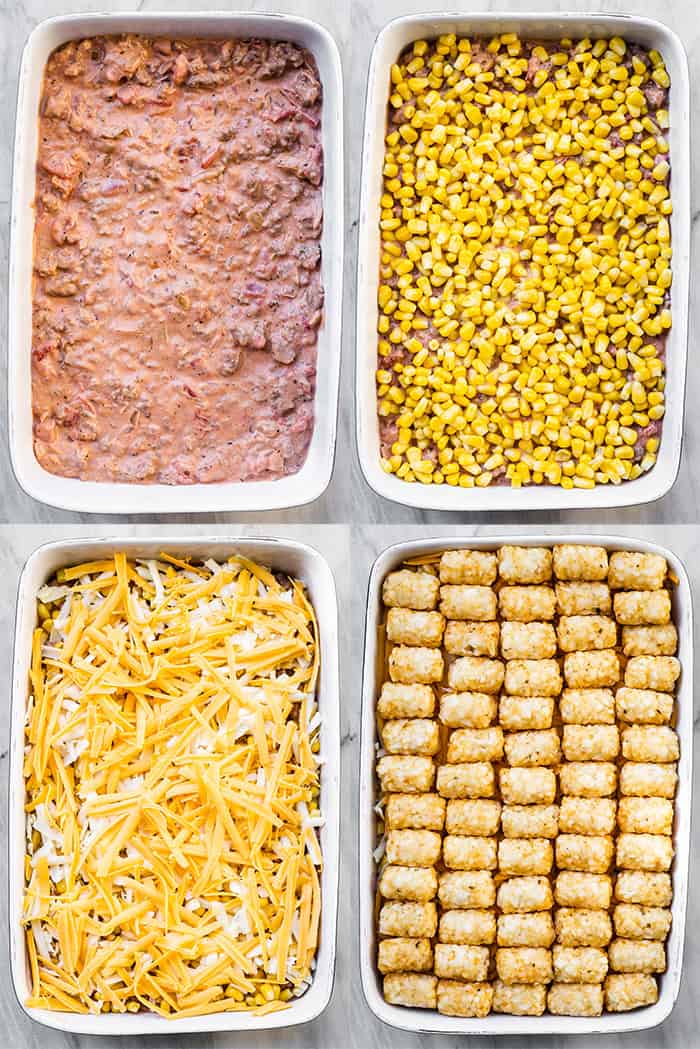
  1. First: Start by cooking the ground beef until it’s only a little bit pink. Then add some onions and garlic and let them cook until the beef is fully cooked.
  2. Next:  Mix in a can of diced tomatoes and some sour cream then season that creamy, beefy sauce with salt and pepper.
  3. Last: Once the beef is ready, you’ll put it into a casserole dish and top it with corn, cheese, and tater tots

Variations to Try

  • Protein: Swap the ground beef with ground chicken.
  • Beans: Add some black beans.
  • Topping: Use curly fries instead of the tater tots.
  • Seasoning: Add some taco seasoning for a Tex-Mex version!

4 pictures showing how to make cowboy casserole.

Can this Casserole Be Made Ahead Of Time?

Yes! This casserole can be prepared and assembled 24 hours in advance. Cover and store it in your fridge until you’re ready to bake it. You’ll want to add a few minutes to the cooking time.

Tips for Making the Best Cowboy Casserole

You might notice that the oven temperature in this recipe is quite a bit higher than some other cowboy casserole recipes. There’s a good reason for that!

We bake our casserole at the temperature that’s recommended for cooking tater tots. This ensures that the tots get nice and crispy because nobody wants soggy tater tots.

So if you want the best cowboy casserole, crank up the heat!

A white bowl filled with cowboy casserole

More Casserole Recipes to Try

Crispy tater tots lined up on top of a cowboy casserole.
Print

Cowboy Casserole

Cowboy casserole is a family favorite made with seasoned ground beef in a creamy sauce, corn, cheese, and topped with crispy tater tots. It's irresistible!
Course Dinner
Cuisine American
Keyword cowboy casserole, tater tot casserole
Prep Time 15 minutes
Cook Time 30 minutes
Total Time 45 minutes
Servings 6 servings
Calories 611kcal
Author Kristen Stevens

Ingredients

  • 1 pound lean ground beef
  • 1 medium onion minced
  • 3 garlic cloves minced
  • 1 14 ounce can diced tomatoes
  • 1 cup sour cream can be light
  • 1 teaspoon salt
  • 1 teaspoon pepper
  • 2 cups frozen corn thawed
  • 2 cups grated cheddar cheese
  • 26 ounces tater tots

Instructions

  • Preheat your oven to 425 degrees.
  • Cook the lean ground beef in a large frying pan over medium-high heat until only a little pink remains. Add the onion and garlic and continue to cook for 5 more minutes. Mix the tomatoes and sour cream into the beef then season with salt and pepper.
  • Pour the creamy beef into a 9x11 inch casserole dish. Top with the corn, then the cheese, then arrange the tater tots in a single layer on the top.
  • Bake for 25-30 minutes, or until the tater tots are crispy and brown.

Nutrition

Calories: 611kcal | Carbohydrates: 48g | Protein: 31g | Fat: 35g | Saturated Fat: 16g | Cholesterol: 106mg | Sodium: 1232mg | Potassium: 873mg | Fiber: 4g | Sugar: 2g | Vitamin A: 616IU | Vitamin C: 15mg | Calcium: 346mg | Iron: 3mg


from The Recipe Critic https://ift.tt/3n32mx7
https://ift.tt/3mZfljq