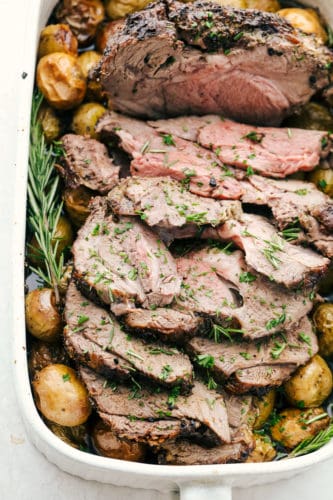
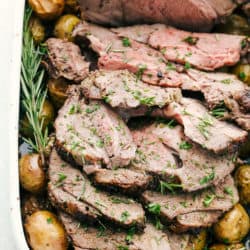
Savory Garlic Herb Crusted Roast Lamb is tender and succulent, perfect for any special occasion. The meat is tender and juicy and the crust gives it such a beautiful flavor. Perfection on a platter!
This juicy decadent dish already has tender potatoes to go with it. So try serving it with a few more veggies and some rolls for the perfect meal. Try it with a side of Sauteed Garlic Asparagus with Bacon, Honey Orange Glazed Carrots or a nice Caesar Salad.

The Best Roast Lamb
Most people think Easter when having lamb, but it’s super easy and is perfect for any Holiday meal. Cooking the Lamb on a bed of potatoes does two things here. First it provides the air to actually circulate better around the roast cooking it more evenly. Secondly it gives you a flavorful perfect side dish. Who could ask for more?1
Cooking lamb may seem intimidating, but it’s no different than cooking any kind of meat. Lamb also seems to be reserved for special occasions but you can have it anytime. There are no rules when it comes to when to eat and when not to eat lamb. So if your craving it, don’t wait! Grab this recipe and cook some up tonight!
Ingredients for Roast Boneless Leg of Lamb
These ingredients are not much different then cooking a beef roast. It’s just so simple, but so delicious!
- Lamb Roast: I bought my boneless from Costco
- Butter: Soften the butter but don’t melt it.
- Garlic: mince the garlic
- Thyme, Oregano, Rosemary: Fresh versions finely chopped
- Salt and Pepper: Be generous for the meat.
- Baby Potatoes Use red or yellow for perfect flavor and roasting
- Olive Oil: Mild flavor
Roast Rack of Lamb!
- Prep: Preheat the oven to 400 degrees. In a small bowl mix the butter, garlic, thyme, oregano, rosemary and salt and pepper.
- Layer: In a roasting dish, place the potatoes and toss with olive oil and salt and pepper. Place the lamb on top of the potatoes.
- Rub: Rub all the butter on the outside of the lamb
- Roast: Place in the oven and roast till internal temp reaches 145 degrees. About 1-1/12 hours depending on the size of your roast.

The Perfect Temperature
The internal temps of lamb are the same as beef. The official done temp is 145 degrees, this will result in a medium well done roast. If you’d prefer your lamb a different doneness here is a reference chart.
- Rare: 115 to 120°F
- Medium-rare: 120 to 125°F
- Medium: 130 to 135°F
- Medium-well: 140 to 145°F
- Well-done: 150 to 155°F
Tips for the Perfect Crusted Lamb
- Lamb: A lamb roast is the same thing as a boneless leg of lamb. So if all you can find is boneless leg of lamb, it’s the same. This recipe will work for both bone-in and boneless leg of lamb. It’s up to you.
- Bring it to Room Temp: This is super important to ensure even cooking. Especially if you have a bone-in leg of lamb. The bone will be cold, keeping the meat from cooking at an even rate, over doing the outside or under doing the inside.
- Rest: Make sure you allow your meat to rest. This allows the meat to reabsorb redistribute the juices for more tender juicier roast. Keep in mind that as it rests it will continue to cook a bit.
- Flavor:Lamb is the perfect meat to load on the seasonings. Don’t be shy. Add more or different seasonings to your liking.
- Taste: If some of your loved ones feel like lamb can taste “gamey” be sure to trim as much as the fat as possible. The “gamey” flavor is carried in the fat.
Storing the Crown Roast of Lamb
- Serve: A great thing about roasted meat is it can sit at room temperature for up to 2 hours before it needs to be stored. This allows time to visit before you have to put it away.
- Store: Cooled lamb can be kept in the refrigerator for up to 4 days in an airtight container.
- Freeze: Cool the lamb completely so no moisture collects which will form ice crystals. Store in the freezer for up to 2 months in a freezer safe container or bag.

More “Crusted” Recipes to Try
Anything with the description “crusted” in it is automatically going to taste amazing, you just know it!
- Walnut Crusted Maple Salmon
- Almond Crusted French Toast with Roasted Strawberry Syrup
- Chili Macadamia Crusted Tilapia
- Parmesan Garlic Crusted Chicken with Garlic Alfredo Shells
- Almond Crusted Chicken with Peach Salad
Garlic Herb Crusted Roast Lamb
Ingredients
- 5-6 pounds lamb roast I used a boneless lamb roast
- 1 cup buttered softened
- 5 cloves garlic minced
- 1 Tablespoon thyme finely chopped
- 1 Tablespoon oregano finely chopped
- 1 Tablespoon rosemary finely chopped
- 1 Tablespoon salt
- 1 teaspoon pepper
- 2 pounds baby potatoes
- 1 Tablespoon olive oil
- Salt and pepper
Instructions
-
Preheat oven to 400 degrees. In a small bowl mix butter, garlic, thyme, oregano, rosemary, salt and pepper. Rub all of the butter on the outside of your lamb.
-
In a roasting dish add the potatoes and toss with olive oil and salt and pepper. Lay the lamb roast on top of the potatoes.
-
Roast in the oven until the internal temperature reaches 145 degrees. About 1 1/2-2 hours. Remove the twine and serve.
Nutrition
from The Recipe Critic https://ift.tt/3lbItmP
https://ift.tt/2JOLOKU