सोमवार, 2 अगस्त 2021

Thai Chicken Skewers

These Thai chicken skewers are marinated in coconut milk, curry, and spices and then grilled to perfection. It’s a quick and easy meal that’s packed full of flavor!

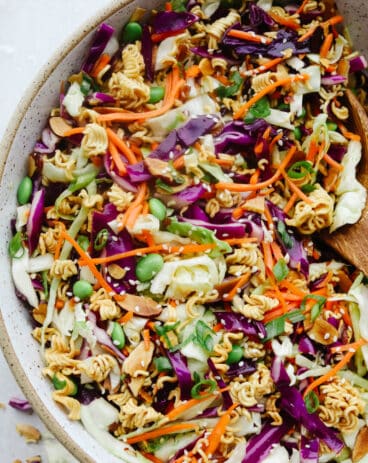
Eating and grilling meat on a stick is just easy and fun! You have to try these other skewers recipes Asian Garlic Steak, Hawaiian Teriyaki Chicken, and Cajun Shrimp and Sausage.

Thai Chicken skewers on a plate garnished with cilantro and peanuts.

Thai Chicken Skewers

I love Thai food, so I decided to recreate some of my favorite restaurant flavors at home with these grilled chicken skewers. Chunks of chicken breasts are marinated in coconut milk, curry paste, ginger, and lime, then threaded onto skewers and grilled. The marinade takes just 5 minutes to put together, and the chicken should sit in the marinade for at least one hour, or up to 8 hours if you like to plan ahead!

You can find all the ingredients you need for the marinade in any major grocery store. The red curry paste comes in small jars and is typically found in the ethnic foods aisle. If it’s not grilling weather, you can either broil the chicken skewers or use a grill pan on your stovetop. After the chicken comes off the grill, it gets sprinkled with cilantro and chopped peanuts. These are so good, you are going to love them!

Ingredients for Thai Chicken

I serve these Thai chicken skewers with a quick and easy peanut sauce. If you’re in a hurry, you can use a store-bought peanut sauce, but the homemade sauce tastes so much better and takes just minutes to put together.

  • Boneless skinless chicken breast: Cut the chicken into 1 inch pieces
  • Coconut milk: You can find this int he Asian aisle by the soy sauce. It is often found in a can.
  • Brown sugar: Adds a bit of sweetness to the spice.
  • Red curry paste: Add more or less depending on how spicy you want it.
  • Knob of ginger: Peel and cut into 3 slices.
  • Zest of one lime: Wash and use a zester or the smallest holes of a cheese grater.
  • Salt and Pepper: Add to taste.
  • Chopped cilantro and peanuts: These are a garnish that you are going to want to make sure you use.

For the Peanut Sauce

  • Creamy peanut butter: You can use natural peanut butter but the consistency will vary.
  • Soy sauce: Use low-sodium soy sauce if you desire.
  • Brown sugar: Adds a bit of sweet to the tang.
  • Lime juice: Use the juice of the lime you zested for the chicken.
  • Sesame oil: This is a finishing oil that adds incredible flavor.
  • Minced garlic: Use fresh for the best flavor but jarred will work when you are in a hurry.
  • Warm water: Add more or less to thin or thicken the sauce.

How to Make Thai Chicken Skewers

The next time you’re craving Thai food, skip the take-out and make these chicken skewers at home instead, you’ll be glad you did!

  1. Make the Marinade: Place the coconut milk, brown sugar, curry pasta, ginger, lime zest, salt and pepper in a resealable freezer bag. Seal and shake to combine.
  2. Marinate Chicken: Place the chicken in the bag. Marinate in the refrigerator for at least one hour or up to 8 hours.
  3. Skewer: Remove the chicken from the marinade and thread onto skewers.
  4. Grill: Preheat the grill or a grill pan to medium heat. Place the chicken skewers on the grill and cook for 4-5 minutes on each side or until cooked through.
  5. Garnish: Sprinkle the cilantro and peanuts on top of the chicken and serve with peanut sauce.
  6. Make the sauce: Combine the peanut butter, soy sauce, brown sugar, lime juice, sesame oil, garlic and warm water in a bowl. Whisk until smooth and serve alongside the chicken.
Upclose picture of thai chicken.

Thai Chicken Skewer Tips

I typically serve my chicken skewers with steamed rice and a green veggie to round out the meal; all of my kids happily devour this dinner which never happens!

  • Chicken: You can use boneless skinless chicken thighs as well as the breasts. Be sure to keep the cuts even and bite sized for fast even cooking. The chicken can be swapped out for pork, beef or shrimp. Cooking times will vary.
  • Marinate: The longer you can marinate the chicken the better the flavor it will have, so plan ahead and make sure you have ample time.
  • Skewers: Soak the skewers for at least an hour and up to overnight. No need to dry them before skewering the meat on.
  • How You Know it’s Done: The internal temperature of chicken should reach 165 degress when done.

Baking, Serving and Thai Chicken Skewers

You are going to want to keep ingredients for this handy so you can make it often.

  • Bake: If you want a hands off way to cook these chicken skewers try the oven. Bake on a baking sheet that has been lined with foil and sprayed. Make sure there is plenty of room between skewers so they do not steam. Bake at 350 for 15-20 minutes or till internal temperature is 165. For a charred finish broil for 1 minute on each side.
  • Serve: Thai Chicken Skewers go perfectly with rice or noodles. They can also be used to top salads, pizzas, vegetable stir fry, or make Thai tacos. Any way you make them they are going to be delicious!

How to Store Chicken Skewers

Leftover Thai Chicken can be stored in the fridge for up to 4 days or in the freezer for up to 3 months. Make sure they are placed in an airtight container or freezer-safe bag. Reheat in the microwave and then finish crisping in the oven or on the stove top. Extra peanut sauce can be kept in the fridge for up to 4 days and can also be frozen for 3 months.
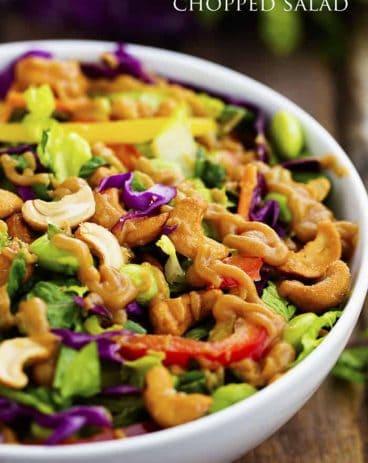
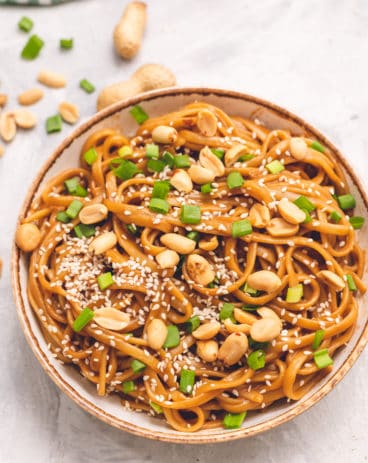
Dipping the chicken in homemade peanut sauce.
Print

Thai Chicken Skewers

These Thai chicken skewers are marinated in coconut milk, curry and spices and then grilled to perfection. It’s a quick and easy meal that’s packed full of flavor!
Course Appetizer
Cuisine Asian American, Thai
Keyword chicken skewers, thai chicken skewers
Prep Time 1 hour 10 minutes
Cook Time 5 minutes
Total Time 1 hour 15 minutes
Servings 4 people
Calories 657kcal
Author Alyssa Rivers

Ingredients

For the chicken skewers:

  • 1 1/4 pounds boneless skinless chicken breast cut into 1 inch pieces
  • 1 can coconut milk
  • 1 1/2 tablespoons brown sugar
  • 1 teaspoon red curry paste or more if you prefer it spicy
  • 1 inch knob of ginger peeled and cut into 3 slices
  • the zest of one lime
  • 1 teaspoon salt
  • 1/2 teaspoon pepper
  • 2 tablespoons chopped cilantro
  • 2 tablespoons chopped peanuts

For the peanut sauce:

  • 1/2 cup creamy peanut butter
  • 2 tablespoons soy sauce
  • 1 1/2 tablespoons brown sugar
  • 2 tablespoons lime juice
  • 1 tablespoon sesame oil
  • 1/2 teaspoon minced garlic
  • 1/4 cup warm water

Instructions

  • Place the coconut milk, brown sugar, curry pasta, ginger, lime zest, salt and pepper in a resealable freezer bag. Seal and shake to combine.
  • Place the chicken in the bag. Marinate in the refrigerator for at least one hour or up to 8 hours.
  • Remove the chicken from the marinade and thread onto skewers.
  • Preheat the grill or a grill pan to medium heat. Place the chicken skewers on the grill and cook for 4-5 minutes on each side or until cooked through.
  • Sprinkle the cilantro and peanuts on top of the chicken and serve with peanut sauce.

For the peanut sauce

  • Combine the peanut butter, soy sauce, brown sugar, lime juice, sesame oil, garlic and warm water in a bowl. Whisk until smooth and serve alongside the chicken.

Notes

Updated on August 2, 2021
Originally Posted on May 24, 2017

Nutrition

Calories: 657kcal | Carbohydrates: 22g | Protein: 42g | Fat: 47g | Saturated Fat: 26g | Cholesterol: 91mg | Sodium: 1414mg | Potassium: 1016mg | Fiber: 4g | Sugar: 15g | Vitamin A: 240IU | Vitamin C: 6.8mg | Calcium: 44mg | Iron: 3mg


from The Recipe Critic https://ift.tt/3jfinQ1
https://ift.tt/3ieoq8m

रविवार, 1 अगस्त 2021

Asian Glazed Salmon

Blanketed with an insanely good soy garlic glaze, this juicy Asian glazed salmon is to die for! With how healthy and delicious it is, it will become your new lunch go-to!

Salmon tastes so amazing with a sweet and savory, Asian-inspired sauce on top. You will love my other Thai, honey sesame, and teriyaki salmon recipes!

Asian glazed salmon served on top of asparagus.

Easy and Delicious Asian Glazed Salmon Recipe

Asian glazed salmon is the perfect recipe for when you’re wanting to make something delicious and healthy without spending the whole night doing so. Just a handful of simple ingredients come together to create the most tender and amazing meal! Combine the ease of cooking salmon, its health benefits, a perfect sauce, and you have a knockout dinner. You would never know that this perfectly glazed fish is diet-friendly when it tastes this good! Not only is this Asian glazed salmon low in carbs, but it’s packed with omega 3s, potassium, and vitamins- making it a dish you can feel great about eating!

To add, I love salmon because it is so easy and fast to cook. The best part about this Asian glazed salmon recipe is that you simply put it under the broiler for 5 minutes on each side, and it is cooked perfectly every time! You are going to love the sweet, tangy, garlicky flavor of this sauce. It tastes incredible and complements the tender, flaky texture of broiled salmon so well. Asparagus and brown rice were what I paired this Asian glazed salmon with and it turned out to be a nutritious but satisfying meal. Even if you aren’t a seafood lover, you need to give this recipe a try! It’s time to break out the soy and hoisin sauce sitting in your pantry and get to making this tasty dish!

Simple Asian Glazed Salmon Ingredients

Once you taste how amazing this Asian glazed salmon is, you won’t believe it is made with just a few easy ingredients! Recipes that taste amazing but don’t require me to buy all new ingredients get an A+ in my book. Measurements for each ingredient are listed in the recipe card below.

  • Brown Sugar: The sweetness of the glaze comes from brown sugar. Once dissolved, it helps to create the perfect texture as well.
  • Soy Sauce: Original Kikkoman soy sauce is typically what I have in my cupboard, but you opt for a low-sodium variety, too. This will help cut down on the salt content of the glaze.
  • Hoisin Sauce: Hoisin sauce is the secret ingredient to so many Asian-inspired dishes. If you haven’t tried it before, it is salty with a hint of sweetness, and has strong umami flavor. It comes in handy for other recipes of mine like general tsos and kung pao chicken, so pick some up next time you make a trip to your local Asian market! It will come in handy, I promise!
  • Ginger: Ginger is very aromatic and will enhance all of the flavors in the glaze so that they eminate perfectly in your mouth. In this recipe, the ginger I use is peeled and grated.
  • Dried Red Pepper Flakes: Add red pepper flakes to taste for slight heat and additional texture.
  • Garlic: Minced garlic is going to do a lot of the heavy lifting in the sauce to give you the perfect savory flavor. Don’t skip it!
  • Lime Juice: Adds the perfect hint of tart, tangy flavor.
  • Salmon: I like to use salmon fillets that are boneless, skinless, and roughly the same thickness. This way, they all cook at the same rate.

How to Make Asian Glazed Salmon

This is the ultimate dish for busy weeknights. You get a tasty, nutritious meal in less than 20 minutes, start to finish! I am sure it will become a regular in your weekly dinner lineup because of how incredibly easy it is to make!

  1. Whisk Together Sauce Ingredients: In a medium saucepan, whisk together brown sugar, soy sauce, hoisin sauce, ginger, red pepper flakes, garlic and lime juice.
  2. Boil: Bring to a boil over medium heat until sauce thickens. Set aside.
  3. Preheat Broiler and Prep Baking Dish: Preheat the broiler to high. Line a baking dish with foil and place salmon on top.
  4. Brush With Glaze: Baste with glaze and broil for 4 minutes. Remove salmon from the oven, turn over, baste with glaze and return to the oven to broil for 4 more minutes.
  5. Repeat: Carefully remove salmon from the oven and baste one more time before serving.
Whisking sauce ingredients together in a pot.

Tips for Making the Best Asian Glazed Salmon

These quick tips can help you upgrade this easy dish! Cooked to perfection and smothered in a flavorful sauce, I know you will love this recipe just as much as my family has!

  • Salmon: I try to pick wild-caught salmon because it is less fatty and healthier than farmed salmon is. It is also more sustainable! Wild-caught salmon will be darker and more vibrant in color than its farmed counterparts. Try to pick salmon that looks moist and doesn’t have brown spots around the edges.
  • Fillet Sizes: The thicker a salmon fillet is, the longer it takes to cook. I recommend choosing fillets that are roughly the same size and thickness so that they all cook up quickly and thoroughly.
  • Why Broil: Broiling is one of my favorite ways to cook up salmon. Not only is it easy, it keeps your fish tender while creating the perfect, caramelized top.
  • Thickening Glaze: If you want to thicken your sauce, you can add a teaspoon of cornstarch at a time until you have reached your desired consistency.
  • Additional Flavors: You can customize your glaze with other ingredients like honey and hot sauce to adjust heat and sweetness to your liking.
  • When Salmon Is Done: You will know that your salmon is done cooking when it turns opaque and flaky. Keep in mind, if your fillets are thick it may need a few more minutes of cooking before you reach this point.
Pouring glaze over salmon in tin foil.

What to Serve Asian Glazed Salmon With

My personal favorite way to enjoy this salmon is with sides that can complement its health benefits. Because of this, grilled vegetables and brown rice are usually in the lineup alongside this tasty dish! You can also have an Asian-inspired night and pair your salmon with potstickers, wontons, and fried rice for an easy take-out style dinner at home!

Salmon in tin foil covered in glaze.

How to Store Asian Glazed Salmon

Being able to reheat in both the oven and the microwave makes this salmon the perfect quick and delicious meal! Great for those of you on the go! Kids can even warm it up for a tasty afternoon snack.

  • In the Fridge: Once your salmon has cooled down completely, you can store it in an airtight container for 3 days.
  • In the Freezer: Asian glazed salmon will keep for up to 6 months in the freezer. Thaw overnight in the fridge before reheating.
  • Reheating: You can microwave your salmon on 50% power for 30 second intervals or until heated through. You can also pop it in the oven, wrap it in tin foil, at 275 degrees Fahrenheit for 10-15 minutes.
Taking a bite of asian glazed salmon, garnished with green onions.
Print

Asian Glazed Salmon

Blanketed with an insanely good soy garlic glaze, this juicy Asian glazed salmon is to die for! With how healthy and delicious it is, it will become your new lunch go-to!
Course Dinner, Main Course
Cuisine Asian American
Keyword asian glazed salmon, salmon, salmon recipes
Prep Time 10 minutes
Cook Time 10 minutes
Total Time 20 minutes
Servings 4 Servings
Calories 432kcal
Author Alyssa Rivers

Ingredients

  • 3/4 cup brown sugar
  • 1/3 cup soy sauce
  • 2 Tablespoons hoisin sauce
  • 2 Tablespoons ginger peeled and grated
  • Dried red pepper flakes to taste
  • 1/2 teaspoon minced garlic
  • 1 Tablespoon lime juice
  • 4 1 to 2 pounds salmon fillets boneless, skinless

Instructions

  • In a medium saucepan, whisk together brown sugar, soy sauce, hoisin sauce, ginger, red pepper flakes, garlic, and lime juice.
  • Bring to a boil over medium heat until sauce thickens. Set aside.
  • Preheat the broiler to high. Line a baking dish with foil and place salmon on top.
  • Baste with glaze and broil for 4 minutes. Remove salmon from the oven, turn over, baste with glaze and return to the oven to broil for 4 more minutes.
  • Carefully remove salmon from the oven and baste one more time before serving.

Notes

Updated on August 1, 2021
Originally Posted on June 19, 2013

Nutrition

Calories: 432kcal | Carbohydrates: 46g | Protein: 36g | Fat: 11g | Saturated Fat: 2g | Cholesterol: 94mg | Sodium: 1296mg | Potassium: 953mg | Fiber: 1g | Sugar: 43g | Vitamin A: 68IU | Vitamin C: 1mg | Calcium: 61mg | Iron: 2mg


from The Recipe Critic https://ift.tt/2WzGf9o
https://ift.tt/2VmIZGP

शनिवार, 31 जुलाई 2021

Melon Salad with a Citrus Honey Mint Dressing

I don’t know about you but nothing hits the spot more on a hot summer day than fresh fruit and salads! Combine the two together and our melon salad will leave you feeling refreshed and satisfied!

This simple melon salad is easy to make but completely delightful to your tastebuds! It cools you down with the watery melon taste but adds a splash of flavor with the citrus honey mint dressing! Pair this with our burgers, corn, and some lemonade. These 4 recipes will create a summer meal for the books!

A bowl filled with different types of melons topped with a dressing.

Melon Salad with Citrus Honey Mint Dressing

Summer brings with it the desire to be outside, enjoying the refreshing sun on my face. There is always excitement in the air for all of the vacations and holidays and outdoor activities! I catch the summer bug and will do just about anything to hold on to that feeling! Making delicious and refreshing salads is one of those things and this one is a salad to remember. I love any excuse to use juicy melons including making a delicious watermelon agua fresca which is always a huge hit!

There is just something so simple about mixing different melons together and creating so much flavor. This recipe is not only delicious but most importantly, it’s a super easy recipe to make! After all, who doesn’t like a recipe that only requires 1 tool and a few ingredients?? Once you’ve finished balling up the melons, take it to the next level by drizzling the citrus honey mint dressing all over, and voila! You have a salad to impress!

What’s in Melon Salad with Citrus Honey Mint Dressing?

There isn’t much I love more than a simple recipe that packs a punch! This melon salad has only a few ingredients and delivers on taste, ease AND it looks impressive! For ingredient measurements, see the recipe card below.

  • Watermelon, honeydew, and cantaloupe: Use a melon baller scoop to create perfectly round balls. If you don’t have one of these, you can slice your melon up into cubes!
  • Lemon and lime: These juices will give this salad a fresh taste and a great citrus flavor!
  • Mint: Chop the mint up finely so that the flavor can be spread evenly throughout the salad.
  • Honey: The honey will balance out the citrus with a dash of sweetness!
A bowl filled with fruit, all scooped as small pieces.

How to make Melon Salad with Citrus Honey Mint Dressing

It only takes as long as scooping out the melon to make this recipe!! It looks impressive and colorful all while being simple and insanely delicious!

  1. Scooping the melon: Take each melon and using your melon scoop (or if you don’t have one, just cut the melon into cubes). Scoop out the melon and place it into the bowl. Do this for all 3 melons then combining them together.
  2. Whisk the Dressing: Next thing to do is make the dressing! Combine the lemon and lime juice into a separate small bowl, stir in the honey until it is dissolved. Then, chop up the mint into fine pieces and stir it in with the honey and juices.
  3. Mix together: Last step is to pour it over the salad until the melons are covered. Serve and enjoy!!
A bowl filled with watermelon, honeydew and cantaloupe scooped in small sizes with dressing being poured on them.

Tips and Variations For the Best Fruit Salad

We all know that the best part about salads is that you just put them in the refrigerator and keep coming back for more. The trick is how to make them last the longest! Follow these easy tips and you’ll be able to munch on these leftovers for days!

  • Smoothie and Juices: Once the melons get soft and extra juicy, then they are probably about on their last leg. However, this is a great time to use them in a smoothie or juice! Toss them in a blender with some ice and any additional fruit and you have yourself a delicious summer drink!
  • Cutting Melons: If you don’t have a round scoop to cut the melons into circles, cutting them into ½ inch to inch squares will also work. If you still want it to look fancy, try cutting them into trianagles for a fun shape and look.
  • Add Ins: Berries, mango and peaches are a sweet addition to this melon salad.
  • Serving: Garnish the melon salad with fresh mint and place in a clear bowl or platter for all to see the beatiful melon colors.
3 different melons on a spoon topped with mint dressing.

Leftovers Callout Title

  • Making Ahead: Store your round melon balls in an air tight container with lemon juice over top for 3 to 5 days. Whisk together the dressing right before you are ready to serve.
  • Refrigerating: Wrap your container with tightly sealed plastic wrap. This will preserve the melons in your fridge for 3-5 days. Don’t forget to seal it after each time it gets opened!
  • Freezeing Fruit: If you find yourself not able to finish the salad in time, you can freeze it! Place it in an airtight container and you can freeze it for up to 12 months!
A bowl of fruit salad with melons and dressing.
Print

Melon Salad with Citrus Honey Mint Dressing

I don't know about you but nothing hits the spot more on a hot summer day than fresh fruit and salads! Combine the two together and our melon salad will leave you feeling refreshed and satisfied!
Course Salad, Side Dish
Cuisine American
Keyword melon salad
Prep Time 15 minutes
Total Time 15 minutes
Servings 4 people
Calories 548kcal
Author Alyssa Rivers

Ingredients

  • 1 small watermelon
  • 1 cantaloupe
  • 1 honeydew

Honey Citrus mint glaze:

  • Juice of half lemon
  • Juice of half of a lime
  • 3 Tablespoons honey
  • 1 Tablespoon mint chopped

Instructions

  • Using a melon baller scoop round spheres out of each of the melons and place them into a medium-sized bowl.

To make the honey citrus dressing:

  • In a small bowl add the lemon juice, lime juice, honey and mint and whisk. Pour over the salad and mix until incorporated.

Nutrition

Calories: 548kcal | Carbohydrates: 138g | Protein: 10g | Fat: 2g | Saturated Fat: 1g | Polyunsaturated Fat: 1g | Monounsaturated Fat: 1g | Sodium: 92mg | Potassium: 2373mg | Fiber: 8g | Sugar: 120g | Vitamin A: 11282IU | Vitamin C: 200mg | Calcium: 114mg | Iron: 4mg


from The Recipe Critic https://ift.tt/2V7iXra
https://ift.tt/3C3ICl2

Dill Pickle Dip

Calling all pickle lovers! Loaded with chopped pickles and herbs, this dill pickle dip is bursting with flavor and absolutely irresistible!

Dips are the perfect summer treat. They are the best crowd-pleasers with how easy-to-make and delicious they are! Jalapeno popper, million-dollar, and hot corn are some of my other favorites!

Dill pickle dip with potato chips, celery, and carrots.

Easy and Delicious Dill Pickle Dip Recipe

As someone who loves easy and delicious dips, I am SO excited to share this recipe with you. This dip only has 6 ingredients and comes together in minutes to create the most amazing zesty, creamy flavor! Because of this, it is always requested at family parties and is gobbled up in no time. The tangy flavor pairs so well with chips, crackers, fresh veggies, you name it! Even my family members who don’t like pickles have become a believer after trying this pickle dip.

Dill pickle dip is the perfect, easy dish for potlucks and game days. Additionally, it is so easy to make and just as easy to store and take on the go! That being said, my personal favorite way to enjoy this insanely good dip is for a Netflix binge night. Like binging your new favorite show, resisting another bite of this flavorful, addictive dill pickle dip is impossible. It is the perfect addition to your easy-to-make snack arsenal!

What You Need For Pickle Dip

With only a handful of simple ingredients, this pickle dip is an easy and inexpensive treat to throw together! It is also easy to customize flavors and substitute ingredients to your liking. I have all individual measurements listed in the recipe card below.

  • Cream Cheese: This is the creamy base of the dill pickle dip. Having your cream cheese at room temperature helps everything to mix together well! Also, a dairy-free variation of this dip can be made with cream cheese like Miyoko’s or Daiya.
  • Sour Cream: Sour cream adds a smooth texture and tangy flavor to your dill pickle dip. Greek yogurt works as a great substitute, too!
  • Chopped Dill Pickles: Small whole dill pickles, finely chopped, are what I like to use in this recipe! You can adjust the size of your dill pieces to your liking.
  • Garlic Powder: Adds a boost of flavor to your dip. Using fresh garlic is another way to achieve this.
  • Dill Weed: Used to add fresh, zesty flavor to your dip and also a hint of texture.
  • Dill Pickle Juice: Dill pickle juice will add additional flavor to your dip. It can also be used to make your dill pickle dip thinner until you reach your desired consistency!

How to Make the Best Dill Pickle Dip

This dip is rich and tasty with minimal effort. As a result, no one will suspect you made it minutes before the party with how much scrumptious flavor is loaded in each bite! You can even use your extra time to make homemade chips to really impress your guests.

  1. Combine Ingredients: In a medium size combine the cream cheese, sour cream, chopped dill pickles, garlic powder, dill weed, and pickle juice until incorporated.
  2. Serve or Chill: Serve immediately or chill for an hour to let the flavors blend and cheese to thicken.
Dill pickle dip ingredients in a glass bowl.

Making the Best Dill Pickle Dip

Dill pickle dip can easily be customized to suit your tastes. So, whether you want to add more flavors or change up texture, you can use these easy tips to craft the best dip possible!

  • Different Pickles: Any kind of pickle will work here, use your favorite! You could try using hot pickles to add a little heat to your dill pickle dip!
  • Flavor Enhancers: Adding diced onion or onion powder to your dip gives it a pop of savory flavor. Jalapeños, a dash of Chili powder or paprika can add great flavor, as well. A little heat plays perfectly with the zesty flavor of dill.
  • Convert to Cheese Ball: Want dill pickle dip but in cheese ball form? No problem! Easily convert your dip into a cheese ball by placing mixture onto plastic wrap and gently shaping it into a ball. Next, refrigerate for at least an hour or until it is set in place. It is then ready to be transferred to a serving dish.
  • Dip Too Thick: If your dill pickle dip becomes too thick, add a spoonful of pickle juice at a time until you get the consistency you are looking for. Also, keep in mind that this dip will become thicker while resting in the refrigerator. If you’re making it in advance, you may need to add a splash of pickle juice to your dip before serving.
  • Serve With: Serve your dill pickle dip up with crackers, chips, veggies or pita. Zucchini chips are a tasty, healthy snack that also pairs wonderfully with dill pickle dip! Also, you can use this as a spread for sliders and sandwiches for a zesty pop of flavor!
Dill pickle dip on serving dish with chips and veggies.

Storing Leftover Dill Pickle Dip

My favorite part about dips is that they are so incredibly easy to store! You can eat them straight from the Tupperware container which makes them the ultimate anytime snack.

  • In the Refrigerator: Store your dill pickle dip in an airtight container for 3-4 days.
  • In the Freezer: This dip will keep in the freezer for up to 2 months in an airtight container. Thaw in the fridge before serving.
Putting dill pickle dip on a potato chip.
Print

Dill Pickle Dip

Calling all pickle lovers! Loaded with chopped pickles and herbs, this dill pickle dip is bursting with flavor and absolutely irresistible!
Course Appetizer, Snack
Cuisine American
Keyword dill pickle dip, dill pickle dip recipe
Prep Time 10 minutes
Total Time 10 minutes
Servings 6 people
Calories 169kcal
Author Alyssa Rivers

Ingredients

  • 8 ounce cream cheese softened
  • 1/2 cup sour cream
  • 1 cup finely chopped dill pickles
  • 1 teaspoon garlic powder
  • 1 Tablespoon dill weed chopped
  • 2 Tablespoons dill pickle juice

Instructions

  • In a medium-size bowl combine the cream cheese, sour cream, chopped dill pickles, garlic powder, dill weed, and pickle juice until incorporated.
  • Serve immediately or chill for an hour to let the flavors blend together and the cheese to thicken.

Nutrition

Calories: 169kcal | Carbohydrates: 3g | Protein: 3g | Fat: 17g | Saturated Fat: 9g | Polyunsaturated Fat: 1g | Monounsaturated Fat: 4g | Cholesterol: 52mg | Sodium: 211mg | Potassium: 86mg | Fiber: 1g | Sugar: 2g | Vitamin A: 632IU | Vitamin C: 1mg | Calcium: 59mg | Iron: 1mg


from The Recipe Critic https://ift.tt/3rNWyLl
https://ift.tt/3xf83MU