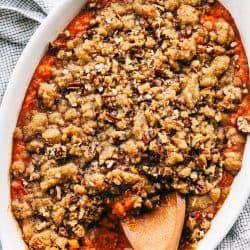
The best sweet potato casserole is smooth and creamy, sprinkled with a brown sugar pecan mixture. It’s a sweet and savory side dish that is perfect for the holidays!
Get ready for a life-changing moment with this sweet potato casserole recipe. If you love sweet potatoes like us, try honey cinnamon, candied, mashed, or this amazing sweet potato hash.

The Best Sweet Potato Casserole Recipe
Sides are my favorite part of Thanksgiving. I always find myself going back for seconds. Mashed potatoes, stuffing, even cranberry sauce… without them, Thanksgiving wouldn’t be Thanksgiving! I could go on and on about my love for these, but for now, let’s talk about this AMAZING sweet potato casserole! It is truly the best I have ever had. It starts with softened sweet potatoes which creates the creamiest, most delicious texture! Then, with a little milk, eggs, vanilla, and brown sugar, it becomes a heavenly sweet treat. Top it with a crumbly brown sugar pecan mixture, and voila! A knockout side!
This sweet potato casserole is honestly so delicious, I will make it outside of the Thanksgiving season. This and corn casserole are some of the most requested sides by my family. I always make sure to make double batches since it goes so quickly! If you are looking for a foolproof recipe for the holidays, this is it. I know that you and yours will love it just as much as my family does! It’s fluffy, nutty, and sweet, with the rich sweetness of brown sugar in each bite. Truly, it is an irresistible side dish that will be loved by all.
Sweet Potato Casserole Ingredients
I love that the ingredients for this casserole are so simple. As long as you’ve got the sweet potatoes and pecans, chances are the rest of the ingredients are in your kitchen! This side dish is as easy to put together as it is delicious.
- Sweet Potatoes: These need to be softened ahead of time for best results. I’ll give you some tips below!
- Brown Sugar: Adds sweetness to the potatoes.
- Eggs: Bind all of the ingredients together and add to the creamy texture!
- Vanilla: Just a dash for extra flavoring.
- Milk: Makes your casserole perfectly smooth and creamy! I always opt for whole-fat milk here. The fat content makes each bite absolutely dreamy.
- Butter: Melted and added for a richer flavor.
Pecan Topping
- Brown Sugar: Gives your topping sweetness and a bit of texture.
- Flour: Separates and ensures no clumping with the sugar and pecans. It’s also going to add a tasty, crumbly texture.
- Melted Butter: Holds everything together and helps bake the topping perfectly.
- Pecans: Chopped and mixed in for a crunchy texture.
How Do I Prepare Sweet Potatoes for a Casserole?
There are a few ways of cooking sweet potatoes for this casserole recipe. The goal is to soften the sweet potatoes enough so they are easy to mash! You can either roast or boil your sweet potatoes. Both ways work great, it comes down to your personal preference! You can also use my mashed sweet potato recipe for more in-depth tips and tricks.
- Roasting: First, rinse and completely dry your sweet potatoes. Poke them with a fork a few times for ventilation. Next, lay your potatoes on a large baking sheet lined with foil and give them a spritz of cooking spray. Bake them for 1 hour at 400 degrees Fahrenheit. Check with a fork to make sure they are tender. Once they’re done, let them cool. They’re now ready to peel! The skins should be soft enough to remove with your fingers. Give your sweet potatoes a quick chop and then add to a bowl for mashing.
- Boiling: Prepare your sweet potatoes by peeling and chopping them into 1-inch chunks. Bring a large pot of salted water to a boil. Then, add the potatoes and boil for 20-30 minutes until tender. Strain the water out and add potato chunks to a large bowl for mashing.

Mashing Sweet Potatoes
Sweet potatoes can be mashed using several methods. It ultimately comes down to your preference and the tools you have on hand!
- Hand Mashing: You can mash with either a fork or a potato masher. These methods will leave you with a rustic-style mash, with a mix of creamy potatoes and sweet chunks.
- Mashing with Appliances: Using a mixer or a food processor will leave you with equally smooth and creamy mashed sweet potatoes.
How to Make the Best Sweet Potato Casserole
Making this casserole is so easy, be prepared to have it as a regular in your holiday lineup! It’s so creamy and insanely good, you’re going to love it! Even my picky eater kids agree that this is one of the best parts of Thanksgiving.
- Prep Casserole Dish: To begin, spray a 1 ½ to 2 quart casserole dish with cooking spray and set aside.
- Mix Casserole Ingredients: In a large mixing bowl, combine mashed sweet potatoes, brown sugar, eggs, vanilla, milk, and melted butter. Pour into prepared casserole dish.
- To Make the Topping: Combine brown sugar, flour, melted butter and chopped pecans. Sprinkle over the top.
- Bake: Bake at 350 degrees for 30-40 minutes until cooked throughout and the top is lightly brown.

Sweet Potato Casserole Tips and Variations
One of the things I love most about this casserole recipe is that you can easily adjust it to your liking! You can change the mashing method depending on what kind of texture you want, and you can add additional flavors, too! Here are a few tips and tricks to upgrade your casserole this Thanksgiving!
- Add Different Nuts: If you’re not a fan of pecans, you can swap them out for other nuts with a sweet and savory crunch or just omit them entirely. Walnuts or almonds are always a great choice! I have also loved making this recipe with cinnamon sugar candied almonds.
- Adding Marshmallows: Marshmallows are so fun to use! They also brown perfectly, leaving the top layer perfectly glazed and golden. Add 1 cup of mini marshmallows on top 5 minutes before baking time is done. They should be nice and golden-brown!
- Seasonings and Spice: Sometimes I like to add in a pinch of pumpkin pie spice or cinnamon to my sweet potato mixture. It gives it a nice warmth and a flavor fit for fall.
More Thanksgiving Favorites
Looking to switch up your recipe lineup this year? These are some of my all-time favorite Thanksgiving recipes, and they’ve never let me down! Just like this sweet potato casserole, they’re easy to make and bursting with flavor! I know they’ll bring joy to your friends and family just like they have with mine. I’ve included recipes both savory and sweet to satisfy each craving!

Side Dishes
Creamy Parmesan Garlic Brussels Sprouts Recipe
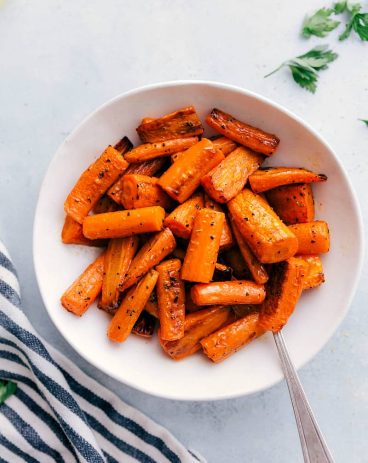
Side Dishes
Honey Orange Glazed Carrots
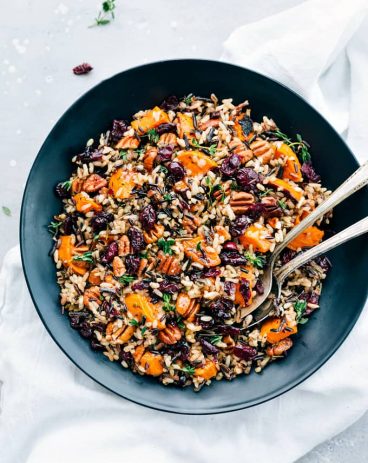
Side Dishes
Cranberry Pecan Sweet Potato Wild Rice Pilaf


Storing Sweet Potato Casserole Leftovers
With the holidays just around the corner, the more prepared you are, the better. This sweet potato casserole recipe can be made in advance! It’s also perfect for leftovers if you want a quick and tasty treat days after Thanksgiving.
- Preparing Ahead: Assemble your sweet potato casserole in your casserole dish and cover with wrap or foil. It will keep in the refrigerator for up to 3 days. Simply follow baking instructions once you’re ready to serve! It’s so easy to just pop it in the oven and prepare your other Thanksgiving dishes.
- Storing in the Refrigerator: Leftovers are the best part of Thanksgiving! Make sure your casserole has cooled completely. Then, either transfer to an airtight container or cover with plastic wrap. It will stay good for 1 week!
- Storing in the Freezer: Store your cooled casserole in an airtight container. It will keep for 1 month. Thaw overnight before serving.
- Reheating: When you’re ready to reheat your sweet potato casserole, place it in the oven at 300 degrees Fahrenheit for 10-15 minutes, or until warmed through. You can also pop a serving in the microwave for 15-20 second intervals until warm.

Tried and True Sweet Potato Recipes
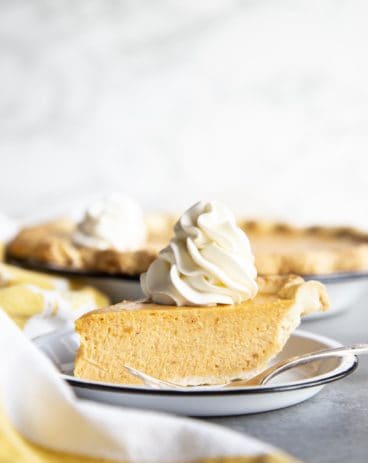
Desserts
Sweet Potato Pie

Side Dishes
Crispy Garlic Sweet Potato Fries Recipe
Side Dishes
Air Fryer Sweet Potatoes
Side Dishes
3 Ingredient Candied Sweet Potatoes
A Reader’s Review
The Best Sweet Potato Casserole
Ingredients
- 3 cups mashed sweet potatoes
- 1 cup brown sugar
- 2 large eggs lightly beaten
- 1 teaspoon vanilla
- 1/2 cup milk
- 1/2 cup melted butter
Topping:
- 1/2 cup brown sugar
- 1/3 cup flour
- 1/3 cup melted butter
- 1 cup chopped pecans
Instructions
-
Prepare a 1 ½ to 2-quart casserole dish with cooking spray and set aside. In a large mixing bowl, combine mashed sweet potatoes, brown sugar, eggs, vanilla, milk, and melted butter. Pour into prepared casserole dish.
-
To make the topping: Combine brown sugar, flour, melted butter, and chopped pecans. Sprinkle over the top.
-
Bake at 350 degrees for 30-40 minutes until cooked throughout and the top is lightly brown.
Video
Notes
Nutrition
from The Recipe Critic https://ift.tt/32PgjUK
https://ift.tt/2qf3fux