बुधवार, 24 नवंबर 2021

The Perfect Smoked Turkey

Just in time for Thanksgiving, this perfect smoked turkey is juicy and tender with a subtle smoky flavor. Start with a simple brine and fresh herbs to make each bite burst with flavor!

No Thanksgiving is complete without a turkey! Looking to switch things up this year? Try my oven-baked herb, air fryer, or slow cooker turkeys!
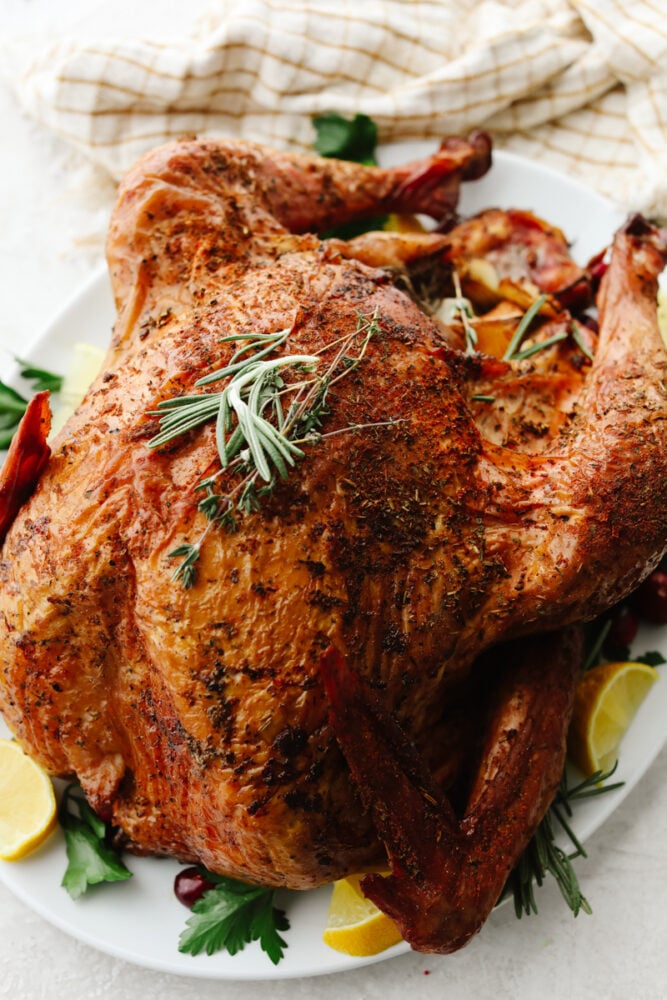
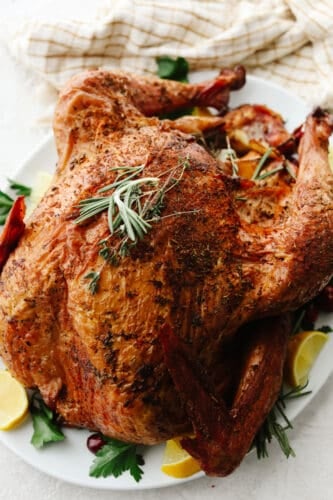
A full smoked turkey on a white plate with garnish.

Amazing Garlic Herb Smoked Turkey Recipe

We have smoked a turkey now for the past two Thanksgivings in a row and I don’t think we will ever go back! Smoking creates some of the juiciest, most amazing turkey I have ever experienced. Dry, flavorless turkey is now a thing of the past! This recipe has been foolproof for me. My turkeys have ended up moist and flavorful each time. To flavor from the inside out, I start out with a simple turkey brine to infuse the meat with flavors of citrus and herb. Then, I generously coat my turkey with my favorite blend of garlic, pepper, and aromatic Italian herbs. I like to stuff my turkey with lemons, onion, and extra herbs to flavor and help tenderize. Then it’s off to the smoker! You’re going to love how easy this is to prepare.

Truly, this smoked turkey is a lot easier than it looks. Whether you’re seasoned in the art of smoking or this is your first time, this recipe will do all of the heavy lifting! It’s super straightforward! I’ve even included a graphic below to give you temperatures and cooking times for all of your smoking endeavors. Once you start smoking your meat, you won’t want it any other way! No matter what meat you choose, it ends up soft, juicy, and deliciously smoky every time. You can find my list of smoked recipes here, with more soon to come!

Everything You Need for the Best Smoked Turkey

The best part about this smoked turkey recipe is that it uses simple ingredients from your cabinet! Thanksgiving is hectic as it is, no need to brave the grocery store! See the recipe card below for a full list of ingredients and measurements.

  • Turkey Brine: A brine is a simple saltwater mix, but I like to add in herbs and citrus for extra flavor! It also helps to tenderize. While this step is optional, I highly recommend putting in the time for a more flavorful turkey! You can find my full recipe here.
  • Whole Turkey: Make sure the giblets and neck are removed.
  • Paprika: I love adding paprika to my turkey rub for some mild spice! It tastes amazing in contrast to the smoky flavor.
  • Garlic Powder: You can’t go wrong with garlic! Added for the perfect savory flavor.
  • Italian Seasoning: This is my personal blend of herbs like rosemary, thyme, marjoram, and basil. It upgrades whatever dish it’s added to!
  • Onion Powder: I love the hint of sharp flavor that onion powder adds to turkey.
  • Salt and Pepper: Used to enhance the smoked turkey’s overall flavor.
  • Apple: I add quartered apples to the inside of the turkey for moisture and a subtle sweet flavor.
  • Onion: Like the apples, I stuff the turkey with quartered onions to flavor from the inside out!
  • Lemon: Sliced lemons are added to the inside of the turkey for zesty flavor.
  • Fresh Rosemary: I like adding whole sprigs of rosemary inside the turkey for flavor. They also work great as a pretty garnish!

What Kind of Smoker Should I Use?

I use the Camp Chef Woodwind grill! It smokes everything to perfection! I find that it balances heat really well to make sure whatever you’re making is cooked evenly! Not to mention, it has built-in wifi so I can monitor and change temperatures on my phone! Anything that lets me keep an eye on dinner while watching Netflix is a win in my book. I highly recommend their products!
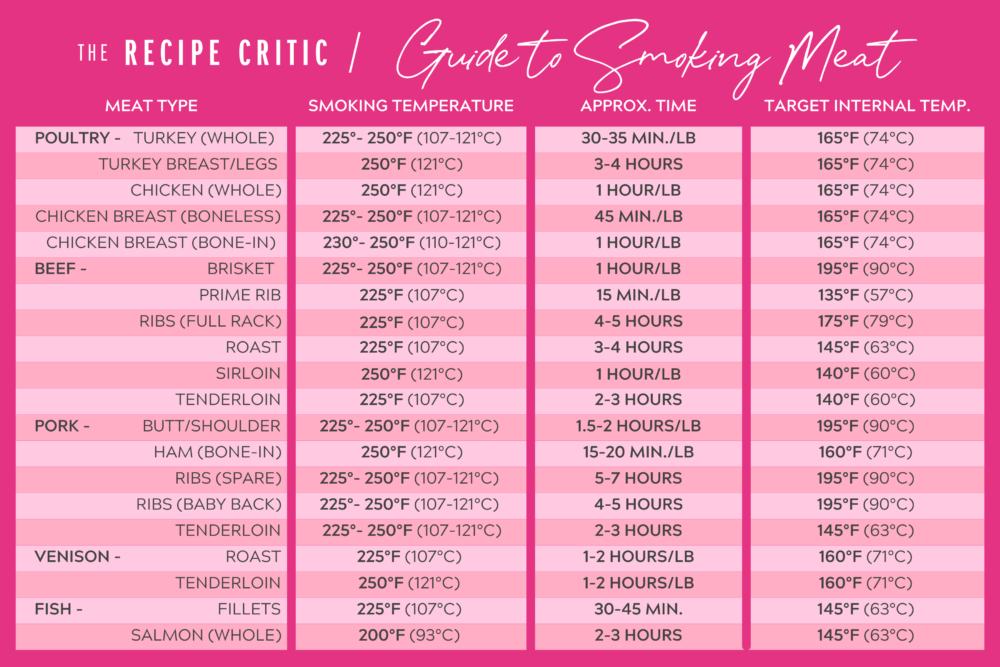
A graphic showing cooking times and temperatures for smoked meats.

How to Make the Perfect Smoked Turkey

In just 5 easy steps you can make an amazing smoked turkey, too! Trust me, this turkey is going to be the star of the show with how tender, delicate, and juicy it is! It’s always a favorite with my friends and family.

  1. (Optional) Brine and Pat Dry: Let’s get smoking! First, remove the turkey from the brine and and pat dry with a paper towel.
  2. Preheat Smoker, Combine Seasonings: Next, preheat the smoker to 225 degrees. In a small bowl, combine the paprika, garlic powder, italian seasoning, onion powder, salt and pepper. Rub generously on the entire turkey.
  3. Stuff: Fill the cavity of the turkey with the apple, onion, lemon and rosemary.
  4. Smoke: Next, place the turkey in the smoker and smoke for 30 minutes per pound. Put the meat thermometer into the thigh without touching the bone, or an about an inch into the thickest part of the breast. Smoke until the internal temperature is 165 degrees Fahrenheit.
  5. Rest: Once the turkey has reached the target internal temperature, remove from the smoker and let rest 10-15 minutes before carving.
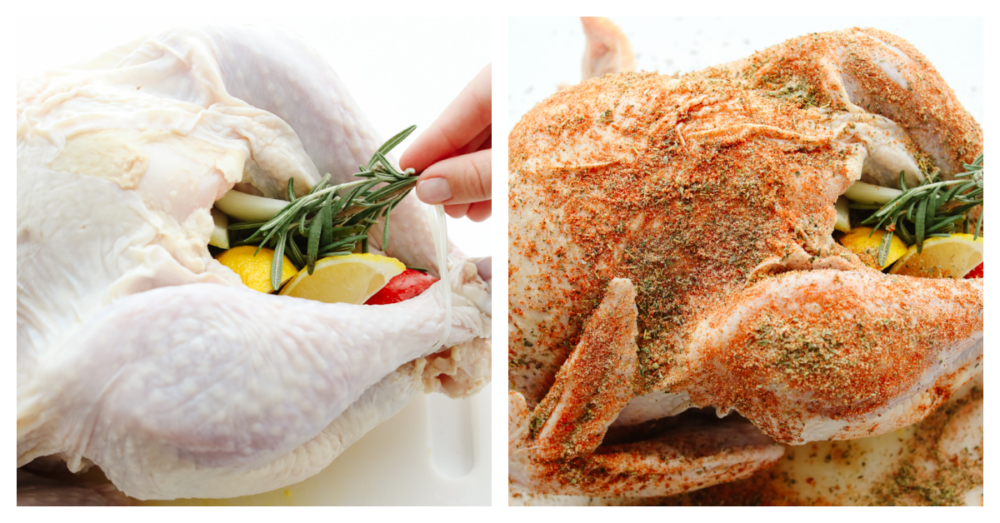
Process shots of stuffing and seasoning turkey.

Smoked Turkey Tips and Tricks

Add these simple tips into your turkey-making process and you’ll have a masterpiece for the holidays! Honestly, smoked turkey is a game-changer. It’s one of the best ways to keep your turkey moist and full of flavor! Now you can have a turkey that looks like a showstopper and tastes like one, too!

  • Thaw in Time: Be sure to thaw your turkey before smoking so it cooks through completely! For a 12-15 pound turkey, I like to thaw 4 days in advance.
  • Don’t Skip the Brine: If you want the best turkey possible, don’t skip the brine! Brining your turkey helps to break down proteins. This makes your turkey more moist and tender! I like to add in herbs and citrus to help infuse flavor, too. You can find my recipe here! It does take 1-3 days to see best results, so keep this in mind so you’re not scrambling before Thanksgiving!
  • Keep Your Grill Closed: I know it’s tempting to open your grill to see how everything’s coming, but I recommend keeping it closed for as long as possible to maintain the right smoking temperature!
  • Check Internal Temperature: The last thing you want to do this Thanksgiving is make your guests sick. It’s super important to make sure the internal temperature of your smoked turkey has reached at least 165 degrees Fahrenheit.
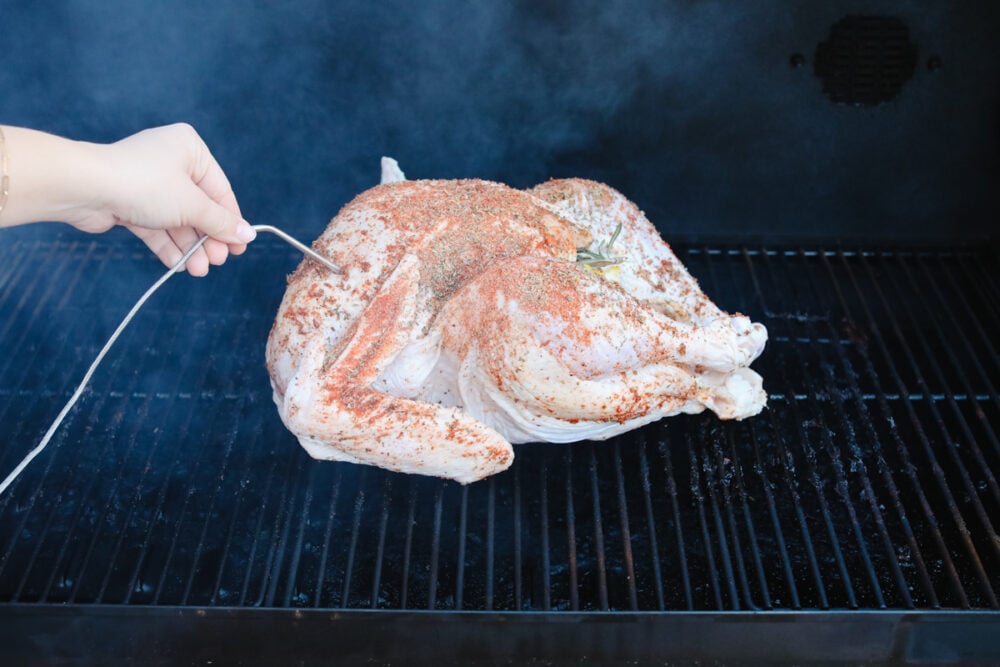
Checking the internal temperature of the turkey.

Amazing Thanksgiving Sides

It will take 7-8 hours to smoke your turkey, so this gives you plenty of time to prepare the rest of Thanksgiving! What would Thanksgiving be without sides? Here are some of my absolute favorite recipes that will pair perfectly with your smoked turkey. I’m sure you’ll love them all!

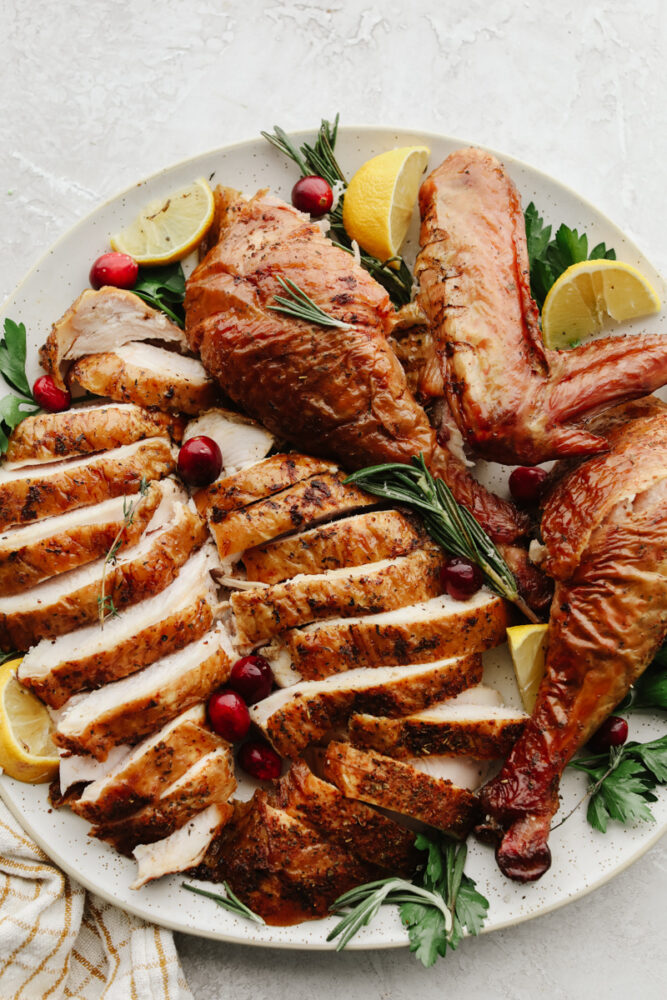
Sliced turkey on a white plate with rosemary, lemon, and cranberry garnish.

Storing Leftover Smoked Turkey

I’m a fiend for Thanksgiving leftovers. Especially turkey! My favorite way to use it is in sandwiches. The smoky flavor of this particular turkey makes them so delicious!

  • In the Refrigerator: Remove any stuffing or fillings and wrap turkey in plastic wrap. Store in the fridge for up to 1 week.
  • In the Freezer: You can store leftover smoked turkey in a freezer safe bag for up to 4 months. Thaw in the fridge for 24 hours before serving/reheating.
  • Reheating: I like to warm leftover turkey in the oven at 325 degrees Fahrenheit. Be sure internal temperatures reach 165 degrees before serving.
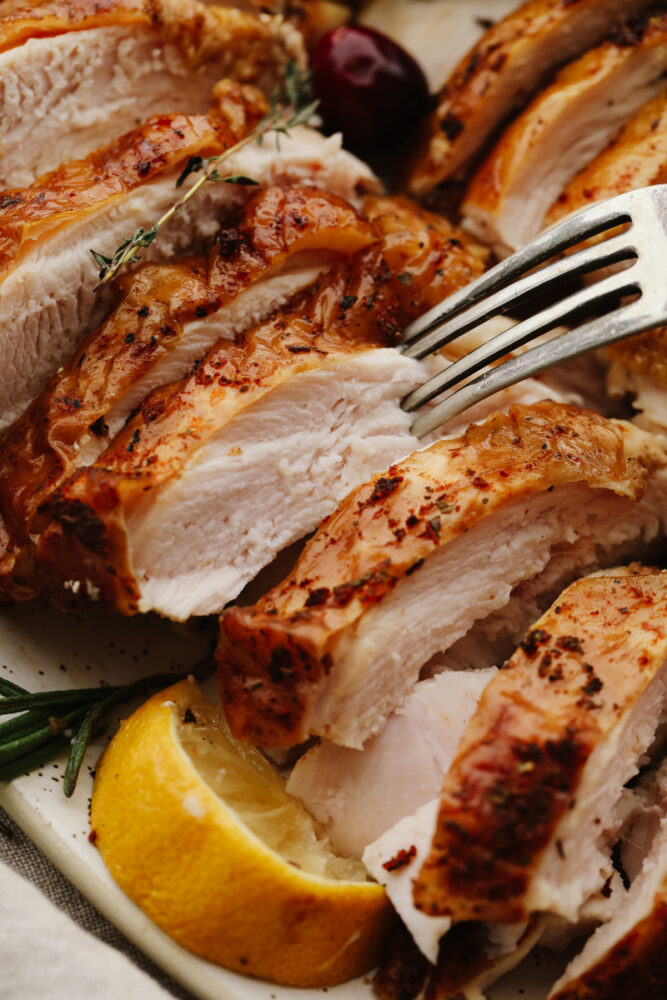
Closeup of a turkey slice being stuck with a fork.
Print

Perfect Smoked Turkey

Just in time for Thanksgiving, this perfect smoked turkey is juicy and tender with a subtle smoky flavor. A simple brine and fresh herbs make each bite burst with flavor!
Course Dinner, Main Course
Cuisine American
Keyword smoked turkey
Prep Time 10 minutes
Cook Time 4 hours
Total Time 4 hours 10 minutes
Servings 8 people
Author Alyssa Rivers

Ingredients

  • 1 Turkey Brine Recipe optional
  • 12-15 pound whole turkey giblets and neck removed
  • 1 Tablespoon Paprika
  • 1 Tablespoon Garlic Powder
  • 1 Tablespoon Italian Seasoning
  • 1 teaspoon onion powder
  • 1 teaspoon salt
  • 1/2 teaspoon pepper
  • 1 Apple quartered
  • 1 onion quartered
  • 1 lemon sliced
  • Fresh Rosemary

Instructions

  • Remove the turkey from the brine and pat dry with a paper towel. *see notes
  • Preheat the smoker to 225 degrees. In a small bowl combine the paprika, garlic powder, Italian seasoning, onion powder, salt, and pepper. Rub generously on the entire turkey.
  • Stuff the cavity of the turkey with the apple, onion, lemon, and rosemary.
  • Place the turkey in the smoker and smoke for 30 minutes per pound. Put the meat thermometer into the thigh without touching the bone, or about an inch into the thickest part of the breast. **see notes. Smoke until the temperature is 165 degrees.
  • Once the turkey has reached the temperature, remove it from the smoker and let rest 10-15 minutes before carving.

Notes

*Brining the turkey is optional, but we love the flavor of the turkey.
** I had a 16 pound turkey and it took about 7 ½ hours. I bumped the temperature up to 250 degrees the last hour so it would be done a little bit faster.


from The Recipe Critic https://ift.tt/3CQVmut
https://ift.tt/3nIWk80
मंगलवार, 23 नवंबर 2021

Awesome Smoked Salmon Dip

This smoked salmon dip is so creamy and delicious! With the smoked salmon flavor taking the stage followed by a hint of lemon and dill, this dip is SOO GOOD!

I love dips because they are easy and delicious! If you like them too and want to try out more then start with this Crab Dip, Hot Corn Dip, and this Creamy Chicken Alfredo Dip!

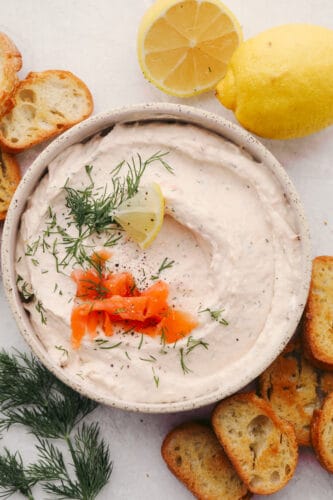
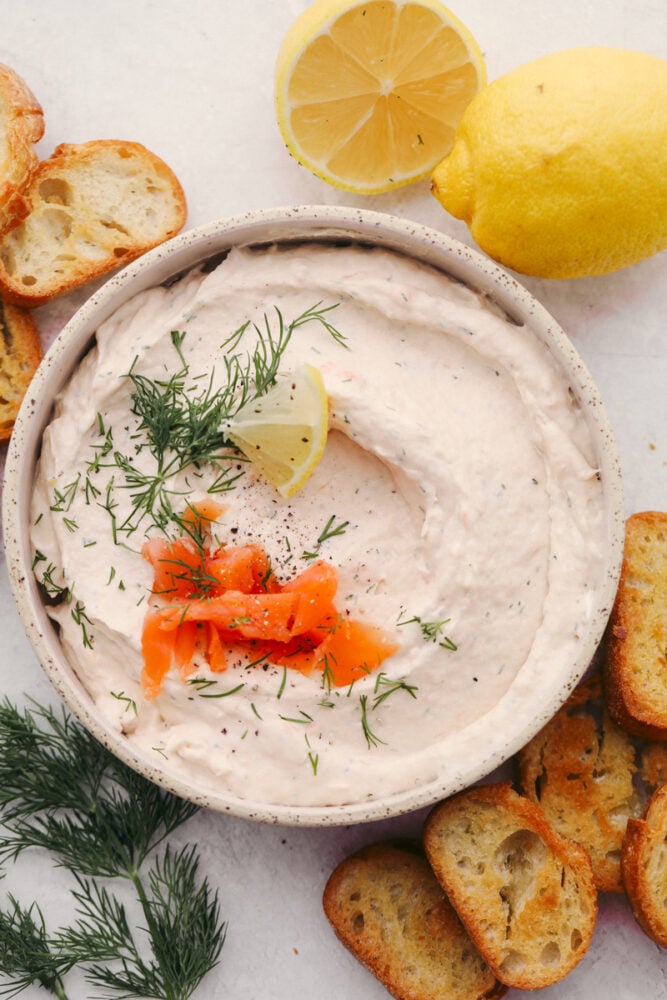
Smoked salmon dip in a bowl with some garnish.

Salmon Dip

I have bought salmon dip from the store and not only is it super expensive but it only has a tiny bit of salmon flavor! This dip is SO much better and you can taste the smoked salmon so strongly in every single bite! Plus, when you combine it with some tangy cream cheese and some lemon, garlic, and dill… well… It doesn’t get much better!

I especially love this dip because you can use it on so many occasions! It’s fancy enough to use at a holiday dinner as an appetizer. Or, you can whip it up for yourself and put it on some crackers, a crostini, or even a toasted bagel at breakfast. This dip is insanely delicious! In fact, because it only takes 5 minutes to whip up, I bet that you make it all the time! I know that I do. Enjoy!

Ingredients for Smoked Salmon Dip

When you mix these ingredients together you are mixing up a little slice of heaven! It’s so, so good! See the recipe card below for a list of exact ingredient measurements!

  • Cream cheese: If you set this out beforehand so that it is at room temperature when you mix it then the dip will be so much smoother!
  • Mayonnaise: Low fat or regular will work just fine!
  • Sour cream: This helps give it a little bit of tang.
  • Smoked salmon: Just chop this up quickly, it doesn’t need to be perfect since you are mixing it in anyway.  
  • Lemon juice: I just used bottled lemon juice for this recipe but you can always use fresh!
  • Garlic powder: I love anything with garlic.
  • Worchestershire: You may not be able to say that word but it sure makes any recipe delicious!
  • Dill: This is the secret ingredient to making this dip extra tasty!

Let’s Make Some Dip!

If you have 5 minutes then you have enough time to make this smoked salmon dip! It’s that easy! Plus, it’s super delicious!

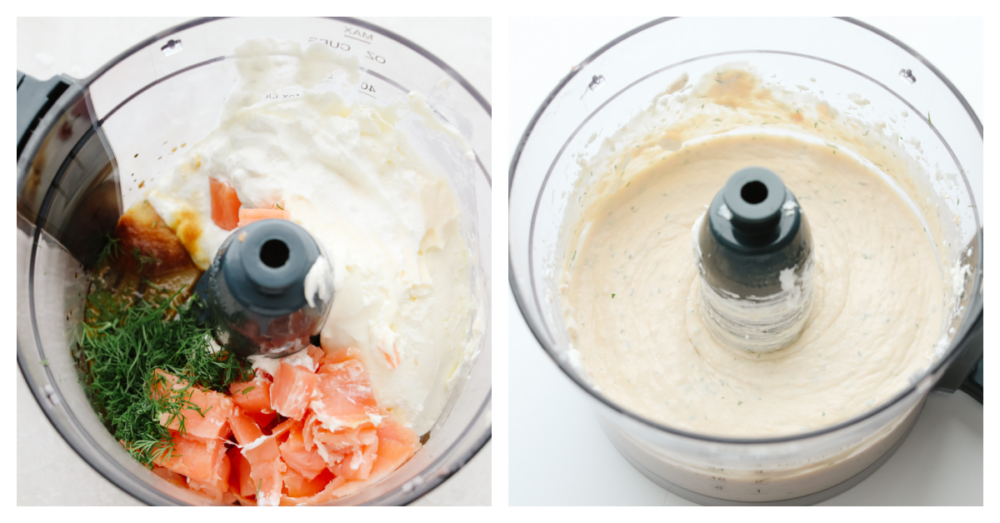
  1. Mix ingredients: In a food processor add the cream cheese, mayonnaise, sour cream, salmon, lemon juice, garlic powder, Worcestershire, and dill.
  2. Pulse and serve: Pulse until smooth and creamy. Serve.
2 pictures showing a food processor with ingredients being put in and then mixed.

What to Serve It With

If you are looking at this smoked salmon dip thinking that it looks super delicious but you have no idea what to eat it with… I’m here to tell you! Here are some ideas that are so delicious to eat with this dip!

  • Crackers: It goes without saying that crackers and dip are a match made in heaven! Try it with some ritz crackers, some wheat thins, or even any of the specialty crackers that they have at Trader Joes!
  • Bread: I looooove bread and dip! Try out this crostini, this french baguette or even this yummy sourdough with this dip!
  • Bagels: You always see fancy seafood spreads at brunch. But with this recipe, you can have it in the comfort of your own home! This dip tastes fantastic on a toasted bagel or biscuit!
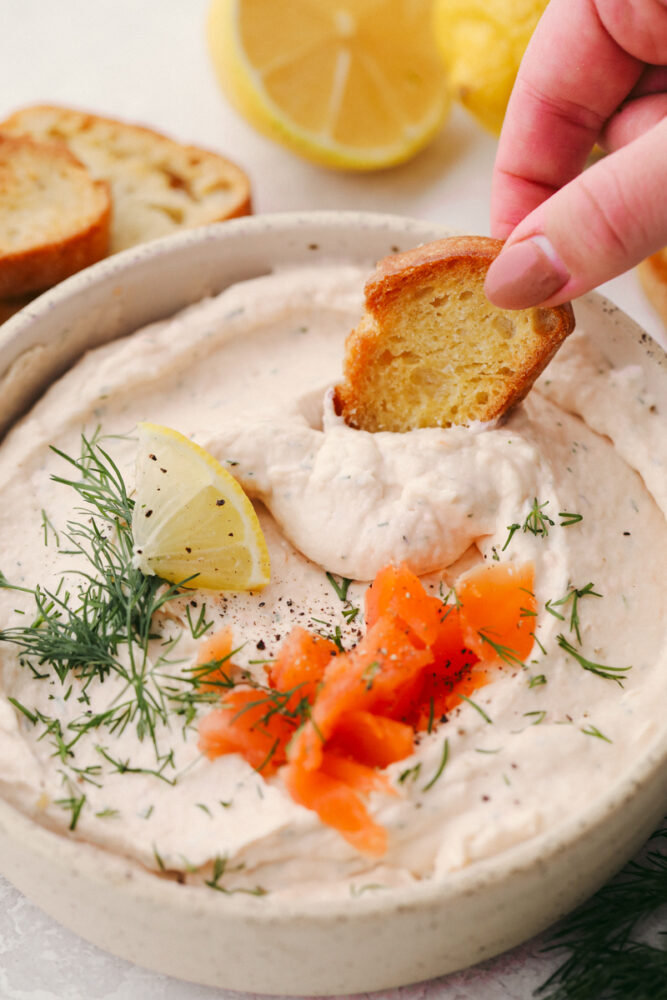
A crostini slice being dipped into smoked salmon dip.

How to Store Leftovers

Whether you are making this ahead of time or just have extra, you can easily store it for later! Place it in an airtight container in your fridge and it can last for up to 5 days! Double the batch and enjoy!

Print

Awesome Smoked Salmon Dip

This smoked salmon dip is so creamy and delicious! With the smoked salmon flavor taking the stage followed by a hint of lemon and dill, this dip is SOO GOOD!
Course Appetizer
Cuisine American
Keyword salmon dip, smoked salmon dip
Prep Time 10 minutes
Total Time 10 minutes
Servings 8 people
Calories 184kcal
Author Alyssa Rivers

Ingredients

  • 8 ounce cream cheese
  • 1/4 cup mayonnaise
  • 1/4 cup sour cream
  • 6 ounces packaged smoked salmon roughly chopped
  • 1 Tablespoon lemon juice
  • 1/4 teaspoon garlic powder
  • 1/2 teaspoon worchestershire
  • 2 Tablespoons dill

Instructions

  • In a food processor add the cream cheese, mayonnaise, sour cream, salmon, lemon juice, garlic powder, Worcestershire, and dill.
  • Pulse until smooth and creamy. Serve.

Nutrition

Calories: 184kcal | Carbohydrates: 2g | Protein: 6g | Fat: 17g | Saturated Fat: 7g | Polyunsaturated Fat: 4g | Monounsaturated Fat: 4g | Trans Fat: 1g | Cholesterol: 43mg | Sodium: 308mg | Potassium: 92mg | Fiber: 1g | Sugar: 1g | Vitamin A: 456IU | Vitamin C: 1mg | Calcium: 39mg | Iron: 1mg


from The Recipe Critic https://ift.tt/3FHZ2AC
https://ift.tt/3r2S5WN

Homemade Oatmeal – 4 Ways

A warm, tasty bowl of homemade oatmeal is the perfect way to start your day! Here are 4 yummy variations filled with fresh fruit, nuts, brown sugar, and more!

Looking for more easy, healthy breakfast recipes? A smoothie bowl, acai bowl, or overnight oats are my go-to breakfasts! They’re so good and will power you through your day!

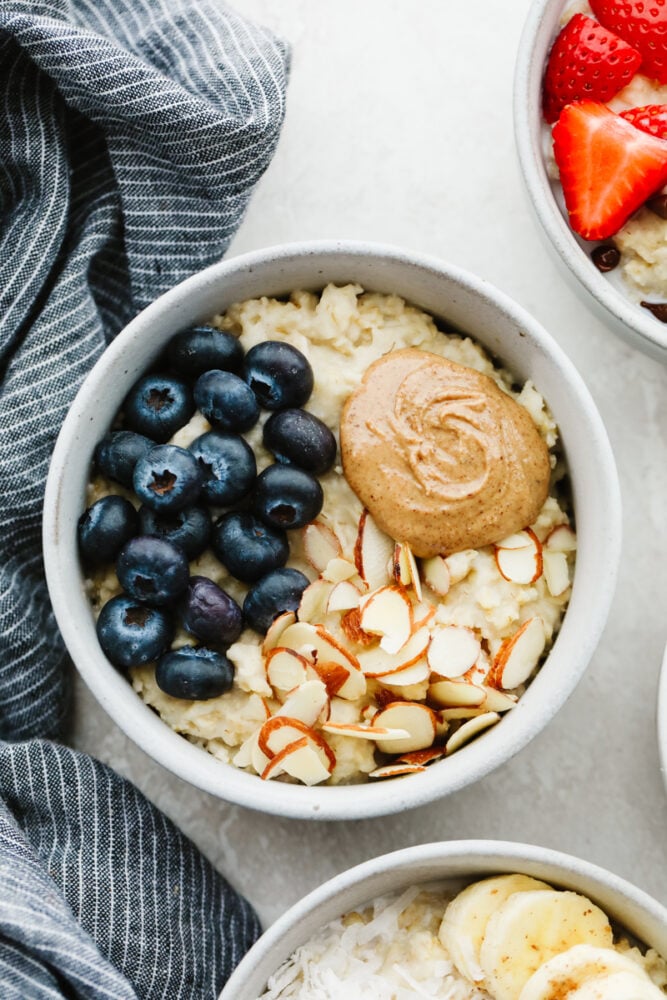
A bowl of oatmeal topped with almond slices, peanut butter, and blueberries.

Healthy and Delicious Homemade Oatmeal Recipe

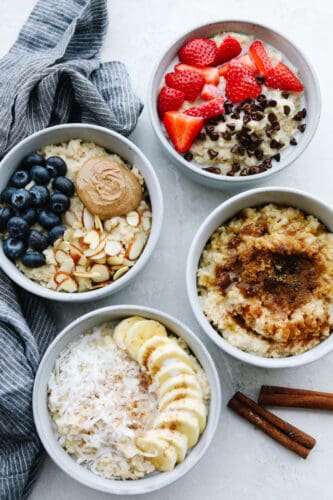
Oatmeal, honestly, is one of my favorite breakfasts. I’ve probably had it a million times but something about it is so hearty and comforting! The best part is, you can add so many different toppings, no two breakfasts are ever the same! I’ve got 4 tasty variations here for you, from almond and blueberry to strawberry chocolate and brown sugar cinnamon! Each is equally delicious, and I know you’ll love having them for breakfast! I certainly have. It’s an easy way to upgrade a classic meal.

Another perk of this homemade oatmeal? It’s nice and healthy! Oatmeal, yogurt parfaits, and overnight oats are what I typically have for breakfast and I love that they are things I can feel good about putting in my body. Oatmeal, specifically, is great because it will keep you full, is a great source of fiber, and also helps to lower cholesterol! And with toppings this good? You’ll forget it’s a healthy breakfast! I’ll give you all the ins and outs on making oatmeal from scratch and some great topping ideas to get you started. You’re going to love them!

Ingredients for Homemade Oatmeal

Oatmeal packets are nice, but it’s so much cheaper to buy rolled oats and make servings yourself! Short and sweet, this ingredient list is as simple as it gets. It makes it super easy to throw together in the morning! Measurements can be found in the recipe card below.

  • Old-Fashioned Rolled Oats: I typically have rolled oats on hand, but you can also use steel cut!
  • Water: Necessary for the oats to absorb.
  • Milk of Choice: Added for creaminess! Whether it’s dairy, non-dairy, or nut milk, use your favorite here! I like using macadamia milk to keep calories low. You can also use more water if you’d like!
  • Salt: Just a pinch is needed to enhance flavor.

Making Oatmeal From Scratch

It only takes a few minutes to whip up some homemade oatmeal! It’s the perfect blank canvas for all of your favorite toppings. You’re going to love how quick, easy, and delicious it is!

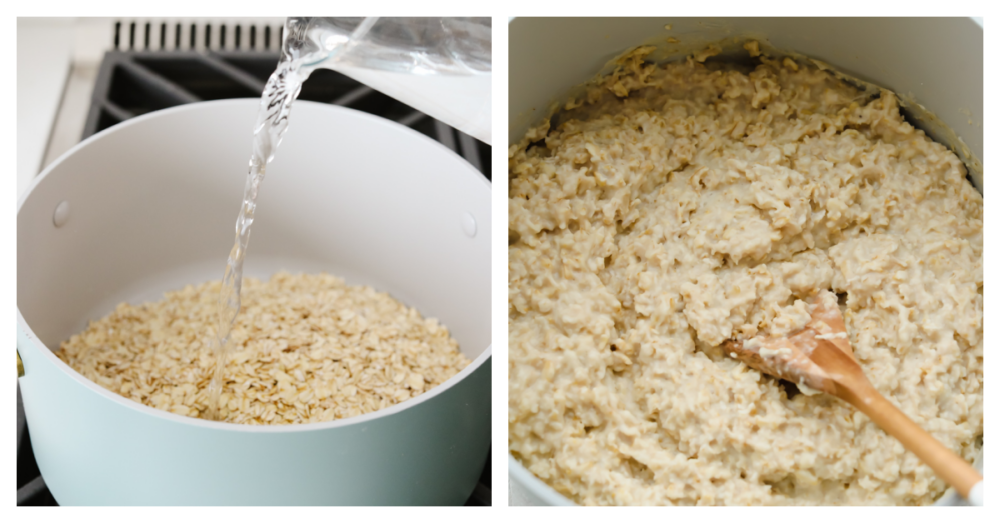
  1. Combine Oats With Liquids and Salt: In a small saucepan, combine the oats, water, milk, and salt over medium high heat.
  2. Boil, Then Simmer: Once it comes to a low boil, reduce the heat and let simmer until it reaches your desired thickness. To keep the oatmeal from burning on the bottom of the pan, stir occasionally.
  3. Remove From Heat: After the oatmeal has cooked through for about 5 minutes, remove the pan from the heat.
  4. Toppings: Next, add desired toppings and a splash of additional milk if you would like.
Process shots of making oatmeal from scratch.

Tips and Tricks for Making the Best Oatmeal

Homemade oatmeal can easily be up-leveled with just a few simple tricks! Use them to craft the breakfast of your dreams! You’ll love how it turns out.

  • Toast Your Oats: If you want to make the most flavorful oatmeal possible, you can first toast your oats in a bit of butter. This will give them a rich, nutty flavor.
  • Stir Occasionally: While it’s important to stir enough so your oats don’t burn on the bottom of your pan, don’t overmix! Stirring too frequently can make your oatmeal slimy.
  • Make Ahead: This tip is perfect for all of you busy readers out there! For easy meal prep, you can make a large batch of homemade oatmeal and then divide it into jars or airtight containers to be reheated throughout the week. Pop a serving in the microwave for 2 minutes, and it tastes as good as new!

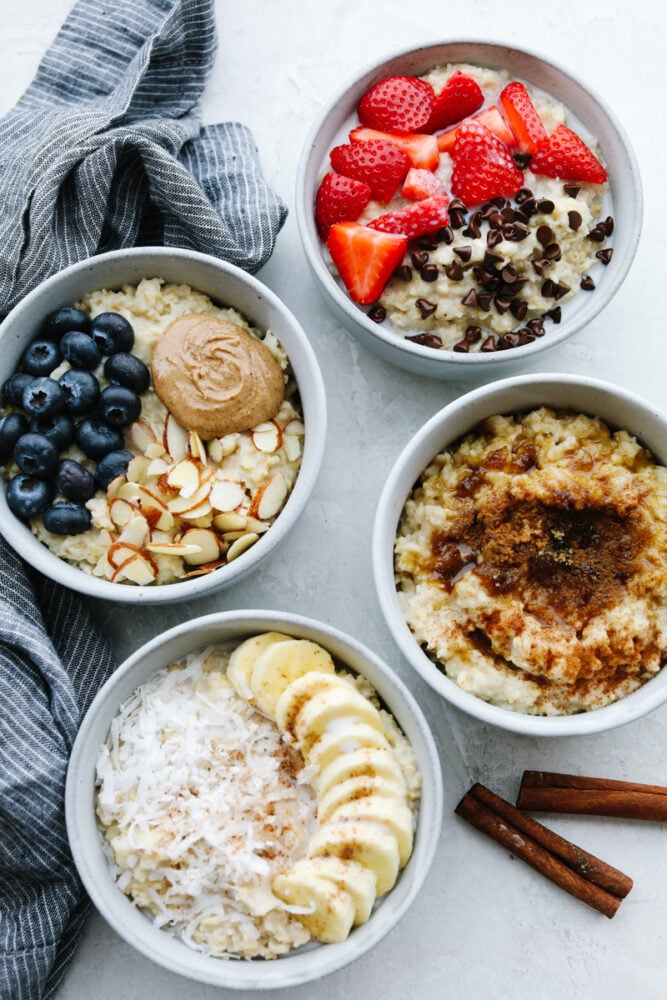
Strawberry Chocolate Chip Oatmeal

This is by far one of my favorite topping combinations. Who doesn’t love a good chocolate-covered strawberry? Contrary to what you’d think, chocolate is actually a beneficial ingredient here! Dark chocolate chips are packed with antioxidants, potassium, and iron! It’s even been linked to lowering blood pressure!

  1. Slice Strawberries: Slice a few strawberries into pieces and place in bowl.
  2. Add Chocolate Chips: Whether it’s milk, white, or dark chocolate, add your favorite here! I always like using dark chocolate chips for their amazing health benefits.
  3. Add a Splash of Cream: I always like to add an extra splash of milk or cream to this combination. It makes it taste like dessert!

Almond Blueberry Oatmeal

For this bowl, I use a mix of blueberries, almonds, and almond butter. The rich, juicy flavor of blueberries pairs so well with nutty goodness! If you aren’t already invested, this mix is loaded with health benefits and will have you feeling great all day! Blueberries, of course, are a superfruit. Low in calories, but high in vitamins and antioxidants! Then, add in protein and healthy fats from almonds and peanut butter and you have a winning combination!

  1. Add Blueberries: First, give your blueberries a quick wash and then add them to your bowl. You can swap these for other superfruits like pomegranate arils or acai.
  2. Add Almonds and Nut Butter: For some tasty texture, add in sliced almonds to your oatmeal. You can also add a dollop of nut butter. I use almond butter here, but peanut butter works great, too!
4 bowls of homemade oatmeal with various toppings.

Banana Coconut Oatmeal

If you want a breakfast that is sweet and delicious, this one’s for you! I use sliced bananas, coconut, a dash of nutmeg, and coconut milk. This particular combination is like a cross between rice pudding and coconut sticky rice. It’s scrumptious! It’s also loaded with potassium and healthy fats.

  1. Slice Bananas: To begin, I like to slice my banana into half-inch pieces. Add them to your oatmeal.
  2. Add Coconut: Next, sprinkle in some shredded coconut. You can use sweetened or unsweetened, depending on your preference.
  3. Spice: Add a dash of nutmeg. This is a great way to add a little extra nutty flavor to your oatmeal.
  4. Add Creamer: To finish up, I like to add in a splash of coconut milk or creamer. It makes it so creamy and sweet!

Brown Sugar Cinnamon Oatmeal

This one is always a classic. Something about it is so nostalgic to me. Nothing beats a warm bowl of homemade oatmeal with cinnamon sugar sprinkled on top. It’s so delicious and comforting!

  1. Make Cinnamon Sugar Mixture: My ratio is typically 1 tablespoon of brown sugar to ½ teaspoon cinnamon. Mix together and sprinkle over oatmeal.
  2. Adding Cream or Honey: To make your oatmeal a bit sweeter, you can add honey, a splash of milk, or creamer.

Storing Leftover Homemade Oatmeal

Homemade oatmeal is great for making ahead! With proper storage, you’ll be able to enjoy this tasty breakfast over and over!

  • In the Refrigerator: Your homemade oatmeal will store for up to one week in an airtight container.
  • Reheating: In a microwave-safe bowl, add a serving of oatmeal and pop in the microwave for 2 minutes. Stir after one minute to ensure it’s warmed through.
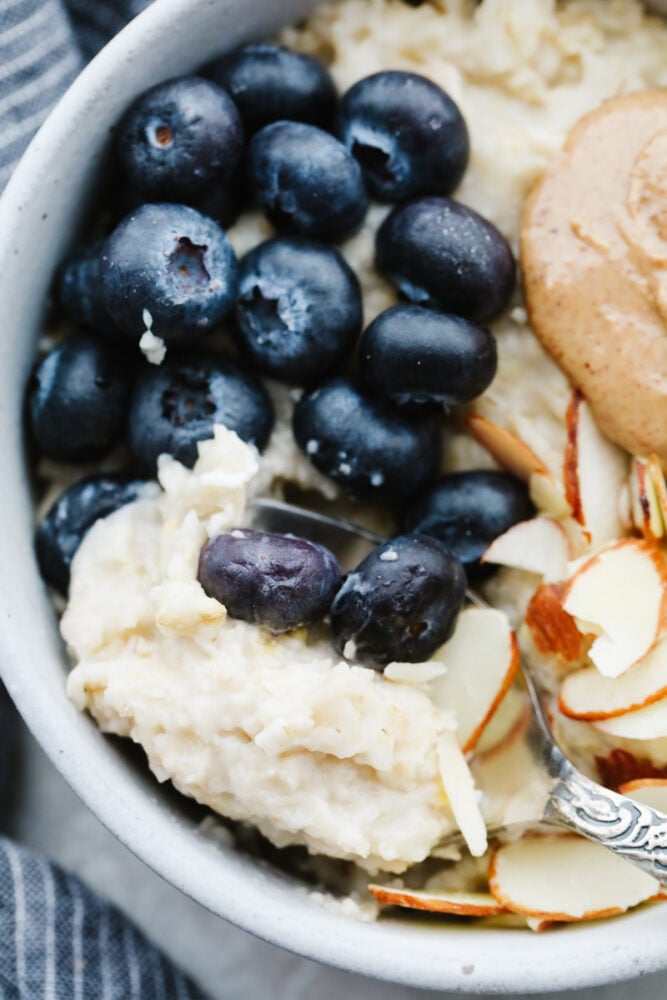
A closeup of oatmeal topped with blueberries, almonds, and nut butter.
Print

Homemade Oatmeal- 4 Flavor Variations

A warm, tasty bowl of homemade oatmeal is the perfect way to start your day! Here are 4 yummy variations filled with fresh fruit, nuts, brown sugar, and more!
Course Breakfast
Cuisine American
Keyword homemade oatmeal, oatmeal
Prep Time 5 minutes
Cook Time 5 minutes
Total Time 10 minutes
Servings 1 person
Calories 154kcal
Author Alyssa Rivers

Ingredients

Basic Homemade Oatmeal

  • 1/2 cup old-fashioned rolled oats
  • 1/2 cup water
  • ½ cup milk of choice or more water (dairy, non-dairy, nut)
  • Pinch of salt

Strawberry Chocolate

  • strawberries, sliced
  • mini chocolate chips
  • milk or cream (splash)

Blueberry Almond

  • blueberries
  • sliced almonds
  • almond butter

Banana Coconut

  • banana, sliced
  • shredded coconut
  • nutmeg, dash
  • coconut milk, creamer (splash)

Brown Sugar Cinnamon

  • brown sugar
  • cinnamon

Instructions

  • In a small saucepan, combine the oats, water, milk, and salt over medium-high heat.
  • Once it comes to a low boil, reduce the heat and let simmer until it reaches your desired thickness. Stir occasionally to keep the oatmeal from burning on the bottom of the pan.
  • After the oatmeal has cooked through for about 5 minutes, remove the pan from the heat.
  • Add desired toppings and a splash of additional milk if you would like.

Notes

1 cup of liquid is the amount needed for this recipe.  It can be all water, all milk, or ½ cup of each.  When cooking oatmeal, it is a 1:2 ratio of oats to liquid.  Milk will help give it a creamier texture.
Also, a lot of recipes call for the liquid to come to a boil before adding the oats.  I have found that step isn’t necessary.  I think the texture turns out just as great, if not better when it’s all brought to a boil together.

Nutrition

Serving: 1bowl | Calories: 154kcal | Carbohydrates: 27g | Protein: 5g | Fat: 3g | Saturated Fat: 1g | Polyunsaturated Fat: 1g | Monounsaturated Fat: 1g | Sodium: 8mg | Potassium: 147mg | Fiber: 4g | Sugar: 1g | Calcium: 25mg | Iron: 2mg


from The Recipe Critic https://ift.tt/3xdok6M
https://ift.tt/3FzeLSy

सोमवार, 22 नवंबर 2021

Juicy Air Fryer Turkey

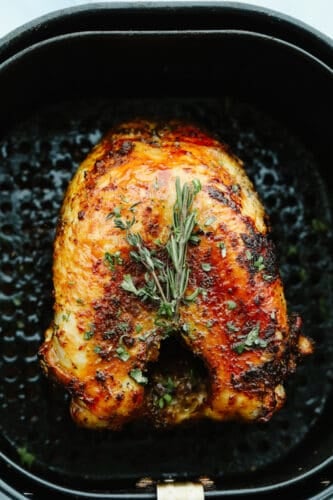
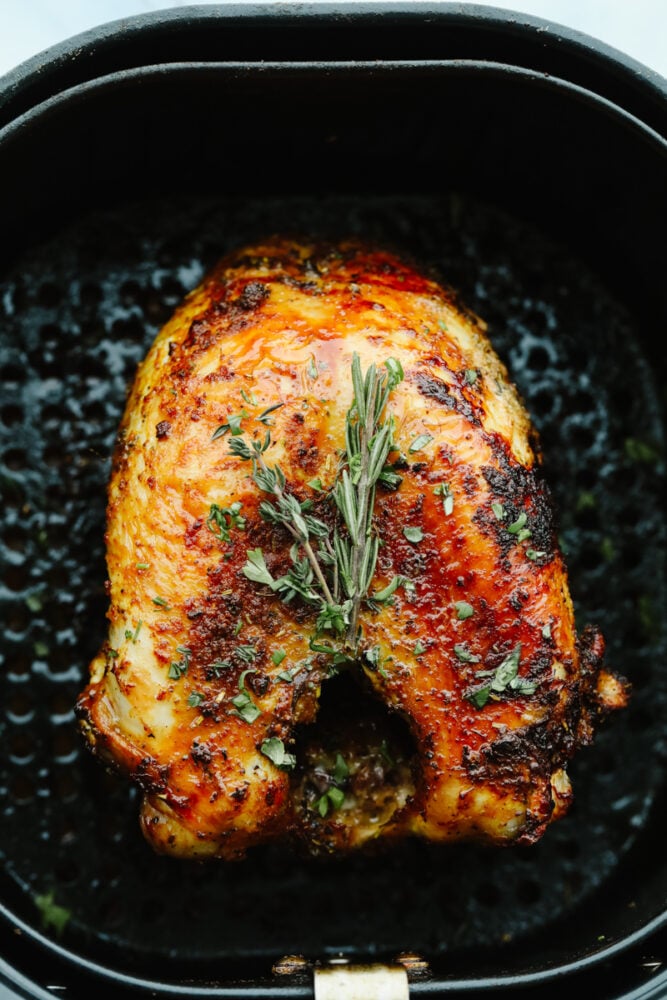
This juicy air fryer turkey is SOO GOOD and will have all of your guests asking for more! It’s perfectly golden brown and dripping in flavor. You will never cook a turkey any other way again!

If you think this turkey is good then you need to try these other amazing side dishes that you can cook in your air fryer! Like these Sweet Potatoes, Brussel Sprouts, or even these super yummy Carrots!

A turkey in an air fryer with garnish.

Air Fryer Turkey

I know, I know, cooking a turkey in an air fryer isn’t the most common way to cook it but guess what?! It should be! This turkey turned out AMAZING. I’m talking juicy, lick your fingers to get every last bite good! This air fryer turkey only takes a few ingredients PLUS you don’t have to wait all day for it to cook! It’s the perfect turkey recipe for those who are just starting out because anyone can make it!

This is a great option if you are only serving a few guests. Or, you could use this for your family dinner sometime during the year! I mean, who says that turkey just has to be cooked at Thanksgiving?! Cook this up with some 1-Hour Rolls, this yummy Slow Cooker Sausage Herb Stuffing, this Easy Turkey Gravy, and these Perfect Mini Pumpkin Pies. Then, you will have yourself a delicious feast that everyone will love!!

What You Need to Make an Air Fryer Turkey

This recipe is so quick and easy to prepare! You just need a few herbs and spices that you probably already have on hand! See the recipe card below for exact measurements.

  • Bone-in turkey: I used a bone in turkey because it has so much flavor! A 3-4 pound turkey will be just the right size!
  • Olive oil: I used olive oil to rub the turkey so that the spices would stick well to it.
  • Italian seasoning: This is such a great blend of spices! You can us store bought or, try making this homemade Italian Seasoning. It’s so good and it only takes 5 minutes!
  • Paprika: I love the sweet taste that paprkia brings to this turkey!
  • Garlic powder: The garlic powder mixes so well with the paprika and Italian Seasoning. The blend will knock your socks off!
  • Salt and pepper: You can use more or less of these depending on the flavor that you are looking for!
  • Butter: This helps the turkey keep in its moisture and adds a rich flavor!

Let’s Cook a Turkey!

Unlike other turkeys, this one doesn’t have to cook all day! It’s so simple… You are going to love it!

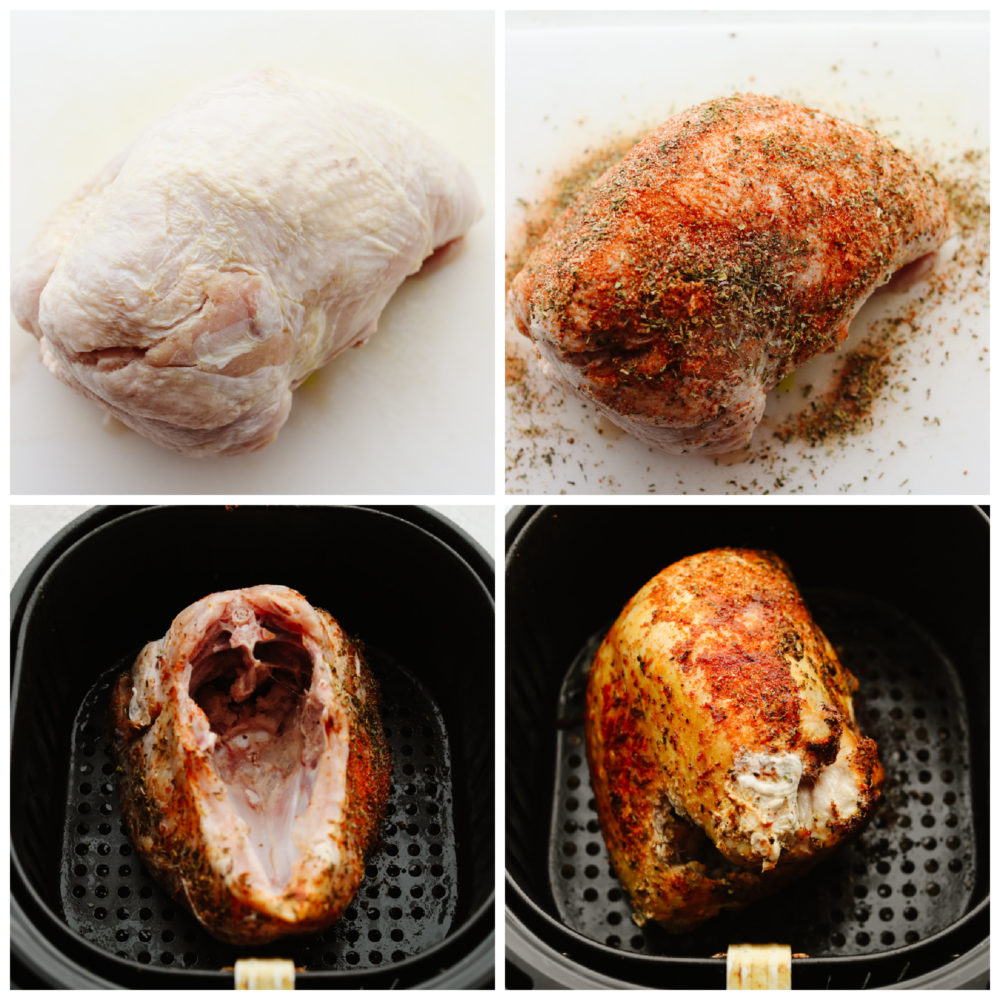
  1. Rub turkey with oil and spices: Rub the turkey in olive oil. In a small bowl combine italian seasoning, paprika, garlic powder, salt and pepper. Rub on the outside of the turkey.
  2. Add butter: Slice the butter and put under the skin of the turkey.
  3. Cook and flip: Lay the turkey skin side down in the air fryer basket. Cook at 350 degrees for 20 minutes. Flip the turkey and cook for and additional 10-15 minutes depending on your size of turkey. Cook until a thermometer reads 165 degrees.
  4. Let it rest and then slice it: Remove the turkey and let rest for 10 minutes. Slice and serve.
4 pictures showing how to put a rub on a turkey and how to flip a turkey in an air fryer.

Turkey Cooking Tips

I can’t get over how easy and delicious this air fryer turkey is to make! Here are a few extra trips that will help yours turn out perfect!

  • Don’t forget to thaw it! Turkeys can take a while to thaw! Make sure that you put your turkey in your fridge a couple of days before you plan on cooking it. Then, it will be all ready to go when the big day comes!
  • Temperature check: Before eating your turkey, it’s important to know if it’s fully cooked of not! A turkey is done when it’s internal temperature reaches 180 degrees if measured in the thigh or 170 degrees in the breast. Use a meat thermometer when it’s done and check it to make sure!
  • Let it rest: This step gets skipped so often because everyone is so anxious to eat! Trust me, I totally get it. But this part is SO important! Letting the turkey rest gives it time to absorb all of the juices that it made while it was cooking. If you slice it right aways, they will all just dribble out when you slice it up which means dry turkey meat. And no one wants that! Let it rest, it’s worth it!!
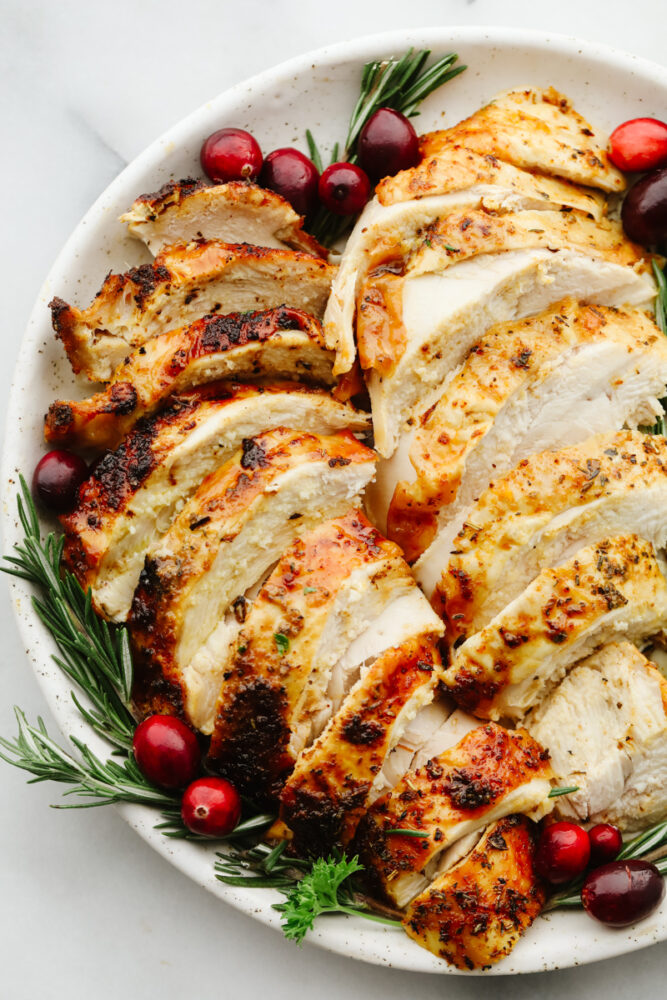
Sliced turkey on a plate with garnish.

How to Store Leftovers

Turkey makes the BEST leftovers! And this air fryer turkey is no exception. Here is how you can save them for later to make sandwiches, soups, or even this Leftover Turkey Casserole!

  • Refrigerate: Once your meat has cooled, place it in an airtight container. Then you can put it in your fridge and it will last for 3-4 days!
  • Reheat: If you want to reheat your turkey then you can go ahead and put it on a plate and cook it in the microwave! Cook it on medium power, 30 seconds at a time until it’s heated through.
Print

Juicy Air Fryer Turkey

This juicy air fryer turkey is SOO GOOD and will have all of your guests asking for more! It's perfectly golden brown and dripping in flavor… You will never cook a turkey any other way again! 
Course Dinner, Main Course
Cuisine American
Keyword air fryer turkey
Prep Time 10 minutes
Cook Time 35 minutes
Total Time 45 minutes
Servings 4 people
Calories 539kcal
Author Alyssa Rivers

Ingredients

  • 3-4 pound bone-in turkey
  • 2 Tablespoons Olive Oil
  • 1 Tablespoon Italian Seasoning
  • 1 teaspoon paprika
  • 1 teaspoon garlic powder
  • 1/2 teaspoon salt
  • 1/4 teaspoon pepper
  • 2 Tablespoons butter

Instructions

  • Rub the turkey in olive oil. In a small bowl combine Italian seasoning, paprika, garlic powder, salt, and pepper. Rub on the outside of the turkey.
  • Slice the butter and put it under the skin of the turkey.
  • Lay the turkey skin side down in the air fryer basket. Cook at 350 degrees for 20 minutes. Flip the turkey and cook for and an additional 10-15 minutes depending on the size of your turkey. Cook until a thermometer reads 165 degrees.
  • Remove the turkey and let rest for 10 minutes. Slice and serve.

Nutrition

Calories: 539kcal | Carbohydrates: 5g | Protein: 67g | Fat: 30g | Saturated Fat: 10g | Polyunsaturated Fat: 1g | Monounsaturated Fat: 7g | Trans Fat: 1g | Cholesterol: 197mg | Sodium: 957mg | Potassium: 40mg | Fiber: 1g | Sugar: 1g | Vitamin A: 443IU | Vitamin C: 1mg | Calcium: 24mg | Iron: 1mg


from The Recipe Critic https://ift.tt/3nFHfE1
https://ift.tt/3CKnKP0