रविवार, 12 जुलाई 2020

Baked Soft Pretzels (Step by Step Instructions!)

Baked Soft Pretzels are soft and chewy on the inside with the perfect salty golden exterior.  This recipe will walk you through these easy homemade pretzels with step by step instructions!

For an unforgettable combination try this baked soft pretzel recipe with homemade Cheese Sauce.  If you love a soft and fluffy pretzel also try Pretzel Bites.
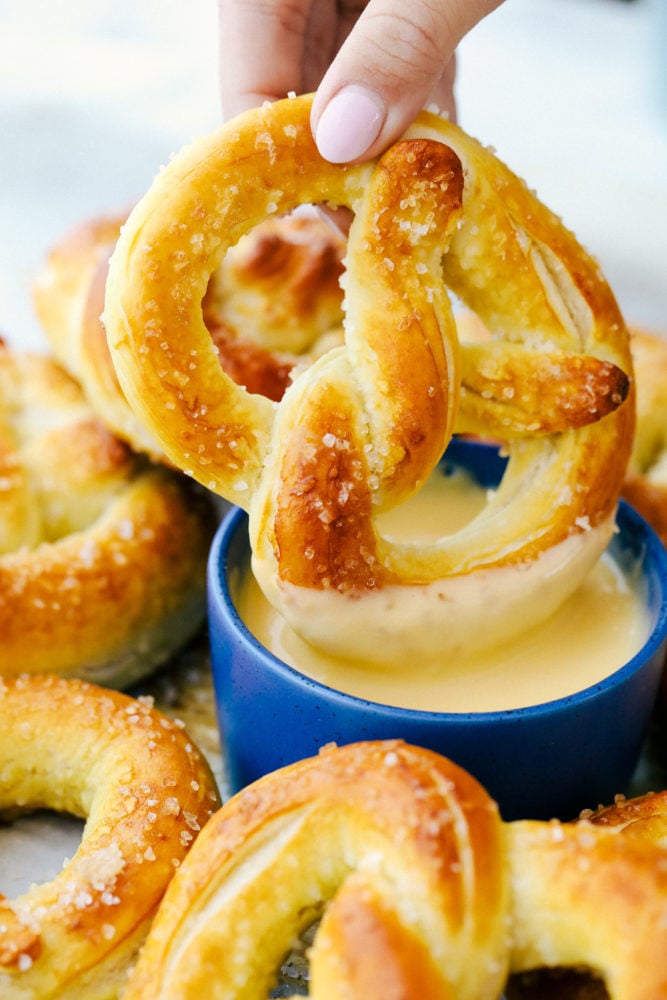
Dipping a pretzel in cheese sauce.

Baked Pretzels

Even if you have never made a pretzel before, this homemade soft pretzel is an easy no-fail recipe that is safe for beginners.  Delicious results are possible every time you put together this short list of ingredients that you most likely have in your kitchen right now.  Just a few minutes is all it takes to have a warm soft pretzel ready to dip in your favorite cheese or mustard dip.

This is the best recipe because it doesn’t call for letting the dough rise overnight.  It is a faster version that will take less time than you think and will turn out better than what you can buy from a store.  The warm fresh from the oven pretzel is worth every minute.  Not to mention the amazing smell they fill your kitchen with as they bake!  They will be a huge hit and will be quickly devoured by kids or adults!

Soft Pretzels Ingredients:

A few basic ingredients come together and create a comforting snack or lunch that is both filling and satisfying.  The baking soda bath creates the iconic golden exterior with a soft and chewy center that is amazing!

  • Warm water: Use the warm water to proof the yeast.
  • Active dry yeast: The yeast causes the dough to rise. To proof it add it to warm water and let it sit for about 5 minutes until it becomes bubbly.
  • Sugar: A hit of sweetness to balance out the saltiness.
  • Salt: To add a bit of saltiness throughout the dough.
  • 3 cups flour: All purpose flour will create a fluffy dough.
  • Vegetable oil: Place oil on top of the already kneaded dough ball then allow it to rise.
  • Hot water: To dip the pretzel dough in before baking.
  • Baking soda: Creates the color and texture you expect from a soft and golden pretzel.
  • Coarse salt: Sprinkle coarse salt as topping to your taste preference.
  • Optional dips: Cheese dip or mustard.

How to Make Homemade Pretzels:

Making delicious soft pretzels we all love from a stand is easier than you think.  These step by step instructions will walk you through how to make the perfect pretzel time after time.  This will quickly become a tried and true family favorite recipe!

  1. Proof yeast: In a stand mixer add the warm water and yeast. Allow the yeast to proof and become bubbly about 5 minutes.
  2. Mix in ingredients: With the dough hook attached, mix in the sugar, salt and flour one cup at a time with dough hook attached. If dough is too dry add in 1 tablespoon more of water. Remove the dough out of the bowl and knead into a ball. Place dough into a large bowl and add the oil on top.
  3. Let dough rise: Cover and let rise until doubled.
  4. Prep oven: Preheat oven to 450 degrees.
  5. Create pretzel shape with dough: Divide the dough into 6 equal pieces. Then roll each piece into a long rope and twist into a pretzel shape.
  6. Wet pretzel dough and add salt: Line two baking sheets with parchment paper. Add the hot water and baking soda together in a medium sized bowl. Dip the pretzel into the bowl and place onto the baking sheets. Sprinkle the top with coarse sea salt.

The Recipe Critic Pro Tip:

If you skip baking soda bath then you will need to set your oven to broil for the last 5 minutes of your bake time. Or use an egg wash of one beaten egg instead.
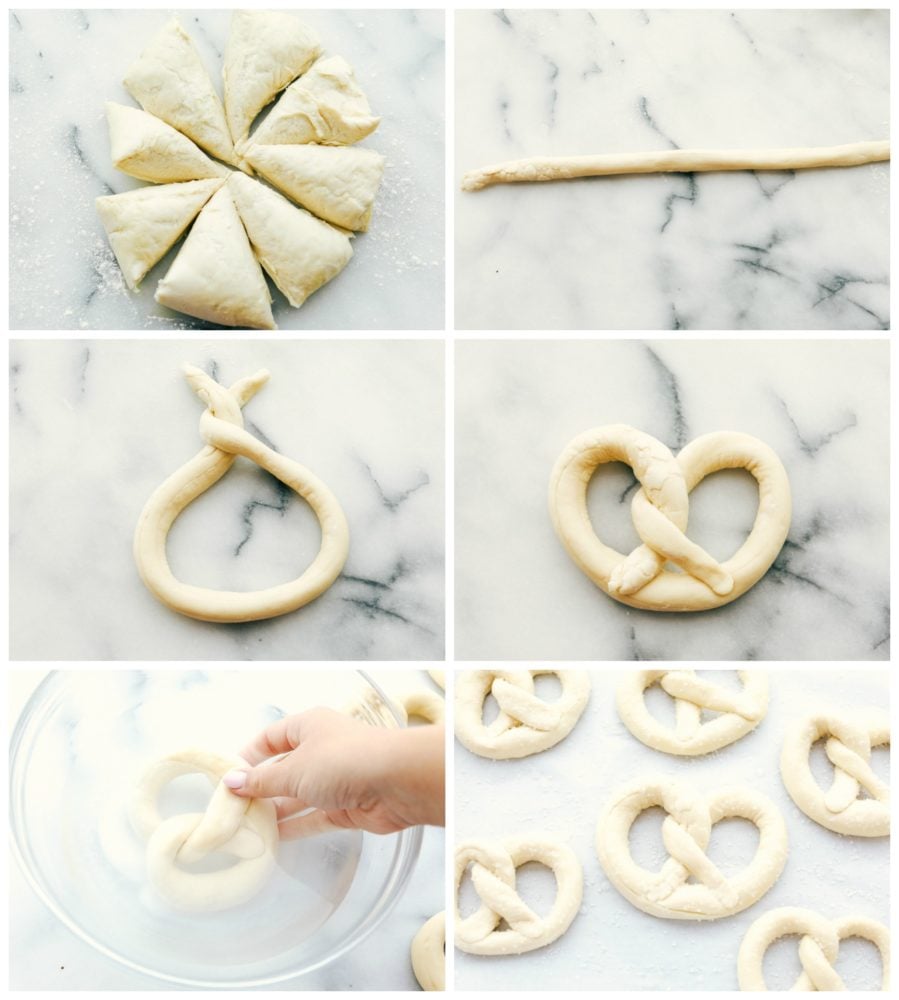
Steps to make a soft pretzel.

Variations:

One of the best things about these homemade soft pretzels is knowing every ingredient that went into them.  Plus, you can make them your own by adding different toppings or serving with your choice of dip.

  • Presentation: Instead of twisting the dough into a classic pretzel shape, cut it into pretzel bites instead.
  • Pretzel: Create an amazing dessert pretzel easily by leaving out the salt and brushing with butter and cinnamon sugar after baking instead. Or add pepperoni in the last few minutes of baking for a pepperoni pretzel
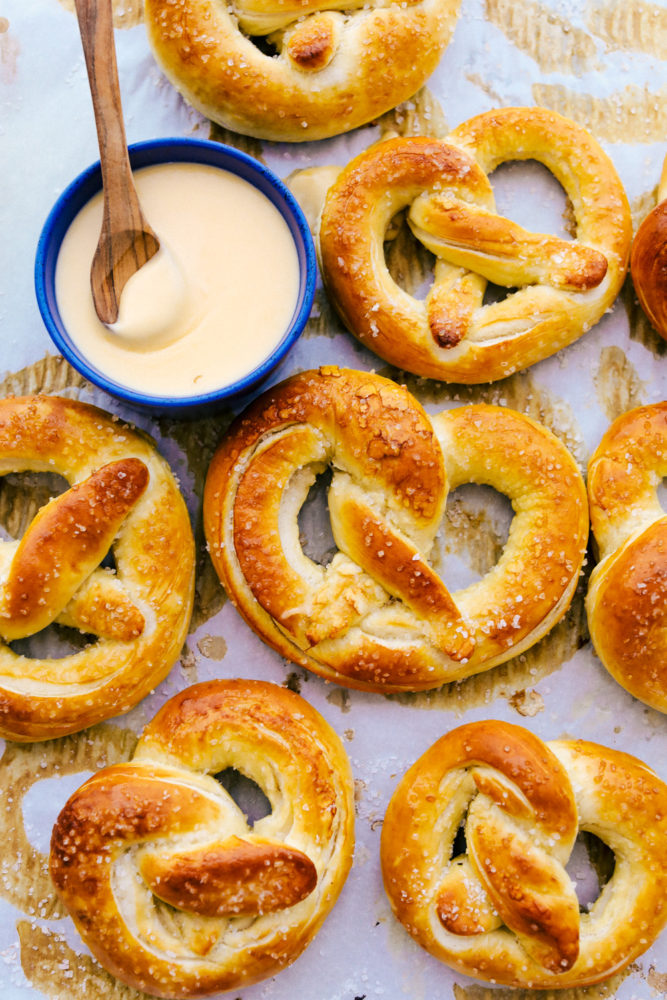
Finished soft pretzels with cheese dip in a blue bowl.

Storing Homemade Soft Pretzels:

You can make these pretzels ahead to enjoy on demand.  Storing them is easy and they keep well.  Whether you are storing finished pretzels or dough, a few simple steps can save you time when a pretzel craving hits.

For Baked pretzels:

  • Store at room temperature: Cover with a dish towel and keep them in a storage container at room temperature for up to 2 days.
  • Refrigerate: To keep your finished pretzels fresh longer, store them in the refrigerator for up to a week
  • Freeze: Make ahead a double batch and freeze them for easy lunches and quick snacks. They will freeze well for up to 1 month
  • To reheat: Wet the pretzel a bit before heating. Either place it in the oven at 325 for 15-20 minutes or microwave a few seconds at a time until heated through.

Pretzel Dough:

  • Refrigerate: Dough will last for up to one day when stored in an airtight container in the refrigerator.
  • Freezer: Dough can be frozen for up to 3 months.
  • Thaw: To thaw your dough, place it in the refrigerator overnight
  • Rest: After thawing your frozen dough, allow it to sit for at least 10 minutes before continuing through the recipe directions.
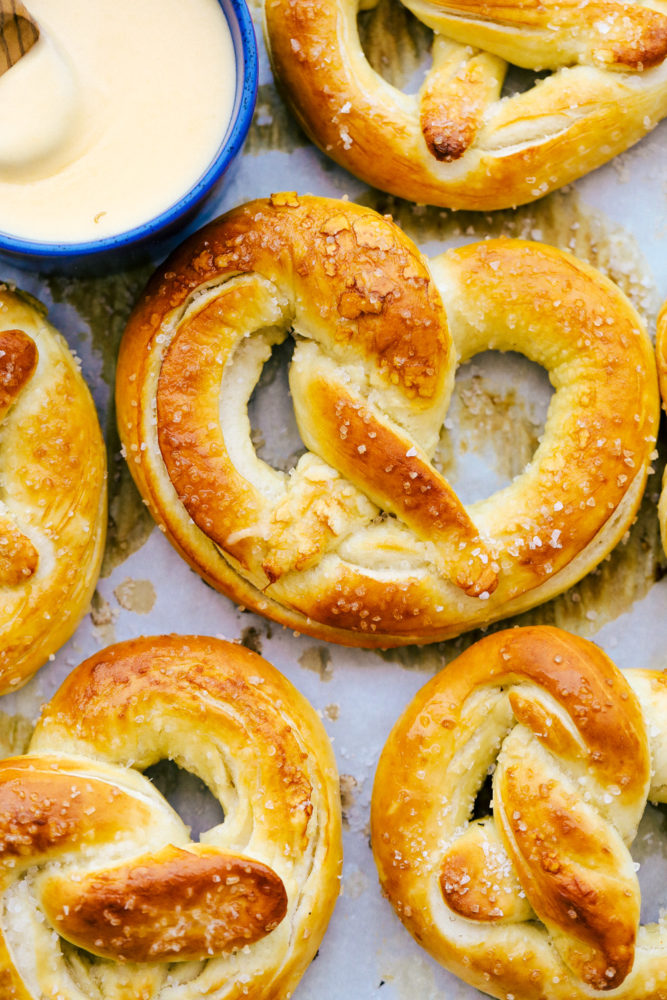
Close up on finished pretzels.

More Homemade Dough Recipes:

Print

Baked Soft Pretzels

Baked Soft Pretzels are soft and chewy on the inside with the perfect salty golden exterior.  This recipe will walk you through these easy homemade pretzels with step by step instructions!
Course Appetizer, Bread, Side Dish
Cuisine American
Keyword baked pretzels, baked soft pretzels, pretzels, soft pretzels
Prep Time 20 minutes
Cook Time 10 minutes
Total Time 30 minutes
Servings 12 Pretzels
Calories 146kcal
Author Alyssa Rivers

Ingredients

  • 1 cup warm water
  • 2 teaspoons active dry yeast
  • 1/4 cup sugar
  • 1 teaspoon salt
  • 3 cups flour
  • 1 tablespoon vegetable oil
  • 2 cups hot water
  • 1/4 cup baking soda
  • coarse salt for topping
  • Cheese Dip

Instructions

  • In a stand mixer add the warm water and yeast. Allow the yeast to proof and become bubbly about 5 minutes. With the dough hook attached, mix in the sugar, salt and flour one cup at a time with dough hook attached. If dough is too dry add in 1 tablespoon more of water. Remove the dough out of the bowl and knead into a ball. Place dough into a large bowl and add the oil on top. Cover and let rise until doubled.
  • Preheat oven to 450 degrees. Divide the dough into 6 equal pieces. Roll each piece into a long rope and twist into a pretzel shape.
  • Line two baking sheets with parchment paper. Add the hot water and baking soda together in a medium sized bowl. Dip the pretzel into the bowl and place onto the baking sheets. Sprinkle the top with coarse sea salt.
  • Bake for 8-10 minutes or until the tops are golden brown. Serve with cheese dip.

Nutrition

Calories: 146kcal | Carbohydrates: 29g | Protein: 4g | Fat: 2g | Saturated Fat: 1g | Sodium: 882mg | Potassium: 53mg | Fiber: 1g | Sugar: 4g | Calcium: 6mg | Iron: 1mg


from The Recipe Critic https://ift.tt/2ZmCFOM
https://ift.tt/2ZjQBcn
शनिवार, 11 जुलाई 2020

Grilled Key Lime Chicken

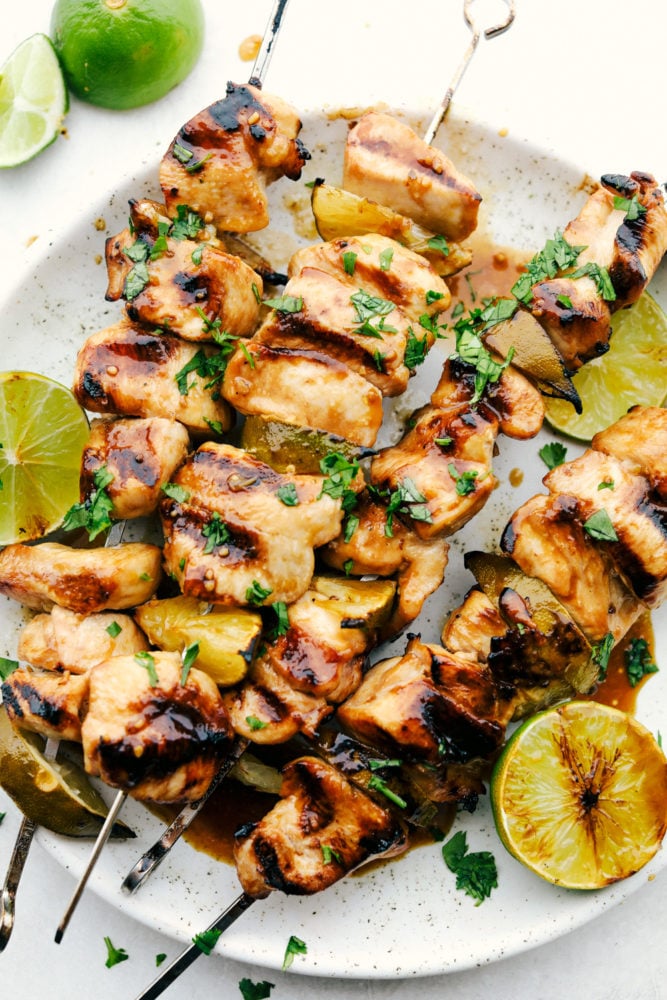
Grilled Key Lime Chicken is tender and juicy chicken marinated in key lime flavor and grilled to perfection on a skewer.  It is quick and easy to make and enjoy with your family on a warm summer night!

So many ways to enjoy this chicken dinner! Try adding this key lime chicken to a fresh homemade salad like my Chili Lime Chicken Salad or grill it and serve it alongside sweet Grilled Coconut Lime Pineapple.

Grilled Key Lime Chicken on skewers on a white plate with fresh cut lemon on the side.

Grilled Key Lime Chicken

We absolutely love BBQ’s at our house in the summertime!  So, new grill recipes are always a big hit.  As soon as I made this Key Lime chicken, it became an instant favorite! The marinade is amazing and it has the perfect hint of lime in it. This is the perfect summer dish and the flavor is incredible.

It was easy to grill the chicken to perfection and it turned out so juicy and tender. Simple to make and comes together in less than 20 minutes. This is a MUST make grilled chicken recipe. Your family will love this key lime chicken!

What’s in Key Lime Chicken?

The secret to this light and fresh grilled chicken is the made from scratch marinade.  The salty, sweet, and sour notes are all perfectly balanced and easy to achieve using a few simple ingredients that come together flawlessly!

  • Soy Sauce: Mixes into the marinade to add salty flavor.
  • Honey: Adds sweetness to the marinade.
  • Vegetable Oil: Keeps the chicken moist as it grills.
  • Lime juice: Adds a fresh citrus lime flavor that sets this recipe apart.
  • Minced garlic: Whisk together with the marinade to add more flavor to the chicken.
  • Chicken breasts: Use boneless skinless
  • Garnish: Limes are optional.

How to Grill Chicken Perfectly:

Grilling this favorite chicken is quick and easy to do!  It takes just a few minutes to whisk together this delicious and simple marinade.  Then, let the chicken marinate for at least 30 minutes and you are ready to grill!  The smell of this chicken as it cooks is so good!  You can have a healthy and delicious meal your entire family loves on their plates in less than an hour!

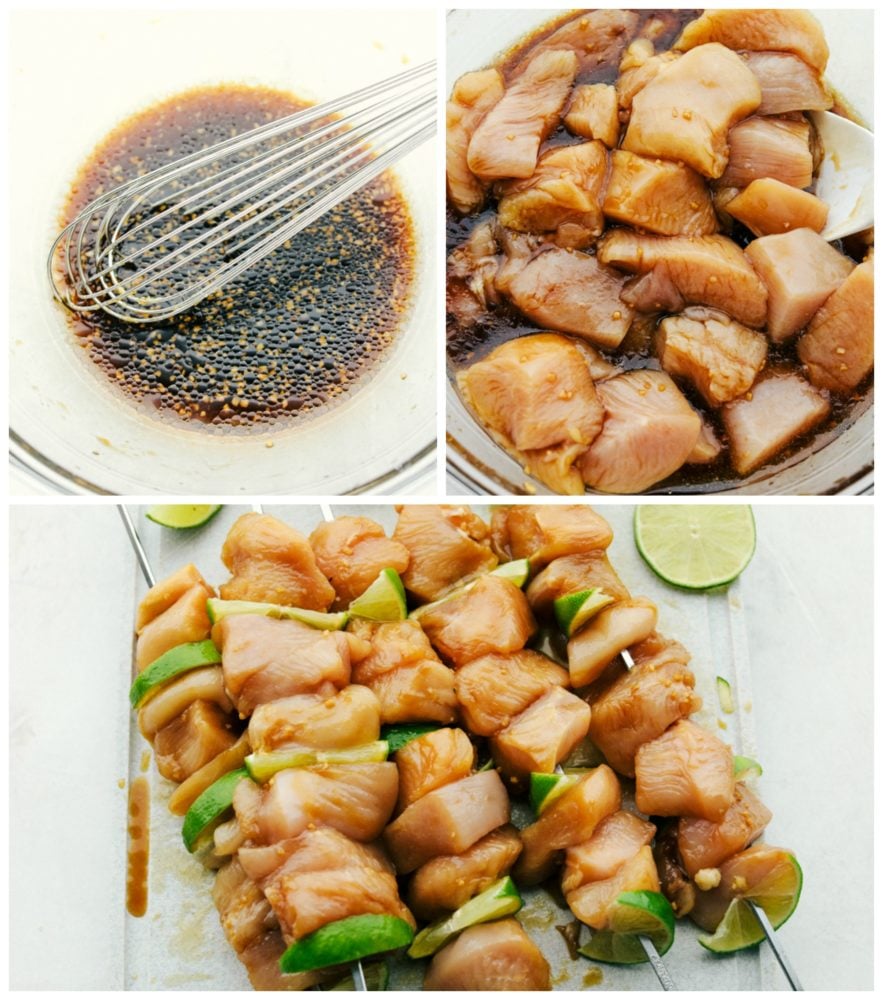
  1. Prep chicken: Cut chicken into one inch squares.
  2. Whisk marinade: Mix soy sauce, honey, vegetable oil, lime juice, and garlic in small bowl.
  3. Allow chicken to marinate: Place the chicken breasts in gallon sized bag. Now, let the chicken marinate in the sauce for at least 30 minutes.
  4. Load skewers: When marinated, slide chicken chunks on skewers. You can also slice thin slices of lime and fold in half and slide in between chicken.
  5. Grill chicken: Baste chicken with sauce once you place them on the grill, then grill for 5-10 minutes on each side until no longer pink in center.
The process of making the marinate for the chicken and putting the chicken on the skewers.

Tips for the Best Grilled Chicken:

The bright and tangy flavors of this key lime chicken are amazing!  The blend of flavors make this chicken an instant favorite.  Keep in mind these tips as you prepare this super easy chicken.

  • Serve with: This chicken is amazing sliced and served in tacos.  It also livens up a fresh green salad.  Grilled pineapple and mango salsa are great sides to serve with the citrus chicken as well.
  • How do you know when the chicken is done: The chicken is done when the juices run clear.  To be sure, check to make sure the chicken has reached an internal temperature of 165 degrees.
  • Rest: Allow the chicken to rest 10 minutes before serving.

Storing Key Lime Chicken:

You may be tempted to think the longer the chicken sits in the marinade the better.  However, do not leave chicken marinating in the refrigerator for longer than 2 days.  The chicken can actually get tough if left in the marinade too long.

Once cooked, allow the chicken to cool completely, then place your chicken in a tightly sealed container with as little air as possible.  Shallow containers work great or you can wrap the chicken tightly with aluminum foil.  The leftover chicken will remain good for 3-4 days in the refrigerator.  If you do not plan to eat it right away, it can be stored in the freezer for up to 4 months.

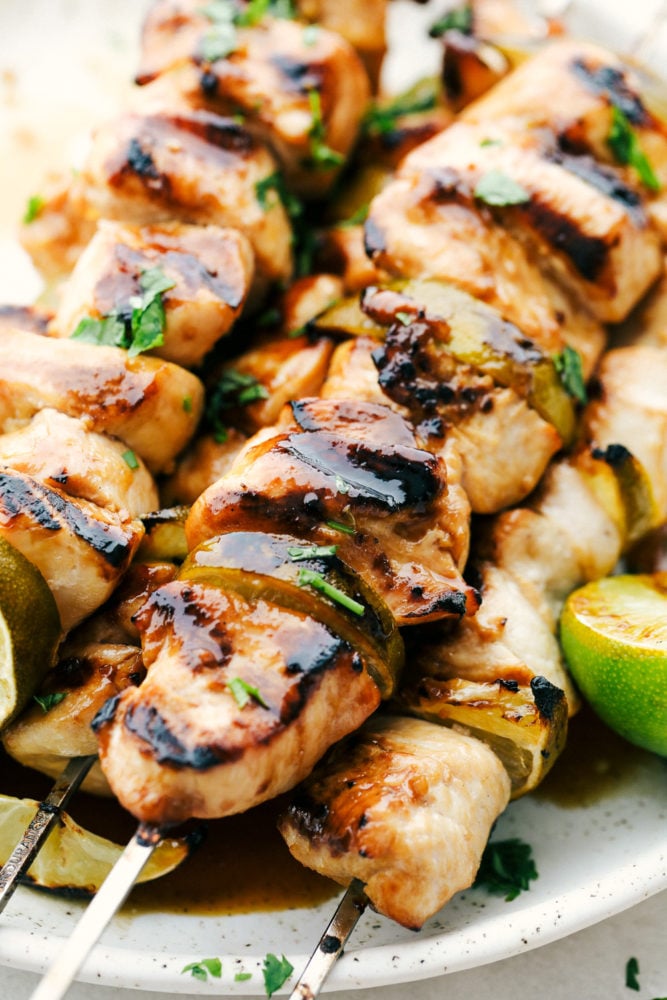
Grilled Key Lime Chicken on skewers on a white plate.

More Amazing Lime Chicken Recipes:

Print

Grilled Key Lime Chicken

Grilled Key Lime Chicken is tender and juicy chicken marinated in key lime flavor and grilled to perfection on a skewer.  It is quick and easy to make and enjoy with your family on a warm summer night!
Course Dinner, Main Course
Cuisine American
Keyword grilled chicken recipes, grilled key lime chicken, key lime chicken
Prep Time 15 minutes
Cook Time 10 minutes
Marinate Time 30 Minutes 30 minutes
Total Time 55 minutes
Servings 6 Servings
Calories 262kcal
Author Alyssa Rivers

Ingredients

  • 1/4 cup Soy Sauce
  • 1/4 cup Honey
  • 2 Tbs Vegetable Oil
  • Juice of 2 limes
  • 2 tsp minced garlic
  • 4 chicken breasts boneless skinless
  • limes for garnish optional

Instructions

  • Cut chicken into one inch squares.
  • Mix soy sauce, honey, vegetable oil, lime juice, and garlic in small bowl.
  • Place the chicken breasts in gallon sized bag and let marinate in the sauce for at least 30 minutes.

Marinate:

  • When marinated, slide chicken chunks on skewers. You can also slice thin slices of lime and fold in half and slide in between chicken.
  • Baste chicken with sauce once you place them on the grill. Grill for 5-10 minutes on each side until no longer pink in center.

Notes

Updated on July 11, 2020
Originally Posted on June 8, 2012

Nutrition

Calories: 262kcal | Carbohydrates: 13g | Protein: 33g | Fat: 8g | Saturated Fat: 5g | Cholesterol: 96mg | Sodium: 716mg | Potassium: 592mg | Fiber: 1g | Sugar: 12g | Vitamin A: 45IU | Vitamin C: 2mg | Calcium: 12mg | Iron: 1mg


from The Recipe Critic https://ift.tt/3flo0cv
https://ift.tt/326iK8F

Homemade Cheese Sauce

Homemade Cheese Sauce is versatile, kid friendly and tastes great on everything from broccoli to bread.  This may be the best cheese sauce ever!

If you are looking for a great cheesy appetizer, try Mozzarella Sticks. Or, make Pretzel bites to dip into this amazing homemade cheese sauce.

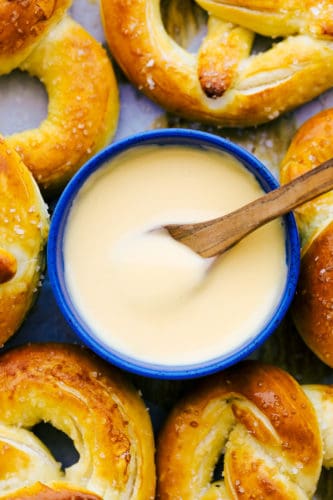
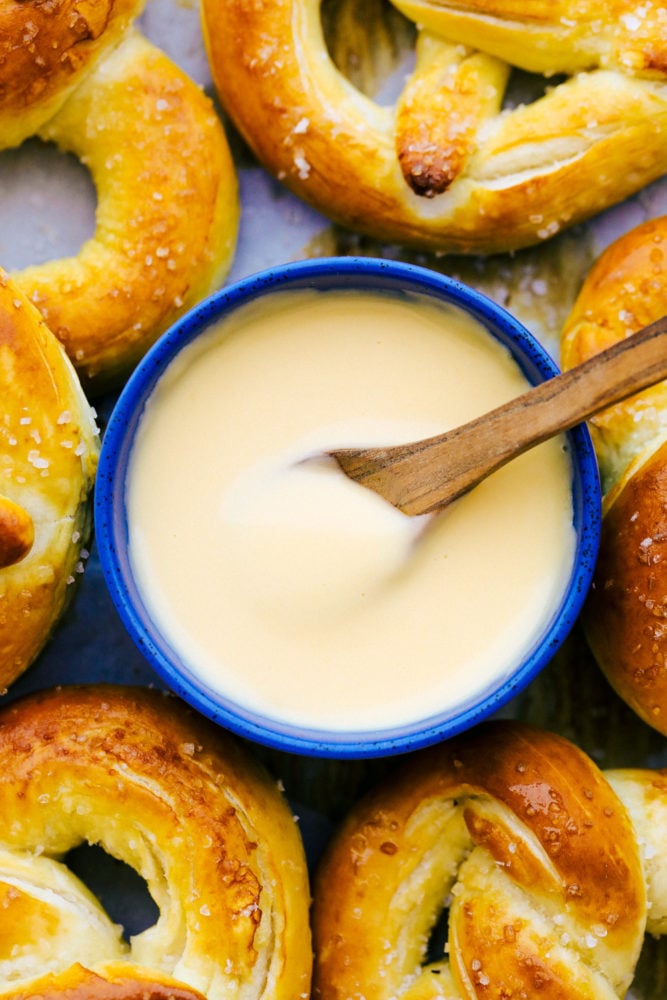
Cheese sauce in a bowl.

Homemade Cheese Sauce

Homemade cheese sauce has a perfectly creamy texture and mild seasonings your family will love!  The flavors are gentle enough that kids will go crazy over it, but it can also very easily be spiced up for a more vibrant sauce that can liven up nachos like my beefy enchilada nachos.  It is soo good you will be pouring this cheese on everything!

This made from scratch sauce is so much better than the processed version from the grocery store.  This is the most amazing sauce and it is ready in minutes!  Since it is so quick and easy to whip up, it is great for an afternoon snack for hungry kids to enjoy with chips or pretzel bites or to smother veggies like broccoli or cauliflower.  This is a must have recipe that is uncomplicated and easy to make, but will be a huge hit!

Easy Ingredients for Creamy Cheese Sauce:

With just 4 simple and familiar ingredients, you can make a cheese sauce that is so tasty you will want to drizzle it on everything!  Basic ingredients you most likely already have in your pantry and fridge will combine easily and make a creamy sauce everyone will enjoy.

  • Butter: Gives the sauce rich flavor.
  • Flour: Thickens the sauce.
  • Milk: Thins the sauce out a bit and adds sweet flavor.
  • Sharp cheddar cheese: Freshly grated cheese will melt better and give a stronger flavor than the coated shredded cheese you can buy in a bag at the store.

How Do You Make Cheese Sauce From Scratch?

This homemade cheese sauce is ready to enjoy in almost no time because the recipe is so simple. It uses well known ingredients that are easy to work with and prepare.  You will be so glad you have this recipe in your collection!

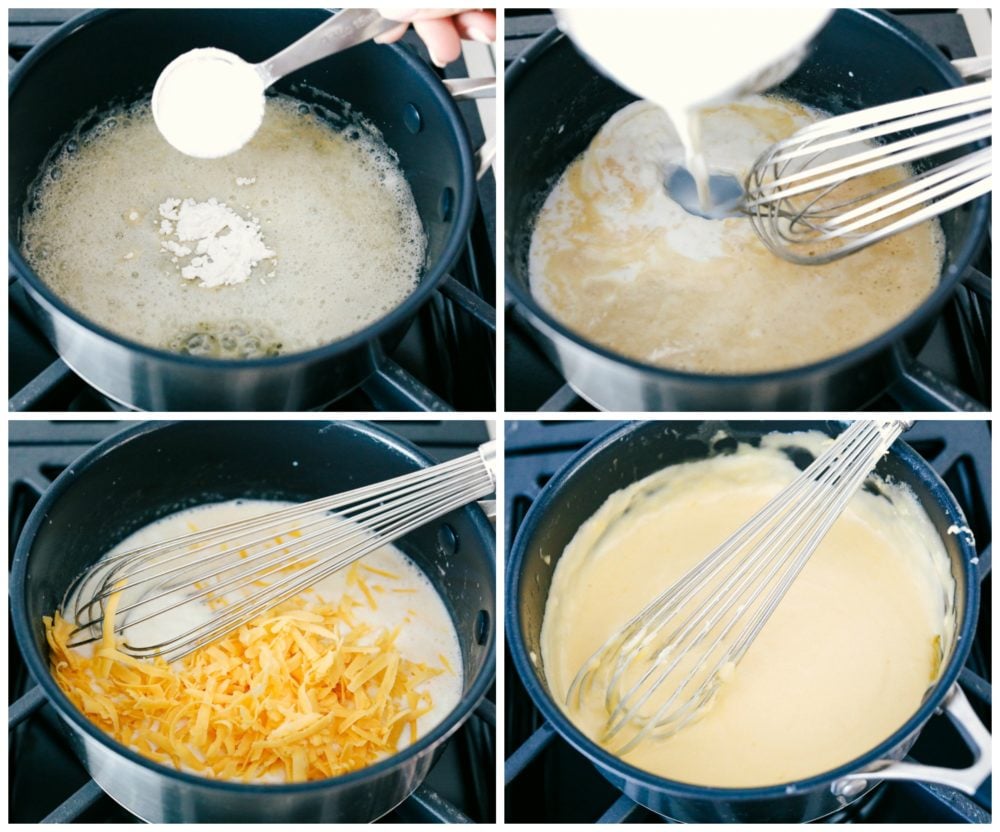
  1. Melt butter: In a medium size sauce pan over medium high heat, then add the butter and melt.
  2. Whisk: Now add in the flour to the butter, then slowly whisk in the milk. Next, add in the cheese. Continue to mix until the cheese is melted.
  3. Serve!

The Recipe Critic Pro Tip:

Your cheese will start to get clumpy or stringy if it gets too hot.  To avoid this, add the cheese end at the very end, then promptly remove it from the heat.

How to make cheese sauce.

Variations:

This may be one of the most versatile family favorite recipes that you will ever make!  It literally goes with anything.  Here are some amazing ideas on how to use this savory cheese sauce with your next meal.

  • What to serve with Cheese sauce: Pretzel bites, Cauliflower fritters, Sheet Pan Nachos, rice, baked potatoes, steamed broccoli, or even roast beef sandwiches.
  • What cheese works best: Use a mix of cheeses and change them up depending on how you plan to use this savory cheese sauce.  For example, swiss and Gruyère are great cheeses that will melt easily and create a perfectly smooth and creamy dip for bread.  Whereas, montery Jack would work very well with a Mexican dish like nachos or enchiladas.  Or use half cheddar and half parmesan for a homemade macaroni and cheese.
  • How to make a spicy cheese sauce: If you prefer a spicier cheese, try adding hot sauce, chili peppers, or cayenne pepper. Rotel diced tomatoes and green chilies would also make great additions if you are making Queso Burgers.

Storing Cheese Sauce:

If you want to make this yummy cheese sauce ahead, or you are in the rare position of having leftovers, this cheese sauce stores well and is easy to heat and use again.  You will need to keep your cheese sauce in a sealed container.  It will keep it in the refrigerator for up to 2 days.  To reheat it, microwave it for 30 seconds then stir and repeat until it is heated throughout.

Dipping a pretzel in cheese sauce.

More Cheesy Recipes:

Print

Homemade Cheese Sauce

Homemade Cheese Sauce is versatile, kid friendly and tastes great on everything from broccoli to bread.  This may be the best cheese sauce ever!
Course Appetizer, Sauce, Side Dish, Snack
Cuisine American
Keyword cheese sauce, homemade cheese sauce
Prep Time 5 minutes
Cook Time 15 minutes
Total Time 20 minutes
Servings 12 People
Calories 110kcal
Author Alyssa Rivers

Ingredients

Instructions

  • In a medium size sauce pan over medium high heat, add the butter and melt. Whisk in the flour and slowly whisk in the milk. Add in the cheese and mix until cheese is melted and serve.

Nutrition

Calories: 110kcal | Carbohydrates: 2g | Protein: 5g | Fat: 9g | Saturated Fat: 6g | Cholesterol: 27mg | Sodium: 142mg | Potassium: 45mg | Fiber: 1g | Sugar: 1g | Vitamin A: 280IU | Calcium: 159mg | Iron: 1mg


from The Recipe Critic https://ift.tt/2ZhCRPt
https://ift.tt/2ZgMcH7

शुक्रवार, 10 जुलाई 2020

Fish and Chips

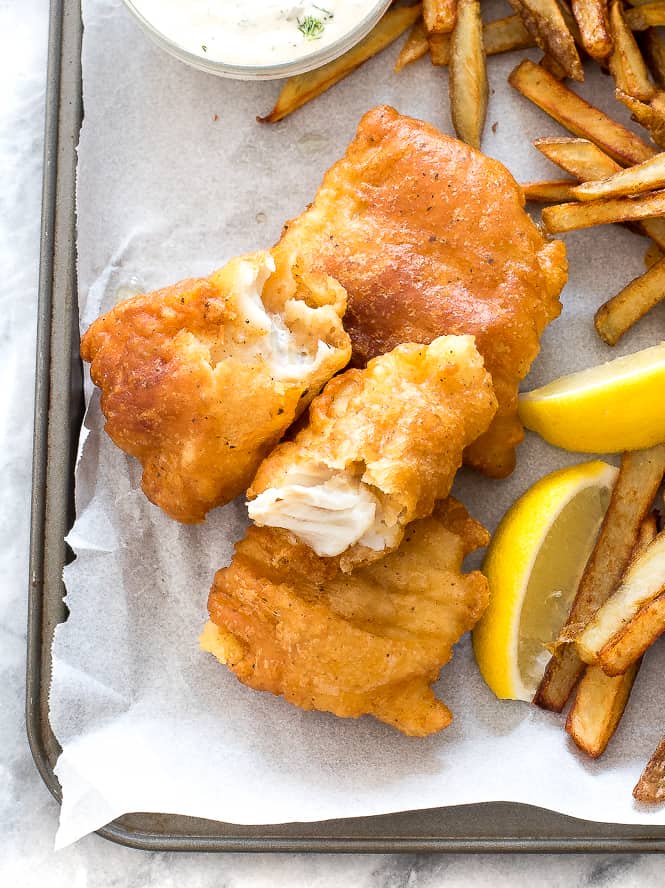
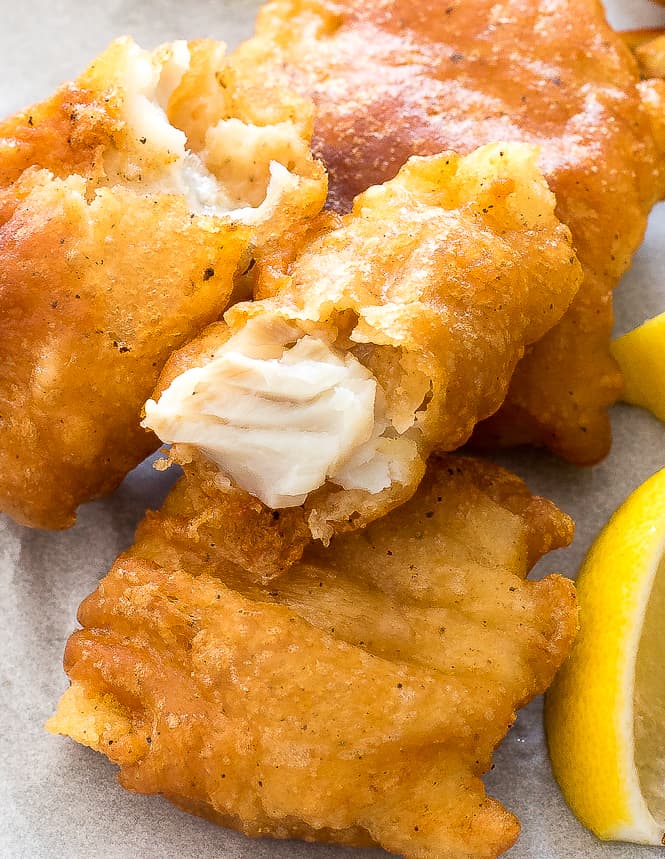
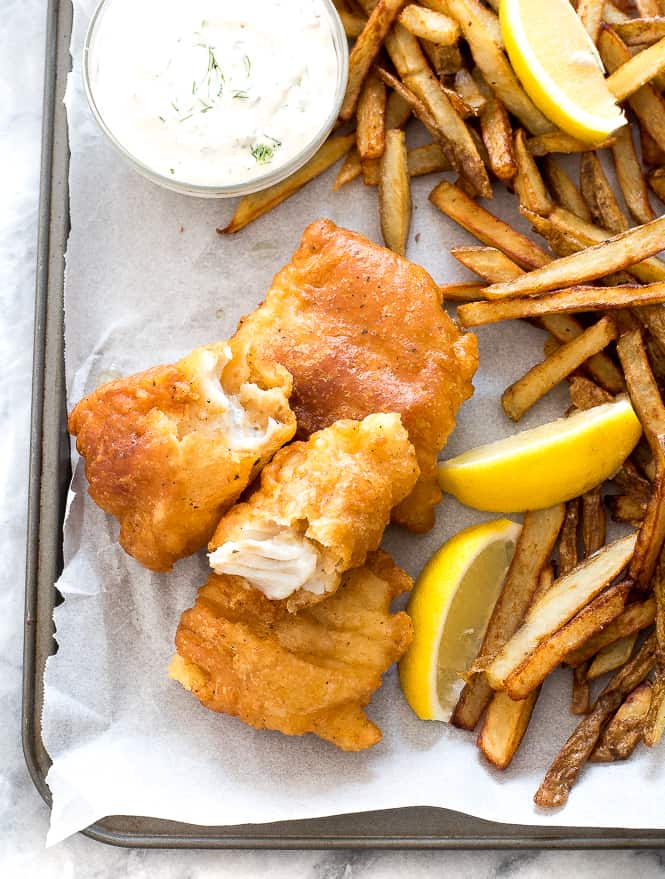
Super Easy Beer Battered Fish and Chips Recipe! This fried cod comes out super crispy and golden brown and flakey on the inside! The homemade french fries are perfectly golden brown and crisp! Serve this Classic Fish and Chips with tartar sauce, lemon wedges, malt vinegar or coleslaw!

Fish is one of my favorite main dishes! Try these Baja Fresh Tacos, Grilled Citrus Salmon with Pineapple Salsa or Best Baked Cod Fish Recipe.

Fish and chips on a sheet pan with parchment paper overtop with French fries and lemon slices on the side.

Beer Battered Fish and Chips

Is there anything better than homemade fish and chips? Perfectly crisp homemade french fries with beer battered cod! These fish and chips are just like the classic. The fizzy beer creates an airy batter perfect for fried cod. Both the fish and the fries get cooked in one pot of oil which means less clean up!

To get perfectly crispy french fries we fry them 2 times! First at a lower temperature then again at a higher temperature. The lower temperature cooks the fries and makes them tender and the higher temperature just crisps them up.

How to Make Fish and Chips:

  • Start with the french fries (1st Fry): Cut potatoes into 1 cm thick fries. Place in colander and rinse in cold water to remove some of the starch. Lay them out on a towel and pat dry. Heat 2 inches of oil on medium low to 200°F-250°F. Add in fries and let cook slowly for 12 minutes, maintaining a 200-250° temperature in the oil. The potatoes will be soft and flexible. Scoop out fries and lay them out on a cookie sheet.
  • Second fry: Raise oil up to 375°F. Refry, this time in small batches 5-7 minutes each,so that the oil temperature stays around 350°-375°F. Sprinkle with salt and pepper to taste.
  • Next make the cod: Cut fresh cod into 8 even pieces. Pat any excess moisture off of fish with a paper towel. In a bowl combine 3/4 cups of flour, salt, pepper, garlic powder, paprika, old bay. Whisk in 6-8 oz. of cold beer. It should be slightly thiner than pancake batter. Toss fish in remaining 1/2 cup of flour, then dip into beer batter, allow excess to drip off for a few seconds, then place carefully into 350°- 375°F oil. Fry no more than 3 pieces at a time so that the oil temperature dose not drop too quickly. Fry for 7 minutes, flipping half way through. While you are frying the rest of the fish keep the already done fish in a 200 degree oven to stay warm.
  • Serve: Immediately with malt vinegar and lime wedges for serving. I also like to have lots of dipping sauces for my fries. Ketchup, ranch and barbecue sauce are a must!

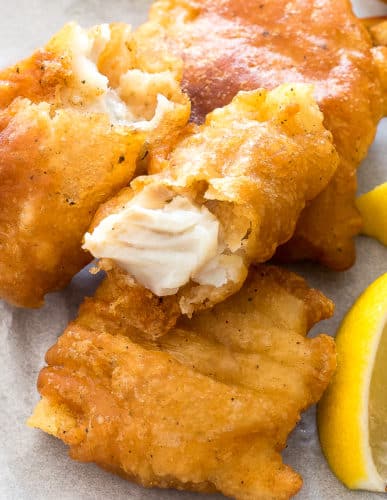
Fried fish on parchment paper with a slice of lemon next to it.

Tips:

  • Pat the cod dry with a paper towel. This is especially important if you are working with thawed frozen fish. This will help the batter stick to the fish and keeps the batter light and crispy.
  • Don’t over crowd the pan when frying the fish. This will cause the fish to stick together.
  • Make sure to use a thermometer when frying the fish and the french fries to ensure the oil is the perfect temperature.

Sliced potatoes in the shape of French fries ready to bake.

Do I Have to Use Beer?

No you can substitute sparkling water in place of the beer. Anything will carbonation creates a crisp airy batter.

Fish on the side with French fries, coleslaw and lemon slices on the side.

What to Serve with Fish and Chips:

Print

Fish and Chips

Super Easy Beer Battered Fish and Chips Recipe! This fried cod comes out super crispy and golden brown and flakey on the inside! The homemade french fries are perfectly golden brown and crisp! Serve this Classic Fish and Chips with tarter sauce, lemon wedges, malt vinegar or coleslaw!
Course Main Course
Cuisine American
Keyword Fish and Chips
Prep Time 20 minutes
Cook Time 25 minutes
Total Time 45 minutes
Servings 4
Calories 288kcal
Author Kelley Simmons

Ingredients

French Fries

  • 1 1/2 lbs russet potatoes
  • oil for frying

Beer Battered Cod

  • 1 1/2 lbs fresh cod
  • 6-8 oz. light beer
  • 1 1/4 cup all purpose flour, divided
  • 1 tsp salt
  • 1/2 tsp pepper
  • 1/4 tsp garlic powder
  • 1/4 tsp old bay
  • 1/4 tsp paprika

Instructions

For the fries

  • Cut potatoes into 1 cm thick fries. Place in colander and rinse in cold water to remove some of the starch. Lay them out on a towel and pat dry.
  • Add 2 inches of oil to a deep pot or chicken fryer no more than ½ of the way full!
  • Heat oil on medium low to 200°F-250°F. Add in fries and let cook slowly for 12 minutes, maintaining a 200-250° temperature in the oil. The potatoes will be soft and flexible.
  • Scoop out fries and lay them out on a cookie sheet. Raise oil up to 375°F.
  • Refry, this time in small batches 5-7 minutes each, so that the oil temperature stays around 350°-375°F. Remove them from the oil and sprinkle immediately with salt.

For the fish

  • Cut fresh cod into 8 even pieces. Pat any excess moisture off of fish with a paper towel.
  • In a bowl combine 3/4 cups of flour, salt, pepper, garlic powder, paprika, old bay. Whisk in 6-8 oz. of cold beer. It should be slightly thiner than pancake batter.
  • Toss fish in remaining 1/2 cup of flour, then dip into beer batter, allow excess to drip off for a few seconds, then place carefully into 350°- 375°F oil. Fry no more than 3 pieces at a time so that the oil temperature dose not drop too quickly. Fry for 7 minutes, flipping half way through.
  • Serve immediately while hot along with the fries. Serve with tartar sauce, lemon wedges and malt vinegar.

Nutrition

Calories: 288kcal | Carbohydrates: 32g | Protein: 34g | Fat: 1g | Saturated Fat: 1g | Cholesterol: 73mg | Sodium: 684mg | Potassium: 1421mg | Fiber: 2g | Sugar: 1g | Vitamin A: 139IU | Vitamin C: 11mg | Calcium: 49mg | Iron: 2mg


from The Recipe Critic https://ift.tt/3fhzsWw
https://ift.tt/2W6V5Bb