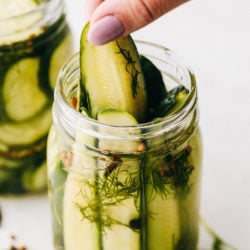
सोमवार, 27 जुलाई 2020

Zucchini Pizza

This easy zucchini pizza recipe is the perfect vegetarian meal when you’re craving a slice. Fresh dough is topped with a savory red sauce, mozzarella cheese, and thin slices of zucchini. The pie is baked until the crust is crispy and cheese is hot and bubbly.

Pizza is always a favorite in our home!  For more pizza ideas, make sure to try this Zucchini Crust Pizza, Taco Pizza, or Keto Pizza.

Zucchini Pizza

Homemade Zucchini Pizza

If you’re looking for a quick dinner idea that the whole family will enjoy, make a pizza! This is a tasty vegetarian option, letting the summer squash shine. The zucchini is thinly sliced, evenly placed around the dough, and then seasoned with Italian herbs and savory seasonings.
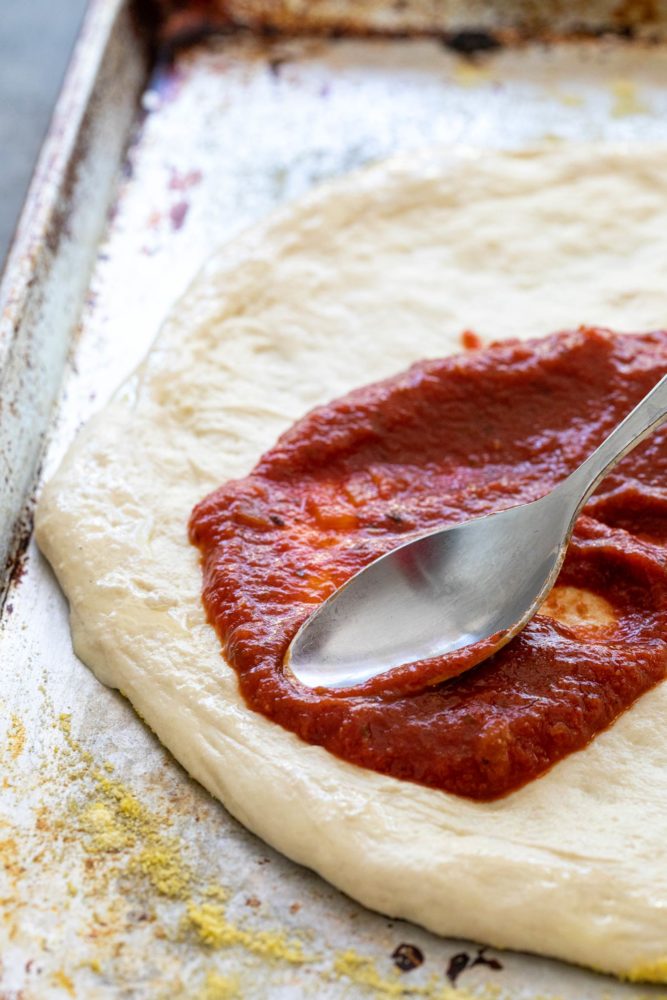
Spoon spreading pizza sauce on dough

How to Make Zucchini Pizza:

  1. If using fresh dough, let it sit at room temperature for 30 minutes to make it easier to toss.
  2. Grease a baking sheet with olive oil and sprinkle with cornmeal.
  3. Shape the pizza dough into a 12-inch circle on the baking sheet.
  4. Evenly spread on the pizza sauce, shredded cheese, zucchini, Italian seasonings, salt and pepper.
  5. Bake at 500ºF until the crust is golden brown and crisp, 10 to 12 minutes.
  6. Sprinkle it with red pepper flakes and parmesan cheese.
  7. Slice and serve the pizza while hot and the cheese is melted.

Pizza Crust:

I use my super easy homemade pizza dough recipe to make the dish from scratch. It yields two pies that have irresistible crispiness, and only takes about an hour to prepare! Or if you are in a pinch for time, store-bought crusts can be used. Look for 1 pound of fresh dough or the 10 to 12-inch wide pre-baked rounds.
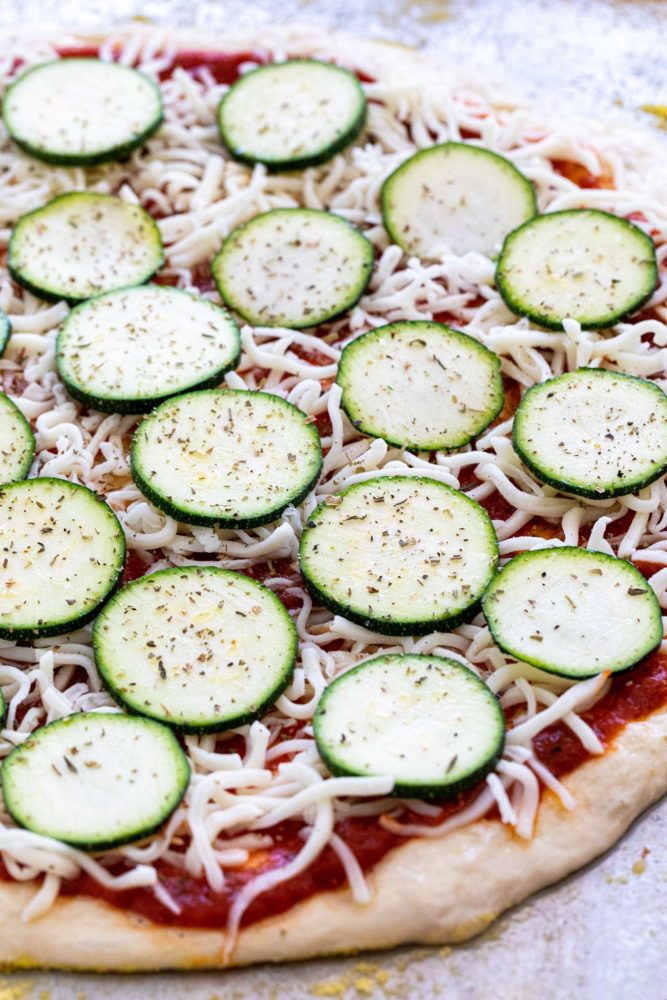
Thin slices of zucchini layered on top of a pizza

More Ways to Cook a Pizza:

Baking the pizza on a large sheet pan yields a larger pie and gives you more flexibility on the size, shape, and thickness. However, for an extra crispy crust, you can bake the pizza in a large cast-iron skillet. You can also grill the pizza dough, flip over, then add the toppings and heat until the toppings are hot and bubbly.
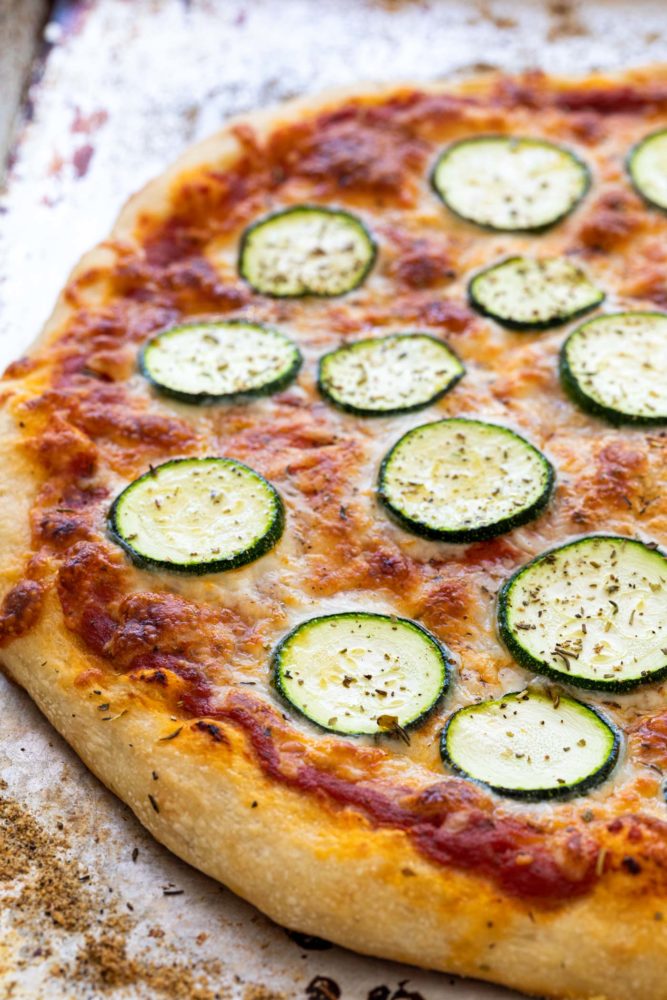
Oven baked pizza with slices of zucchini on top

Other Topping Suggestions:

To switch up this recipe, other ingredients can be used to pair with the zucchini. Slice up some yellow squash, red onions, or bell peppers for extra color and crunch. Add some mushrooms for a more savory taste. Sprinkle on some creamy feta, goat, or ricotta cheese. Add some pungency with marinated artichoke hearts or briny olives.
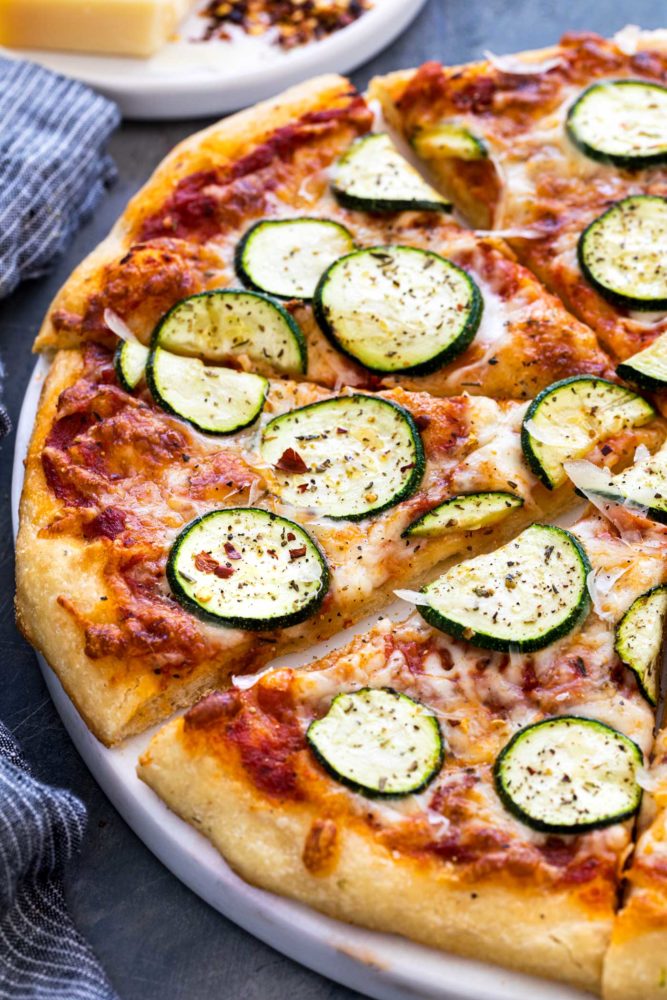
Pizza pie thats been cut into slices

Looking for More Pizza Inspired Recipes? Try these!

Print

Zucchini Pizza

Easy zucchini pizza recipe perfect vegetarian meal. Fresh dough is topped with a savory red sauce, mozzarella, and thin slices of zucchini.
Course Dinner, Main Course
Cuisine American, Italian, Italian American
Keyword homemade pizza, pizza pie, zucchini pizza
Prep Time 45 minutes
Cook Time 10 minutes
Total Time 55 minutes
Servings 8 slices
Calories 187kcal
Author Jessica Gavin

Ingredients

  • Olive oil for brushing
  • Cornmeal optional
  • 1 pound fresh pizza dough store-bought or homemade
  • ½ cup pizza sauce or marinara sauce
  • 1 cup 4 ounces shredded mozzarella cheese
  • ¾ cup thinly sliced zucchini ⅛-inch thick about 22 slices
  • ¼ teaspoon Italian seasonings
  • kosher salt as needed for seasoning
  • black pepper as needed for seasoning
  • Red pepper flakes for garnish, optional
  • Shaved parmesan cheese for garnish

Instructions

  • If using store-bought pizza dough, allow to sit at room temperature for 30 minutes.
  • Set the oven rack to the lower position. Preheat to 500ºF (260ºC). Lightly brush a large baking sheet with olive oil. Evenly sprinkle cornmeal on the pan if desired.
  • On a lightly floured surface, stretch and shape the dough into a 10-inch circle.
  • Transfer dough to the baking sheet. Use fingers to press into a 12-inch circle. Leave the edges slightly thicker, about ½-inch tall and wide.
  • Brush some olive oil on the edges of the dough to make the crust crispier when baked.
  • Spread the sauce on top, followed by the cheese, and zucchini. Sprinkle the Italian seasonings on top, and some salt and pepper.
  • Bake the pizza on the lowest oven rack until the crust is golden brown, and the cheese is melted and bubbly, about 10 to 12 minutes.
  • Sprinkle some red pepper flakes (if using) and parmesan cheese on top.
  • Slice and serve pizza immediately when still hot.

Nutrition

Calories: 187kcal | Carbohydrates: 29g | Protein: 8g | Fat: 5g | Saturated Fat: 2g | Cholesterol: 11mg | Sodium: 579mg | Potassium: 92mg | Fiber: 1g | Sugar: 5g | Vitamin A: 184IU | Vitamin C: 3mg | Calcium: 75mg | Iron: 2mg


from The Recipe Critic https://ift.tt/39tJNMY
https://ift.tt/39uSfLK
रविवार, 26 जुलाई 2020

Perfect Pineapple Upside Down Cake

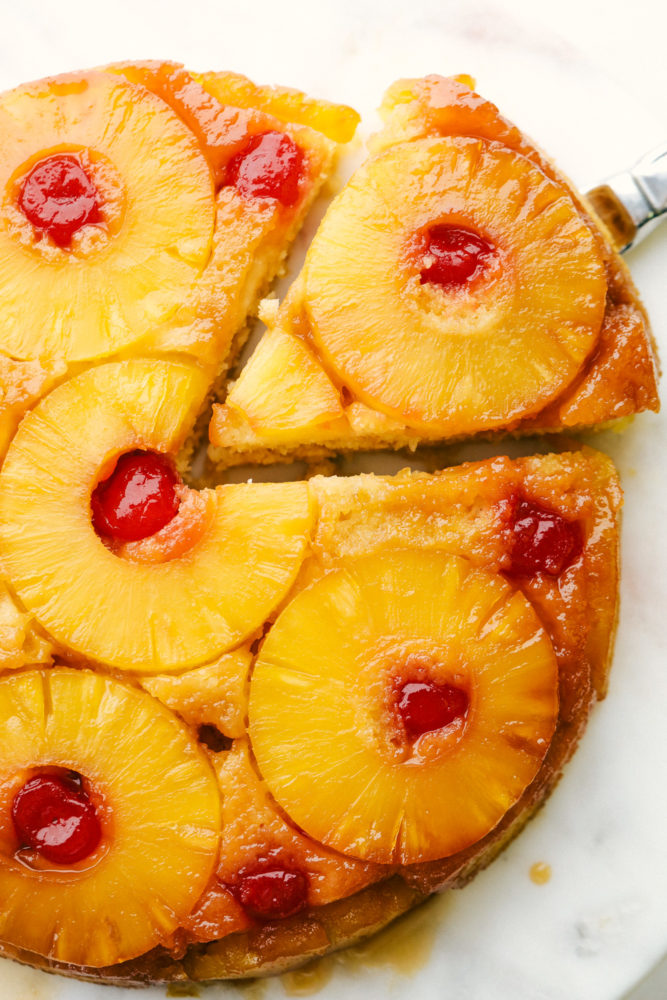
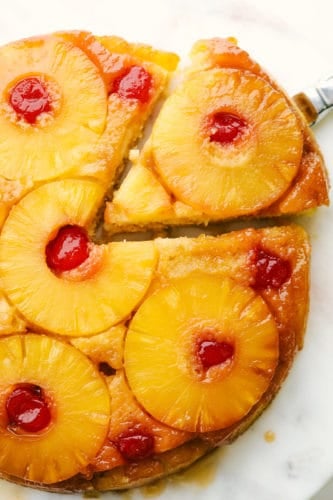
Perfect Pineapple Upside Down Cake is moist and fruity pineapple cake that is topped with delicious caramelized fruit.  It’s no wonder this simple and easy made-from-scratch cake has been a tried and true favorite for years!

Also try Pineapple Upside Down Cupcakes which are a fun twist on the classic Pineapple Upside Down Cake!  Or for a great pineapple taste that uses crushed pineapple, try Amazing Pineapple Cake!

Cutting a slice of Perfect Pineapple Upside down cake.

Perfect Pineapple Upside Down Cake:

Family favorite Pineapple Upside Down Cake is a soft and moist cake with a sticky-sweet fruit layer.  It is a great recipe for bakers who are looking for an easy but unique cake to make from scratch at home.  The colorful fruit topping is simple but impressive to serve, and it is a classic dessert that you will not be able to get enough of!

The cake layer is moist and rich and the pineapple flavor explodes in every bite!  Once flipped over, the brown sugar and butter topping drips down and coats the fruit.  Then, the caramelized fruit soaks in to the cake and creates the most moist cake ever!  It is a great recipe that you will make again and again because it is not only easy, but also delicious in every way!

Pineapple Cake Ingredients:

Canned pineapple and maraschino cherries are a couple of the no-fuss ingredients that will make this impressive, decadent dessert. These and a short list of other basic ingredients come together effortlessly to make an amazing treat your family and friends will go crazy over!

Topping:

  • Brown sugar: Combine with melted butter and spread on the bottom of the baking dish.
  • Butter: Melted to easily spread along the bottom of the pan.

Cake Ingredients:

  • Pineapple: Sliced canned pineapple rings work great!
  • Maraschino cherries: Sweet center of the pineapple that also adds great color!
  • All purpose flour: Part of the cake batter that will give it good structure that will hold up to the fruit layer.
  • Baking powder: Helps the batter rise.
  • Salt: Added to cake batter to balance all of the sweetness.
  • Butter:Softened to mix into the cake batter.
  • Sugar: Part of any great dessert!
  • Brown sugar: Measure it packed to get a rich sweet molasses flavor in the cake.
  • Egg: Adds moisture and stability to the batter.
  • Sour cream: Even more moisture!
  • Milk: Adding milk to the batter makes the cake moist and soft.
  • Pineapple juice: Great pineapple flavor throughout every bite.

Let’s Bake a Cake!

This buttery-rich homemade cake is topped with a baked fruit layer. It is incredibly delicious and easier than you think to make!  The pineapple flavor is bursting throughout every single bite.  A made from scratch cake has never been so easy!!

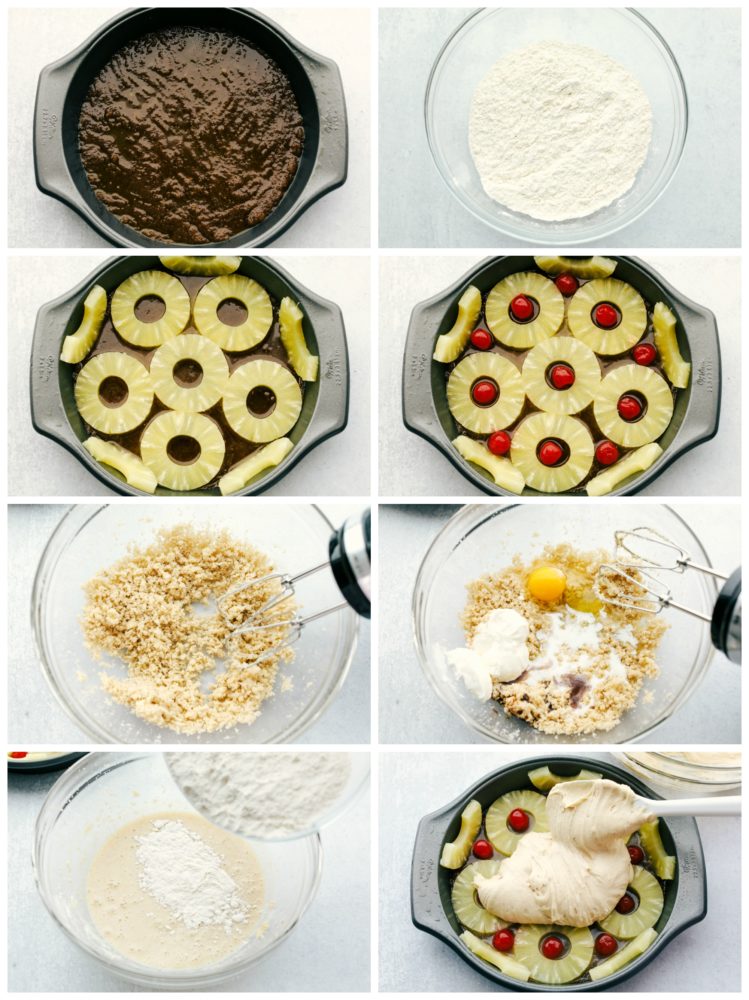
  1. Prep: Preheat oven to 350 degrees and grease a 9 inch cake pan.
  2. Make the topping: Combine the brown sugar and melted butter in a small bowl. Spread on the bottom of your 9 inch cake pan.
  3. Layer pineapple and cherries: Arrange the pineapple slices along the bottom of the pan and along the rim. Add cherries to the center of pineapple and in between pineapple slices.
  4. Mix together cake batter: In a medium sized mixing bowl combine the flour, baking powder and salt. In another medium sized mixing bowl with a hand mixer combine the softened butter and sugars and beat until incorporated. Add in the egg, sour cream, milk and pineapple juice and beat until just combined. Add in the flour mixture.
  5. Cover fruit with cake batter: Spread batter evenly on top of the prepared fruit covered pan.
  6. Bake: Place pan in the oven and bake for 30-35 minutes or until golden brown and toothpick inserted comes out clean.

Steps to make pineapple upside down cake.

The BEST Pineapple Upside Down Cake:

Classic recipes don’t have to be outdated.  This recipe that has been around for generations is still as current and tasty as ever!  A few pro tips will teach you how to finish off and store this unbelievably good dessert!

  • Room temperature ingredients: Allow all ingredients to come to room temperature before combining them together to get the best mixture.
  • Don’t grease the pan: Because you coat the bottom of the dish with butter, you do not need to grease the pan.  The cake will slide right out when you flip it over at the end.
  • Dry fruit: Pat the pineapple and cherry dry before pouring the batter over it.  This is already a very moist cake and any extra moisture from the fruit will make it overly wet.
  • When to flip the cake: Wait 10-15 minutes before flipping your cake over. Allowing it to cool first will make sure your cake stays together and does not fall apart when you flip it over.  Try using a cooling rack or plate and placing it over the cake before turning the pan over.
  • Storing: Pineapple upside down cake is best served fresh.  Storing can cause the cake to get too mushy due to the moisture from the fruit.  For best results when storing, let the cake cool completely, then wrap it tightly and refrigerate for 2-3 days or freeze for about 1 month.
  • Reheating: To reheat in the oven, cover it with foil and bake at 350 degrees for about 5 minutes or until heated throughout.

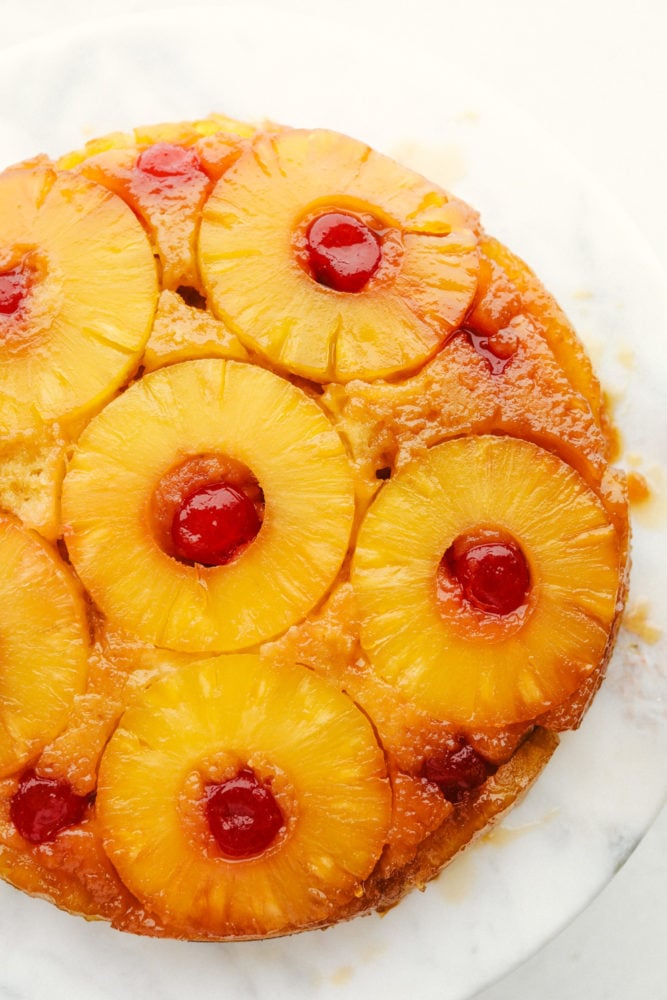
Areal view of finished pineapple upside down cake.

Do You Eat Pineapple Upside Down Cake Warm?

This soft, simple dessert can be served warm or cold.  Either way, the pineapple flavor will be light and tasty.  If you serve it warm, top it with vanilla ice cream for amazing combination.  To reheat a frozen or refrigerated cake, simply cover it with aluminum foil and place in the oven until it is warm throughout.  Or, enjoy pineapple upside down cake as a cool and refreshing treat, and serve it right out of the refrigerator!

Close up on a slice of pineapple upside down cake.

More Fruity Cake Recipes:

Print

Perfect Pineapple Upside Down Cake

Perfect Pineapple Upside Down Cake is moist and fruity pineapple cake that is topped with delicious caramelized fruit.  It's no wonder this simple and easy made-from-scratch cake has been a tried and true favorite for years!
Course Dessert
Cuisine American
Keyword pineapple, pineapple cake, pineapple upside down cake
Prep Time 15 minutes
Cook Time 35 minutes
Total Time 50 minutes
Servings 8 Slices
Calories 348kcal
Author Alyssa Rivers

Ingredients

Topping:

  • 1/2 cup brown sugar
  • 1/4 cup butter melted

Cake Ingredients:

  • 1 20 ounce can pineapple sliced
  • 12 maraschino cherries
  • 1 and 1/3 cup all purpose flour
  • 1 teaspoon baking powder
  • 1/2 teaspoon salt
  • 1/4 cup butter softened
  • 1/2 cup sugar
  • 1/4 cup brown sugar packed
  • 1 large egg
  • 1/4 cup sour cream
  • 1/4 cup milk
  • 1/4 cup pineapple juice

Instructions

  • Preheat oven to 350 degrees and grease a 9 inch cake pan. To make the topping combine the brown sugar and melted butter in a small bowl. Spread on the bottom of your 9 inch cake pan. Arrange the pineapple slices along the bottom of the pan and along the rim. Add cherries to the center of pineapple and in between pineapple slices.
  • In a medium sized mixing bowl combine the flour, baking powder and salt. In another medium sized mixing bowl with a hand mixer combine the softened butter and sugars and beat until incorporated. Add in the egg, sour cream, milk and pineapple juice and beat until just combined. Add in the flour mixture.
  • Spread evenly on top of the prepared pan. Bake for 30-35 minutes or until golden brown and toothpick inserted comes out clean.

Nutrition

Calories: 348kcal | Carbohydrates: 54g | Protein: 3g | Fat: 14g | Saturated Fat: 8g | Cholesterol: 55mg | Sodium: 271mg | Potassium: 138mg | Fiber: 1g | Sugar: 37g | Vitamin A: 441IU | Vitamin C: 1mg | Calcium: 69mg | Iron: 1mg


from The Recipe Critic https://ift.tt/3f0UVSF
https://ift.tt/2D2oYfn

शनिवार, 25 जुलाई 2020

No Bake Oreo Balls

No Bake Oreo Balls are rich and smooth truffles that are moist and flavor packed and coated with a smooth chocolate shell.  They are quick and easy to prepare and are a treat everyone will go crazy over!

Try Cookies and Cream Cheesecake Bars or Oreo Cheesecake Brownies for more of the dense chocolate and cream cheese texture.  They make the perfect Oreo treats!

Oreo truffles stacked on a white plate.

Easy No Bake Oreo Balls

No bake Oreo balls are perfect treats to beat the summer heat.  They are quick and easy to make and don’t require you to heat up your kitchen.  The hardest part will be waiting for these delicious oreo balls to freeze.  Dip them and drizzle them in luxurious white and semi-sweet chocolate for layers of rich flavor that is so good!

Oreo desserts are always a huge hit because of their sweet and balanced flavor.  This treat is no exception.  They will be crowd-pleasing and impressive.  They look gorgeous and taste incredible.  Stack them up for a beautiful display, but beware they will disappear quickly.  Make more than you think you need because they are hard to resist!

Oreo Balls Ingredients:

This super short list of ingredients comes together to make the BEST oreo dessert!  The bite-size truffles are bursting with sweet oreo flavor and coated with a smooth layer of rich chocolate and a sprinkle of oreo crumbs.

  • Oreo cookies: The start of any amazing dessert!
  • Cream cheese: Soften to room temperature then mix together with crushed oreos.
  • White chocolate chips: Melt the chocolate chips to drizzle over the oreo balls for a soft and sweet coating.
  • Semi-sweet chocolate chips: Great for balancing all the sweetness in these oreos!
  • Crushed Oreos: Sprinkle on top of the truffles for a perfect crunchy topping.

How to Make No Bake Oreo Balls:

No bake oreos are quick and easy to assemble and don’t even require you to pre-heat your oven.  The presentation of these oreo truffles is so pretty and impressive.  They look professional, but once you make them, you will see how easy it is to create these beautiful and delicious oreo truffles from scratch at home!

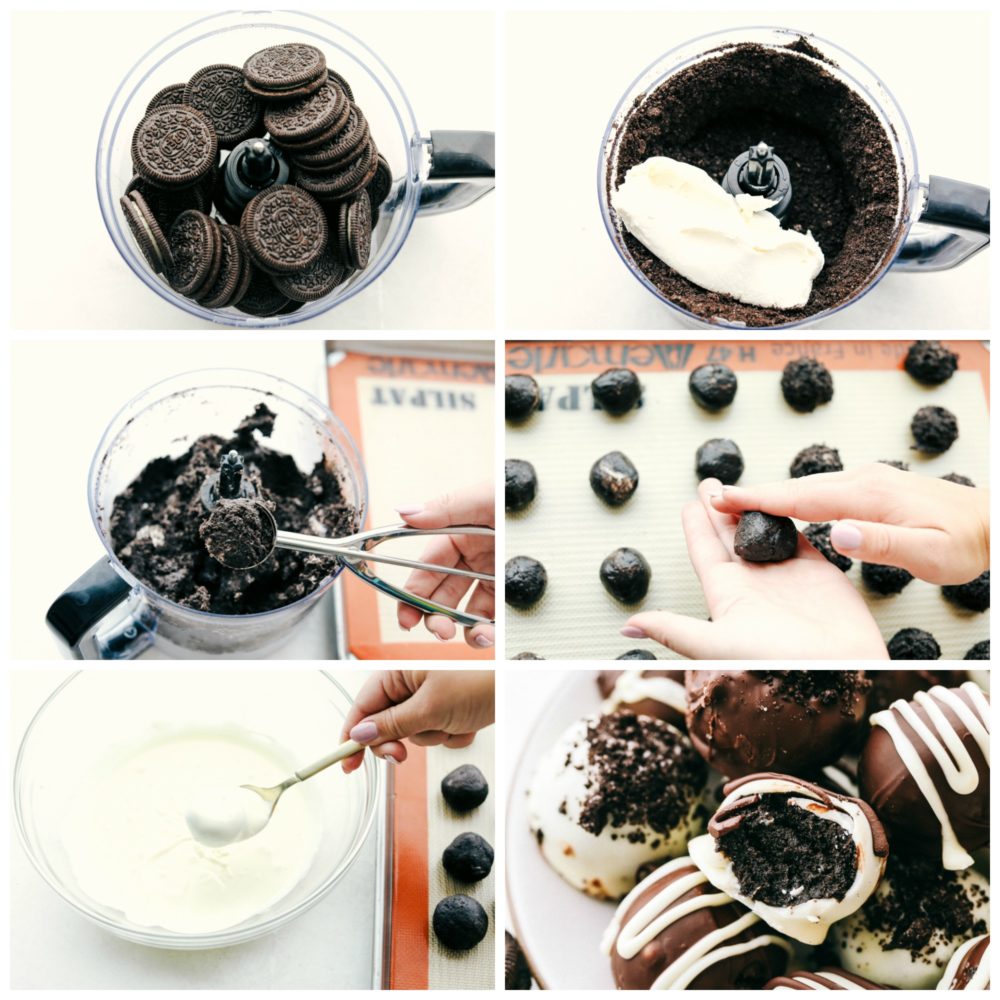
  1. Prep: Line a cookie sheet with parchment paper. Then, in a food processor add the oreos and pulse until fine crumbs.
  2. Mix together cream cheese and oreo crumbs: Add in the cream cheese and continue to mix until fully combined.
  3. Form truffles: Using a small cookie scoop, scoop out 1 inch balls and place on parchment paper. Then roll each ball in your hands to make them perfectly round.
  4. Chill: Freeze oreo balls for about 20 minutes.
  5. Chocolate coating: In a medium size bowl melt the chocolate chips 30 seconds at a time until smooth and melted.  When it is melted, dip each ball into the chocolate and place on the parchment to let set.
  6. Serve and enjoy: Top with crushed oreos if desired.

Steps to make oreo truffles.

Tips for Creating the Perfect Oreo Truffles:

Get creative with these Oreo balls.  Make them each unique with different toppings and chocolate drizzles.  There is no wrong way to make them, so have fun!

  • Coating Truffles: Use a toothpick to dip the oreo balls in the melted chocolate. It’s the best way to get a perfect smooth coat.
  • Toppings: Crushed oreo sprinkled on top of these truffles gives a great crunch.  Also try nuts, sprinkles, or coconut to add different flavors and textures.
  • Chocolate: Candy melts or cooking bars are also great to use for the chocolate coating if that is what you have on hand.  Add vegetable oil to thin out chocolate that is thicker than you prefer.

How to Store Homemade Oreo Balls:

To store your oreo balls, place them in an airtight container and use wax paper to separate layers.  Then, you can freeze these truffles for up to two months.  You will be so happy when you remember you have them to pull out for last minute entertaining or for a luxurious weeknight treat.  If you plan to eat them within a couple of weeks, they can be stored in the refrigerator.

Areal view of finished oreo truffles.

More Oreo Dessert Recipes:

Print

No Bake Oreo Balls

No Bake Oreo Balls are rich and smooth truffles that are moist and flavor packed and coated with a smooth chocolate shell.  They are quick and easy to prepare and are a treat everyone will go crazy over!
Course Dessert, Snack
Cuisine American
Keyword no bake oreo balls, oreo balls
Prep Time 15 minutes
Total Time 15 minutes
Servings 24 Oreo Balls
Calories 168kcal
Author Alyssa Rivers

Ingredients

  • 1 14 ounce package Oreo cookies
  • 1 8 ounce package cream cheese
  • 2 cups white chocolate chips
  • 2 cups semi sweet chocolate chips
  • crushed Oreos for topping

Instructions

  • Line a cookie sheet with parchment paper. In a food processor add the oreos and pulse until fine crumbs. Add in the cream cheese and continue to mix until fully combined.
  • Using a small cookie scoop, scoop out 1 inch balls and place on parchment paper. Roll each ball in your hands and freeze for about 20 minutes.
  • In a medium size bowl melt the chocolate chips 30 seconds at a time until smooth and melted. Dip each ball into the chocolate and place on the parchment to let set. Top with crushed oreos is desired.

Nutrition

Calories: 168kcal | Carbohydrates: 17g | Protein: 2g | Fat: 11g | Saturated Fat: 6g | Cholesterol: 4mg | Sodium: 15mg | Potassium: 128mg | Fiber: 1g | Sugar: 14g | Vitamin A: 12IU | Vitamin C: 1mg | Calcium: 39mg | Iron: 1mg


from The Recipe Critic https://ift.tt/2ZWwRMu
https://ift.tt/3hETSJT

Refrigerator Pickles

Refrigerator Pickles are easy to make and are perfectly crunchy and flavorful.  Crispy pickles have been a family favorite for years and are now so simple to make from scratch at home!

For a creative way to use your refrigerator pickles and their juice, try using them to make Copycat Chic-fil-a Nuggets or a Chic-fil-a Chicken Sandwich.  Add a pickle on the sandwich too for the perfect crunch!

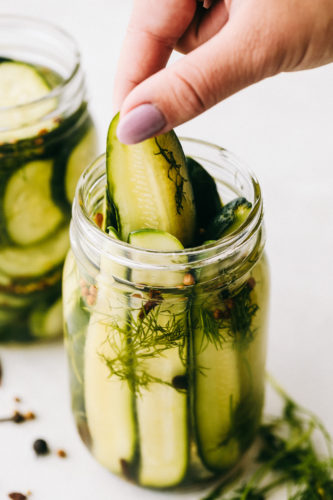
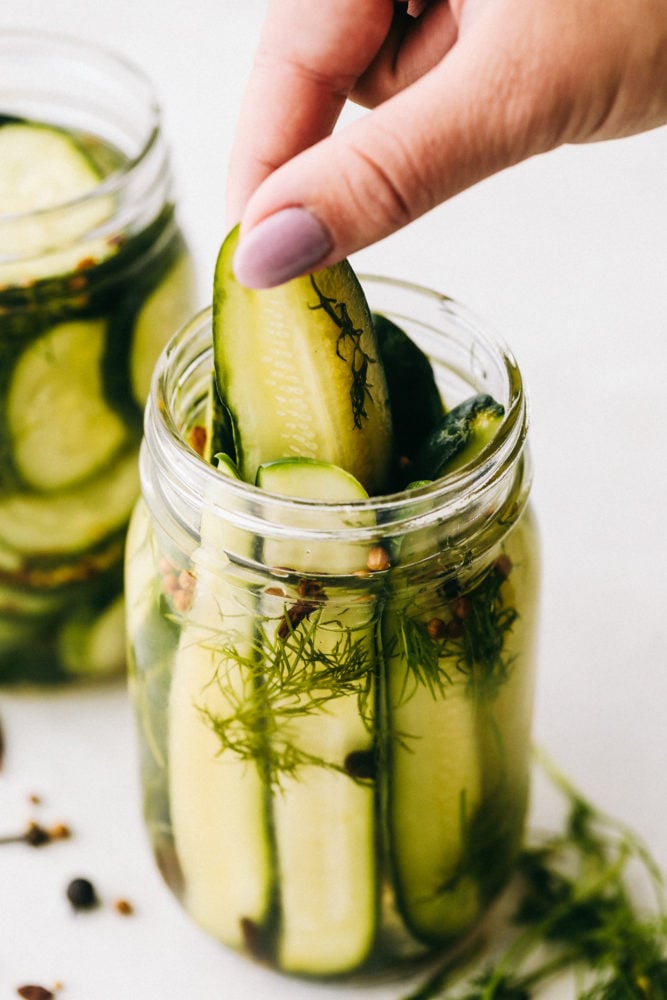
Refrigerator pickles in a jar

Refrigerator Canned Pickles

Vibrant and crisp pickles make such a refreshing snack or addition to any sandwich.  Store bought jars can lack the pungent flavor and crunchy bite that makes a pickle so delicious.  That’s why pickling cucumbers at home is so amazing.  You are guaranteed they will be light and fresh and you can create the exact taste you want in your pickle by making variations in your brine.

These refrigerator pickles are loaded with the bright and fresh taste of vinegar and a hint of sweetness from the sugar and garlic.  It is so easy to become obsessed with these incredible pickles.  They will be a huge hit at any barbecue or picnic and everyone will be so impressed they are homemade!

Pickle Jar Ingredients:

Refrigerator pickles are naturally low carb, low calories, and fat free.  They are a great healthy snack.  The ingredients in the brine are pantry staples that give the pickles their signature flavor.

  • Pickling Cucumbers: These are different than the smooth cucumbers you may be picturing. Instead, look for short, bumpy skinned cucumbers.
  • Fresh Dill: Adds the dill flavor you expect in a pickle.
  • Water: The base of the brine that the cucumbers soak in.
  • Vinegar: Helps break down the cucumber and soak in the flavors.
  • Pickling Spices: Add even more great taste to these pickles.
  • Sugar: Balances the other salty flavors.
  • Salt: If you are on a low sodium diet, reduce the amount of salt you add in.
  • Garlic: Place a garlic clove on top of the brine for a rich smooth flavor.

Let’s Make Pickles!

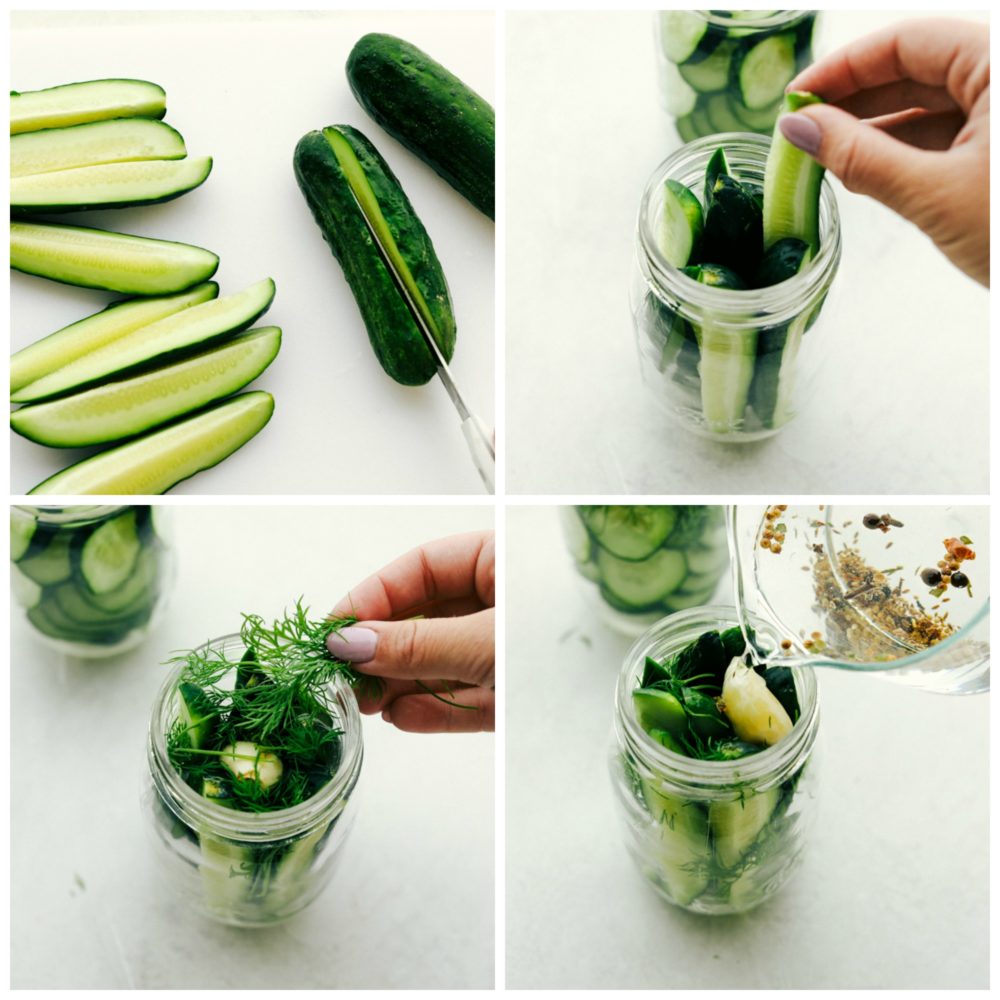
Pickles are surprisingly easy to make at home.  Simply cut cucumber and allow it to soak in the vinegar and pickling spice mixture.  This is a no fail recipe that requires little effort and time, but delivers huge flavor that your whole family will enjoy!

  1. Cut cucumbers: Slice cucumbers as desired, lengthwise or horizontal. Place in 2 (16 ounce) mason jars.
  2. Fill jars: Place the dill into the jars.
  3. Mix brine: In a bowl combine water, vinegar, pickling spices, salt and sugar. Pour into the jar until the liquid is covering the cucumbers.  Place a garlic clove on top and seal.
  4. Refrigerate: Let the pickles soak for at least 24 hours.

The process of canning pickles.

Tips and Variations for Homemade Pickles:

To make canned pickles even better, tweak the brine to suit your taste preferences.  You can load the pickles up with your favorite spices and have total control over the ingredients.  Every bite will be bursting with personalized flavor!

  • Serve with: Zesty pickles are great stacked up on burgers and sandwiches like this Big Mac burger or an ultimate Cuban sandwich. They also make a great snack alongside Chicken Caesar Salad wraps on a picnic.
  • Spicy Pickles: If you love spicy pickles add a bit of red pepper flakes to your liquid.
  • Boil the brine: For even more amazing flavor, try boiling your brine. Just make sure to let it cool completely before adding in your pickles or they will become soft.  If you decide to boil your brine, do not use pans with metal in them like copper or cast iron, or you will get a metallic taste.  Instead, stick to stainless steel or ceramic.
  • Presentation: Slice the cucumbers differently depending on their use. For example, cut them into spears for snacking.  However, when making them to use in sandwiches you will want to slice them into round slices or long thin slices.

How Long Do Canned Pickles Last?

Your homemade pickles will be fresh in your refrigerator for up to 2 months.  However, once you try them you will see they will not last that long!  They do become more soggy the longer they sit, so for the best crunch use soon after making them.

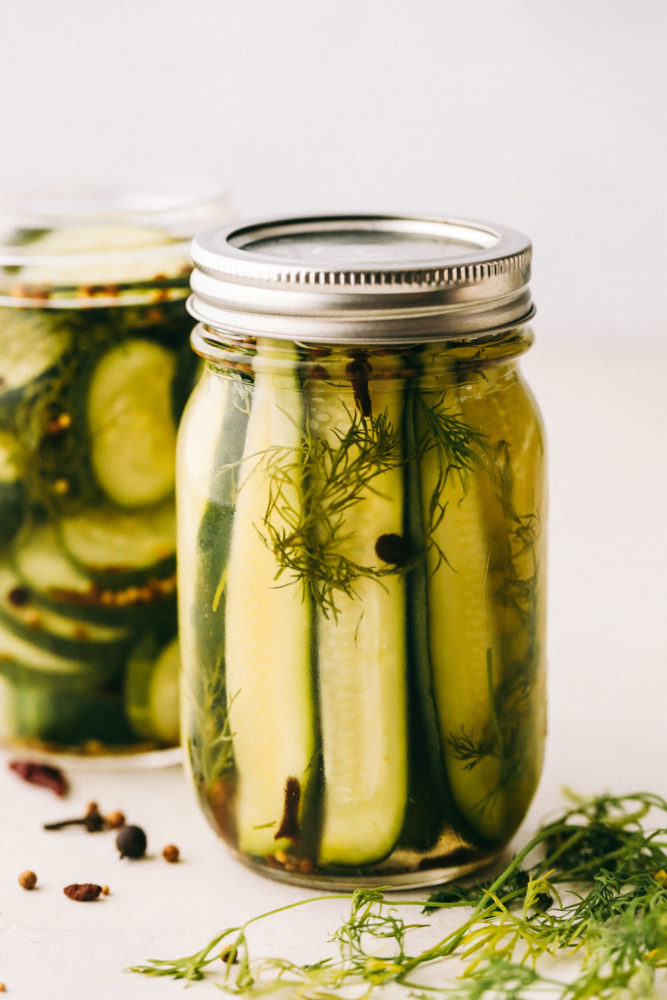
Jar of refrigerator pickles.

More Homemade Condiment Recipes:

Print

Refrigerator Pickles

Refrigerator Pickles are easy to make and are perfectly crunchy and flavorful.  Crispy pickles have been a family favorite for years and are now so simple to make from scratch at home!
Course Appetizer, Side Dish, Snack
Cuisine American
Keyword canned pickles, pickles, refrigerator pickles
Prep Time 10 minutes
Total Time 10 minutes
Servings 2 Jars of Pickles
Calories 157kcal
Author Alyssa Rivers

Ingredients

  • 6 Pickling Cucumbers
  • 2 Tablespoons fresh dill
  • 1 cup water
  • 2/3 cup vinegar
  • 1 Tablespoon pickling spices
  • 1 tablespoon sugar
  • 1 teaspoon salt
  • 1 garlic clove

Instructions

  • Slice cucumbers as desired, lengthwise or horizontal. Place in 2 (16 ounce) mason jars.
  • Place the dill into the jars.
  • In a bowl combine water, vinegar, pickling spices, salt and sugar. Pour into the jar until the liquid is covering the cucumbers. Place a garlic clove on top and seal. Refrigerate for at least 24 hours.

Nutrition

Calories: 157kcal | Carbohydrates: 28g | Protein: 6g | Fat: 2g | Saturated Fat: 1g | Sodium: 1191mg | Potassium: 1255mg | Fiber: 7g | Sugar: 18g | Vitamin A: 679IU | Vitamin C: 30mg | Calcium: 151mg | Iron: 2mg


from The Recipe Critic https://ift.tt/2WVcAEZ
https://ift.tt/2BrX4Jd