मंगलवार, 22 सितंबर 2020

Pumpkin Cream Cheese Truffles

Combine cream cheese with pumpkin and a few amazing ingredients to get a delicious truffle. Creamy melt in your mouth richness with all the flavors of fall, it’s the perfect decadent dessert!

I love the spice that comes from the gingersnaps in this recipe. Ginger is such a great flavor to bake with, try these other ginger rich recipes.  Perfect Gingerbread Cookies, Best Ever Molasses Cookies, or Gingerdoodles.
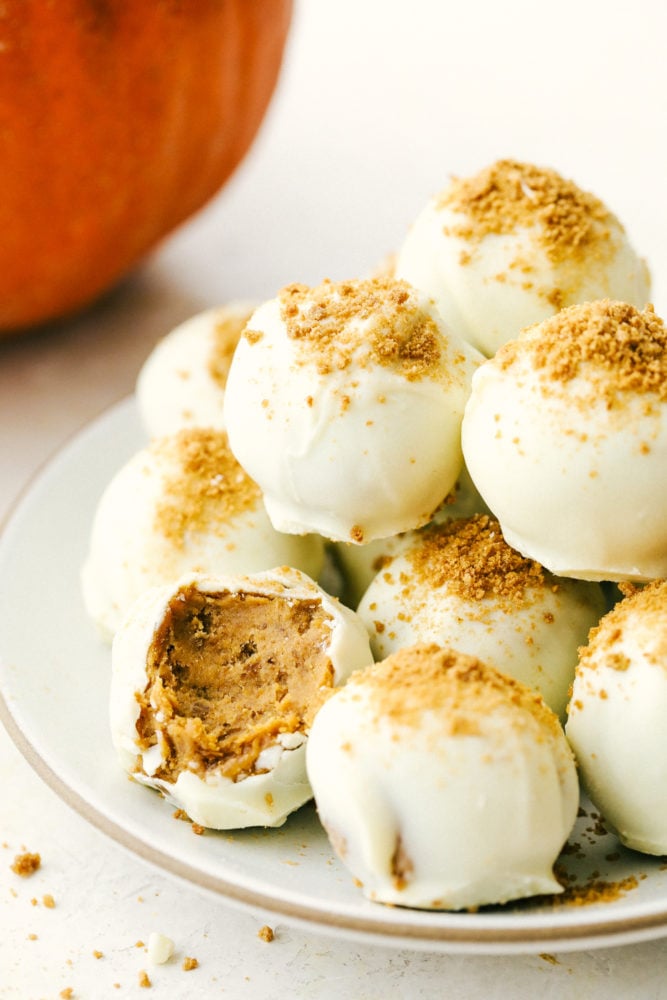
Cream cheese, pumpkin and gingersnaps combine to make amazing pumpkin truffles.

Pumpkin Cream Cheese Truffles

These Pumpkin Cream Cheese Truffles are the perfect dessert when you want something sweet and full of those sweet fall flavors but you don’t want a whole piece of pie. Pumpkin and cream cheese are a match made in heaven and the richness of these truffles is irresistible.

These are perfect for a quick but impressive dessert and although they take a little time, they are quite simple to make. Rolling the truffles in the white chocolate and waiting for them to set is the hardest part. They are going to be the hit of table, whether it’s at your office party, a family gathering or a festive holiday. They are sure to impress.

White Chocolate Truffle Ingredients:

Combining the flavors of graham crackers and gingersnaps in the truffles adds a little bit of crunch and texture with flavor that will have you coming back for more. Luscious white chocolate is melted to perfection coats the delicate balance of sweetness and spice. We call it a bit of fall Heaven.

  • Gingersnap Cookie: You want to buy ones that are crunchy not soft
  • Graham Cracker: Blend these with the cookies so they’re all the same consistency
  • Cream cheese: You can use low fat cream cheese
  • Confectioners’ Sugar:  Other wise known as powdered sugar
  • Pumpkin Puree: You don’t need a whole can, save the rest in the fridge for another pumpkin recipe
  • Cinnamon: Blends beautifully with the ginger
  • Salt: Helps to balance the sweet
  • White Chocolate Chips: You’ll divide the white chocolate chips to use in two different times. Almond Bark will also work for the coating.

Making Pumpkin Truffles:

  • Crumbs: In a food processor place the cookies and crackers and pulse till fine crumbs. You can also place them in a gallon freezer bag and crush with a heavy rolling pin.
  • Mix: In a large bowl combine the crumbs, cream cheese, sugar, pumpkin puree, cinnamon and salt and beat till smooth.
  • Melt:  Melt 1/2 cup chocolate chips in the microwave in 30 second increments stirring between each one till melted. Watch carefully so you don’t burn it. Add the melted chocolate to the truffle mixture and chill for about 2 hours till solid enough to roll into balls.
  • Form: On a lined baking sheet with parchment paper, roll a heaping teaspoons of the mixture into balls. Melt the remaining chocolate and drop the balls in the chocolate using a spoon to coat.  Place the truffle on the parchment paper and garnish with extra crumbs if desired.
  • Chill:  Refrigerate the truffles for at least 30 min or till chocolate has set. Refrigerate any leftovers.
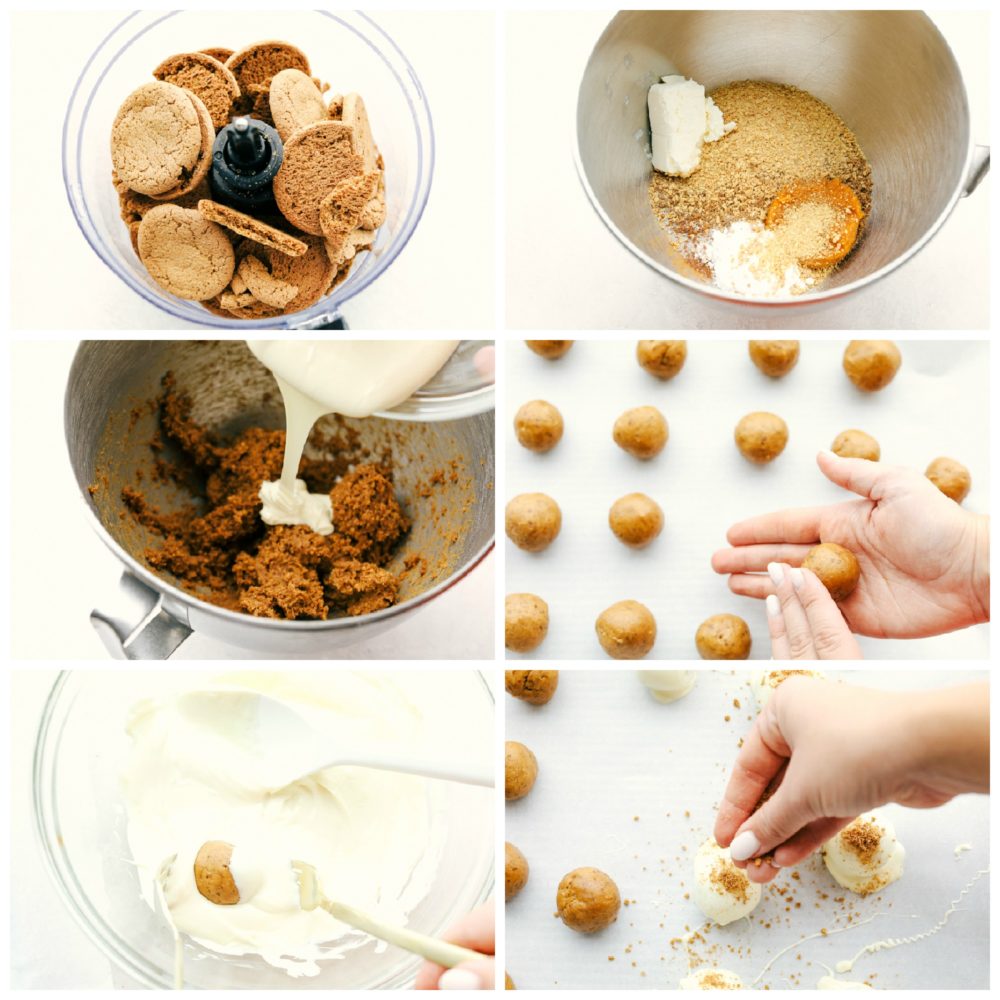
 

Making pumpkin cream cheese truffles with gingersnaps and graham crackers.

Why this Truffle Works and Tips:

  • Gingersnaps and Graham Crackers: Truffles need a soft mold-able center so you can roll them into that iconic truffle shape. The gingersnap and graham cracker crumbs provide the stability and intense added flavor to the pumpkin mixture. Pumpkin puree is borderline runny. Combined with the cream cheese and white chocolate you have a perfectly soft delicate flavored middle.
  • Crumb Tip: The finer the crumb the easier the filling will be to shape and roll and mix together.
  • White Chocolate: White chocolate chips are made to hold their shape when melted so it can be tricky to get it the right consistency. That’s why you want to melt it in increments, and stirring often to help break it down and not burn it. Using the White chocolate chips in the batter will help it hold it’s shape when it cools.
  • White Chocolate Tip: If you have trouble melting the chocolate to the right consistency for the outer coating, use the almond bark or a high quality white chocolate that will melt easier.
  • Melting:  Moisture is the enemy of melting chocolate. Be careful not let water get into your chocolate especially if you use a double boiler to melt it.

Variations of Pumpkin Truffles:

  • Chocolate: Try using dark, semi-sweet or milk chocolate for your outside coating.
  • Garnish: Sprinkle with pumpkin pie spice or course salt for a different flavor.
  • Filling: Add in finely chopped walnuts or pecans for a little extra crunch.
  • Substitute: You can substitute pumpkin pie spice for the cinnamon or add nutmeg with the cinnamon for a bit for zing.
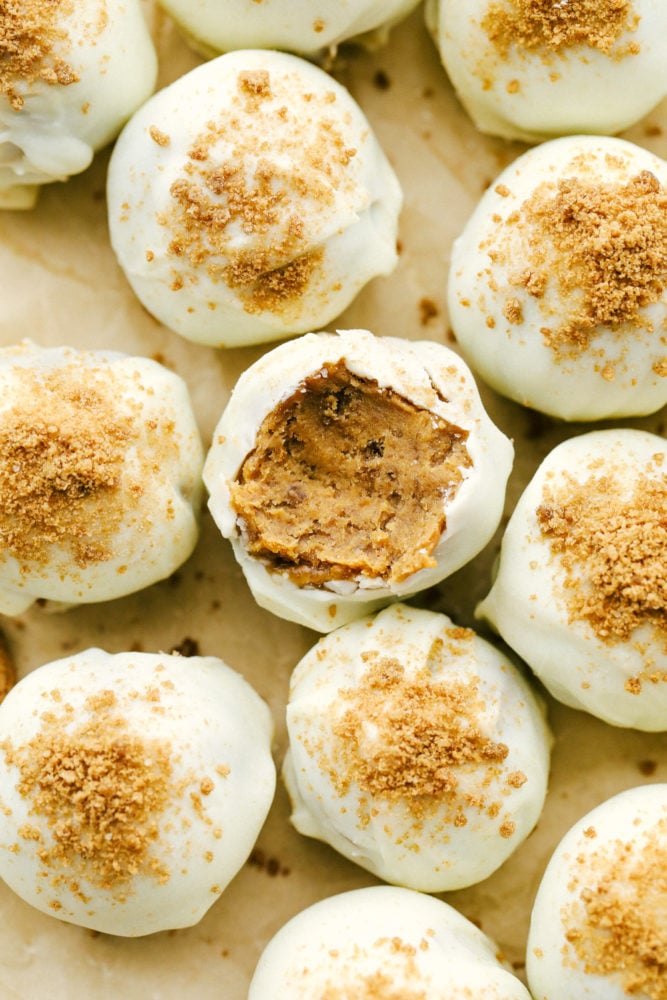
Pumpkin Cream cheese Truffles with gingersnaps and graham crackers.

More Pumpkin Sweetness:

Print

Pumpkin Cream Cheese Truffles

A delicious no bake truffle that is combined with pumpkin and cream cheese!
Course Dessert, Snack
Cuisine American
Keyword cream cheese truffles, pumpkin truffles, truffles, white chocolate truffles
Prep Time 20 minutes
Chill 2 hours 30 minutes
Total Time 2 hours 50 minutes
Servings 12 Truffles
Calories 291kcal
Author Alyssa Rivers

Ingredients

  • 1 1/2 cup gingersnap cookie crumbs
  • 1/4 cup graham cracker crumbs
  • 2 ounces cream cheese softened
  • 2 tablespoon confectioners’ sugar
  • 1/4 cup canned pumpkin purée
  • 1/4 teaspoon ground cinnamon
  • Pinch of fine salt
  • ½ cup white chocolate chips
  • 2 cups white chocolate chips almond bark will also work

Instructions

  • In a large mixing bowl or kitchen aid mixer with paddle attachment, combine gingersnap crumbs, graham cracker crumbs, cream cheese, sugar, pumpkin puree, cinnamon and salt. Beat until smooth.
  • Melt 1/2 cup chocolate chips in microwave every 30 seconds, stirring so that it doesn't burn. Add the melted chocolate and combine with mixture. Cover and chill for about 2 hours until it is solid enough to roll into balls.
  • Line a baking sheet with parchment paper and roll one heaping teaspoon of the mixture into balls. Melt the remaining white chocolate and drop the balls in the chocolate using a spoon to coat. Lift the truffle out of the chocolate and place on the parchment paper. Garnish with additional gingersnap crumbs and graham cracker crumbs if desired.
  • Chill truffles for about 30 minutes until chocolate has set. Refrigerate remaining truffles.

Notes

Updated on September 21, 2020
Originally Posted on October 15, 2013

Nutrition

Calories: 291kcal | Carbohydrates: 36g | Protein: 3g | Fat: 15g | Saturated Fat: 9g | Cholesterol: 13mg | Sodium: 132mg | Potassium: 176mg | Fiber: 1g | Sugar: 27g | Vitamin A: 867IU | Vitamin C: 1mg | Calcium: 93mg | Iron: 1mg


from The Recipe Critic https://ift.tt/2yoeRLU
https://ift.tt/3cmhQYF
सोमवार, 21 सितंबर 2020

Instant Pot Chili

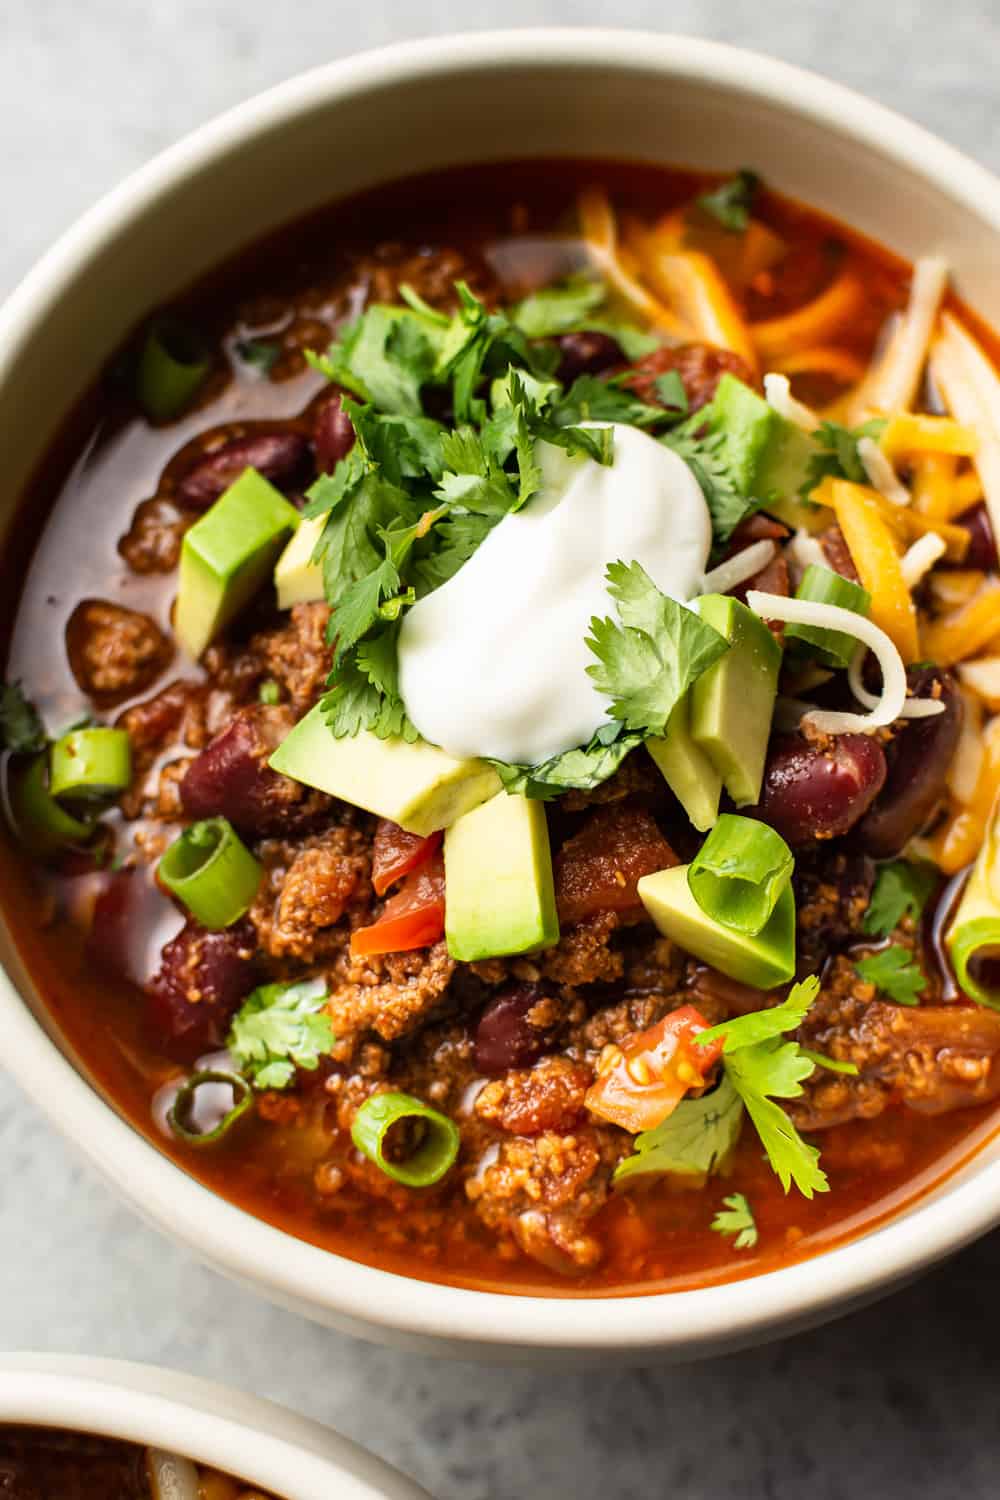
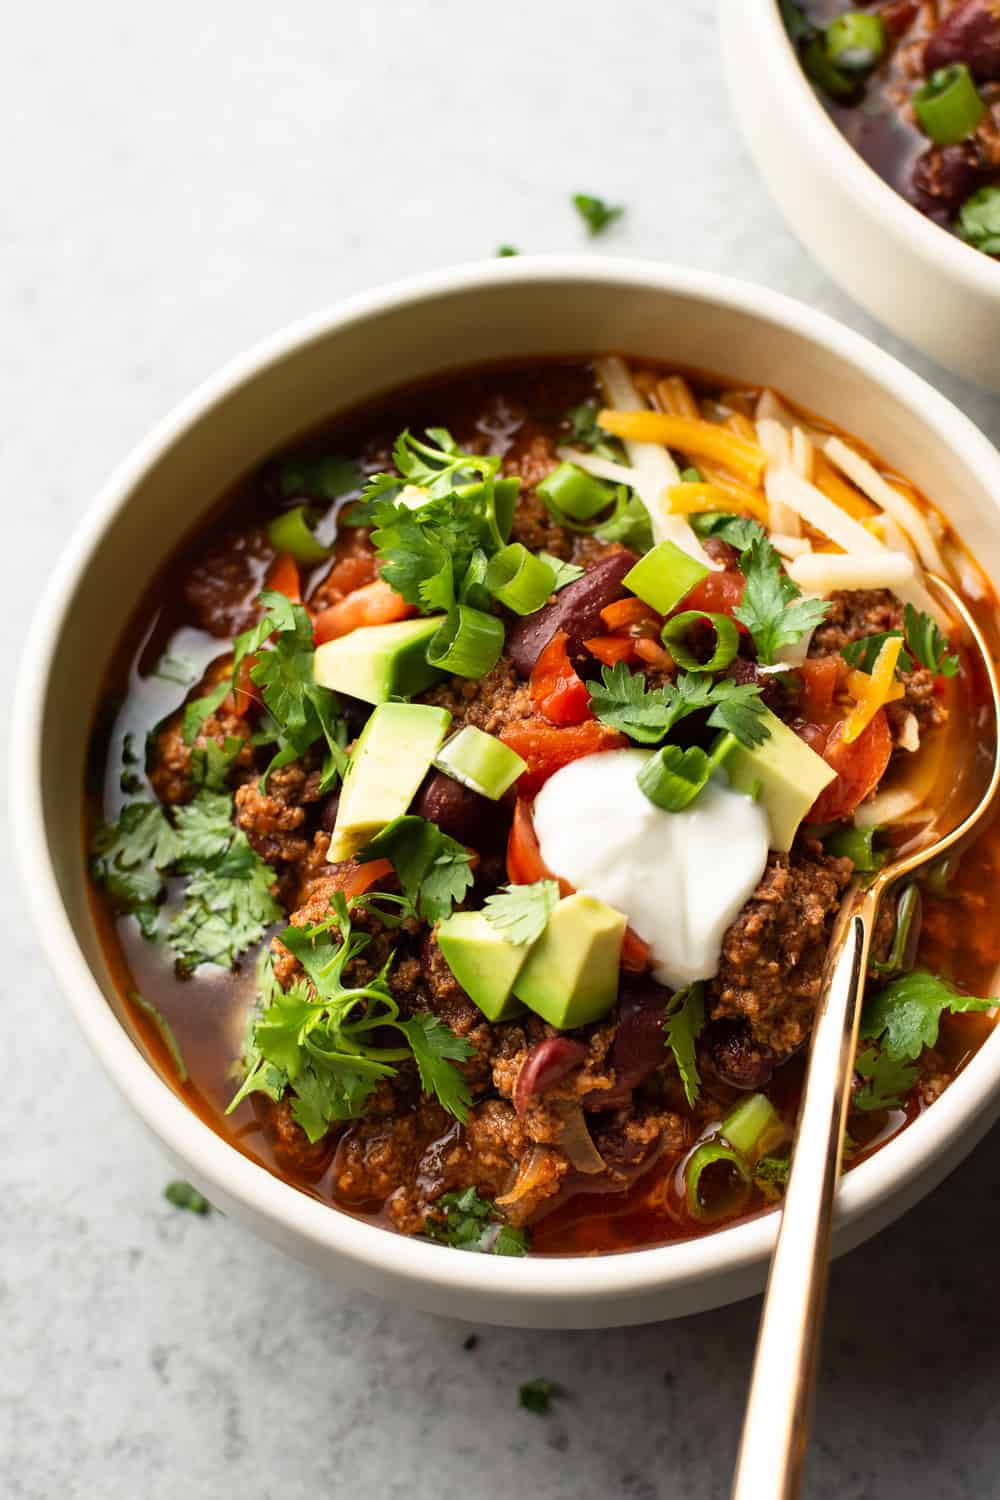
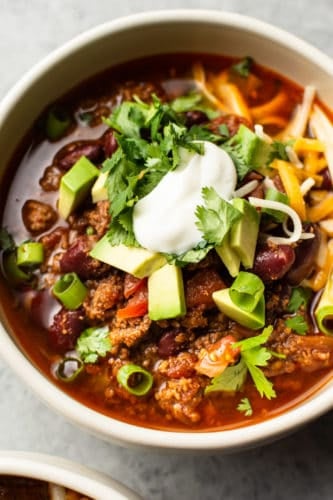
close-up of Instant Pot chili

Instant Pot Chili is simple to make and hearty. The electric pressure cooker builds amazing flavors in a short time, and everyone will love loading up their bowls with their favorite toppings!

Love your Instant Pot? Try this Instant Pot Beef StewInstant Pot Ribs, or these Instant Pot Salsa Verde Chicken Tacos.

close-up of Instant Pot chili

Best Instant Pot Chili

Who can resist a good chili? Natasha here from Salt & Lavender with a cozy recipe for you. Chili is so easy to make in the electric pressure cooker! Prep time is minimal, and you can do other things while the Instant Pot works its magic. This chili is delicious straight out of the pot, but it’s also great for freezing/meal prep. Just freeze it in individual portions or use a larger container and let it thaw in the fridge overnight.

Chili Ingredients:

  • Ground beef (you can use your preferred type of ground meat)
  • Onion for added flavor (sautéed in olive oil)
  • Kidney beans (I used red ones but feel free to sub with white ones or another type of canned bean if you prefer)
  • Canned tomatoes (I used a combo of tomato sauce and diced tomatoes)
  • Spices: Garlic, chili powder, smoked paprika, and cumin for that signature chili flavor. Optional: cayenne pepper if you like it hot!
  • Beef broth for moisture and salty flavor

How to Make Instant Pot Chili:

  1. Sauté. Add the chopped onion and oil to your Instant Pot and press the sauté button. Cook for 4-5 minutes.
  2. Brown the beef. Stir in the ground beef and cook, stirring often, until browned.
  3. Add the rest and seal it up. Stir in the garlic, followed by the diced tomatoes, tomato sauce, beef broth, beans, chili powder, smoked paprika, cumin, cayenne pepper. Close the lid, ensure the valve is set on “sealing”, press the “manual” button, and set the timer for 15 minutes.
  4. Release the pressure. Once the countdown has finished, do a quick pressure release or let the pressure release naturally (this will build more flavor). Season the chili with extra salt & pepper as needed and serve with desired toppings.

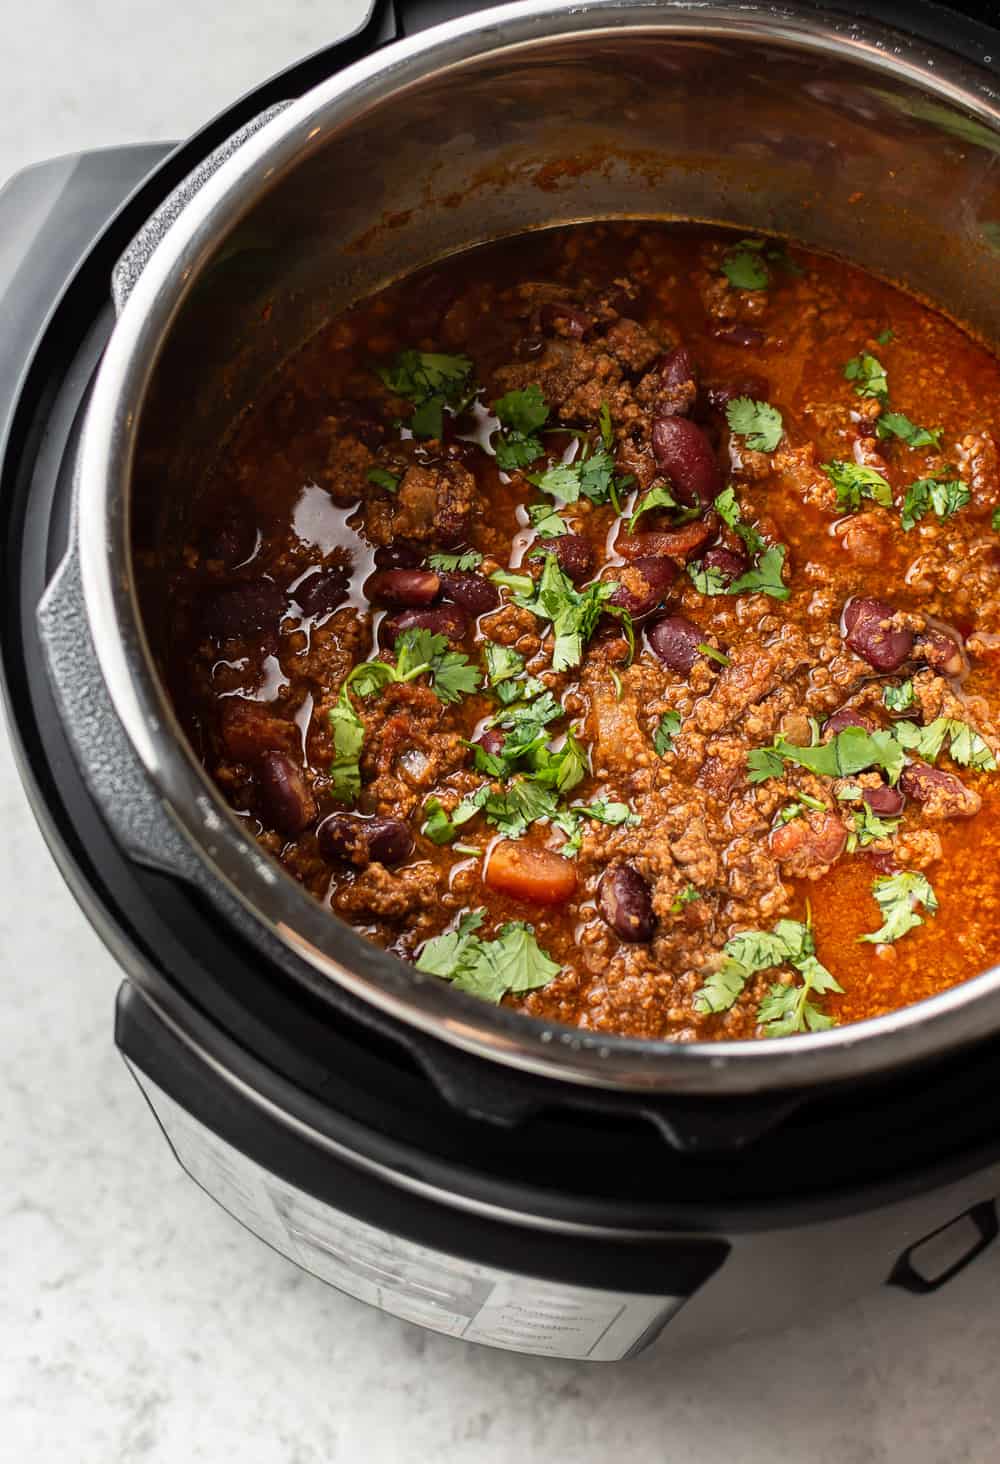
close-up of beef chili in an Instant Pot

What Kind of Ground Meat to Use in an Instant Pot?

You can use ground beef or ground turkey in this recipe… or even a mix of ground beef and ground pork if you wish!

What Chili Toppings to Use?

  • Avocado (chopped or sliced)
  • Cilantro
  • Sour cream
  • Tortilla strips/crumbled chips
  • Scallions or chives
  • Cheese blend (try cheddar or a Tex-Mex style for some heat)
  • Chopped tomato

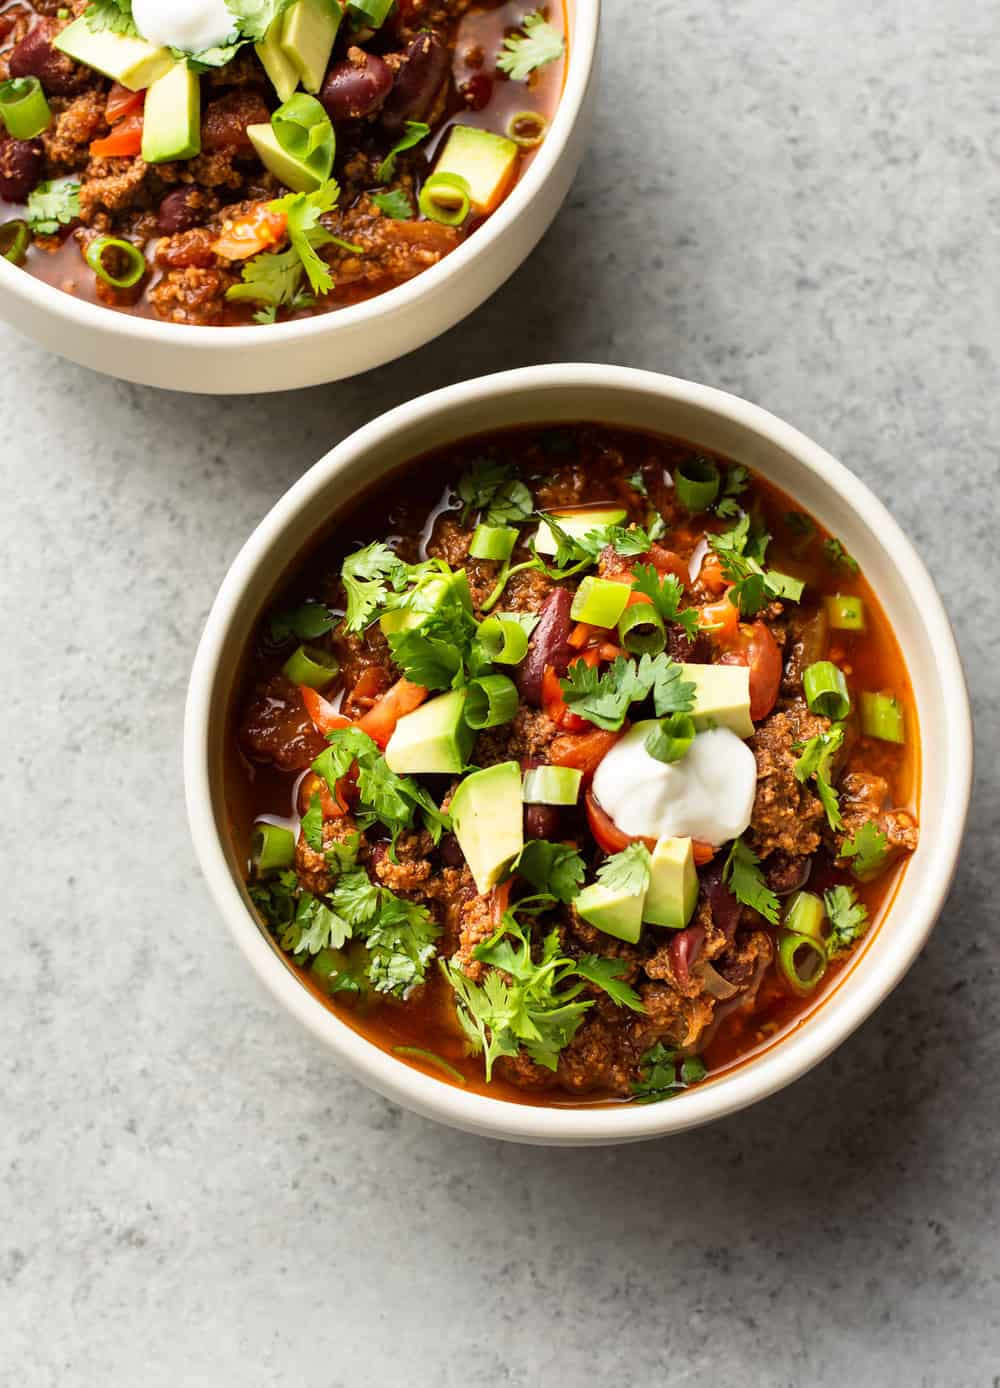
two bowls of Instant Pot chili

What to Serve with Homemade Chili?

This chili is incredibly delicious served with some bread (try a crusty bread or cornbread) – it’s great for mopping up all those tasty juices. Or try it on a baked potato!

Instant Pot chili in a bowl with a gold spoon

Other Chili Recipes to Try:

close-up of Instant Pot chili
Print

Instant Pot Chili

Instant Pot Chili is simple to make and hearty. The electric pressure cooker builds amazing flavors in a short time, and everyone will love loading up their bowls with their favorite toppings!
Course Dinner, Main Course
Cuisine American
Keyword Electric Pressure Cooker Chili Recipe, Instant Pot Chili Recipe
Prep Time 10 minutes
Cook Time 20 minutes
Inactive time: 15 minutes
Total Time 45 minutes
Servings 6 Bowls Full
Calories 458kcal
Author Natasha Bull

Ingredients

  • 1/2 medium onion (chopped)
  • 1 tablespoon olive oil
  • 2 pounds lean ground beef
  • 3 cloves garlic (minced)
  • 1 (28 fluid ounce) can diced tomatoes (use fire roasted ones for more flavor)
  • 1 (14 fluid ounce) can tomato sauce
  • 1/2 cup beef broth
  • 2 (14 fluid ounce) cans red kidney beans (drained)
  • 3 tablespoons chili powder
  • 1 tablespoon smoked paprika
  • 1 teaspoon ground cumin
  • 1 teaspoon cayenne pepper (optional - if you want it spicy)
  • Salt & pepper (to taste)
  • Garnish: avocado, scallions, sour cream, Tex-Mex cheese, cilantro, tortilla strips, etc. (optional)

Instructions

  • Add the chopped onion and oil to your Instant Pot and press the sauté button. Cook for 4-5 minutes.
  • Stir in the ground beef and cook, stirring often (break it up with your spoon), until browned.
  • Stir in the garlic, and then add the diced tomatoes, tomato sauce, beef broth, beans, chili powder, smoked paprika, cumin, cayenne pepper. Close the lid, ensure the valve is set on "sealing", press the "manual" button, and set the timer for 15 minutes.
  • Once the countdown has finished, you can do a quick pressure release or let the pressure release naturally (this will build more flavor). Season with extra salt & pepper as needed and serve with desired toppings.

Notes

  • Serves 6-8 depending on portion size.
  • This chili is quite saucy, so if you prefer a more dry chili, omit the beef broth (just be sure to add extra salt) and/or use a smaller can of tomato sauce (or try a few tablespoons of tomato paste).
  • If the beef is excessively fatty, spoon some of the fat out before proceeding with the rest of the recipe once you've browned it.
  • This recipe freezes well.
  • Inactive time represents the time that the Instant Pot takes to get up to pressure.

Nutrition

Calories: 458kcal | Carbohydrates: 43g | Protein: 47g | Fat: 12g | Saturated Fat: 4g | Cholesterol: 94mg | Sodium: 604mg | Potassium: 1671mg | Fiber: 14g | Sugar: 7g | Vitamin A: 2341IU | Vitamin C: 20mg | Calcium: 124mg | Iron: 11mg


from The Recipe Critic https://ift.tt/2FLuVPq
https://ift.tt/2RMPJII

Melt in Your Mouth Pot Roast Recipe

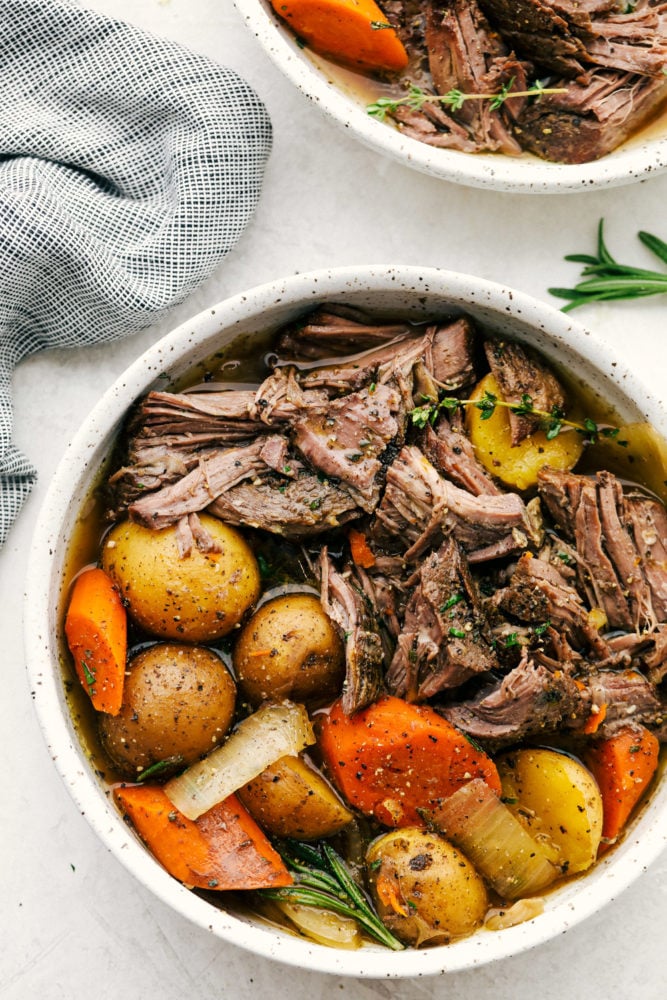
Utterly perfect fork tender, melt in your mouth pot roast, with delicate potatoes, sweet carrots, sits in a perfectly seasoned broth. This recipe is super simple but will make you feel like you’ve spent all day cooking.

Make a balanced meal with a nice fresh garden salad and some homemade rolls. Perfect Soft and Buttery Rolls or Copycat Texas Roadhouse Rolls should do the trick.

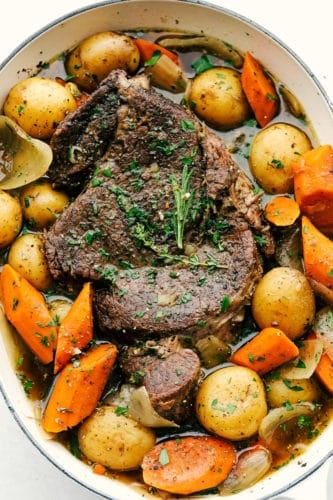
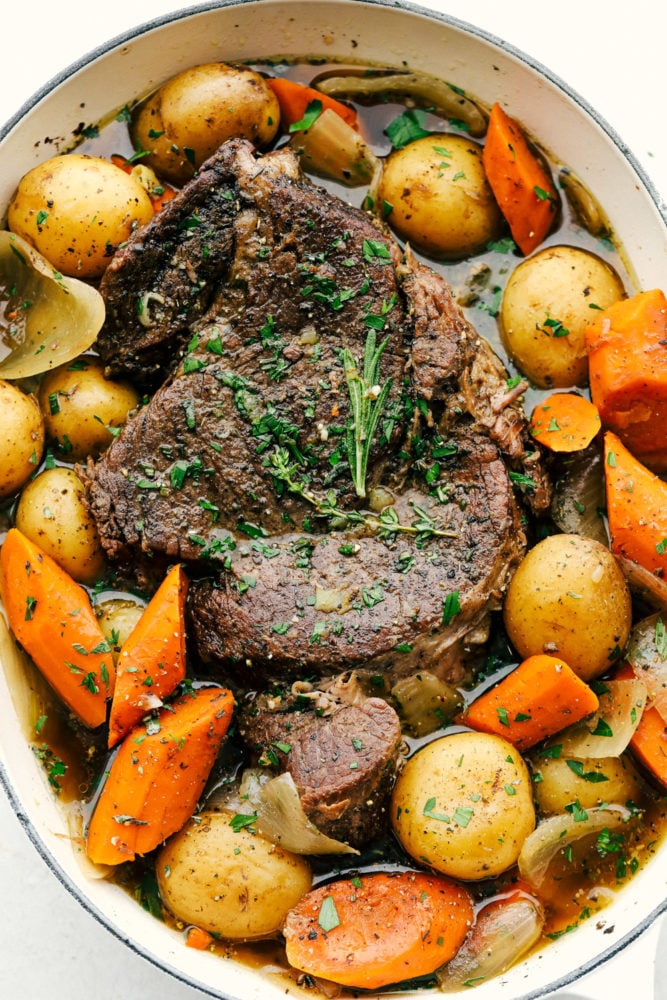
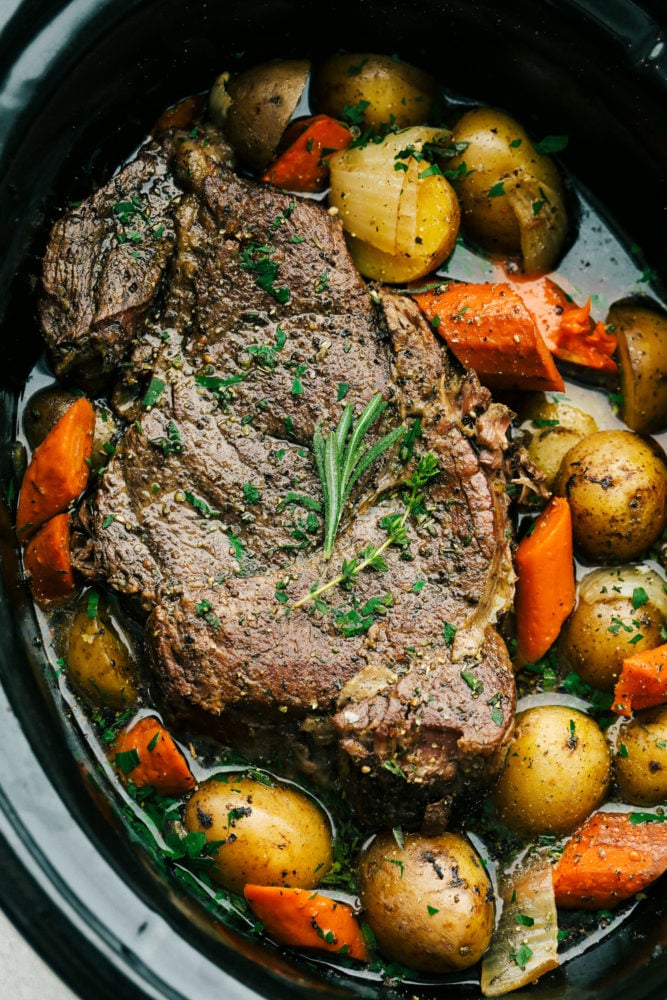
Melt in you mouth pot roast with tender carrots and potatoes

Melt in Your Mouth Pot Roast

Not only is this melt in your mouth Pot Roast a quintessential Sunday meal, it’s also perfect for company, or a special occasion because it’s just so easy. Prep it, throw it all together and at the end of the day you have a perfect sit down dinner hearty enough to fill any appetite. Generously seasoned meat, coupled with onions and vegetables surrounded by a savory broth is just so heavenly.

One of the best things about this roast is that it’s almost better the next day. Perfect for leftovers or use to make sandwiches, tacos or other hearty roast meals. It’s one of those meals that you make once and can usually use at least twice. Perfect a hectic work week.

Pot Roast Ingredients:

I’ve given you three ways to cook the roast but the ingredients are all the same. It’s one of those hearty meals that brings everyone together around the table for good conversation and great memories.

  • Olive Oil: Can use Canola oil, but I like the extra bit of flavor the Olive Oil adds.
  • Chuck Roast: 3-4 pound roast. If your roast is much bigger, you’ll need to adjust the seasonings to accommodate so you have enough flavor
  • Salt and Pepper: This is for generously seasoning the roast before searing.
  • Carrots: Use large carrots you have to cut yourself, they have so much more flavor than baby carrots.
  • Potatoes: The best potatoes for putting in a roast are yellow, golden or Yukon potatoes.
  • Onion: Yellow or white onions are flavorful but mellow enough to add flavor but not over power.
  • Beef Broth: Make your own or buy from your local store located usually near the soups.
  • Red Wine: The alcohol will cook off and your left with flavor and tenderness, but if you’d like a substitute use apple juice, cranberry juice or more beef broth.
  • Worcestershire Sauce: Boosts and intensifies the meaty flavor
  • Garlic: Use fresh minced garlic for the best taste.
  • Onion and Garlic Powder: Using powder helps enhance the flavor.
  • Salt and Pepper: This is to add to the sauce.

How to Make Tender Roast:

The wonderful thing about this recipe is that you can make it Three different ways and end up with the same result any way you make it. The main premise of putting it together is the same for all three methods. So whether you use a slow cooker, Instant Pot or the Oven it will always be melt in your mouth delicious.

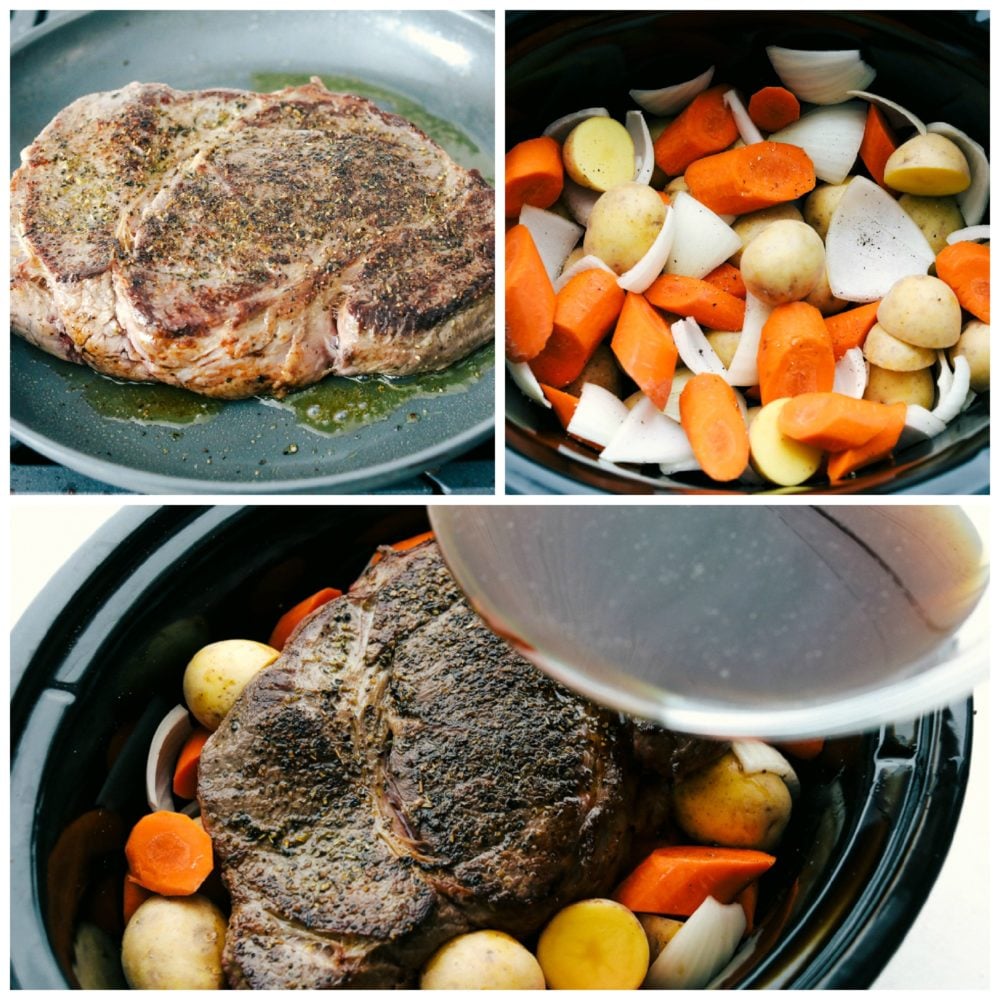
  1. Sear: For the oven and slow cooker, heat the oil over medium high heat in a cast iron skillet or heavy frying pan.  Salt and pepper the roast generously rubbing it in good. Once the oil starts to smoke sear each side of the roast for 2-3 minutes to give it a nice dark brown crust. If using an Instant Pot use the saute button. Wait till it says “Hot” before adding the oil and once it smokes sear the roast on all sides. Remove the roast from the instant pot.
  2. Assemble: In the slow cooker, instant pot or a large casserole dish place the carrots, potatoes and onions into the bottom.  Next place the meat on top. In a small bowl combine the beef broth, red wince, Worcestershire sauce, garlic, onion and garlic powder and salt and pepper. Pour over the roast.
  3. Cook: In the Slow Cooker cook on low for 10 hours or till tender. In the Instant Pot cook on high for 60 minutes and natural release. For the oven cover tightly with foil or a fitted oven safe lid and cook at 425 for ONLY 30 min then turn the oven down to 300 for 4-5 hours.

The steps to making melt in your mouth pot roast with tender carrots and potatoes

Tips for The Best Pot Roast:

  • It’s all about the Beef:  For that super tender roast it starts with the cut of meat. You want a cut that has lots of marbling. Which means it’s got lots of striations of fat running through it. This produces that amazing texture. Chuck Roast is the ideal cut, Brisket is another heavily marbled meat. Bottom or Top Round roasts are leaner and won’t be as tender.
  • Why Sear: Don’t skip this essential step. Searing the meat at a high temperature brings out the most flavor in the meat by caramelizing the natural sugars and brings out the savory flavor of the beef with it’s rich brown crust. It will also seal in those amazing juices.  Make sure your pan is HOT. If your pan isn’t hot enough you will steam the meat which can actually make it tough.
  • Simplify: You can make the morning prep faster for yourself by prepping the veggies the night before. Place in a sealed container or bag in the fridge till morning
  • Size: Size of meat and vegetables matter. If your roast is too large for your pan, pot or cooker you can cut it down to fit. Sear the cut pieces individually before adding them. If your roast is overly large you may want to add a little extra spices to your sauce. Cut all the veggies to roughly the same size for even cooking. Chunk your onions don’t finely chop them. I find they give off more flavor and don’t turn to mush.
  • Low and Slow:  To achieve the perfect tenderness it is always best to cook your roasts long and low. It will yield the best flavor and texture.

Melt in you mouth pot roast with tender carrots and potatoes

Storing and Freezing:

Pot Roast makes the best leftovers.

  • STORE: Cool the roast and vegetables and store in an air tight container for up to 4 days.
  • Freeze: Freeze the roast in a freezer safe container or bag for up to 2 months. Thaw overnight in the fridge and reheat in a pan on the stove in it’s sauce or microwave.

Melt in you mouth pot roast with tender carrots and potatoes

More Amazing Beef Recipes:

Beef is so tasty hearty and versatile. Try these other yummy beef recipes.

Print

Course Dinner, Main Course
Cuisine American
Keyword pot roast, pot roast recipe
Prep Time 10 minutes
Cook Time 10 hours
Total Time 10 hours 10 minutes
Servings 6 People
Calories 566kcal
Author Alyssa Rivers

Ingredients

  • 2 Tablespoons olive oil
  • 3-4 pound chuck roast
  • salt and pepper
  • 4 large carrots sliced
  • 1 pound baby potatoes
  • 1 yellow onion chopped into large pieces
  • 2 cups beef broth
  • 1/2 cup red wine
  • 3 Tablespoons Worcestershire sauce
  • 3 cloves garlic minced
  • 1 teaspoon onion powder
  • 1 teaspoon garlic powder
  • 1 teaspoon salt
  • 1/2 teaspoon pepper

Instructions

To make in the slow cooker:

  • In a large cast iron skillet heat the olive oil on medium high heat until it starts smoking. Salt and pepper each side of the roast and sear for 2-3 minutes on each side to give it a dark brown crust.
  • In a 5 quart slow cooker add the carrots, potatoes, and onion. Place the roast on top. In a small bowl combine beef broth, red wine, Worcestershire sauce, garlic, onion, garlic powder, salt and pepper. Pour over the top of the roast.
  • Cook on low for 10 hours or until tender.

To make in the Instant Pot:

  • Press the sauté button on the instant pot and wait for it to say "HOT". Add in the olive oil. Salt and pepper the beef and slice the beef in half if it doesn't fit. Working in batches, sear on each side for 2-3 minutes.
  • Place the carrots, potato, and onion into the bottom of the instant pot. Place the meat on top. In a small bowl combine beef broth, red wine, Worcestershire sauce, garlic, onion, garlic powder, salt and pepper. Pour over the top of the roast.
  • Cook on high pressure for 60 minutes and then do a natural release.

To roast in the oven:

  • Preheat oven to 425 degrees. In a large cast iron skillet heat the olive oil on medium high heat until it starts smoking. Salt and pepper each side of the roast and sear for 2-3 minutes on each side to give it a dark brown crust.
  • In a large casserole dish add the carrots, potatoes, and onion. Place the roast on top. In a small bowl combine beef broth, red wine, Worcestershire sauce, garlic, onion, garlic powder, salt and pepper. Pour over the top of the roast. Cover tightly and roast for 30 minutes. Turn the oven down to 300 degrees and allow to roast for 4-5 hours.

Nutrition

Calories: 566kcal | Carbohydrates: 22g | Protein: 47g | Fat: 31g | Saturated Fat: 12g | Cholesterol: 156mg | Sodium: 987mg | Potassium: 1377mg | Fiber: 3g | Sugar: 4g | Vitamin A: 6823IU | Vitamin C: 20mg | Calcium: 82mg | Iron: 6mg


from The Recipe Critic https://ift.tt/35S2pGA
https://ift.tt/2FLdz5n

रविवार, 20 सितंबर 2020

Parker House Rolls

Parker House Rolls are soft, melt in your mouth rolls, that are buttered before and after baking for rich irresistible flavor. They are so good, it’ll be hard not to want to make them everyday.

These are so yummy you can eat them plain or for extra pizzazz, pair these tender rolls with home made Apple Butter, Strawberry Jam or this Easy Honey Butter! Anyway you serve and eat them, they’re delicious!

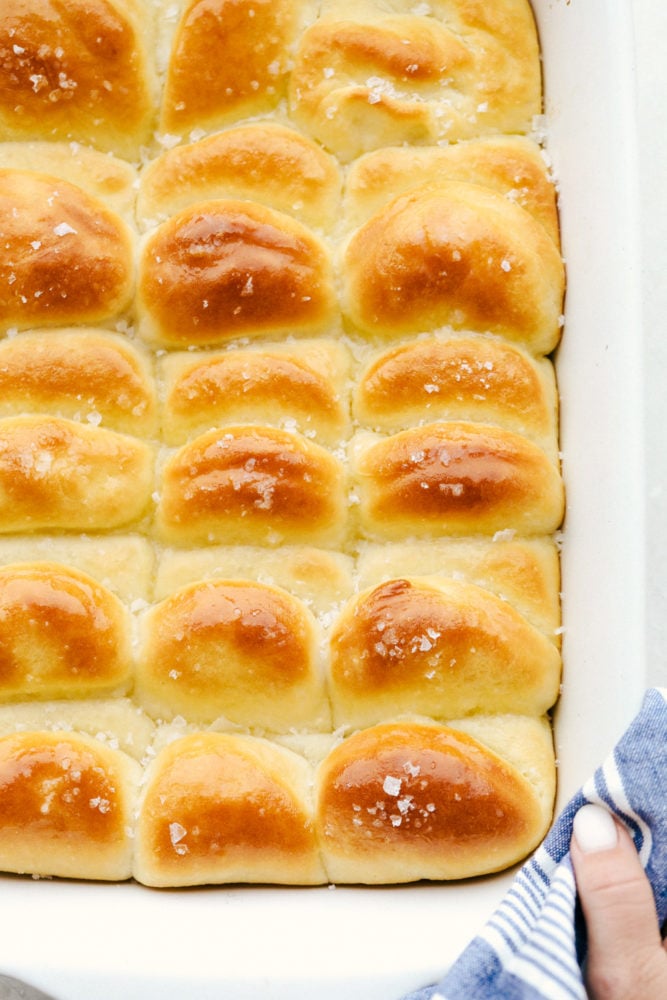
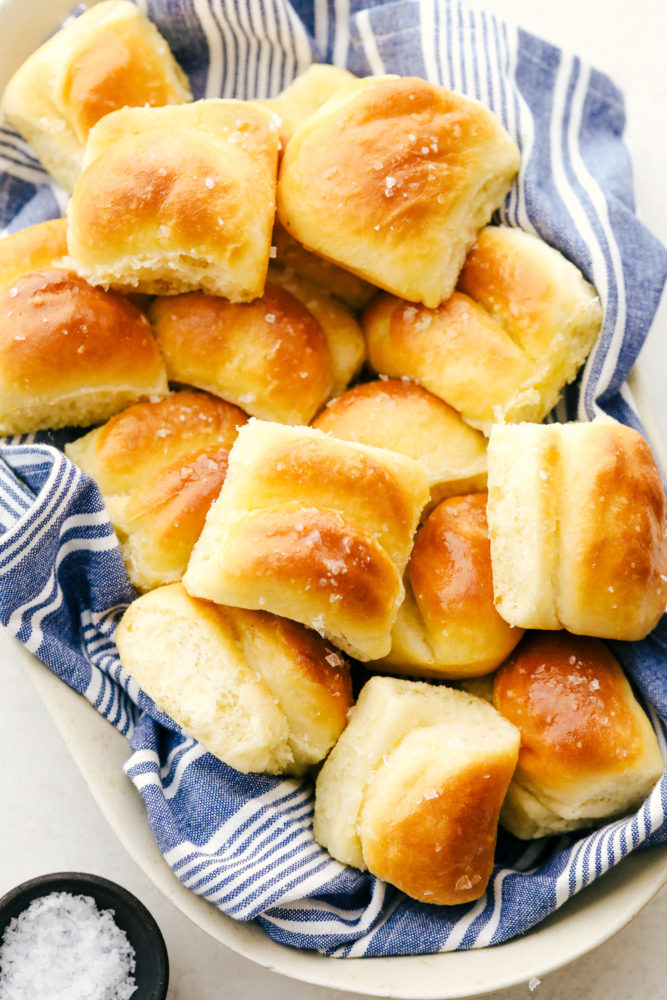
Baked parker house rolls in a pan.

Amazing Parker House Rolls

Parker House Rolls are so decadent and heavenly, you can serve them at a nice dinner or for just a special treat during the week. They will be the talk of the table. They are super simple and easy to make too. It just takes a little time, but it’s really hard to mess these up. If you’re new to working with yeast, this is a great first recipe to try. They turn out beautifully no matter what!

The extra touch of butter both before and after you bake them make them so buttery and soft. These pillow-y rolls are a bread lovers dream come true. Optional is topping these exquisite rolls with flaky salt extra flare and taste. These will soon become a dinner favorite. Use them for holiday meals, special occasions, or when ever you just want a home baked divinely made roll.

Parker House Ingredients:

The milk, butter and egg in these rolls create an enriched dough which makes the rolls super soft.

  • Milk: The more fat in the milk the richer the dough
  • Warm Water: Make sure it’s between 95 and 110 degrees to activate but not kill the yeast
  • Sugar: Slightly sweetens the dough but mostly feeds the yeast.
  • Active Dry Yeast: There is a difference between Active and Instant and both can be used here. If you use Instant you don’t have to let the yeast proof.
  • Butter:  Add flavor and softness
  • Egg: Extra large eggs are my go to for extra rich bread.
  • Flour: Unbleached bread flour will yield a nice rise to your rolls.
  • Salt: Essential is bringing flavor to the rolls.

How to Make the Dough:

Bread of any kind always takes a little bit of time, but these are so worth it!

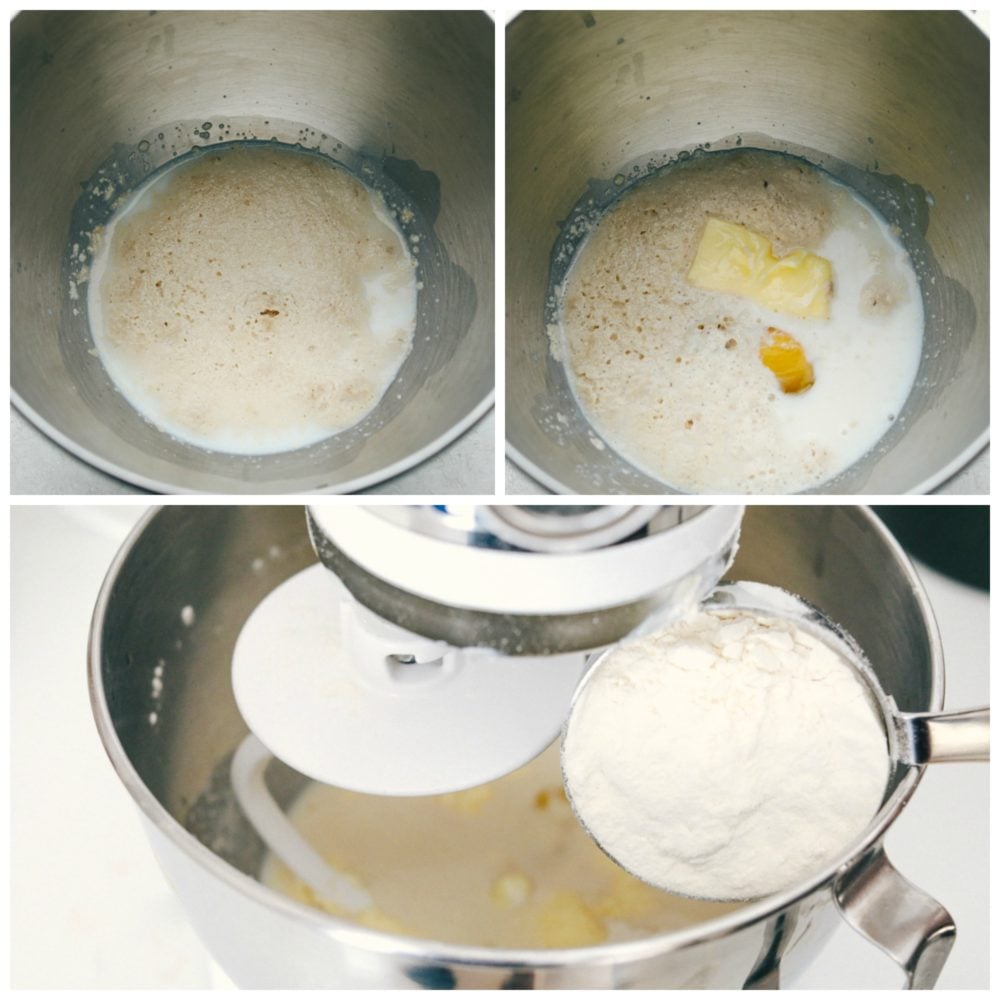
  1. Warm: Microwave the milk until just warm, but do not scald it. Then add it to a stand mixer along with the warm water, sugar and yeast. Stir and let the yeast proof for 5-10 min. If you use Instant yeast you can skip the proofing step.
  2. Combine: Next add in the softened butter and egg. Using a dough hook, add in the flour and salt and mix on low until a dough starts to form. Increase the speed and add flour if needed until the dough pulls away clean from the bowl. It should be soft but not sticky.

Making the dough for Parker House Rolls

Tips for Kneading the Dough:

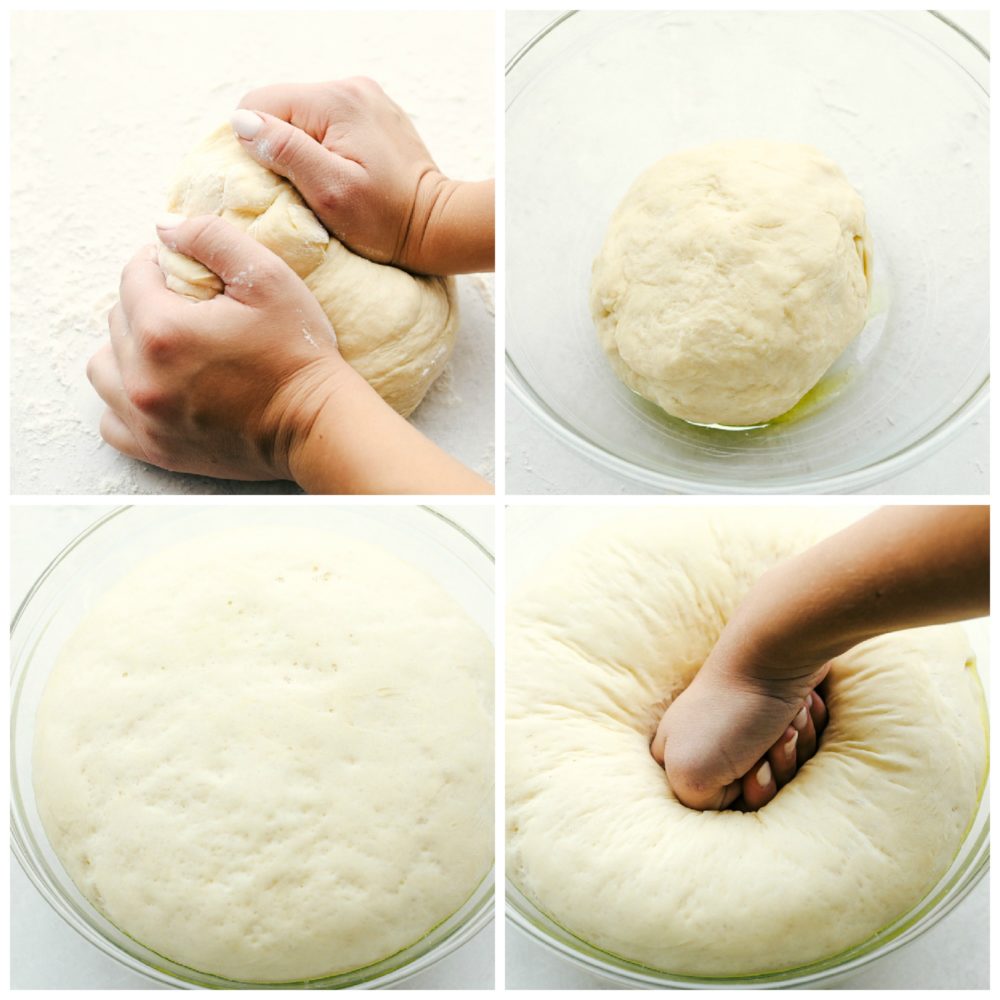
  1. Knead: On a floured surface knead the dough until smooth-5-10 minutes. Place in a large greased bowl and cover with plastic wrap and let rise for 1-1/2 hours or till doubled.
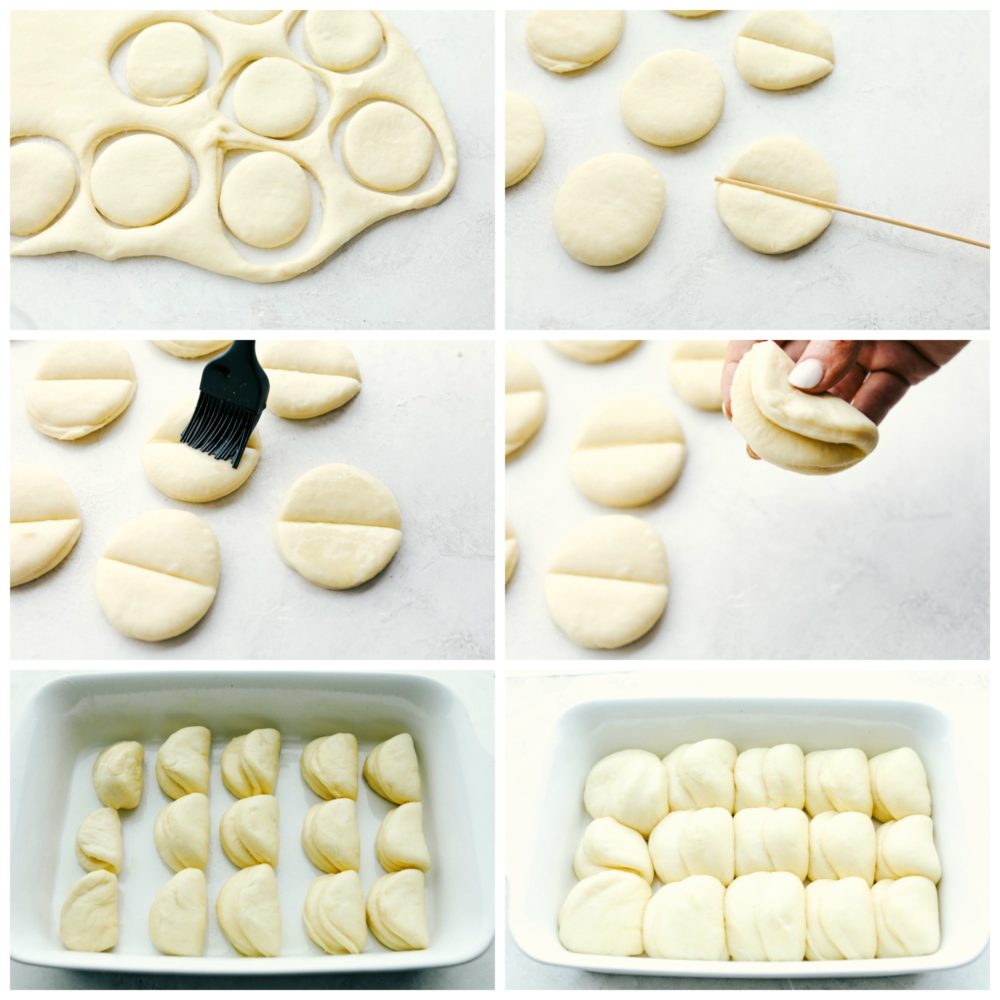
  2. Punch: Once risen, punch the dough down and roll out to 1/2 inch thick. Cut circles with a biscuit cutter. Indent the middle of each circle with a wooden skewer or handle of a spoon, and brush with melted butter. Fold in half and place in a 9×13 inch greased pan. Cover again and let rise until doubled, about an hour.
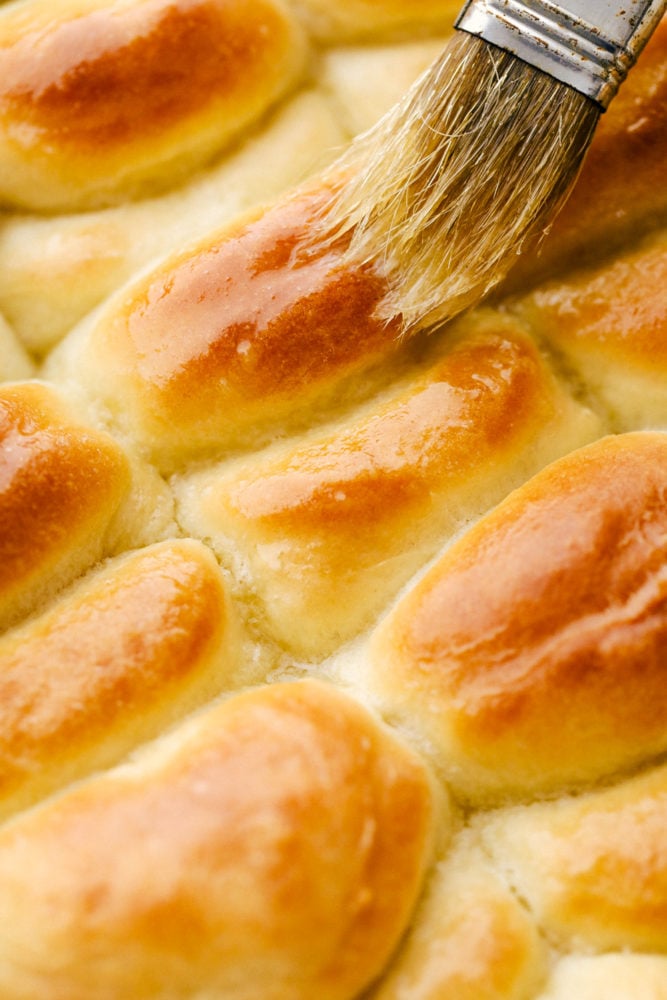
  3. Bake: When ready, bake in a 350 degree oven for 15-20 minutes or till golden brown. Remove from the the oven and brush with additional butter and top with flaky salt if desired.

Kneading Parker House Rolls

Cutting out and shaping buttering Parker House

What are Parker House Rolls?

  • Where did they Originate: Parker House Rolls were accidentally invented in the 1870’s by an angry baker. The story goes that the baker who worked at the Parker House Hotel in Boston was mad after an altercation with a hotel guest and threw an unfinished pan of rolls in the oven. The folded over appearance, created a buttery light as a feather texture like pocket on the inside and a golden buttery top on the outside. By the late 1870’s the recipe was appearing in cookbooks and has been a family favorite ever since.
  • Shape: If you troll the internet you’ll discover Parker House Rolls in all sorts of shapes. The classic original however is the one I have here. Folding the circles in half will give you that original pocket for your butter or jam, but there is no wrong way to fold, roll or shape your roll. They will all taste amazing.

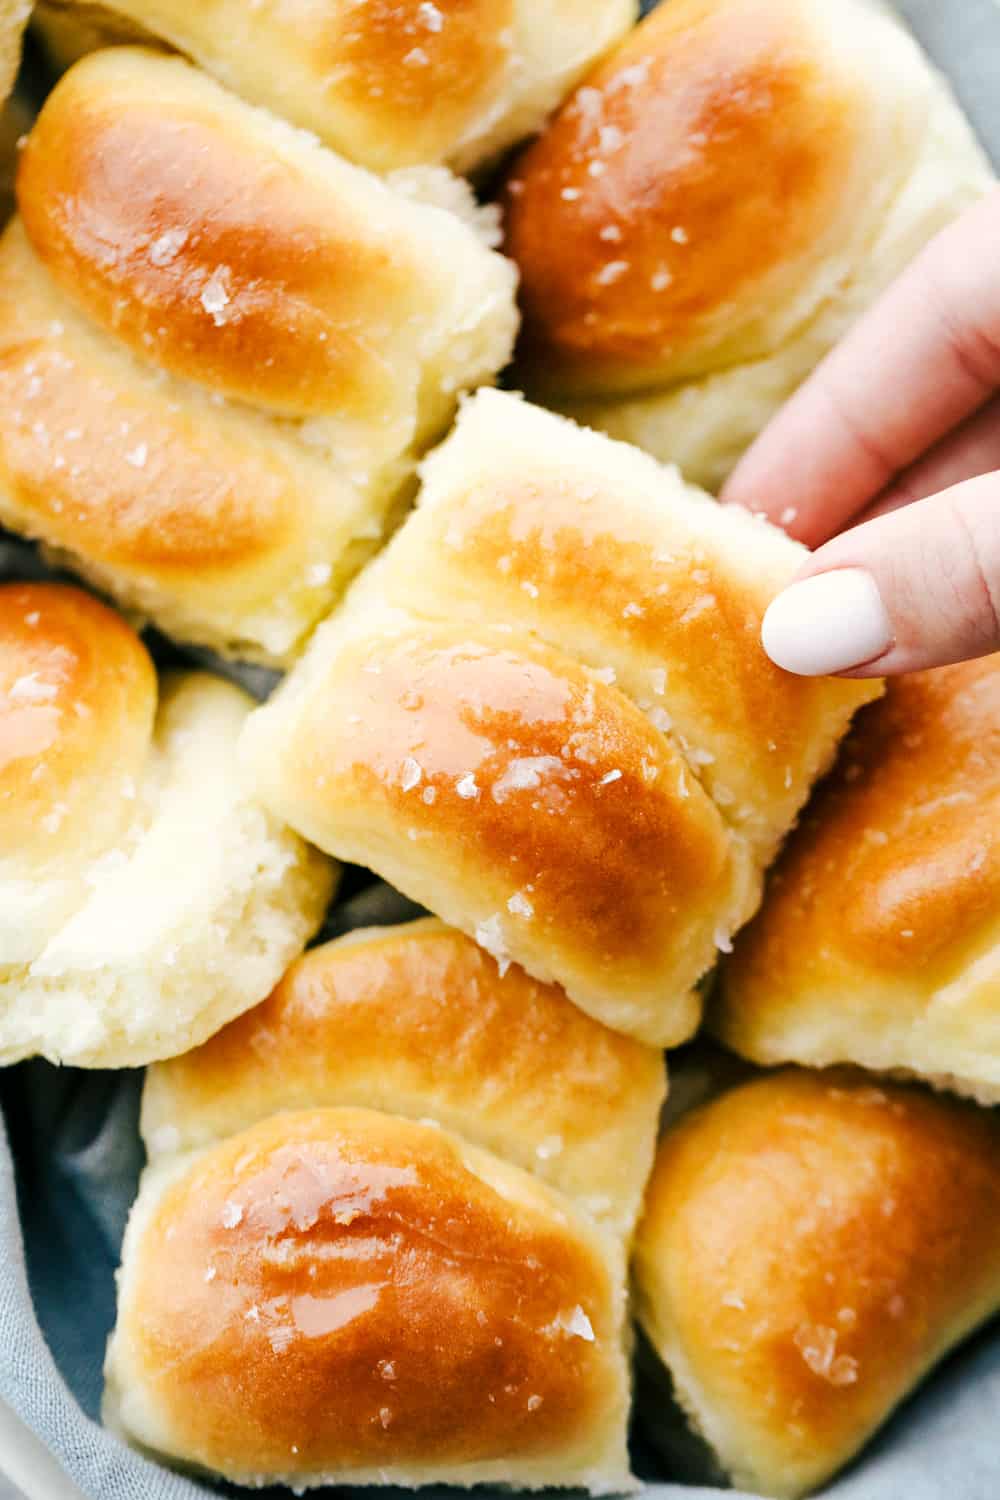
Brushing butter on golden baked Parker House Rolls

Make Ahead, Store and Freezing Rolls:

  • Make Ahead: If you’d like to get a head start on these the day before or early in the morning, follow the recipe up to just after you shape them. Once you have shaped them and put them in a pan, put the pan in the fridge till your ready to bake. They will keep in the fridge up to overnight. When ready to bake bring the rolls out 30 min. prior to baking and then bake as directed.
  • Freezing them Before Baking:  You can easily freeze the dough as well before baking, think Rhodes Rolls. Shape the rolls on pan and freeze for at least 8-12 hours. You can then put them in a freezer safe bag and freeze for up to 3 months. When ready to use Thaw at room temperature for 3-5 hours till risen. Then bake as directed.
  • Freezing already Risen: You can also let the rolls rise then freeze in a freezer safe bag or container for up to 3 months. Again let the rolls thaw at room temperature till soft about 2 hours and bake as directed.
  • Storing Baked Rolls: Bake and cool rolls completely. Keep in an airtight container or bag for up to 3 days or freeze for up to 3 months. Thaw and warm before serving.

Parker House Rolls soft, melt in your mouth rolls, that are buttered before and after baking with flaky salt

Serve Rolls with One of These Yummy Soups:

Rolls are a staple with soup and here are a few favorites to try:

Print

Parker House Rolls

Parker House Rolls are soft, melt in your mouth rolls, that are buttered before and after baking for rich irresistible flavor. They are so good, it'll be hard not to want to make them everyday.
Course Appetizer, Bread, Side Dish
Cuisine American
Keyword house rolls, parker house rolls, parker rolls
Prep Time 20 minutes
Cook Time 20 minutes
Total Time 40 minutes
Servings 12 Rolls
Calories 179kcal
Author Alyssa Rivers

Ingredients

  • 1 cup milk
  • 1/4 cup warm water
  • 2 Tablespoons sugar
  • 1 0.25 ounce package active dry yeast
  • 4 tablespoons butter softened
  • 1 egg
  • 2 1/2-3 cups flour
  • 1 teaspoon salt
  • 3 tablespoons butter melted

Instructions

  • Heat the milk in the microwave until it is warm but not scalding. Add it to the stand of a mixer with the warm water, sugar and yeast. Stir and let the yeast proof for 5-10 minutes.
  • Add in the softened butter and egg and combine using the dough hook. Add in the flour and salt and mix together on low until the dough starts to form. Increase the speed and add flour if needed until the dough pulls clean away from the bowl.
  • On a floured surface add the dough and knead until the dough is smooth. Place in a large bowl with 1 teaspoon olive oil. Cover and let rise for 1-1/2 hours until it has doubled.
  • Punch the dough and roll out to 1/2 inch thick on a floured surface. Cut circles with a biscuit cutter. Indent the middle of each dough round and brush with butter. Fold in half and place in a 9x13 inch greased pan. Cover and let rise for 1 hour until doubled.
  • Preheat the oven to 350 degrees and bake for 15-20 minutes or until golden brown. Remove and brush with additional butter and top with flaky salt if desired.

Nutrition

Calories: 179kcal | Carbohydrates: 23g | Protein: 4g | Fat: 8g | Saturated Fat: 5g | Cholesterol: 33mg | Sodium: 267mg | Potassium: 60mg | Fiber: 1g | Sugar: 3g | Vitamin A: 257IU | Calcium: 31mg | Iron: 1mg


from The Recipe Critic https://ift.tt/2RVYy3j
https://ift.tt/2Eiq33L