बुधवार, 21 अक्तूबर 2020

The Best Creamy Scalloped Potatoes of Your Life!

Creamy Scalloped Potatoes are a tender, creamy and so delicious comforting dish! The parmesan cheese adds such an amazing flavor with a slight crust around the edges.

These make such a great side dish! They go perfect with Classic Honey Glazed Ham, Garlic Butter Prime Rib, or Skillet Salisbury Steak!

Cheesy, tender savory scalloped parmesan potatoes.

Creamy Parmesan Scalloped Potatoes

These Scalloped Potatoes are going to become an instant favorite at your home. They are SO creamy and delicious. And you are going to love the parmesan cheese inside. They are baked to tender potato perfection and the top will have a delicious crisp parmesan crust. Then you dig in to the creamy, delicious and cheesy layers.

Whether you are making these for a special occasion, holiday or any family dinner, you are going to LOVE these! It’s perfect for any meal. They’re comforting and hearty. Everyone is going to love these cheesy creamy potatoes.

Scalloped Potatoes Ingredients

  • Butter: Butter and potatoes just go together
  • Flour: Acts as a thickener
  • Salt and Pepper: Add more or less to taste
  • Whipping Cream: This is not frozen whipped topping. You can use heavy whipping cream or half and half.
  • Parmesan Cheese: Adds flavor and texture
  • Mozzarella Cheese: Such a great melting flavorful cheese
  • Potatoes: I used Russets
  • Chives: Fresh for garnish

How to Make Scalloped Potatoes

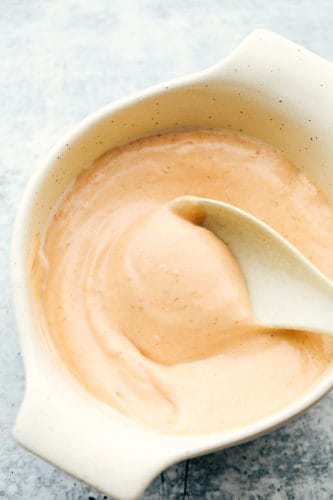
  1. Melt: In a small saucepan melt the butter over medium heat and add in flour salt and pepper. Add in the whipping cream and stir till it begins to thicken. Then add in half of the parmesan cheese.
  2. Layer: In a lightly sprayed 2 quart casserole dish, arrange half of the potatoes overlapping each other. Spread half of the sauce on top followed by 1/2 cup mozzarella cheese. Repeat with another layer of potatoes and sauce topped with mozzarella cheese and remaining parmesan cheese.
  3. Bake: Cover with foil and bake at 325 for 40 minutes. Uncover and bake for 25-30 minutes more until the potatoes are fork tender and the top is starting to brown. Sprinkle with chives before serving.

Making the creamy cheese sauce for Parmesan Scalloped Potatoes.

Potato Tips

  • Kind: Russet Potatoes or Yukon Golds deliver the best taste and shape. Russets have the most starch and make the creamiest sauce, and Yukons tend to hold their shape a little better.
  • Cutting: Try to keep the potatoes the same size and slice them  between 1/8 and 1/4 inch thick. You can use a mandoline or other tool for even uniformity.
  • Cook: Do not boil your potatoes before baking. The sauce relies on starch from the potatoes to thicken it.
  • Add ins: There are lots of ways to diversify this basic recipe. Add garlic, diced onion, peppers, for heat add a can of diced green chilies. You can also add crumbled bacon or small cubes of ham.
  • Cheese: You can use different kinds of cheese for different flavors and textures. Experiment with your favorites.
  • Curdling: The curdling is caused by high heat. So to keep the sauce together, you need to make a smooth cheese sauce instead of layering grated cheese and milk or cream with the potatoes. Also don’t boil your sauce.

Layering potatoes, cream sauce and cheese for perfect scalloped potatoes.

Storing Parmesan Scalloped Potatoes

  • Fridge: Keep in an airtight container in the fridge for up to 3 days in the fridge. Reheat in the oven.
  • Freeze: If you plan to freeze the scalloped potatoes, the potatoes need to be removed from the oven before they finish cooking to protect their texture. Once you freeze the potatoes, you may want to thaw them in the refrigerator or bake them frozen.
  • Make Ahead: You can bake these ahead of time and refrigerate the day before then reheat in the oven for half an hour to 40 min before serving

Cheesy, tender savory scalloped parmesan potatoes.

Need Even More Potato Inspired Side Dishes? Try these!


Print

Creamy Parmesan Scalloped Potatoes

These scalloped potatoes are tender, creamy and so delicious! The parmesan cheese adds such amazing flavor and these are a must make side dish!
Course Side Dish
Cuisine American
Keyword parmesan scalloped potatoes, scalloped potatoes
Prep Time 20 minutes
Cook Time 1 hour
Total Time 1 hour 20 minutes
Servings 6 People
Calories 528kcal
Author Alyssa Rivers

Ingredients

  • 2 tablespoons butter
  • 2 tablespoons all-purpose flour
  • 1 teaspoon salt
  • 1/2 teaspoon freshly ground black pepper
  • 2 cup whipping cream can also use half and half
  • 1/2 cup grated Parmesan cheese divided
  • 1 cup shredded mozzarella cheese divided
  • 2 pounds russet potatoes peeled and sliced about 1/8 inch thick
  • Snipped fresh chives for garnish

Instructions

  • Preheat oven to 325 degrees. Lightly spray a 2 quart casserole dish with cooking spray and set aside. In a small saucepan melt 2 Tablespoons butter over medium heat and which in the flour, salt and pepper. Add the whipping cream and stir for about 2 minutes until it starts to thicken. Add 1/4 cup parmesan cheese.
  • Arrange half of the potatoes in the prepared casserole dish overlapping each other. Spread half of the sauce on top followed by 1/2 cup mozzarella cheese. Repeat with another layer of potatoes and sauce topped with mozzarella cheese and remaining parmesan cheese.
  • Cover with foil and bake for 40 minutes. Uncover and bake for 25-30 minutes more until the potatoes are fork tender and the top is starting to brown. Sprinkle with chives before serving.

Video

Notes

Updated Post on October 21, 2020
Originally Posted on March 23, 2019

Nutrition

Calories: 528kcal | Carbohydrates: 32g | Protein: 13g | Fat: 40g | Saturated Fat: 25g | Cholesterol: 141mg | Sodium: 703mg | Potassium: 715mg | Fiber: 2g | Sugar: 1g | Vitamin A: 1481IU | Vitamin C: 9mg | Calcium: 258mg | Iron: 2mg


from The Recipe Critic https://ift.tt/2WlhDM6
https://ift.tt/31oWMww

मंगलवार, 20 अक्तूबर 2020

Mexican Pinwheels

Mexican Pinwheels are a slightly spiced creamy chicken blend rolled up in easy to eat bite sized appetizer. Soft pillowy tortillas wrapped around colorful, amazing flavored filling are going to be a hit at your next gathering!

These are such a fun snack to serve! You can pair them with chips and some Mouthwatering Cowboy Caviar, Blender Salsa or Pico de Gallo. Make an impression the next time you bring a dish with these.

Pinwheels stacked on top of each other on a plate.

Mexican Tortilla Pinwheels

There is something about the color and easiness of pinwheels that make them so attractive. They are almost always the first to disappear at an event. The Mexican twist on the filling of these is  different from what’s usually served. It will be such a nice surprise to bite into them. Pinwheels are so easy to eat, no mess. Everyone loves them.

The awesome thing about pinwheels is how easy they are to make. They do require refrigeration to help them set up and stick all together. They are so nice to make ahead of time and pop them in the fridge and then you can move on to other things.  I love the smooth creaminess of these easy and super tasty little snacks.

Pinwheel Ingredients

Simple ingredients that are easy to find or have on hand.

  • Cream Cheese: Make sure it’s softened
  • Sour Cream: Full fat or low fat, both work great
  • Rotel Tomatoes: This is tomatoes with green chilies, make sure to drain them
  • Green Bell Pepper: Create texture and flavor
  • Chicken: Cooked and shredded
  • Mexican Cheese: This is a great blend of cheese that work well.
  • Taco Seasoning: The best is this homemade seasoning.
  • Green Onion: Chop these pretty finely
  • Cilantro: Brightens the flavor and makes it taste so fresh
  • Tortillas: Flour tortillas will roll the easiest.

How to Make Mexican Pinwheel Snack

Super easy to assemble and quick, just need a little time in the fridge.

  1. Mix: In a large bowl or stand mixer place all the ingredients except the tortillas. With the mixer or using a hand mixer beat together all the ingredients till smooth and creamy and mixed well.
  2. Roll: Spread about 1/4-1/2 cup of mixture on a tortilla leaving about an inch around the edges. Roll up tightly and cover really well with plastic wrap and refrigerate for at least 2 hours.
  3. Slice: When ready to serve slice into at least 1 inch pinwheels.

The process of making Mexican pinwheels.

Tips and Variations for Easy Mexican Pinwheels

Whether it’s a special occasion or just because, these Mexican Pinwheels are going to be a crowd pleaser!

  • Tortillas: You can use a wide variety of tortillas for these. Try flavored wraps or flatouts. I’d stick to flour based however, corn tortillas are not as soft and tend to fall apart.
  • Filling: You can add black beans, corn, and for extra spice try dicing a jalapeño or diced chilies in the filling
  • Cheese: The recipe calls for Mexican cheese which is usually a blend of 3 cheeses. This adds the best flavor combo and it’s usually finely grated which rolls up the best in the tortillas. You can easily sub out any other type of cheese you’d like. Cheddar, pepper jack, monterey jack, or even cotija will all work. I suggest finely grating what ever you use.
  • Refrigerate: Don’t skip this step. This makes sure the filling and tortillas meld together so they don’t come undone when you cut them.
  • Slicing:  Use a serrated knife and make sure you don’t slice them too thin. They’ll come undone.
  • Covering: When you put them in the fridge, make sure you cover them well so the ends especially don’t dry out. That’d be bad.

How to Use Mexican Taco Pinwheels

  • Lunch: These aren’t just for appetizers, they make great lunches. Easy to eat, little mess and kids love them. (Adults too)
  • Snacks: Better for you then crackers or junk food, these are perfect when you need a little snack
  • Potluck: Perfect for a gathering, for easier transportation don’t cut them until you arrive at your destination. Make sure you cover them tightly so they don’t dry out.
  • Serve: Serve with salsa or guacamole, or all by themselves. They are that good.
  • Dinner:  You can even use these for a light dinner served with  rice, fruit and veggies.

Up close photo of the Mexican pinwheels.

More Pinwheels to Try

Because pinwheels are not just fun to make, their fun to eat!

Print

Mexican Pinwheels

Mexican Pinwheels are a slightly spiced creamy chicken blend rolled up in easy to eat bite sized pinwheels. Soft pillowy tortillas wrapped around colorful, amazing flavored filling are going to be a hit at your next gathering! 
Course Dinner
Cuisine Mexican
Keyword chicken bacon ranch pinwheels, mexican pinwheel
Prep Time 15 minutes
Total Time 15 minutes
Servings 6 People
Calories 498kcal
Author Alyssa Rivers

Ingredients

  • 12 ounce cream cheese softened
  • 1/2 cup sour cream
  • 1 10 ounce can rotel drained (tomatoes with green chilis)
  • 1/2 green bell pepper finely diced
  • 2 cups chicken cooked and shredded
  • 2 cups Mexican cheese shredded
  • 2 Tablespoons Homemade Taco Seasoning
  • 2 Tablespoons green onion chopped
  • 2 tablespoons cilantro chopped
  • 6 flour tortillas

Instructions

  • In a large bowl or stand mixer combine cream cheese, sour cream, rotel, bell pepper, chicken, cheese, taco seasoning, green onions and cilantro. Using the mixer or hand mixer beat together until smooth.
  • Place 1/4- 1/2 cup of the mixture on the tortilla and spread leaving about an inch from the edges. Roll up tightly and refrigerate for an hour.
  • Slice into one inch pinwheels and serve.

Nutrition

Calories: 498kcal | Carbohydrates: 20g | Protein: 18g | Fat: 39g | Saturated Fat: 21g | Cholesterol: 121mg | Sodium: 744mg | Potassium: 234mg | Fiber: 1g | Sugar: 5g | Vitamin A: 1296IU | Vitamin C: 9mg | Calcium: 356mg | Iron: 2mg


from The Recipe Critic https://ift.tt/31muzqk
https://ift.tt/2Teuct6

Yum Yum Sauce

Yum Yum Sauce, the name says it all, a Japanese steak house mayo based sauce that is amazing. This popular sauce is light, sweet and tangy!

Popular sauces that are made from scratch are so easy and so much better. Think homemade Famous Fry Sauce, Tzatziki Sauce and Homemade Cheese Sauce.

Creamy, smooth tangy Yum Yum Sauce

Homemade Yum Yum Sauce

Yum Yum Sauce is a staple at Japanese Hibachi restaurants, although it’s not something you’d find handedly in Japan. It’s an North American thing, but oh is it good. Hibachi is a method of cooking meat, vegetables and seafood on a high heat metal cooking plate. This sauce is almost always on the table, with your meal.

This is so easy and simple to make you’ll wonder why you’ve waited so long to try it. You can find Yum Yum Sauce sold at stores, but this is so much easier and so much better!

How to Make Yum Yum Sauce Ingredients

Simple ingredients but big on flavor.

  • Mayo: The creamy base
  • Rice Vinegar: Adds a zing of deliciousness but is a MUST for that added touch in this Yum Yum Sauce
  • Tomato Paste: Do not substitute this with ketchup. Big no no.
  • Paprika: There are a range of flavors in paprika stick to the sweet not smoky ones
  • Garlic Powder: Flavor enhancer
  • Sugar: Counter acts the acid in the tomato paste and binds everything together.
  • Butter: May sound weird but it’s a crucial part of the yum yum
  • Salt and Pepper: Add to taste
  • Water: Thins the sauce to the right consistency.

Make it Yummy!

This must have sauce is so simple to make you won’t have to go to a Japanese Steak house to get it!

  1. Mix: In a small bowl whisk all the ingredients but the water together. Then thin with the water to desired consistency.

Mixing the ingredients for creamy smooth tangy Yum Yum Sauce.

How to Use Yum Yum Sauce  

Similar to what many call “Fry Sauce” but different, this sauce can be used in a variety of ways. It’s so versatile, it should be a staple in your fridge for sure.

  • As a dipping sauce for shrimp
  • Drizzled over fried rice and noodles
  • With grilled chicken, meat and seafood
  • Slathered on hamburger and hot dog buns
  • With French fries and sweet potato fries
  • As a dipping sauce for potstickers and wontons
  • As a vegetable dip
  • With sushi and rice balls
  • In pasta salads
  • In potato salads
  • As a salad dressing
  • On baked potatoes

Creamy, smooth tangy Yum Yum Sauce.

Tips and Storing Sauce

  • Variety: This is definitely a great base sauce, if you need to add more or less seasoning to your liking go for it. Add some cayenne, a splash of vinegar or extra pepper. You decide.
  • Let it set: The longer the sauce sits before you use it the better, if you can plan to make a day ahead. It gives time for the flavors to meld.
  • Store: This is best kept in the fridge for up to 10 days. However this is so easy to make and so good, you can make small batches and make it fresh every time you need it.

close-up of hibachi chicken on a plate

Recipes to Have with Yum Yum Sauce

Print

Yum Yum Sauce

Yum Yum Sauce, the name says it all, a Japanese steak house mayo based sauce that is amazing. This popular sauce is light, sweet and tangy! 
Course Sauce
Cuisine Asian American, Japanese
Keyword yum yum, yum yum sauce
Prep Time 5 minutes
Total Time 5 minutes
Servings 32 Tablespoons
Calories 54kcal
Author Alyssa Rivers

Ingredients

  • 1 cup mayonnaise
  • 2 Tablespoons tomato paste
  • 1 Tablespoon rice vinegar
  • 1 teaspoon paprika
  • 1 teaspoon garlic powder
  • 1 Tablespoon Sugar
  • 1 Tablespoon Melted Butter
  • salt and pepper
  • 2-3 Tablespoons water

Instructions

  • In a small bowl whisk the mayonnaise, rice vinegar, tomato paste, paprika, garlic powder, sugar, butter and salt and pepper.
  • Add water as needed to get the desired consistency.

Nutrition

Calories: 54kcal | Carbohydrates: 1g | Protein: 1g | Fat: 6g | Saturated Fat: 1g | Cholesterol: 4mg | Sodium: 56mg | Potassium: 14mg | Fiber: 1g | Sugar: 1g | Vitamin A: 62IU | Vitamin C: 1mg | Calcium: 1mg | Iron: 1mg


from The Recipe Critic https://ift.tt/3kftOGG
https://ift.tt/2H7wLLv

सोमवार, 19 अक्तूबर 2020

Gold Star Cincinnati Chili

Cincinnati Chili is a classic Midwestern recipe that slow simmers the meat sauce then served over top noodles. This chili is nothing like you have ever had before!

This fun, iconic American dish is a staple in the city of Cincinnati. Complete your meal by serving alongside a Greek Salad, a baked potato, and end the meal with some homemade funnel cakes!

A white plate with Cincinnati chili and noodles wrapped around a fork.

Cincinnati Chili Recipe

This chili is definitely unlike any other chili! It’s a combination of so many different foods and flavors. This chili cooks up as a flavorful meat sauce that is perfect to use over noodles or to smother hot dogs with. It can be eaten in a bowl like a regular bowl of chili, but that’s not it’s purpose in life!

This is such a fun and unique meal that the entire family is sure to love. The best part is that everyone can choose which way they want to eat it. Beans? No beans? Onion? Cheese? You can pick your own way!

What Makes Cincinnati Chili Different?

Cincinnati Chili is a recipe developed in the 1920s thanks to Greek immigrants who settled in the Midwest. It’s a combination of a soupy Midwestern stew and traditional Mediterranean spices. It was created as a hot dog topping, and was originally served at a stand outside a theater called Empress. 

Later the owners of the hot dog stand expanded into a restaurant which they named Empress and started serving the chili over noodles also. As the idea spread other restaurants and chili parlors opened, adopting the same style of chili. Today some of the most popular chili parlors serving this dish are Empress, Skyline, and Gold Star Chili. Today Cincinnati Chili is known as an iconic American dish, and is enjoyed by many people visiting the Midwest. 

Ingredients Needed

  • Tomato Paste: helps to thicken the meat sauce and also gives a nice red, tomato base to the broth.
  • Water/Broth: This recipe can be made with just water, as the meat simmers in the pot it will become quite flavorful. If you want to push the flavor along a little bit you can do a mixture of half water and half beef broth.
  • Ground Beef: 80/20 is a good balance for the chili. We need just enough fat to create a flavorful broth while simmering, but we don’t want too much fat, since we’re boiling the meat, the grease will stay in the pot, we can’t just drain it out.
  • Onion: some say that no onion is included in the actual chili, but it gives a great flavor. Mince the onion up nice and fine and you don’t even notice the bits in the chili.
  • Chili Powder: Adds a depth of flavor.
  • Salt: Amount can be adjusted to taste if needed.
  • Cinnamon, Nutmeg, Allspice & cloves: The warm spices are what sets this chili apart from all others!
  • Cocoa: a necessity to come as close to authentic Skyline Chili as possible.
  • Worcestershire Sauce: not a required ingredient, but it does add a depth to the broth of the chili.
  • Vinegar: brightens up the meat sauce.

Chili in a pot with a wooden spoon in it.

How to Make Cincinnati Style Chili

This copycat original is famous by Skyline chili parlor. Cincinnati chili is a flavorful meat sauce infused with mediterranean spices. Serve over noodles or on top of a hot dog!

  1. Combine: Water/broth with tomato paste to start the broth. Crumble the ground beef with your hands and add it into the liquid.
  2. Add in: Remaining ingredients for the chili.
  3. Bring to a simmer: Let the chili simmer for 2-3 hours while covered, until meat is fully cooked. Stir the meat. To ensure the meat is completely crumbled, it should have a fine texture, no large chunks of meat.
  4. Storing Chili: Let the chili cool to room temperature and then cover to store in the refrigerator overnight.
  5. Remove Grease: The next day, break up the cooled grease on the top of the chili, remove it completely, then bring the chili back to a simmer on the stovetop.
  6. Serve: Serve over spaghetti noodles or on a hot dog.

The process of making Cincinnati chili in four photos.

What to Serve with Cincinnati Chili

While you could serve up a bowl of this chili, that’s not how you will typically see it served. Most common ways of enjoying this particular style of chili is over hot dogs as a “cheese coney” or over spaghetti noodles. 

Whichever way you choose to go, just make sure you have plenty of oyster crackers on the side!

  • Cheese Coney: hot dog, bun, chili, cheese, mustard and onion (optional)
  • Simple: Just noodles and chili combined.
  • Have it with more: Add cheese with your noodles and chili
  • More to Love: Noodles, chili, cheese and onions or beans. The variations are endless!
  • The Works: Add all five together and you have it all with noodles, chili, cheese, onions and beans.

Cincinnati chili with spaghetti noodles garnished with cheese, onions and crackers.

More Chili Recipes to Enjoy

Print

Cincinnati Chili

Cincinnati Chili is a classic Midwestern recipe! This chili is nothing like you have ever had before! Slow simmered meat sauce is served over spaghetti noodles. 
Course Dinner, Main Course
Cuisine American
Keyword chili, Cincinnati Chili
Prep Time 15 minutes
Cook Time 2 hours
Total Time 2 hours 15 minutes
Servings 8 People
Calories 352kcal
Author Serene Herrera

Ingredients

  • 4 cups water (OR can do half water, half beef broth)
  • 6 ounce tomato paste
  • 2 pounds ground beef (80/20)
  • ½ cup onion finely diced
  • 3 Tablespoon chili powder
  • 2 Tablespoon worcestershire sauce
  • 1 Tablespoon apple cider vinegar
  • 1 Tablespoon light brown sugar
  • 2 teaspoon salt
  • 1 teaspoon ground cumin
  • 1 teaspoon cinnamon
  • ½ teaspoon ground nutmeg
  • ¼ teaspoon ground all spice
  • ¼ teaspoon ground cloves
  • 1 ounce dark chocolate OR unsweetened cocoa powder
  • 1 bayleaf

Toppings

  • spaghetti noodles cooked
  • beans
  • onion diced
  • cheddar cheese shredded
  • oyster crackers

Instructions

  • In a large dutch oven combine the water and tomato paste. Whisk together to combine.
  • Crumble the meat with fingers and add to the liquid in the pot.
  • Add all remaining ingredients to the pot and stir to combine.
  • Bring pot of chili to a simmer over medium heat. Cover and lower heat. Let simmer for 2-3 hours stirring occasionally. Skim grease from the top as needed.
  • Remove the chili from the heat and allow to cool to room temperature. Cover and store the chili in the refrigerator overnight.
  • After chili has cooled overnight, using a spoon, breakup the grease on the top of the chili and remove completely.
  • Bring the chili back to a low simmer over medium heat.
  • Serve the chili warm over spagehtti noodles or over a hot dog.

Notes

If you don't have time to store the chili overnight, you can simply skim the grease as best as you can from the top of the chili and serve. Storing overnight helps remove the grease and allows further development of the flavors. It is not necessary. 


Nutrition

Calories: 352kcal | Carbohydrates: 11g | Protein: 21g | Fat: 25g | Saturated Fat: 10g | Cholesterol: 81mg | Sodium: 924mg | Potassium: 659mg | Fiber: 3g | Sugar: 6g | Vitamin A: 1214IU | Vitamin C: 6mg | Calcium: 57mg | Iron: 4mg


from The Recipe Critic https://ift.tt/35cSEkj
https://ift.tt/31o5LOx