शुक्रवार, 31 जुलाई 2020

Oven Baked Denver Omelet

An Oven Baked Denver Omelet is a delicious omelet packed with ham, onions, peppers and cheese that you can throw into the oven in a moments notice!  It is a hearty and satisfying family breakfast that everyone will go crazy over!

Freezer friendly breakfast meals are a must on busy mornings that still require warm nutritious meals.  Try Breakfast Burritos or Denver Omelet Breakfast Muffins for delicious and easy recipes everyone will enjoy.

Denver omelet slice on a white plate.

Oven Baked Denver Omelet

Commonly known as a “Western Omelet” this Baked Denver Omelet is the BEST baked omelet recipe. It is filled with fresh ingredients like ham, fresh onion, green peppers and cheese and is ready in no time at all!  Break out of a breakfast rut and try these warm, fluffy eggs fresh out of the oven.  A large pan of these tasty and healthy eggs that are filled with ooey-gooey cheese will be an instant hit for breakfast, lunch or dinner!

Whether you are baking them for your family or a brunch for a crowd, they are easy to prepare for a crowd.  They are light and tasty but also filling and satisfying!  No more standing over a skillet while you cook omelet after omelet for every member of your family.  Simply whisk these ingredients together then bake.  In less than 30 minutes you will have a warm and filling breakfast that everyone will love and enjoy together!

Denver Omelet Ingredients:

Just a few simple ingredients come together quickly and easily to make a fresh and satisfying breakfast for your entire family.  These are staple ingredients are no-fuss and set up perfectly in your oven and become a light and fluffy omelet everyone will love!

  • Eggs: Whisk together eggs with cream to make the perfect buttery and light egg.
  • Half and half cream: Makes the eggs light and fluffy.
  • Cheddar cheese: Freshly shredded cheese mixed in will add sharp, earthy flavor.
  • Ham: Chopped and fully cooked deli ham adds the perfect salty taste.
  • Onion: Adds a sweet bite of flavor!
  • Green pepper: Mild and sweet flavor that adds color, flavor, and crunch.

Let’s Bake an Omelet!

All the flavors you love in an omelet are easy to put together and bake in less than 30 minutes!  Just whisk together the ingredients and pour into a greased pan, then relax while your stress free breakfast bakes!

  1. Prep: Preheat oven to 400 degrees. In a medium sized mixing bowl whisk together eggs and cream. Add in cheese, ham, onion and green pepper.
  2. Bake: Pour into a greased 9×9 inch pan. Bake for 25 minutes or until golden brown.

Steps to make a denver omelet.

Variations of Denver Omelette:

This Baked Denver Omelet is packed with so many delicious ingredients my family loves like ham, onions, peppers, and gooey cheese. The great thing about this recipe is that you can customize it so it is a huge hit with your family like it is with mine!

  • Toppings: Pico de Gallo, Mango Lime Avocado Salsa, Salsa, sausage gravy, sour cream, or guacamole.
  • Serve with: Hash browns, Sweet Potato Hash, bacon, fresh fruit, Biscuits and Gravy
  • Additional fillings: Bacon, crumbled cheese such as feta or blue cheese, spinach, mushrooms, zucchini.
  • Ingredient swaps: Use milk or heavy whipping cream instead of half and half.
  • Pro Tip: Cook onion and peppers before adding them in to give them a slightly caramelized taste and reduce the moisture they will add to the egg.
  • Seasoning: Add seasoning salt for and pepper to increase the flavor of this light and tasty baked omelet.  Also try paprika, chili powder or red pepper flake if you like an extra punch of spice.

Can You Make a Baked Denver Omelet Ahead?

Yes! Make this Denver omelet ahead and store it until you are ready to serve.  Let the omelet cool completely before covering it tightly with aluminum foil or plastic wrap.

  • Freeze: Make ahead and freeze for 3-6 months without sacrificing flavor or quality.
  • Refrigerate: Store in an airtight container for 3-4 days in the refrigerator.
  • To thaw: Thaw in the refrigerator or place directly in the oven to heat.
  • To re-heat:  Microwave a slice of Denver omelet for 30 seconds at a time until it is heated throughout.  Or place entire tray in the oven at 350 for 10 minutes or until warm throughout.

Cutting a slice of oven baked denver omelet.

More Egg Breakfast Recipes:

Print

Oven Baked Denver Omelet

A delicious omelet packed with ham, onions, peppers and cheese that you can throw into the oven in a moments notice!
Course Breakfast
Cuisine American
Keyword omelet, omelet recipe, oven baked denver omelet
Prep Time 10 minutes
Cook Time 25 minutes
Total Time 35 minutes
Servings 6 Servings
Calories 251kcal
Author Alyssa Rivers

Ingredients

  • 8 eggs
  • 1/2 cup half and half cream
  • 1 cup cheddar cheese shredded
  • 1 cup ham chopped fully cooked
  • 1/2 cup onion
  • 1/2 cup green pepper

Instructions

  • Preheat oven to 400 degrees. In a medium sized mixing bowl whisk together eggs and cream. Add in cheese, ham, onion and green pepper.
  • Pour into a greased 9x9 inch pan. Bake for 25 minutes or until golden brown.

Notes

Updated on July 30, 2020
Originally Posted on July 4, 2014

Nutrition

Calories: 251kcal | Carbohydrates: 3g | Protein: 18g | Fat: 18g | Saturated Fat: 9g | Cholesterol: 260mg | Sodium: 486mg | Potassium: 234mg | Fiber: 1g | Sugar: 1g | Vitamin A: 623IU | Vitamin C: 11mg | Calcium: 193mg | Iron: 1mg


from The Recipe Critic https://ift.tt/39JJUE0
https://ift.tt/314mO7b
गुरुवार, 30 जुलाई 2020

Tomato Jam

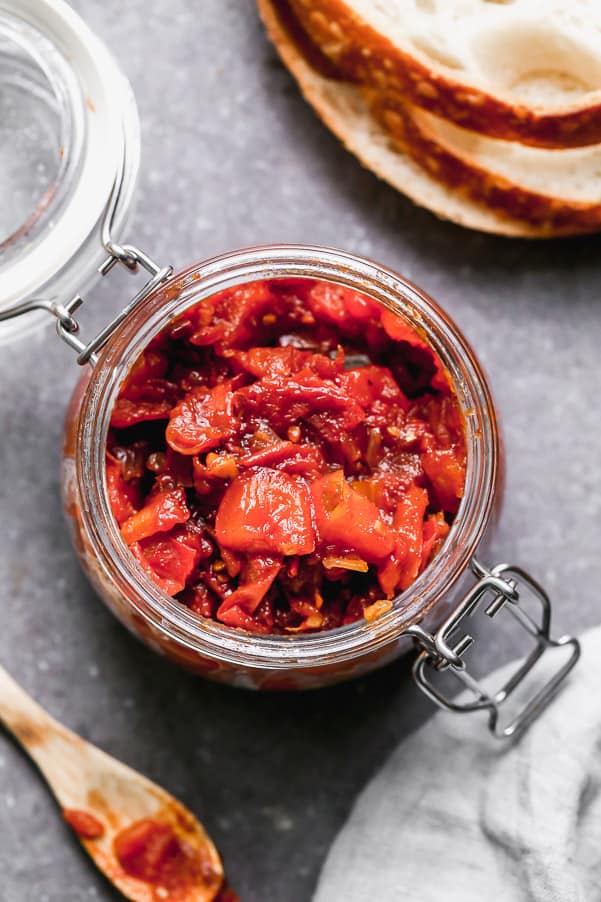
This Easy Tomato Jam is the perfect condiment to slather on toast, sandwiches, and everything in between. All you have to do is throw everything in a pot, let it simmer, and you’re done.

It’s tomato season! For more awesome ways to use fresh tomato, check out this Chilled Cucumber Tomato Salad, this One Pot Fresh Tomato Pasta, and this Caprese Sandwich with Basil.

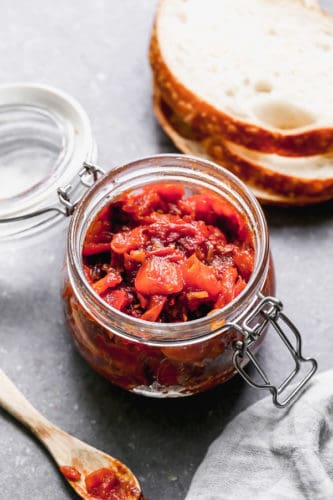
Overhead shot of tomato jam in a jar.

Homemade Tomato Jam

If there’s anything you do with all those leftover tomatoes this summer, make this tomato jam! It’s the perfect combination of sweet and savory, and goes with pretty much anything. We love to slather it on toast with a runny fried egg, snuggle it into plain turkey sandwiches, and serve it alongside grilled chicken.

Bonus? It’s a virtually fool-proof, hand-free recipe. All you have to do is throw everything in a pot and let it do its thing until the tomatoes break down and are perfectly jammy and sweet.

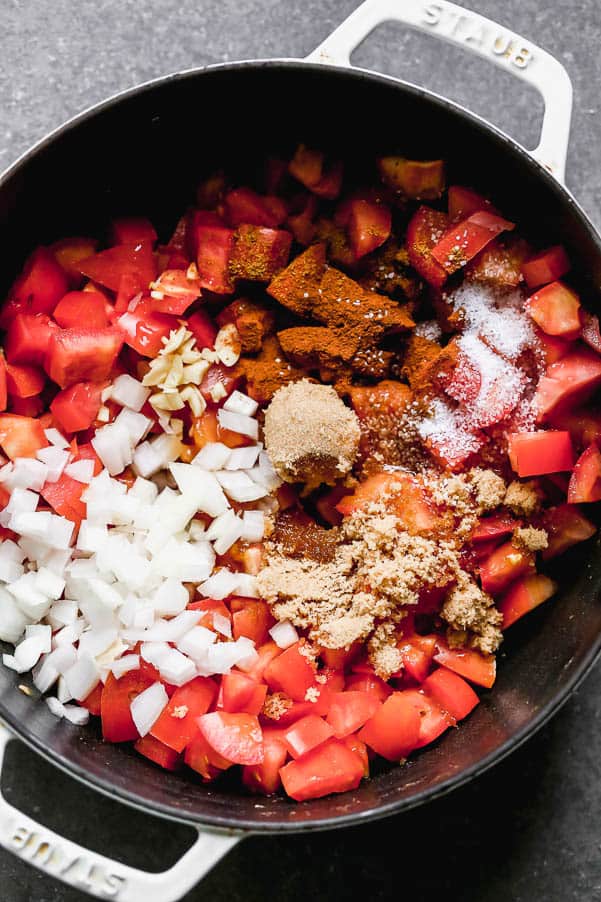
Overhead photo of the ingredients in the tomato jam.

Ingredients in Tomato Jam:

  • Tomatoes. If you have a ton of leftover heirloom tomatoes you need to get rid of, of course you can use those, but tomato jam is best purposed for those less sweet Roma tomatoes.
  • Vinegar. Ever jam needs a little bit of acid, and while you could use pretty much any vinegar you have on hand, we went with apple cider vinegar. It has the perfect amount of sweet and acidic flavor, plus it’s super affordable.
  • Lemon. To me, lemon and tomato go hand in hand, so we add just a little bit in addition to the apple cider vinegar.
  • Onion and garlic. You won’t always find onion and garlic in a tomato jam recipe, but I really like the extra flavor and texture they both add to the tomato jam.
  • Spices. For a smoky, warm flavor, we add both ground cinnamon and ground cumin. Just enough to add a little bit of flavor, but not enough for it to be singled out.
  • Sugar. Another really important ingredient in our tomato jam. Sugar of course, adds sweetness to the tomato jam, but it’s also necessary to balance out all the acid in the tomatoes, vinegar, and lemon juice.

Let’s Make Some Jam!

Guys. This is SO easy. Here’s how it goes down.

  • Chop the tomatoes. You’ll want to take out the core of each tomato, but leave the seeds and skin.
  • Add tomatoes, vinegar, lemon juice, sugar, spices, salt, onion, and garlic to a large pot. Stir.
  • Bring the mixture to a boil, and reduce to a simmer.
  • Cook until jammy and sweet and savory and delicious!

Tomato Jam being stirred with a wooden spoon in a pot.

Substitutions, Tips and Tricks for Recipe Success:

  • While our recipe does call for Roma tomatoes, if you have leftover tomatoes, then by all means, use what you have!
  • If you only have apple cider vinegar or lemon juice, you can use one or the other.
  • Apple cider vinegar can be swapped out for white wine vinegar or sherry vinegar.
  • Stir frequently to prevent the tomatoes from burning or sticking.
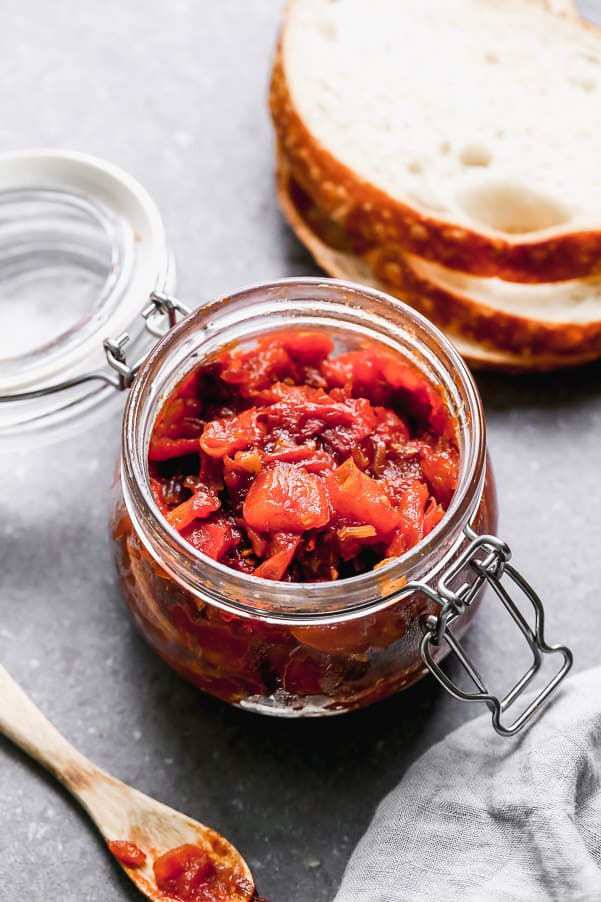
  • Season properly! In addition to the teaspoon of salt the recipe calls for, you will also have to adjust to your taste. I like things on the saltier side, so I always end up adding a half teaspoon or so more.Tomato jam in a clean can jar with a wooden spoon on the side with tomato jam on it.

Uses for Tomato Jam:

  • Spread whole-grain toast with whipped ricotta cheese and tomato jam
  • Spoon tomato jam on top of brie and bake in a 375-degree oven until brie is melted, about 15 minutes.
  • Spoon tomato jam on top of burrata cheese and serve with toasted crostini.
  • Slather tomato jam on whole-wheat bread with Boursin cheese and thick-cut roasted turkey.
  • Serve alongside scrambled eggs and toast.

Making Tomato Jam with Pectin:

If you want a more jell-like texture, you can add a tablespoon of pectin to the mixture. Boil for 1-2 minutes and then let cool.

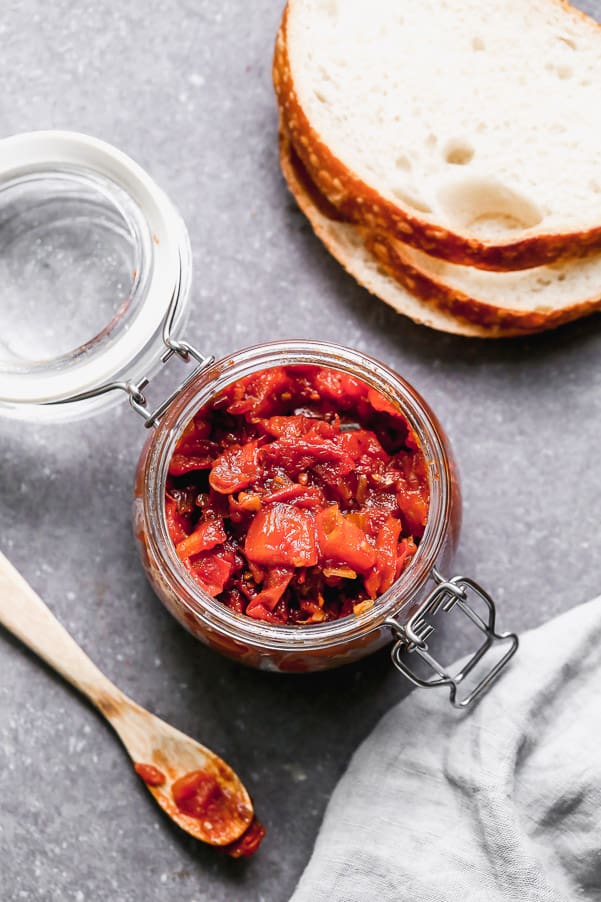
Tomato jam in a clear jar with a wooden spoon and three slices of bread surrounding the jar.

What to Serve with Jam:

Print

Tomato Jam

This Easy Tomato Jam is the perfect comdiment to slather on toast, sandwiches, and everything in between. All you have to do is throw everything in a pot, let it simmer, and you're done.
Course Sauce
Cuisine American
Keyword jam, savory jam, tomato jam
Prep Time 10 minutes
Cook Time 2 hours
0 minutes
Total Time 2 hours 10 minutes
Servings 1 cup jam
Calories 459kcal
Author Nicole Leggio
Cost $10

Equipment

  • Large pot

Ingredients

  • 2 lbs roma tomatoes, cored and chopped
  • 1/2 cup packed brown sugar
  • 2 tbsp apple cider vinegar
  • 1 tbsp lemon juice
  • 1/2 medium onion, chopped
  • 1 large garlic clove, minced
  • 1/2 tsp ground cinnamon
  • 1/4 tsp ground cumin
  • 1 tsp kosher salt

Instructions

  • Add all ingredients to a large stock pot. Heat over medium-high. Cook until the tomatoes start to break down, after about 10 minutes. Stir occassionally.
  • Once the tomatoes come to a boil, reduce to a low simmer and cook for another one and half to two hours, stirring occassionally, until no liquid remains and the texture is jam-like.
  • Season to taste with salt and pepper. Cool completely and store in an airtight container.

Nutrition

Serving: 1cup | Calories: 459kcal | Carbohydrates: 117g | Protein: 1g | Fat: 1g | Saturated Fat: 1g | Sodium: 2362mg | Potassium: 227mg | Fiber: 2g | Sugar: 110g | Vitamin C: 11mg | Calcium: 117mg | Iron: 1mg


from The Recipe Critic https://ift.tt/3jTvqGl
https://ift.tt/2P8qAqL

बुधवार, 29 जुलाई 2020

Chocolate Zucchini Bread

Chocolate Zucchini Bread is moist, sweet and filled with a hidden gem! It bakes perfectly and has a beautiful cracked sugar crust topping!

Chocolate plus zucchini is a delicious combination. Try this Chocolate Zucchini Cake, Chocolate Zucchini Cupcakes with Chocolate Cream Cheese Frosting or Double Chocolate Zucchini Brownies for more dessert ideas.

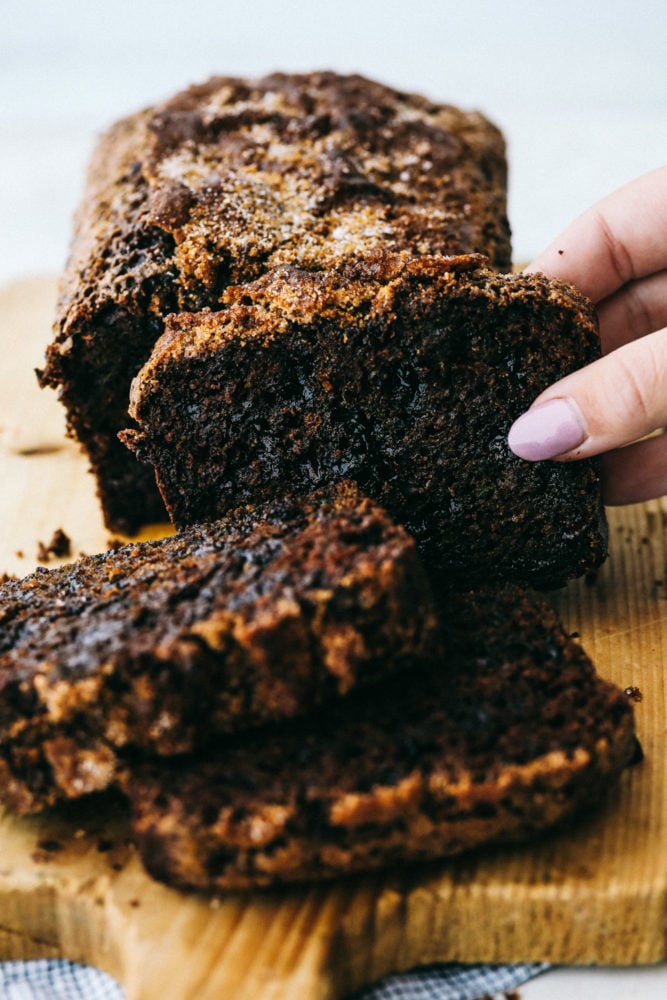
Chocolate zucchini bread sliced on a cutting board.

Chocolate Zucchini Bread

Zucchini is my favorite summer vegetable. It is one of the best garden vegetables and grows abundantly for everyone to share. I love how easy this bread is to make and comes together so quickly. This quick bread bakes so well and looks delicious straight out of the oven. The zucchini is a hidden gem that creates a moist and delicious bread.

Top this with a sweet crust after baking and it is to die for. It creates a dessert like bread that everyone loves. Kids love this chocolate zucchini bread recipe and most don’t even know that zucchini is hidden in the bread. It is the perfect combination and loved by all!

Zucchini Bread Ingredients:

It is the perfect afternoon snack, early morning breakfast or a light dessert after dinner. Get your chocolate fix by enjoying this tired and true favorite!

  • All Purpose flour: Helps thicken the quick bread.
  • Cinnamon: Gives a hint of sweet and spicy flavoring.
  • Salt: Just a pinch.
  • Baking Soda: This will help the bread raise.
  • Unsweetened Cocoa Powder: Added chocolate flavoring to the bread
  • Canola Oil: The best type of oil for baking bread.
  • Sugar: Sweet the bread with white sugar.
  • Brown Sugar: Makes the bread moist and sweet.
  • Eggs: Works well with the baking soda and creates a higher rise in the baked bread.
  • Vanilla: Added for flavoring 
  • Sour Cream: Creates a moist and delicious inside.
  • Zucchini: The main ingredient! Fresh is best and shredded then strained from the water.
  • Mini Chocolate Chips: More chocolate!

Topping:

  • Brown Sugar and White Sugar: Delicious sweetness added on top!
  • Cinnamon: A sweet and spicy seasoning to add more flavoring.

How to Make Easy Chocolate Zucchini Bread:

It is easy to make and comes together quickly. This bread has the perfect blend of sweet with a healthy and twist of zucchini. Add in the chocolate and be even more amazed!

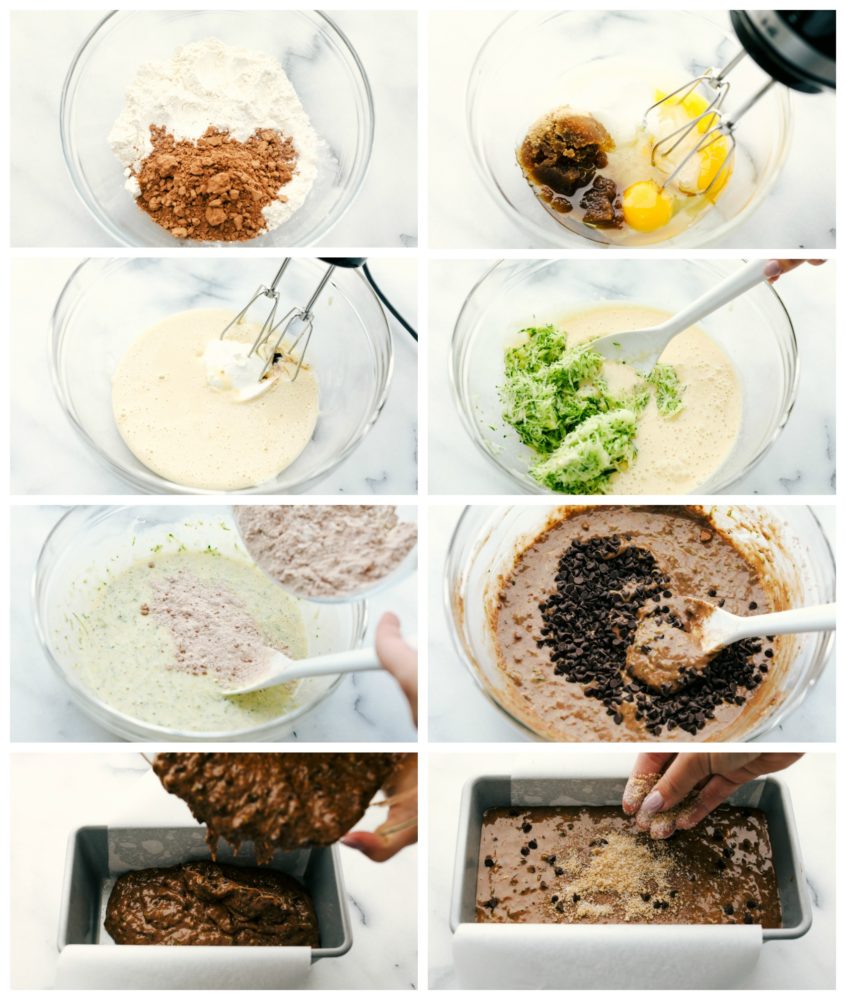
  1. Prepare Bread Pans: Preheat oven to 350 degrees. Butter and flour a large 9″ bread pan and set aside. Mix topping ingredients and set aside.
  2. Combine Dry Ingredients: Whisk together flour, cinnamon, baking soda, salt, cocoa powder in a small bowl until combined. Set aside.
  3. Mix Together: In a stand mixer or using a hand mixer, beat together sugars, oil, and eggs for about 1-2 minutes until slightly fluffy. Add vanilla and sour cream.
  4. Add in Zucchini: Fold in the grated zucchini. Add the remaining dry flour ingredients. Stir to combine and lastly fold in the chocolate chips.
  5. Pour Bread Batter: Pour into prepared 9″ bread pan. Sprinkle the topping on the top. Bake for 50-60 minutes. I set a time for 45 minutes and mine was done at that time. Oven temperatures vary, so just make sure a toothpick entered in the center comes clean.
  6. Serve When Cooled: Let cool for about 5-10 minutes and remove from pan. Delicious served a little warm, even with a little butter on top.

The process of making chocolate zucchini bread.

Preparing Fresh Zucchini:

Fresh zucchini is best when making this chocolate quick bread. I love to have fresh picked zucchini or bought from the store. Either way, this zucchini bread is always a hit!

  • Summer or Fall Season: This bread is best made with the freshest zucchini vegetable. If possible, use a home grown zucchini rather than a store bought zucchini. Zucchini is best picked from the garden in the summer or fall season.
  • Grating Zucchini: Cut the ends off the zucchini and do not peel if you would prefer. Use a grater to grate with the skin on or off. Fresh zucchini is very moist and watery. This will increase the breads moistness as it bakes as well.
  • Drain Moisture: Place the grated zucchini in a sieve or several paper towels. Discard any excess liquid from the zucchini the best that you can. Let it sit while combining ingredients.
  • Dry Zucchini: Add some water to the zucchini to help moisten the zucchini before adding it to the bread batter.

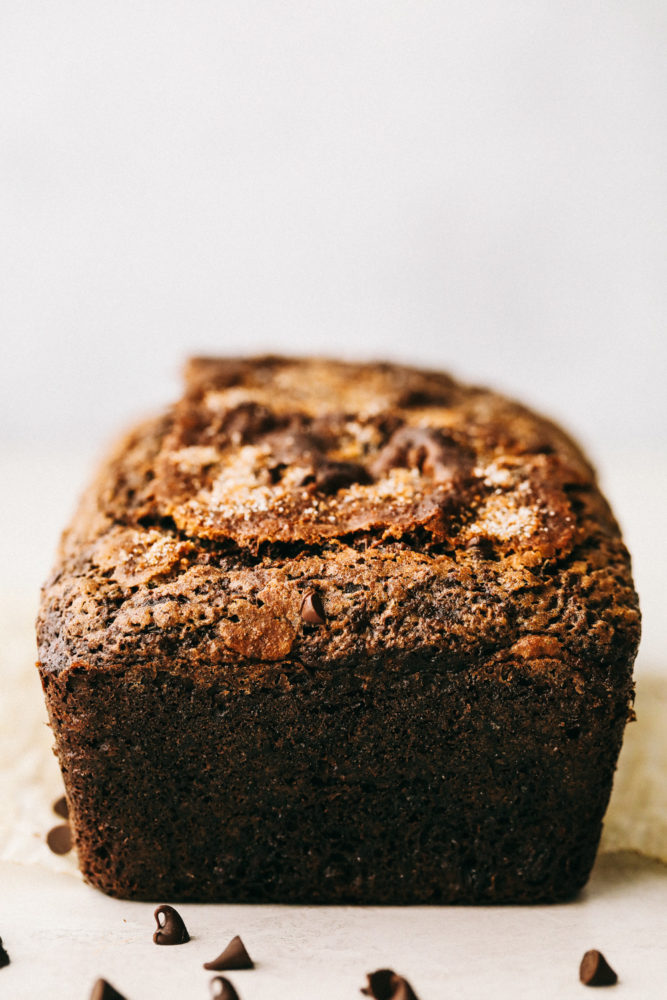
Chocolate zucchini bread with chocolate chips scattered on bottom.

Variations and Substitutions:

Create your perfect bread using these variations and substitutions. Enjoy chocolate zucchini bread just the way you like it!

  • Add Water: If you notice your zucchini is not moist. Either add 1 to 2 Tablespoons to the bread batter or soak the shredded zucchini for a few minutes before adding it to the bread batter.
  • Flour: White flour is best. If you are wanting a whole wheat flour use half and half flour.
  • Cocoa: Make sure to use natural unsweetened cocoa powder to help activate the baking soda. Do not use dutch process cocoa for this chocolate bread.
  • Sugar: Add a little more sugar (3/4 cup) to make a sweeter bread.
  • Yogurt: Substitute sour cream for a low fat plain greek yogurt. Vanilla flavor will also work or non greek yogurt.
  • Chocolate Chips: Add in peanut butter chips or white chocolate chips for a variation. Chocolate chips are a must for this bread to become sweater and more flavorful.
  • Slicing Bread: Let the bread cool before slicing the bread. It is best to slice the chocolate zucchini bread with a bread knife. Slice zucchini bread with a bread knife.

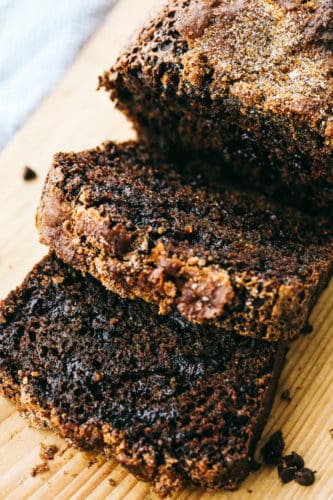
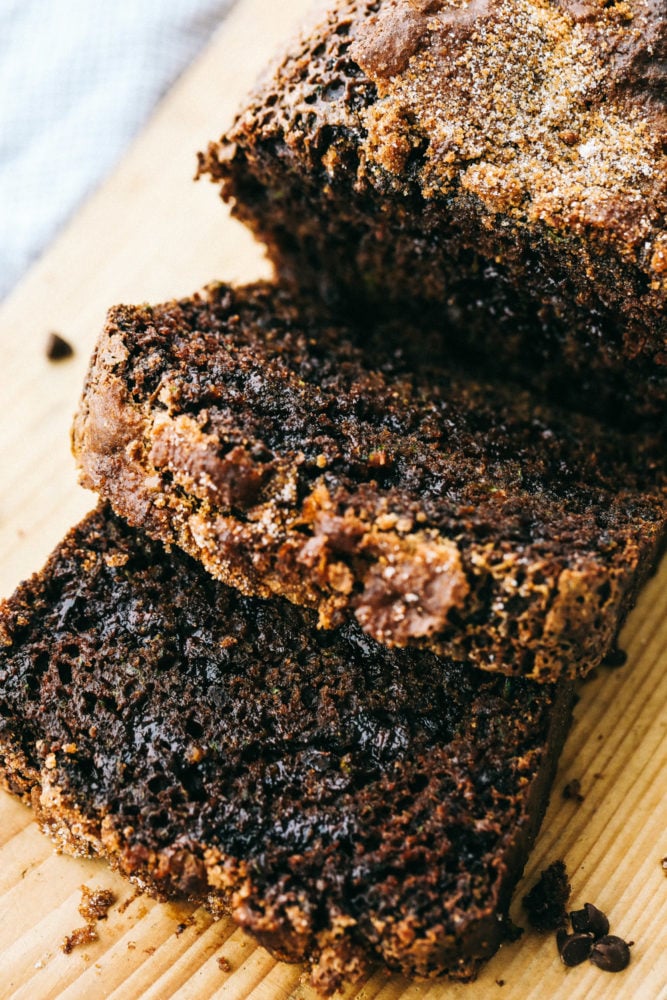
Chocolate zucchini bread sliced in three pieces on a cutting block.

Storing Homemade Zucchini Bread:

There are a few ways to store zucchini bread. The trick is, to try and have left overs. This quick bread goes fast and is a great snack or dessert for everyone around!

  • Storing Chocolate Zucchini Bread: Storing the bread in a ziplock bag at room temperature will work perfectly. This will last about 3 to 4 days long.
  • Freezing a Loaf of Bread: Tightly wrap the zucchini bread in plastic wrap. Place in a ziplock bag and place in the freezer for 1 month. When ready to serve, thaw at room temperture over night. This will last for about 2 to 3 days at room temperature.

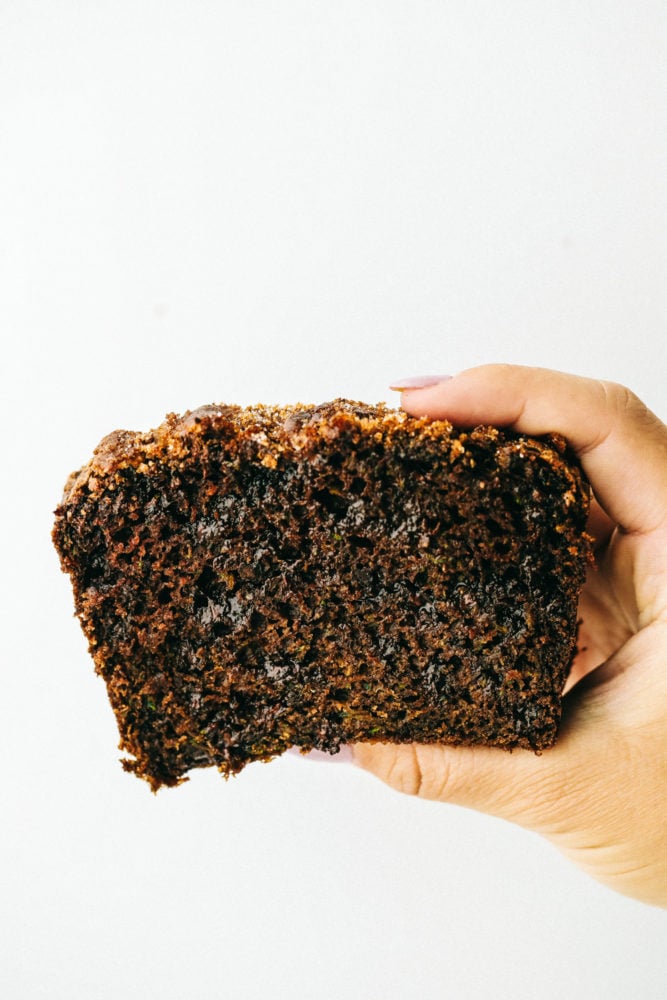
Chocolate zucchini bread held up with a hand with a white background.


More Fresh Zucchini Recipes:

Print

Chocolate Zucchini Bread

A delicious chocolate quick bread with 1 1/2 cups of zucchini inside! It bakes perfectly and has a beautiful cracked sugar crust topping!
Course Appetizer, Bread, Breakfast, Dessert, Side Dish, Snack
Cuisine American
Keyword bread recipes, chocolate zucchini bread, zucchini bread
Prep Time 20 minutes
Cook Time 50 minutes
Total Time 1 hour 10 minutes
Servings 8 Servings
Calories 313kcal
Author Alyssa Rivers

Ingredients

  • 1 Cup All Purpose flour
  • 1 teaspoon cinnamon
  • 1/4 teaspoon salt
  • 3/4 teaspoon baking soda
  • 3 Tablespoons unsweetened cocoa powder
  • 1/4 Cup canola oil
  • 1/2 Cup sugar
  • 1/4 Cup brown sugar
  • 2 eggs
  • 1 teaspoon vanilla
  • 1/4 Cup sour cream
  • 1 1/2 Cups zucchini grated and strained
  • 1/2 Cup mini chocolate chips

Topping:

  • 2 Tablespoon brown sugar
  • 2 Tablespoon white sugar
  • 1/2 teaspoon cinnamon

Instructions

  • Preheat oven to 350 degrees. Butter and flour a large 9" bread pan and set aside. Mix topping ingredients and set aside.
  • Whisk together flour, cinnamon, baking soda, salt, cocoa powder in a small bowl until combined. Set aside.
  • In a stand mixer or using a hand mixer, beat together sugars, oil, and eggs for about 1-2 minutes until slightly fluffy. Add vanilla and sour cream.
  • Fold in the grated zucchini. Add the remaining dry flour ingredients. Stir to combine and lastly fold in the chocolate chips.
  • Pour into prepared 9" bread pan. Sprinkle the topping on the top. Bake for 50-60 minutes. I set a time for 45 minutes and mine was done at that time. Oven temperatures vary, so just make sure a toothpick entered in the center comes clean.
  • Let cool for about 5-10 minutes and remove from pan. Delicious served a little warm, even with a little butter on top. 🙂

Notes

Updated on July 29, 2020
Originally Posted on August 19, 2013

Nutrition

Calories: 313kcal | Carbohydrates: 47g | Protein: 4g | Fat: 13g | Saturated Fat: 4g | Cholesterol: 46mg | Sodium: 210mg | Potassium: 140mg | Fiber: 2g | Sugar: 33g | Vitamin A: 176IU | Vitamin C: 4mg | Calcium: 46mg | Iron: 1mg


from The Recipe Critic https://ift.tt/2ACQyhy
https://ift.tt/2Dl0w91

मंगलवार, 28 जुलाई 2020

No Bake Cheesecake

No Bake Cheesecake is so creamy, luxurious, and surprisingly easy to make from scratch at home.  Top it with whipped cream and fresh fruit and it will be a huge hit that everyone will obsess over!

Simple variations of this no bake cheesecake can make a big impact when entertaining.  Try 2 Ingredient Cheesecake Dip or Cheesecake Stuffed Strawberries for quick and easy twists on no-bake cheesecake that can be served as delicious starters.

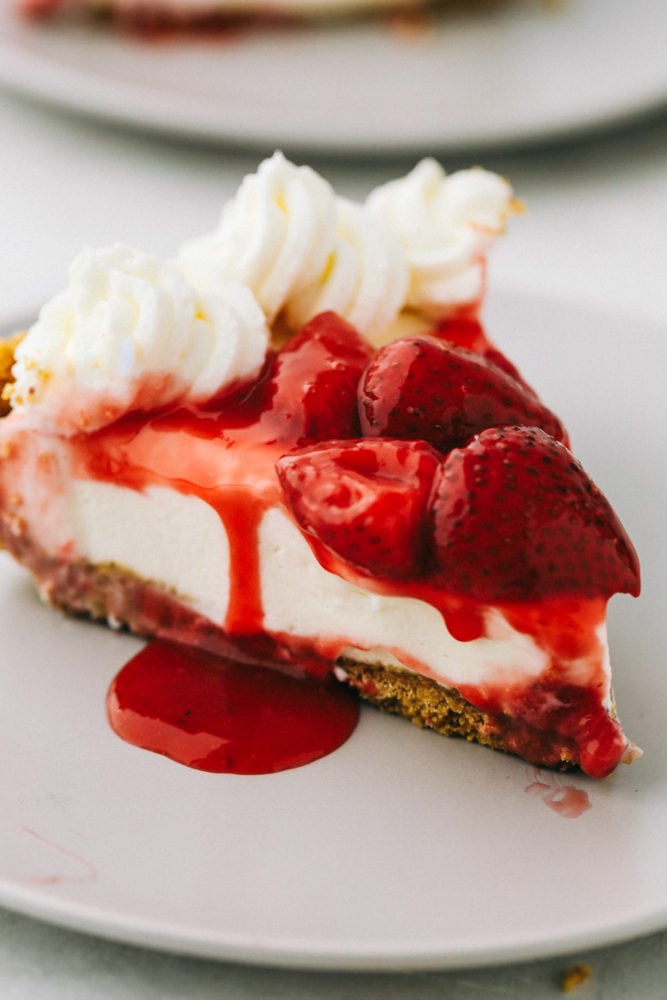
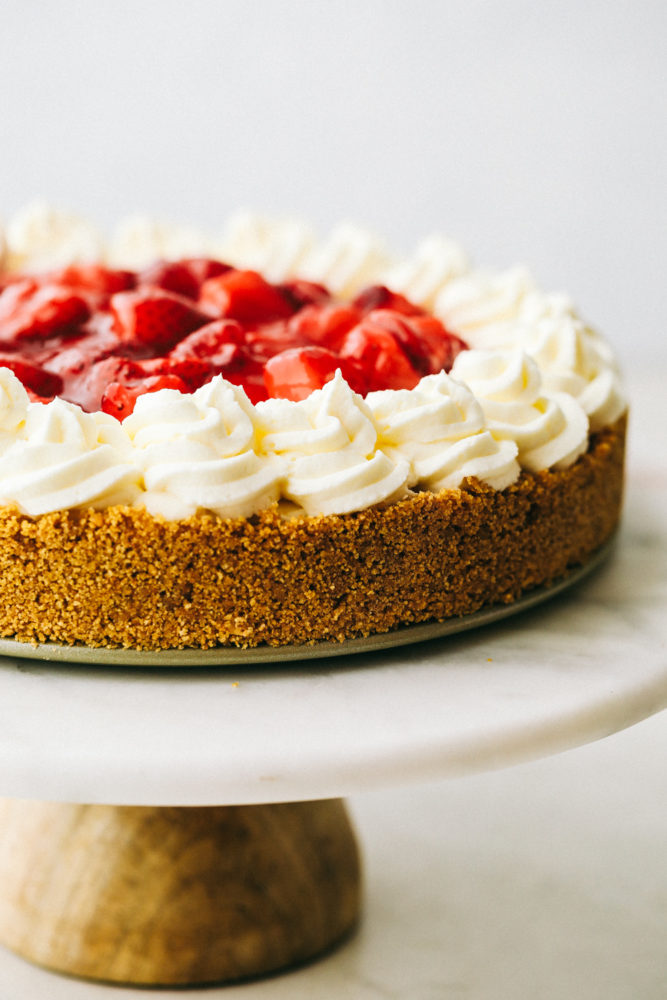
Finished no bake cheese cake topped with whipped cream strawberry syrup and strawberries.

Easy No Bake Cheesecake

No Bake cheesecake is the best no bake cheesecake you will make!  The rich flavors are easy to achieve and effortless to create.  It is an amazing dessert that your family will request over and over.  The good news is you can make simple swaps to the crust and switch up toppings for an entirely different feel so you will never get tired of it!

Every bite of the filling is bursting with tangy cream cheese, smooth vanilla, and bright lemon flavors that are irresistible together!  The crunch of the crumbly graham cracker crust is a perfect contrast to the soft and sweet filling.  Your family and friends will go crazy over how incredibly delicious it is!  Make more than one at a time, because this no bake cheesecake gets devoured quickly!

No Bake Cheesecake Ingredients:

A short list of no-fuss ingredients come together to make the most decadent cheesecake.  For the best results, make sure all the ingredients are at room temperature before you begin the recipe.   This will prevent the cheesecake from cracking, and give you a perfectly smooth and creamy filling.

  • Graham crackers: Crush in food processor or with a rolling pin over a bag of crackers.
  • Brown sugar: Mix together with butter and graham crackers to make a sweet and buttery crust.
  • Butter: Binding agent to hold together the crust.
  • Cream cheese: Mild and tangy flavor and smooth texture for the filling.
  • Lemon juice: A hint of vibrant citrus flavor.
  • Vanilla: Brings out all the flavors in the filling.
  • Sugar: Adds sweetness!
  • Heavy whipping cream: Makes the filling even more smooth and sweet.
  • Optional Topping: Strawberry sauce

How to Make Cheesecake:

No-bake cheesecake is a luxurious dessert that is no longer only reserved for a restaurant on date night.  Now, you can make this any day of the week because it is so easy to put together from scratch at home!

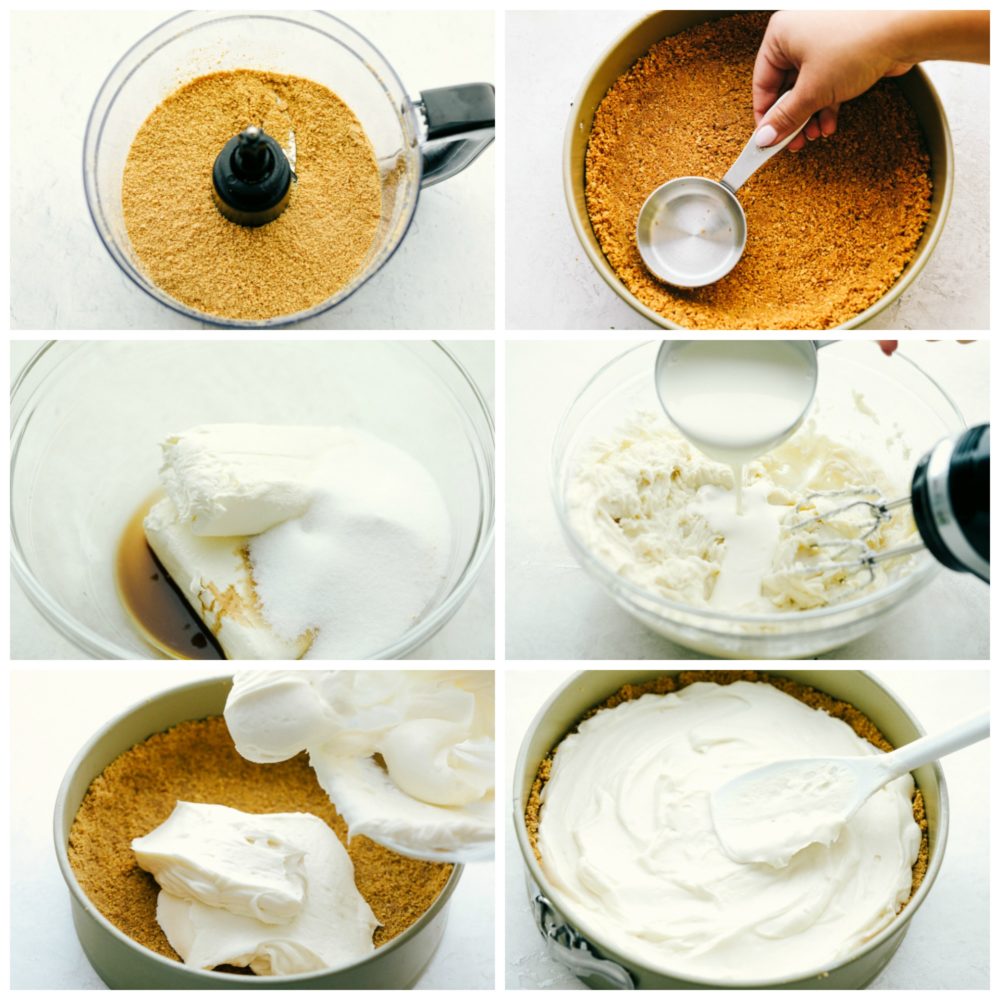
  1. Mix crust: In a medium sized bowl add the crushed graham cracker, brown sugar, and butter and mix until incorporated.
  2. Form crust: In a springform pan add the graham crackers and press firmly into the bottom and sides. Place in the refrigerator.
  3. Combine filling: In a large bowl combine the cream cheese, lemon juice, vanilla and sugar. Beat until smooth and creamy.  Add in the heavy whipping cream and continue to beat until stiff peaks form.
  4. Layer filling over crust: Spread filling evenly along the crust.
  5. Chill and Serve: Place in refrigerator to chill for 3 hours or overnight and serve with strawberry topping if desired.

Steps to make no bake cheesecake.

Variations for Homemade Cheesecake:

No Bake cheesecake is less dense and heavy than baked cheesecakes.  It is incredibly delicious, light and tasty!  Here are my ideas for how to create a variety of inspired twists on this one amazing recipe!

  • Design: Prepare the cheesecake in a parchment paper lined 8×8 dish.  Then, after chilling in the refrigerator lift the cheesecake out with the parchment paper and cut the cheesecake into small squares for bite sized treats.  Even dip them in chocolate for a smooth outer shell and professional looking presentation.  Or prepare them in small cups or a mini muffin pan for smaller servings you don’t have to slice.
  • Toppings: Add whipped cream and fresh fruit for extra sweetness and color. Strawberries are a favorite, but raspberries, blueberries, or any fruit that’s in season make great toppings.  Also try sauces like lemon curd, freezer jam, homemade salted caramel sauce, or chocolate syrup.
  • Filling: Add a bit of sour cream for even more tangy flavor and creaminess. Or for a small crunch try adding in some crushed oreos, sprinkles (a hit with kids) or chocolate shavings.
  • Crust: To change up the flavor try using chocolate or cinnamon sugar graham crackers or crushed oreos in the crust.

Close up on finished no bake cheesecake decorated with whipped cream and strawberries.

Can you Freeze Strawberry Cheesecake?

Yes!  Before decorating, wrap your no bake cheesecake in heavy duty aluminum foil, plastic wrap, or place in a shallow airtight container.  Then store it in the freezer for up to 3 months.  Thaw it in the refrigerator and add toppings before serving.  It will remain good for up to 3 days in the refrigerator.

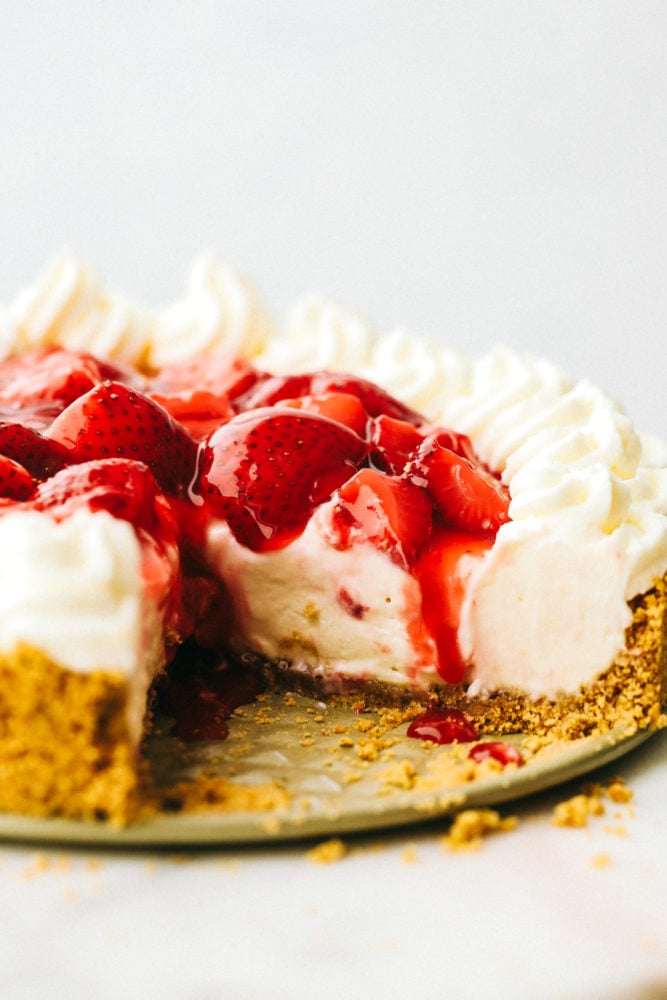
Close up on a no bake cheesecake with one slice missing.

More Decadent Cheesecake Recipes:

Print

No Bake Cheesecake

No Bake Cheesecake is so creamy, luxurious, and surprisingly easy to make from scratch at home.  Top it with whipped cream and fresh fruit and it will be a huge hit that everyone will obsess over!
Course Dessert
Cuisine American
Keyword cheesecake, no bake cheesecake, strawberry cheesecake
Servings 12 Slices
Calories 251kcal
Author Alyssa Rivers

Ingredients

  • 2 cups graham cracker crushed
  • 1/4 cup brown sugar
  • 1/2 cup butter melted
  • 2 8 ounce cream cheese softened
  • 1 Tablespoon lemon juice
  • 1 teaspoon vanilla
  • 1/2 cup sugar
  • 1 cup heavy whipping cream

Optional Topping:

Instructions

  • In a medium sized bowl add the crushed graham cracker, brown sugar, and butter and mix until incorporated. In a 9 inch springform pan add the graham crackers and press firmly into the bottom and sides. Place in the refrigerator.
  • In a large bowl combine the cream cheese, lemon juice, vanilla and sugar. Beat until smooth and creamy. Add in the heavy whipping cream and continue to beat until stiff peaks form.
  • Spread filling evenly along the crust. Chill for 3 hours or overnight and serve with strawberry topping if desired.

Nutrition

Calories: 251kcal | Carbohydrates: 25g | Protein: 2g | Fat: 17g | Saturated Fat: 10g | Cholesterol: 48mg | Sodium: 176mg | Potassium: 48mg | Fiber: 1g | Sugar: 16g | Vitamin A: 528IU | Vitamin C: 1mg | Calcium: 31mg | Iron: 1mg


from The Recipe Critic https://ift.tt/2OYIUTc
https://ift.tt/2X3nd93